2012 Jeep Wrangler: What's It Like to Live With?
Read the latest updates in our long-term road test of the 2012 Jeep Wrangler as our editors live with this car for a year.
What do you want to know about?
- Introduction
- Never Lock a Jeep
- This Thing is Terrible
- Hooked After One Night
- Can't Wait
- Liking the Drivetrain
- Mods Coming Soon
- Unlimited Possibilities
- She's a Jeep Date
- Discuss
- Get Rid of the Rear Headrests
- This Is More Like It
- Better Set Aside 15-20 Minutes
- Easter Egg!
- Worst Mobile Office. Ever.
- New Meats
- Optional Equipment
- Step One
- The Alamo
- The Sum
- Jay Leno's Parking Spot
- This Or That
- Boing
- Smoooth
- Road King
- Não Italiano
- More Meat
- Smooth is a Stretch
- The Jeeps of SEMA
- Track Tested
- Stick With the Stick
- Call of Duty Modern Warfare 3
- The Key and The Dogtag
- Basic
- Off Road with Video
- Unhinged
- Milestone
- Great on Power, Short on Looks
- Will The Bike Fit?
- The Palate Cleanser
- The Sharp Parts
- Nice to Meet You
- Urban Off-Roading
- A Little Help
- Cold Confirmation
- At Least It Looks Like It's Put Together Well
- Make Mine a Boat
- So That's What It's For
- What Plate Would You Create?
- We Built An RTI Ramp
- The Appearance of Usefulness
- Pivot Point
- Guess My Weight
- Original Tire Wearer
- New Wheels and Tires
- RTI Ramp Trip #2 (Wheels & Tires)
- Wheel Locks
- New Tires and TPMS Sensors
- Details
- Big Tire Track Test
- Fuel Economy on the BFGs
- Jeep Nostalgia
- Unimpressive Headlights
- The Buzz
- Weekend Adventure Summary
- Sharing a Jeep
- Base Model Ups, Downs
- iPhone Speedometer FTW
- DIY Oil Change
- Dirty Jeep (Done Dirt Cheap)
- Boom! Jeep Shot
- Speedometer Recalibration
- Um... Is This Normal?
- Loving the New Wheels and Tires
- It's Wet In Here
- Resetting the Oil Change Monitor
- New TPMS Sensors
- Headlight Help
- New TPMS Sensors Installed
- RTI Ramp Trip #3 (Stabilizer Bar Disconnected)
- Rubber Not the Same As Steel
- Badge of Honor
- Keeps the Stink Out
- Kids Like Jeeps
- I Want Them
- Before and After
- Ruh-Roh
- Off-Road Tire Comparo With Photo and Video
- Mopar Pre-Runner Lift Kit — We Have One
- Who Doesn't Like Jumping Jeeps? With Video
- Headrest Discomfort
- Mopar Pre-Runner Shake Down
- How I See Off Roading
- Should We Get a Hemi?
- It Soiled My Shirt
- The Downside of Whitewalls Out
- The Top
- Good Small-Item Storage
- Mini Adventure
- Good Seats
- RTI Ramp Trips #4 and #5 (Mopar Stage III Suspension With Stab On, Stab Off)
- The Rear Window
- No Use for the Green Zone
- LAPD Just Don't Understand
- Looks Good In The Driveway
- Sleepy Time
- I'd Get the USB
- Ten Thousand Miles and Counting
- Truckhaven Drive-By
- Dragon in the Desert
- Seeing Red
- Soiled My Pants
- One Headlight
- Manual or Auto?
- Installing a Mopar Stage 3 Lift Kit With Fox Racing Shox, Front
- Installing a Mopar Stage 3 Lift Kit With Fox Racing Shox, Rear
- Cool Touch Since 1941
- Kickin' HVAC
- Cheap Raingler
- Action Camper
- Lots of Warnings
- How RTI Compares To A 4-Door Rubicon
- New Headlights
- Installing New Headlights
- On the Road to Moab
- 2012 Jeep Wrangler to Moab: Now That's A Linear Fuel Gauge
- 2012 Jeep Wrangler to Moab: Crossing the Sierra
- Off-Roading With The Family With Video
- 2012 Jeep Wrangler to Moab: Taking The Loneliest Road
- 2012 Jeep Wrangler to Moab: The Last Leg
- 2012 Jeep Wrangler to Moab: First Trail Day
- 2012 Jeep Wrangler in Moab: Driving Other Jeeps
- Cracked Windshield
- Engine Grime
- 2012 Jeep Wrangler in Moab: Top of the World
- 2012 Jeep Wrangler in Moab: 7-Mile Rim and Wipeout Hill
- 30 > 33?
- Rubicon or Sport?
- Hood Flutter
- Shopping for a Windshield
- My Kind of Compact Car
- Priceless Door Discovery
- An Honest Speedometer
- Service at 15,000 Miles
- Happy 15K
- We're Going to Install a Superwinch
- Planet Jeep
- Some Planning Required
- Report From Altitude
- Things to Come
- Modded for Endor
- Topless in the Rain
- Undercover Jeepist
- Superwinch Close-Up
- Downside to the BFGs
- We're Adding U-Connect Bluetooth and USB
- Our Expedition One Front Bumper is Here
- Double Kumbaya!
- I'd Rather Be...
- Whac-A-Mole. Or Hand.
- Hill Assist
- Expedition One Front Bumper
- Out With the Old
- Installing an Expedition One Front Bumper
- We Have Superwinch!
- Low Brow Adventure
- Urban Apocolypse II
- Urban Apocolypse Ready
- Yes, It Rains in the Desert
- Dwarfed
- Murdered
- Modification Compendium
- Yay For The Solid Axle
- Report From Bald Mountain
- Purchase Decision: New Or Used?
- How To Not Be Prepared
- Most Modified Vehicle?
- Putting the Top Up In Time
- Kumbaya
- Now With U-Connect Bluetooth
- That's Why
- That Pesky Front License Plate
- DIY TPMS Threshold Reset With AEV ProCal
- Double Rainbow
- Siren Song
- DIY Speedometer Recalibration with AEV ProCal
- Back From the Dealer
- Twenty Thousand Miles
- Adding U-Connect To a Base Radio
- Suburban Assault
- Installing the Bikini Top
- Early Oil Change Alert
- Too Tall
- Off Road, Step 1
- Oil Change Alert Redux
- Off-Road Video For Wussies
- Light Foot
- Up The Hill
- It's Getting Wet
- Now It's Wet. And There Are Rocks
- Light Off Roading
- Does The Bike Fit? Round Two
- Still With Us
- Tantrum Maker
- On Any Sunday
- Off-Road With On-Board Video
- Off Road With Company
- The Rear Seat
- More On-Board Camera
- I Liked the Post Office Special
- Holiday In Sequoia
- Loose Door Seal
- Recreational Towing
- Rain Out Weekend
- Unexpected Pentastar Cylinder Head Replacement Under Warranty
- Which Tire Pressure Gauge is Correct?
- Last Chance Canyon
- The Big Loop
- Washboard Abuse
- Wants to Be Wild
- With Google Maps, Who Needs Factory Navigation?
- Fuel Economy Update for January
- Earned Its Stripes
- Interior Wear
- Simple Ventilation Controls
- Built-In Bike Security
- Needs Proper Gearing
- Rear Headrest Fail
- Am I In My Lane?
- My Parents-In-Law Bought One
- Fuel Economy Update for February
- A Piece of Jeep's History
- Rookie Off-Roading
- Garaged With Inches to Spare
- Help Me Up, Will Ya?
- Off-Road Near the Grand Canyon
- Windshield Replacement
- I Dislike Tire Shine Products
- Installing a Teraflex Front Stabilizer Bar Disconnect
- Running Strong at 30,000 miles
- Off-Road in Moab in Jeep's Jeeps
- Airing Down with Staun Tire Deflators
- Fuel Economy Update for March
- Rear Tailgate Crack
- 32,000-Mile Service
- Edmunds' New Car
- Fuel Economy Update for May
- Installing a TeraFlex HD Hinged Tire Carrier
- Transformed with 4.10 Rubicon Crate Axles
- Wrap-Up

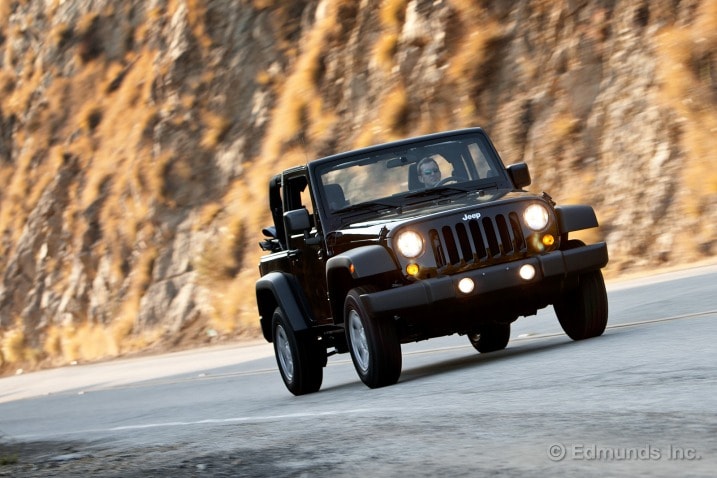
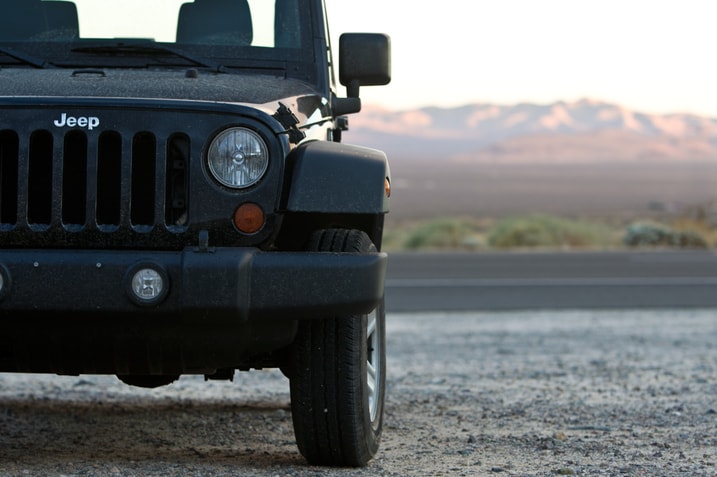
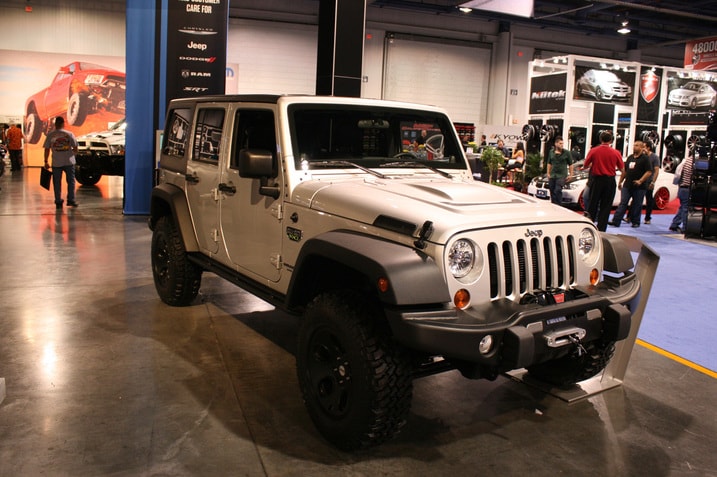
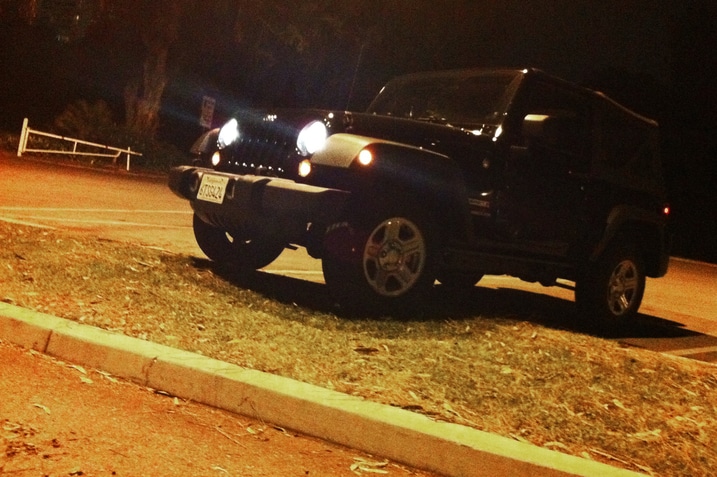
The 2012 Jeep Wrangler you see here will not be the same Jeep Wrangler that leaves us in 12 months. Admittedly, it looks rather lame with its steel wheels, tiny tires and who-cares black paint. If we said we boosted it from the Dollar Rent-a-Car in Maui, you'd probably believe it.
However, that just means our long-term 2012 Wrangler is a clean slate. New wheels and real tires will be an absolute must; a new axle ratio seems likely. Rock rails, a winch and maybe even a snorkel could also be in order. True, we don't routinely find ourselves fording rivers, but you just never know when our office might be relocated to a place with "Gulch" in its name. Besides, few things look as cool as a Wrangler with all the fixins.
To be honest, though, the Wrangler isn't for everyone. No matter what we do to it, it will always have solid axles, deafening wind noise, doors that provide little crash protection and a thin layer of vinyl for a roof. Some of our editors may see those traits as glaring flaws, while others may view them as endearing quirks. We'll see who changes their mind after 12 months.
What We Bought
The Jeep Wrangler has come a long way from its humble roots shuttling around GIs. Today's Wrangler is available with two or four doors, a hard or soft top, navigation, leather upholstery, heated seats, automatic climate control, satellite radio and an Infinity sound system.
In light of this, we bought a Wrangler with the following options: air-conditioning.
Yep, that's it. We said no thanks to power locks, power windows, power mirrors, keyless entry, Bluetooth, an automatic transmission and alloy wheels, along with all those frivolities mentioned above. We were going to nix the A/C as well, but we couldn't find a Wrangler without it in Southern California. Probably for the best.
So what we bought is a Jeep that is a mere $800 away from the base price. It's the bare-bones, bargain-basement 2012 Jeep Wrangler that shows up on The Price is Right, and should you ever find yourself staring at one during the Showcase Showdown, you'll want to remember that it stickers for only $23,740. After some shrewd negotiating, we got the price down to $22,570 thanks to an end-of-the-month deal.
Why We Bought It
Admittedly, this is not the first Jeep Wrangler that has passed through our garage. In fact, it's not even the first of its generation. We had a 2007 Jeep Wrangler Unlimited for a year, a truck in which we struggled to reach 15,000 miles, let alone the regular 20,000. As we wrote in its long-term wrap-up, "Once you compare this Jeep to competitive SUVs, it falters. We see four doors and we want a more civilized experience. The Unlimited just does not offer the level of isolation and highway demeanor we would get from a Toyota FJ Cruiser or Nissan Xterra."
So why are we getting an even less civilized, less isolating, less spacious and less equipped Wrangler? Well, for starters, the ultimate Jeep has undergone quite a few changes since our old long-termer. The frustrating soft top was improved for 2010, while last year saw a new interior that actually looks as if someone bothered to style it. Improved materials were welcome, but when you can remove a vehicle's doors, our expectations on that front are low. More important was the standard stability control and hill start assist.
This year, however, the biggest change occurs. Gone is the agricultural pushrod V6 that didn't really do much except make a lot of uncouth noise. The new Pentastar 3.6-liter V6 produces 285 horsepower and 260 pound-feet of torque. Performance testing of a 2012 Unlimited Sahara showed this engine shaves a second off the Wrangler's 0-60 time, while the EPA says fuel economy is up by 1 mpg combined. From a subjective standpoint, it makes a world of difference in terms of getting off the line and it sounds better, too.
How will we fare living with a bare-bones two-door 2012 Jeep Wrangler? Will we actually like it more, or will we complain incessantly about not having heated seats and an iPod interface? Heck, will we simply miss power locks? And what sort of aftermarket goodies can we add to make it cooler to look at and more capable off-road?
Well, we have 12 months on the Long-Term Test Blog to detail our likes and dislikes, and hopefully we can hit 20,000 miles this time around.
Current Odometer: 841
Best Fuel Economy: 16.7
Worst Fuel Economy: 16.0
Average Fuel Economy (over the life of the vehicle): 16.3
Edmunds purchased this vehicle for the purposes of evaluation.
Growing up, I spent a lot of time in Jeeps. They were cheap, tough, cool, easily modable, relatively dangerous (which ups the cool factor to a 16 year old), and dead-simply enough to fix yourself.
As we got bored of our small town and the wooded trails it contained, we started visiting Boston and New York City more and more and, eventually, a number of my Jeep-owning friends moved to the city.
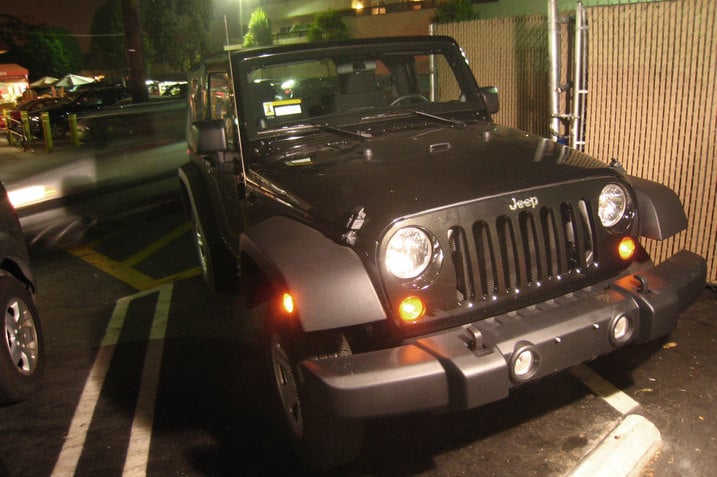
Last night I parked our new Jeep Wrangler went to lock the door — my laptop and the GF's laptop were in the car after all — when I remembered rule number 1 of driving a Jeep in the city: Never Lock the Doors; Never Leave Valuables in the Car.
Why? Easy. Leaving the door unlocked means the thieves can simply walk into the car instead of slicing open the top. A lot of convertible owners have the same thing, but Jeeps are particularly vulnerable due to, well, an extremely thin top with plastic windows. (Clever thieves will simply unzip the rear window from the outside, but, shhhhh; no need to tell them about that issue.)
So we carried our respective computer bags into the grocery store and left the Jeep alone. "I hate this thing," she said. "It's great! Every trip is an adventure!" I replied.
We're used to, for better or worse, thinking cars are a vault that keeps everything inside safe and sound with just the click of a keyfob, it's fun to get away from that for a while.
(Plus, without power door locks, who has the time?)

The Jeep Wrangler is quite possibly the worst form of automotive transportation you can buy. Let's run down the list of reasons, shall we? Take a deep breath ... and go. It can be broken into by undoing a zipper. The wind noise is excessive. You don't raise the roof as much as painstakingly reconstruct it. Our Wrangler has no power windows, locks or doors. You can remove the doors, which don't provide crash protection any way. The trunk is so small you can't even fit the roof's back window in it. The back seat legroom stinks. It has the aerodynamic profile of the Parthenon (good one Jay). Not only is there no dead pedal, there's no where left of the clutch to put your foot at all — just wall. Steering is vague, handling a touch scary, the ride choppy. I'm probably missing stuff.
And yet, it's been a tough task to pry the Wrangler's key out of my hand.
Sure, I was writing the introduction for the Wrangler, but I kept coming back to it once my assignment was complete. Despite its absurd number of faults, I just love this thing. There is just such an old-school connection with it that is so hard to find these days. I don't even mind driving it in traffic despite its manual transmission and lack of creature comforts.
The Wrangler is making me realize more than ever that my favorite cars are those that are unapologetically honest. It knows what it is, it's upfront with its faults, and if you don't like it, well, buy something else. It may technically be the worst form of automotive transportation when compared to everything else, but it was intended to be that way. It's not like the Jeep Compass, which is bad because it's badly executed. The Wrangler can't be everything to everyone, and that's fine. BMWs of old used to be like this, but aren't any more. Pretty sure that's the reason my fondness for that brand has rapidly waned. Appealing to everyone may get you sales in the short-term, but you'll never grasp onto those lifelong fans by establishing an emotional connection.
With the Wrangler, all you have is an emotion connection because you're certainly not thinking with your head. You can stuff the Wrangler full of a whole host of items to make it more civilized (we didn't), but most of the above faults still remain. And really, those faults are part of the charm. As Magrath said with a fond smile on his face, "It's a really fun piece of crap."
I didn't realize how long it had been since I'd driven a real Jeep. A family member had a series of Wranglers that I liked (at least when he let me drive them). All were pre-2007 models with the old 4.0-liter inline-6, all had the manual gearbox, one had the zipper front windows, one was a Rubicon, all were clumsy-silly-fun, and so is this 2012 Jeep Wrangler.
I ran errands in it last night, and it was a great time. I dig the loopy manual shifter (it's funny, but the original Jeep just feels too serious with an automatic), the super-upright seating position, the terrific visibility and the 3-foot turning circle (or 34.5 feet, whatever, it feels tiny).
Our long-term also looks fantastic with black paint, and I'm still at the stage of being all excited when I walk up to it in a parking lot.
I'm itching to get my hands on the keys of the Jeep in a few weeks. That's right, not now, but in a little over three weeks. That's because I'm an upland hunter and the season starts here in California October 15th.
Last year we had the Raptor. It was more than capable to get me out into the great wilderness of the Mojave without a hitch. I'm looking to do the same in the Jeep. yes, the Raptor was overkill for where I traveled, but our Jeep in bone stock. I'm thinking some new meats would help bridge that gap in capability.
Even if I don't bring home dinner during the opener, I love being in the outdoors. Our Jeep is a perfect vehicle for all my favorite outdoor activities. I'll make it my mission in the next year to utilize the Jeep and it's potential as much as possible. Not just another blog about my run to the grocery store and back, but a run to a top of a mountain range and camping out.
If you could tell us what to do with the Jeep, what would you do? I'm meaning both equipment wise and adventure wise? What should our goals be with this blank slate?

I got last-minute tickets to Friday's Angels-A's game (back when the Angels' mathematical wild card chances looked a little better), and waded right into evening L.A. traffic with our long-term 2012 Jeep Wrangler. Making allowances for my slightly euphoric mood (going to a baseball game with potential post-season implications!), I enjoyed my extended time in the Wrangler.
To start, this may be my favorite application to date of the 3.6-liter Pentastar V6. This engine is not big on real-world low-end grunt (doesn't matter what the actual rating is), and in some Chrysler vehicles (the minivans especially), it sounds and feels kind of rough. But I don't notice this stuff in our Wrangler, which isn't much over two tons. This engine feels much stronger than last year's 3.8-liter and at least as good as my fading memory of the 4.0-liter inline-6.
The gearing is kind of tall, so in heavy traffic, there was a lot of room to hang out in 1st gear, and when that wore out its welcome, well, there was 2nd gear. If there's a tricky part of driving the Wrangler in heavy traffic, it's the long, slow clutch engagement, which starts somewhere off the floor and finishes high. Makes sense for an off-roader, but makes it vulnerable to clumsy-footed city dwellers.
Despite the slightly tricky clutch takeup and slightly crowded footwell, heel-and-toe downshifts are possible in the Wrangler, and they are kind of fun. The Pentastar V6 responds with a nice growl when you get them right.

I'm making a list of mods we want to bolt onto our 2012 Jeep Warngler. We'll do it in stages of course, and document it all with photographs.
We're following the classic garage-tuner formula: intentionally buy the bare-bones, steel-wheel strippo model to lock in low(er) monthly payments, using the saved money to add targeted mods in stages, one paycheck at a time.
The basic idea is a mild, functional upgrade of our new JK; we're not going for SEMA glory here. There's a lot of desert nearby and we plan to make frequent visits over the next year.
Our plan revolves around tires and wheels, and the number we have decided on is 33, as in 33 inches tall. We're going after the extra ground clearance such taller tires will provide.
This decision may well force the installation of a mild 2-inch lift, but we're not interested in cartoon status so it'll be no more than that. And yes, we're prepared to swap in 3.73 gears to bring the overall gearing back in line, 4.10s if we're feeling frisky.
A winch bumper and winch are in the cards, as are rock rails. We'll probably add a door mirror relocation kit. A Bikini top is likely next spring.
Could we have bought a Wrangler spec'd out closer to what we'll end up with when we're done? Sure, but half the fun of owning a Jeep is modding it. It's one of the most compelling DIY vehicles on the road today.
As for the photo, knock yourself out. It's an underhanded softball pitch.

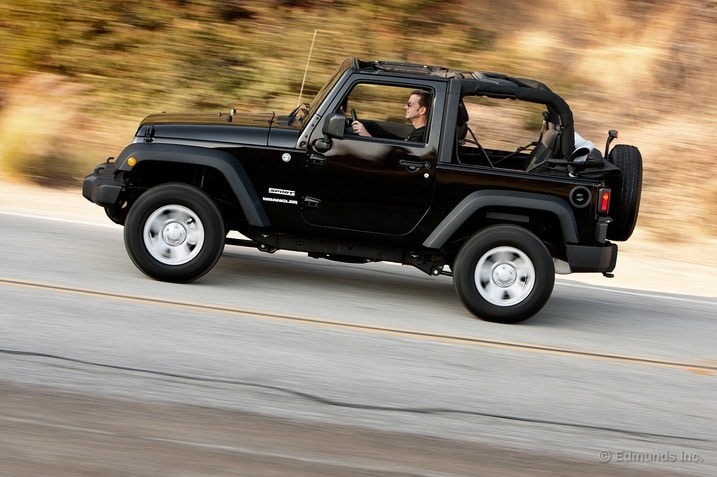
Now that's a back-to-basics, bare-bones, old-school driving experience. I actually find the manual-crank windows and non-central-locking doors strangely endearing, a welcome change from the power-everything that's become the norm these days.
As for the soft-top's windows billowing in the breeze on the highway, and the bouncy ride, well, you just have to chalk those up as "Jeep things."
I'm definitely happy we stuck with the standard six-speed manual. It makes much better use of the Pentastar V6's newfound power versus the new-for-2012 five-speed automatic. And, of course, the six-speed gets the driver more involved.
A part of me, though, wishes we had scrimped and saved our quarters a few more months to afford the four-door Unlimited Sport model, the long wheelbase of which gives a far smoother ride and greater cargo room/general usability. But that would've set us back another $3,500 and defeated our plan of starting with the absolute cheapest Wrangler and building it up from there.
And the real fun will begin once we start taking it off-road. Where the Wrangler truly shines.

My wife planned a date night for us Saturday night that involved driving down to Orange County. I picked the car for our journey: the Jeep Wrangler. Truth be told, I forgot about the date, but rather than scramble to trade someone for something less "terrible," I decided to walk the walk and keep the Jeep.
Yes, the ride on the I-110 was choppy. Yes, the wind noise was deafening. Yes, I had to ask my date to lock her own door (oh the shame). But not surprisingly, we were more than happy with our Jeep date. She even pointed out that the Wrangler was the unofficial vehicle of her high school — the car that all the cool kids got. She actually wanted one, but when her dad informed her that the automatic was lame and that the manual was the only way to go, she backed down. My kinda father in law.
People will no doubt complain that we're wasting our Wrangler by not taking it up a mountain or fording some stream every weekend, but you know what, our humble Jeep is a hell of a lot of fun even when driving on the freeway or around the city.

While digging through our Jeep's manual for the factory's recommended break-in procedure, I stumbled across this section. Click on the image for a full sized version.
Full disclosure - the above text was taken from two consecutive pages (72 and 73) of the manual and was then cut and pasted in order to form one page/image with all of the text. Nothing has been omitted.
So, yeah. Discuss.

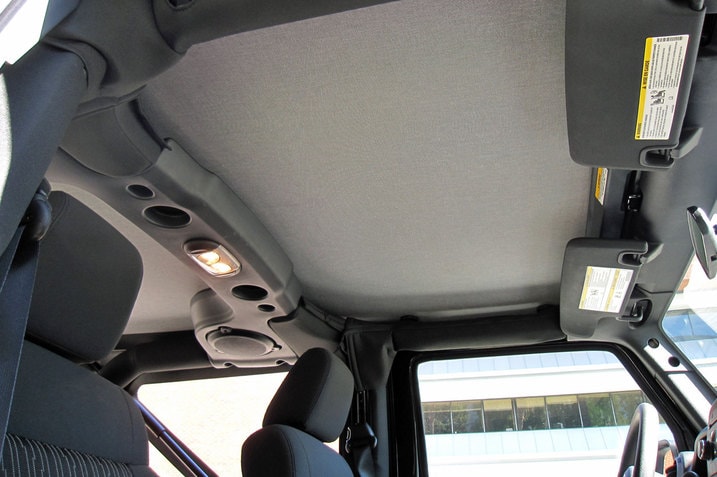
This is the Wrangler's rear view with the rear headrests in place. It sucks, so I removed them about 30 seconds after we got the Wrangler and out they've remained until I took the above picture.

We've kept the headrests in the Jeep just in case someone tries to use the cramped back seat, but that means they otherwise fill the tiny cargo area and/or roll around. Oh well, better than not seeing anything and looking dopey. Jeep should probably use the flush-mounted headrests that dig into your back if you don't raise them like those in the third row of our Odyssey. Or perhaps drop-down ones like those in the Mustang.

You can't fully appreciate the Jeep Wrangler by driving it around town. So I was more than happy to get sidetracked with a brief off-course excursion in the desert yesterday. Nothing too crazy, just some quick fun in the dirt.
And off-road is where the Wrangler belongs. It will never be a stellar highway vehicle, but it will always be one of the best off-roaders in the world.
I was pounding along on some fire roads and the Wrangler just didn't care. Deep sand? No problem, it has ground clearance galore. Meanwhile, the suspension was soaking up everything I threw at it, with ease. Embedded rock, the kind that would rattle most crossovers loose? It barely noticed. Huge dip across the road? It was like the Wrangler was saying, "Come on, is that all you got? Why'd you even bother slowing down?"

Then I came across a semi-steep trail off the fire road. Hmm...what to do? Uh, put it in 4WD and go up. Why? No reason. You don't need a reason in the Wrangler. You just do it, because you can.
And what did the Wrangler think? It was laughing at me again, saying, "Seriously buddy, if you don't need 4WD Low, don't even waste my time."
Yes, this thing is ultra-capable. Even in bone-stock, base model, wimpy-tire form.


Before the Jeep Wrangler was officially announced as a long-termer, we had to take photos for the intro. Of course, Kurt and I had to cover both top-up and -down photos requiring, well, putting the top down. Any guesses how long it took the two of us (and Kurt had done it once before with his wife)? Thirteen minutes. There are two header latches, two side-rail releases, three windows to remove, and finally the top arduously folds down. A couple days later, rain was forecast, so I took it upon myself to put the top back up. It took me 20 minutes by myself.
I'm told that this is an improvement on previous Wranglers' top operation. This is as good as it gets in the, what is it now, 70 years it has been in existence? I'd shudder to think.
How long does it take a Jeep veteran to do the whole thing?

Walking past the Jeep one evening, I spotted something out of the corner of my eye. D'you see it? Easter Egg! Here's a tighter shot of it. How long has Jeep been doing this?

Chevrolet is celebrating its 100th anniversary this year, and this week GM planned a celebration of sorts for members of the media, issuing press releases and announcing news morning and night.
So I'm here in Santa Monica doing my usual news editor thing, while Editor in Chief Scott Oldham is attending the hoopla in Detroit. The Chief, who's nothing if not, uh, thorough, called me several times this morning to make sure I was on top of everything he was learning in the Motor City. I was driving to the office in the Jeep Wrangler during a couple of his calls, which went something like this:
Chief: "Hey, Scoop. It's me. Didja get the bit on the TrailBlazer?"
Me: "Trial laser from GM, too? I just edited a BMW story yesterday on laser tech replacing LED."
Chief: "Not, laser. Blazer! Can you hear me, Scoop?"
Me: "You gotta a scoop? On what? Who's your source?"
The Chief grumbles something in New Jerseyan and hangs up.
He calls back.
Chief: "It's a full truck frame, not crossover. Maybe say, 'unlike the Grand Cherokee.'"
Me: "You're at Chrysler now? I thought you were only going to GM this week.
Let's just say it didn't get any better from there. I have an awesome Bluetooth earpiece, but it was no match for the Wrangler's wind and road noise.
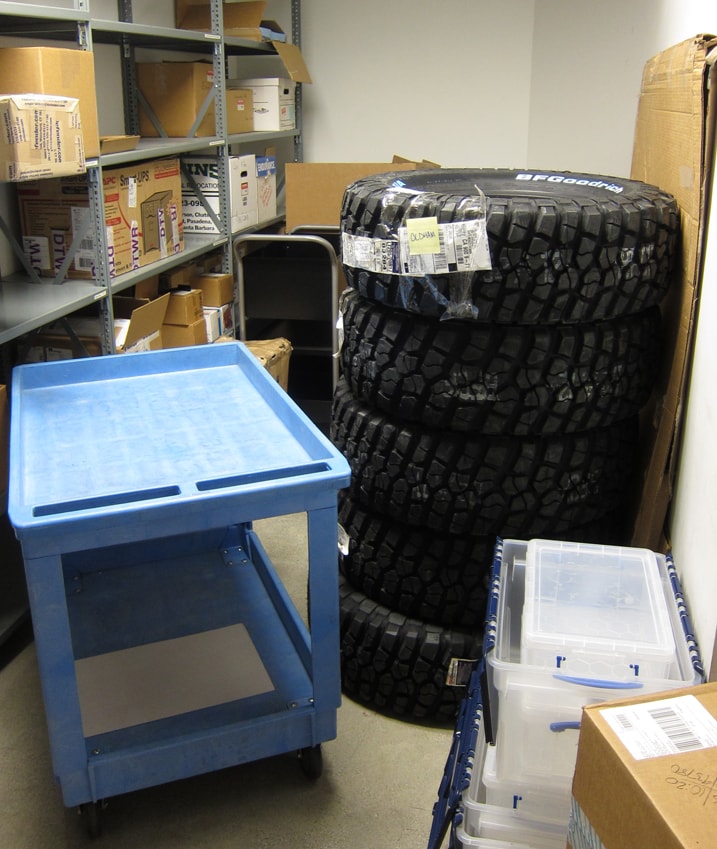
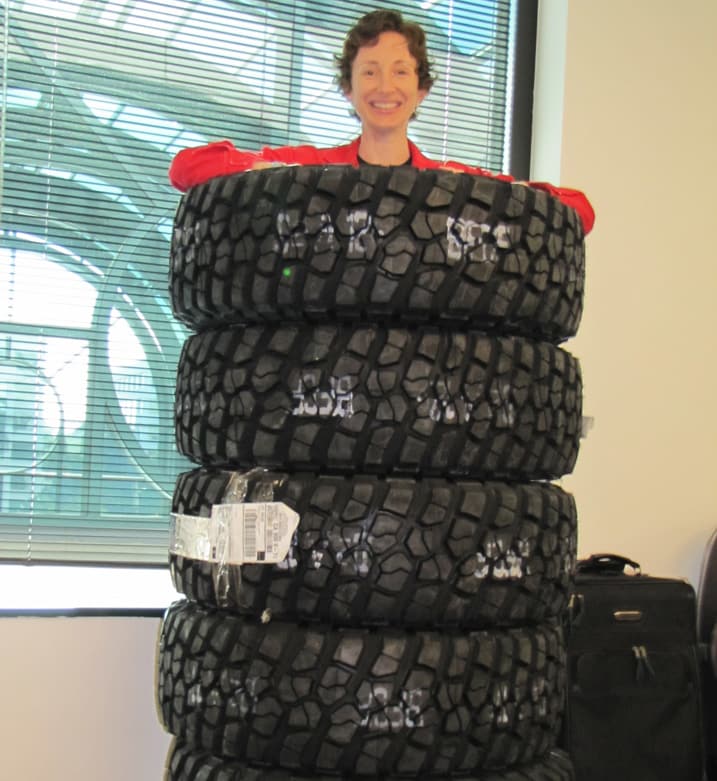
"The package delivered to you earlier is 5 very large tires. I just wanted to give you the heads up that they are in fact in the mailroom despite their size." — Sincerely, our very friendly receptionist.
That's code for "Get these tires out of my mailroom now!"
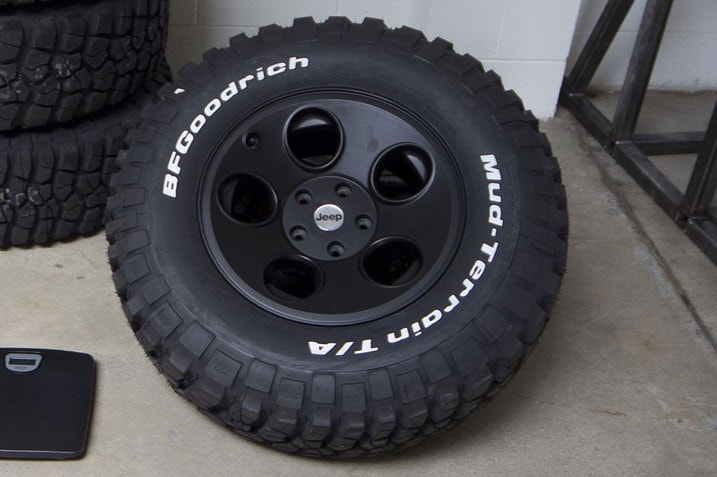
...as if we weren't already sprinting upstairs the second we heard that our Jeep's new 33" BFGoodrich Mud-Terrain T/A KM2s were finally here.

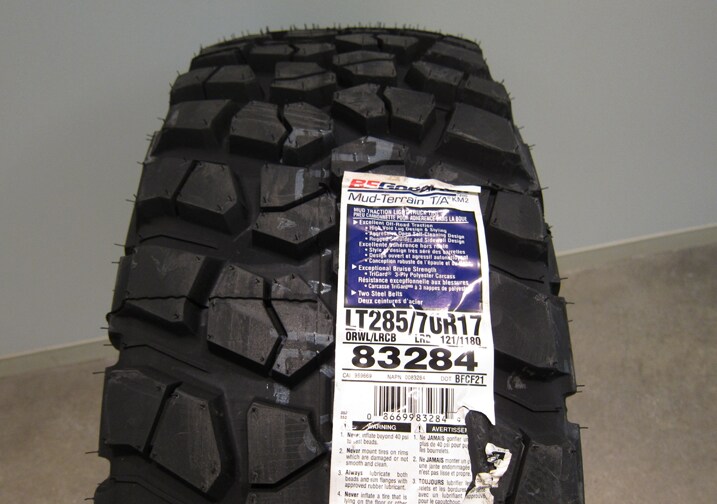
Our plans for project 2012 Wrangler are shoring up quite nice. We think we know what we're doing for suspension (but we'll update you on that later) and everything else which means it was pretty safe for us to go ahead and get some tires. We're not going crazy with lift, either and figured 33s would be just fine.
Deciding on the BFGoodrich Mud-Terrain T/A KM2 (KEY feature MUD traction, 2nd generation) took about two seconds.
According to Tire Rack, our 285/70R17 Mud-Terrains weigh 59 pounds each (we'll weigh them ourselves later), have a tread depth of 19/32" a section width of 11.5", a tread width of 19.5" and do 630 revolutions per mile. They cost $274 each and shipping's about $70. We got five because A) We'll need a spare and B) Jeeps without a matching spare look stupid.
What we still don't have, however, are wheels. These tires fit on wheels 7.5 - 9" wide so that's our only constraint.

And because it was Friday and we were bored, we wanted to see if Bryn would fit in the stack.

Yep.

Our Wrangler came about as stock as can be. About the only option we have is air conditioning. I put plenty of miles on our Jeep the last few days and for the most part, I don't think you really need much else.
But if I could change one thing, I would.
Honestly I'd prefer the hard top. Not because I think it's too loud on the freeway or it gets hot easily on a warm day. Id get the hard top because it has glass.

Plastic isn't as durable. I noticed on the side window there is a warning to "do not rub dry." Why? It scratches easily. Examples of which can now be found from the branches I brushed while in the Mojave. It wasn't like I drove straight into a Joshua Tree, it was the normal off-road kind of brush you'd find on any trail.
Another reason to get the hard top I found while out in the Mojave and carrying gear, the rear plastic window has to be rolled up to access larger items like coolers. It's not the end of the world to zip up the sides and roll it up, but after doing it several times I got tired of the process. I'd rather be able to swing open the gate and lift the glass.
While at my family cabin in Tahoe, I found the low temp (38 degrees) made the plastic window material surprisingly rigid. Yes I did expect it not to be as pliable, but as I carefully tried to roll up the rear window I noticed a few kinks had appeared. Permanent kinks.
If I owned a Jeep, I don't know if I'd be the kind of owner that would drop the top at any opportune moment. Without that advantage of a soft top all I see in one are rear window zippers that get jammed (already fixed once), plastic which windows scratch easily, can kink, and they will yellow over time. A glass rear window on struts wouldn't give me those problems. The $735 (MSRP) cost savings of a soft top over the hard top isn't worth it to me.
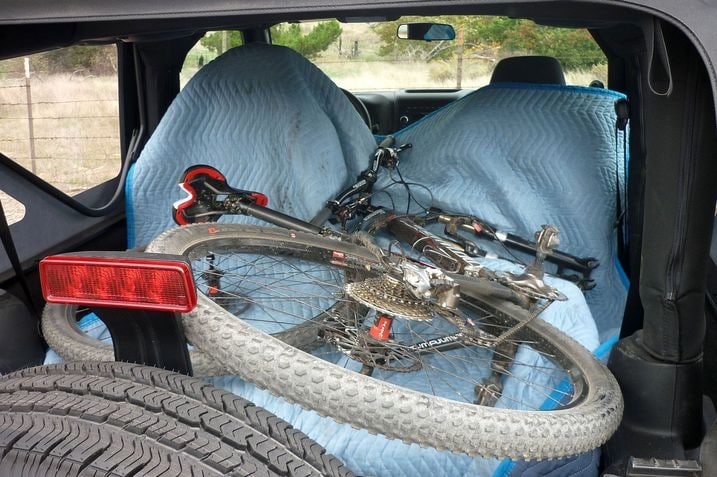
I got the keys to our Jeep and I was about to go on an upland adventure. It was going to be me, my hunting buddy, and my dog. I couldn't imagine a better vehicle in our fleet to have than our Wrangler.
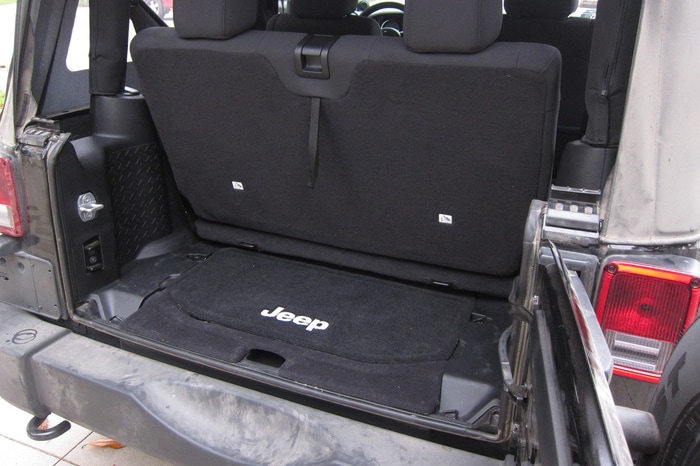
In looking over the Jeep for the first time, I quickly realized I was going to have to edit my gear as much as possible. The first hurdle of my adventure was the Jeep's cargo capacity. As you can see in the photo, our 2-door variety doesn't have a lot of cargo room.
After a little fiddling, I found the rear seats can fold and then tumble forward, giving you 61.2 cubic feet of cargo room. They may tumble forward, but the do not lock in position. Driving around town I found they flop about quite a bit. Not good for my gear nor the dog.

Thankfully the seats are removable. Not only that, but it's a snap to take the whole bench out. Pull a handle to tumble forward, a release bar underneath unlocks the hinges, lifts right out with ease.
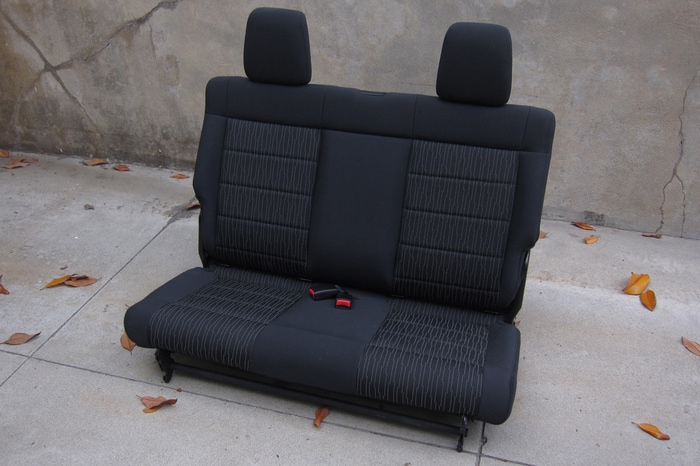
Once the seat was out, my gear fit in to a nice low level where I could comfortably get the dog in back with plenty of room. Traveling light and fast was the original idea, the limitation of the Jeep just forced me to focus. Thanks, Jeep.


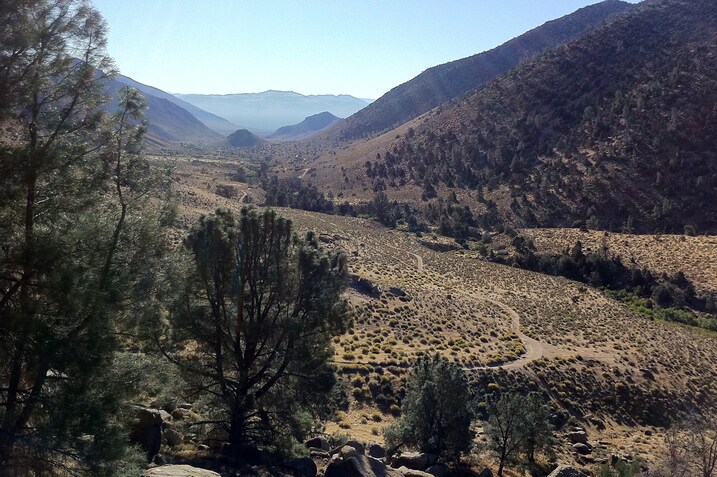
The Alamo. Not the Texas variety, but an old shepherds hut out in the Mojave we so named after discovering it a few years back. Perfect place to make camp during upland hunting. Perfect country for our Jeep. Easy fire roads, flat valley.
We had originally thought about making camp in rougher country just south of Randsburg, but decided that the jeep we had might not make it. It was the tires. Looking at the street issued wraps we weren't sure they make it over the rough terrain on the way to a few campsites we knew about high in the Garlock Mountains.
We were wrong.
We had met up with a group of friends that were experienced four wheelers at our Alamo campsite. They had a range of vehicles, from a 2010 Jeep Wrangler Rubicon, two generations of the Toyota Land Cruiser, and finally a Land Rover Discovery II. All capable vehicles.
After camping at the Alamo for two nights, we decided to check on another spot, much further up the canyon dubbed "Cowboy Hideout." We'd have to pass through some challenging terrain including a climb up a very silty hill that any 4wd vehicle would have trouble with. Yeah, I wanted to check out the new spot, but I don't do as much back country cruising as these guys. Besides, I had the most one of the most basic Jeeps you can get. I was nervous.
The video is boring, right? It should be! It shows that even with our street-meats, this thing has got plenty of capability to beat the silty hill. The Disco2 in front of me (not in the video) bogged down several times and had to make three attempts. Watching it struggle made me nervous. When it was my turn, I dropped our Jeep into 4-lo, put it in second gear, and just motored. I MOTORED up through the silt without a hiccup. As I crested the hill I screamed victory.
Once we got to the top we all took a moment to savor the view from Cowboy Hideout. So maybe the Disco2 isn't as tough as one might think, but the challenge illuminates the possibilities our basic Jeeps provides. I'm in love. With our Jeep that is. This thing is pretty freakin' awesome.
By the time I got back to my house after a five day loop around California, I was ready to not be driving anymore. I was tired, my dog was restless, and I just wanted to take a shower.
I had romped through the Mojave, cruised up the Eastern Sierras, over them to Tahoe, and down through the Central Valley to Los Angeles. The sight of a dirty Jeep in my driveway the next morning made me smile.
I wasn't sick of the Jeep. I wanted more.
I think it's a good sign in any vehicle that after a lot of seat time, you want more. It might be a little crude, a little loud and short on creature comforts, but I overlook all of those detractors because it's so much fun.
At the core of improvements for our 2012 Wrangler is the engine. Does the new Pentastar V6 make a big difference? Jeep claims 40 percent more horsepower, 10 percent more torque, and 26 percent faster 0-60 mph. The 3.6L Pentastar V6 engine delivers 285 horsepower and 260 pound-feet of torque.
If you read my "Alamo" blog, you'd know I met up with a bunch of 4-wheelers. Ron, the owner of the 2010 Rubicon, took our Wrangler for a spin. Right away he noticed the horsepower "which would make it really nice for the highway" and the ability for our Jeep to crawl up hills in 4-lo without throttle and not stalling. Granted the hill climb might be due to a timing retard or some other kind of engineering. In Ron's estimation, the new engine wasn't bent just towards folk who would keep it mostly on blacktop, but gave it a nice nod to the dirty birds too. I would concur with Ron as to the freeway power. It had strong acceleration from a stop and plenty of power to pass trucks at freeway speed. I never felt like the Jeep was a dog in any sense.
In total I drove 1,174 miles during which time I had a good mix of terrain and surfaces. During my Mojave off-roading, I averaged 14.7 mpg. During a long stretch of freeway from Tahoe back to LA, I got 21 mpg. My best tank range was 315.2 miles. For a vehicle that's shaped like a brick, and a tall one at that, I think that's pretty good. I think the new engine does make a big difference
The future is bright for our Jeep. We might have plans to mod it, but at it's core it remains a solid, inexpensive ticket to adventure. I can't wait for the next trip I can take in it.

Want to see Jay Leno do stand up? Not interested in battling for tickets or waiting in long lines with tourists at the Tonight Show? Come on down to the Comedy and Magic Club in Hermosa Beach, California.
Even though his name is rarely on the marquee, Jay has played a set here just about every Sunday evening for the last 20-odd years, working out material for the coming week's monologues.
HB's proximity to Hollywood makes it convenient for him, but because this is not a jaded industry town the reactions of the laid-back beachside crowd are said to be more indicative of how the jokes will fare across the country. Or so I've been told.
Maybe you don't want to see Leno perform. Maybe you'd rather see his vast car collection one meticulously restored machine at a time. If so, simply drive past the club on a random Sunday evening. Our 2012 Jeep Wrangler (and that Range Rover) sits parked in Jay's private spot. You'll be able to tell if Jay's there (or about to be there) by the orange cones the club sets out Sunday afternoon.
I lived across the street in a second floor apartment in the early 90's, with a view of the club from my bedroom window not unlike this one. From there I saw Jay pull up in everything from Stanley Steamers (complete with cap and goggles) to Duesenbergs, from Hudsons to Ferraris, as well as stuff more obscure and weird than any of those. You name it, he's probably driven it here and left it in this very spot while he went inside to do his routine.
And still does, according my eye doctor, whose office is on the first floor under my old apartment.

If you read my series of blogs on the Jeep and my adventure through California, you would know that a friend, Ron, an owner of a 2010 Jeep Rubicon, got a chance to drive our long term Wrangler. After a spin around the hills of our "Alamo" campsite, he came back with a lot to talk about.
It became clear to me at the start of our conversation he knew far more about our Jeep than I did. After four minutes of a number conversation (the kind of discussion about cars where nouns and verbs are replaced with specs and part numbers), I asked him to put his thoughts into an email.
I find it next to impossible to drive our Jeep smoothly. There's a lot of driveline lash that will have you bobbing back and forth, no matter how smooth you are on the pedals. Let off the throttle slightly and you're greeted by a significant lurch forward. Get back on it and it feels like the whole car is made of gelatin. Boing, lurch, slosh. The Jeep is not my choice for taming the urban wilds. But let's face facts, the Jeep isn't meant to. That's why I can't wait for the opportunity to try it out on some trails. Soon.
Traditionally, when Mark Takahashi is wrong in a blog, I simply walk over to his desk and ask him very politely what in the world he was thinking. Then when he tries to respond I yell, very loudly, "YOU BOUGHT A LOTUS ELISE, YOU DON'T GET TO MAKE JUDGEMENTS ABOUT NORMAL THINGS NORMAL PEOPLE DO" and walk away.
He's actually gotten pretty good at interjecting salient tidbits in the gaps when I'm breathing in for the next round of screaming. It's fun. Really.
But I couldn't let last week's transgression stand. I yelled at him in person, questioned his ability to drive (he's actually quite good) and informed him that I'm taking this one public.
You'll notice that I'm using the same picture of our Wrangler (shot by Niebs for the Wrangler's introduction) that Mark used in his offending post, but havn't ruined it with a giant page-sowing animation. Why? Because the Wrangler doesn't ride that like. (And because I want to be able to load this page.) Not if you know how to drive it.
Sure, if you hit some bumps or some asphalt undulation the Jeep's going to let you know, but Mark's complaint wasn't about that. Mark was talking about excessive driveline lash which is something I've yet to experience in our Jeep. With a light, long-throw clutch with plenty of feel and an engine happy to loaf along under 2K rpm, I've found our Jeep to be a great companion for city driving. Easy even.
There is, however, a trick: Stay out of first.
There's not a lot of lash in first when I drive, but that's because I can feel it building and get to 2nd asap. Reader goaterguy nailed it in Mark's post "First is too high for normal driving. My solution is fairly simple, on level roads I start in second gear, problem solved."
I haven't found this necessary, but I do short shift first and I have every time I've driven the Jeep. Those of us who drive manuals know the feeling of a driveline winding up, we know when an engine is running out of breath and we know that when that whole thing winds up on a tall truck with soft springs it's going to unleash fury. Solution: don't do that.
Mark's not a short-shift guy. Mark's more of a "Alright, we're on the rev-limiter let's power shift!" type of guy. It's why
And speaking of power-shifting a Jeep, yes we've tested it and yes you'll get the numbers soon. This week.

You know, I like the Jeep. You never know where it’ll take you.
It’s taken me plenty of places with boulders and wash-outs and water bars, but it’s also taken me down alleys in New York City, up the length of California Highway 1, around Lake Tahoe and even into a thundershower in the middle-of-nowhere western Nevada on Interstate 80 where there were two rainbows.
Turns out, the Jeep is not so bad to drive on pavement.
This Wrangler Sport doesn’t rattle. The blows absorbed at road level from potholes and the rest (there was a lamp in my lane today) are absorbed by plenty of rubber bushings before it they get to the bottom of the driver eat. The light-effort steering doesn’t have much on-center feel, but this is because the geometry is meant for off-roading, where you want to avoid as much kickback from the wheel as you can.
Once tech guys look under the Jeep and see those stick axles, their tongues start wagging and they begin doing little equations on their calculator watches and try to teach you about unsprung weight. But the truth is, the Wrangler doesn’t ride bad at all. The wheels articulate pretty decently, so the Wrangler doesn’t try to buck you off over the bumps.
You just have to get used to a fairly lively ride. The axles aren’t located very firmly in order to get wheel articulation, so you can feel the body sway back and forth, but the ride motions are managed well enough that you wouldn’t be talking about jiggle and jounce like some Oldsmobile ride engineer.
Some driving skill is called for, of course. The suspension (such as it is) will wind up when you jump too hard on the throttle (the short overall gearing plays a role here), but off-road guys know enough not to jump on the gas whether the traction is dirt or pavement. This new V6 also works very well, delivering a broad spread of torque like a four-cylinder, and it’s easy to manage the six-speed manual transmission with its rifle-bolt shift action.
Really, no matter what kind of lively adjectives you might hear applied to the Jeep Wrangler’s capability as a street car, this device is way, way nice than you realize. Sure, it's an off-road vehicle living in an alien world of concrete and traffic, so you have to get your driving act together to get the best out of it. But that's what I like about it — no slackers need apply.
I’ve driven so many cars that are way, way worse, pricey ones as well as cheap ones.

I didn't think there had been any Italian influence on the 2012 Jeep Wrangler (wisely, Fiat just let the Jeep guys built a kick-ass Jeep) until I spotted this stamping on the spare wheel. I figured the wheels were Italian and forgot about it, but last night, curiosity got the better of me.
Fumagalli is in fact a Brazillian wheel manufacturer that has been making wheels since the late 1940's, equipping among other brands, the original Willys Jeep.
That's probably a lot more than you wanted to know about the Wrangler's stock steelies, but there you have it. You can thank me when "What is Fumagalli?" becomes the correct question in Final Jeopardy.

Love the Wrangler, but that's not news by now. Many of us have professed our adoration already. It's a bit of an adjustment for me though, coming from a decade of driving a Cherokee. The Wrangler's profile and wheelbase give me a little pause, and I realize I can't guide it through a corner nor get back on the gas as quick as I can in the Cherokee.
I'll reiterate what others have written, that the Wrangler feels a little buoyant and its steering is vague. If it were mine, I'd swap on at least some 235s for a little more footing (although looks like PLENTY of tire is in our near future). Still, the new Wrangler is more civilized than I originally thought.
Clutch action is long, but light, and the gearbox is slick. It's about as easy in traffic as the Mazda2's. I found my hand quite often just resting on the shifter. It's actually kinda fun and effortless to row this thing. Sure, you'll be surging and bucking a bit if you're creeping along at 20 mph, but…it's a Jeep. That's not a pass, but getting behind the wheel does require that you suspend any deeply-held beliefs about ride quality.
And the new engine is, as everyone else has noticed, fantastic. I don't think it pulls as strong down low as the 4.0-liter in my four-speed 2001 XJ (one for the chassis code nerds). Indeed, the XJ makes less torque than the Wrangler, but makes it much sooner: 225 lb-ft @ 3,000 rpm vs. the Wrangler's 260 lb-ft @4,800. Still, the Pentastar sounds better doing it; wish the Cherokee growled like this thing. Hopefully there's an exhaust on the mods list. It'd be nice to hear more of this Pentastar rumble at cruising speed.

While Mike Magrath was hard at work in Las Vegas, I decided to give his (and a few commenters) Jeep driving style a try. And yes, starting out in second gear and short shifting definitely smoothes out the driveline lash. I rarely got past 2,000 rpm and took it out of gear when coasting. But I'm still right.
And here's why I think I'm still right. We all agree there's a lot of driveline lash, and that was the whole point of my first post. For someone who's never driven a Wrangler, it will certainly seem excessive, at least with the manual transmission. For the dazzling urbanite outside of a rustic setting, this should certainly be considered before selecting a Jeep as a daily driver. The added time spent in the clutch's friction zone (starting in second gear) is sure to shorten its life. Just sayin'.
On my way to drop off the rent check this morning, however, I discovered another way to smooth out the driveline lash. I had to turn left from a small side street onto a busy boulevard. There are rarely gaps in traffic, so when I see one, I go for it. I started in first and gave it the kind of throttle I give lower profile cars. I got the revs well past my normal shift point, but still nowhere close to redline and shifted decisively and quickly. Nope, no driveline lash.
So there it is. As long as you don't drive moderately, the Jeep is fine in terms of driveline lash. Either nurse it off the line in second and lope it along at low revs, or get on it and drive aggressively. That's the key, at least for me.

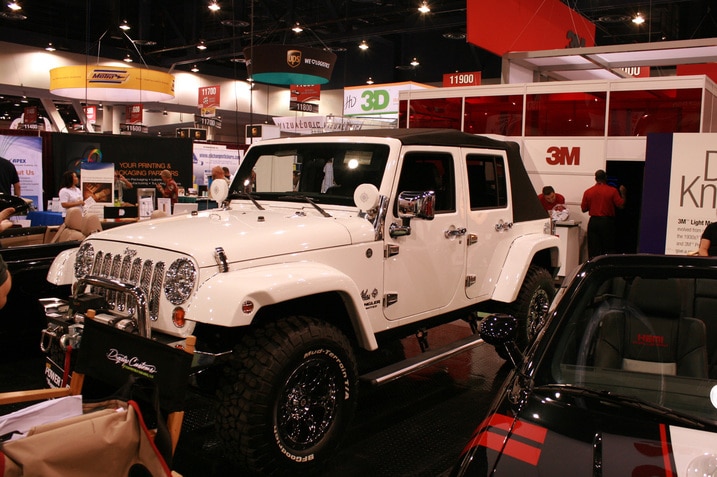
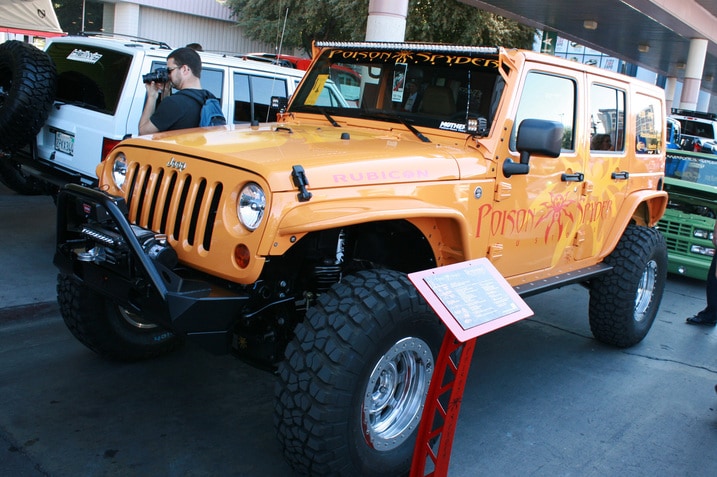
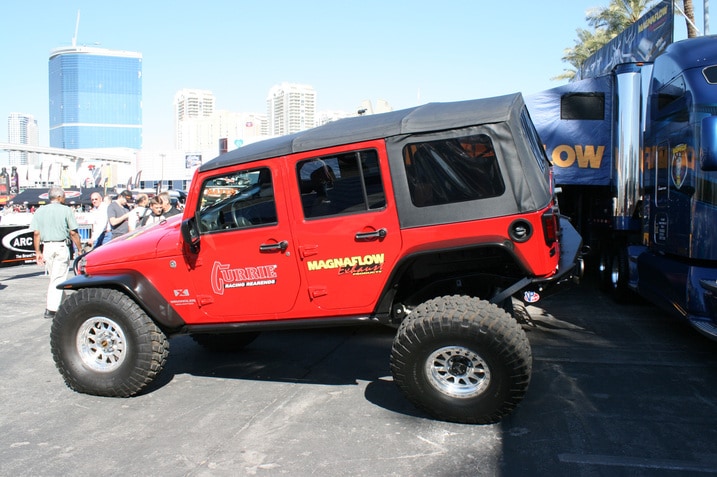
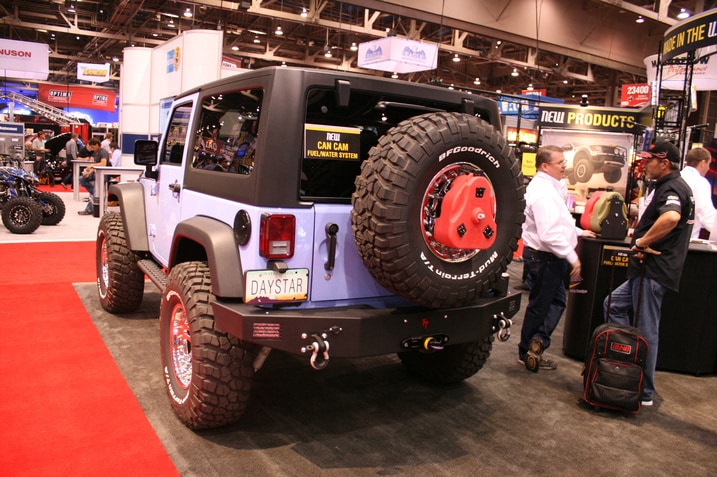
By now pretty much everyone knows that I spent far less time at SEMA scoping out cool cars than I did trying to find pretty girls. But as I was walking from hall to hall to hall and back again, I noticed a LOT of Jeeps. It makes sense, the Jeep Wrangler was the "Hottest 4x4 SUV" of SEMA.
So with that out of the way, here are a bunch of Wranglers. See any mods we MUST do to our 2012 Wrangler?


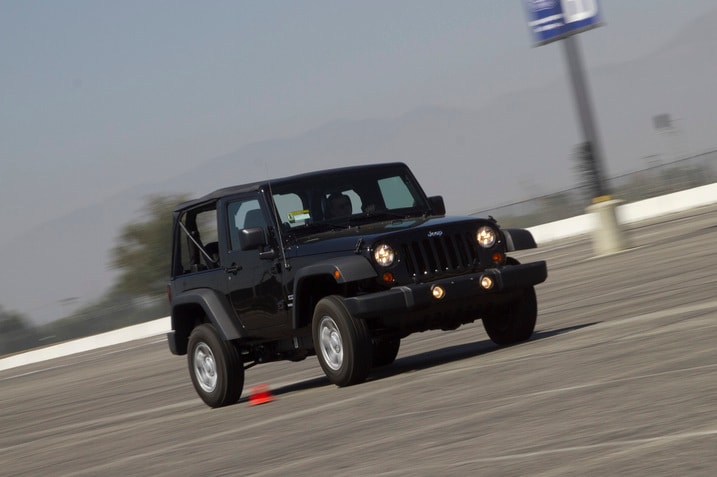
The big news for the 2012 Jeep Wrangler wasn't so much the spruced up interior, but rather the new, standard, 3.6-liter Pentastar V6. This engine makes 285 horsepower and 260 pound-feet of torque. Those are big numbers for a Jeep that starts at just over $20 grand.
Not only does our Long Term Wrangler have the new motor, but it's also got a six-speed manual. We've already tested the 2012 Wrangler Sahara Unlimited with the five-speed manual and were as curious as you are as to how the smaller, lighter Wrangler with row-your-own box did when pushed to its limits at the track.
You asked for it so here we go...
Vehicle: 2012 Jeep Wrangler Sport
Odometer: 728
Date: 09-20-2011
Driver: Chris Walton
Price as tested: $23,740
Specifications:
Drive Type: Four-wheel drive
Transmission Type: Six-speed manual
Engine Type: Naturally aspirated, port-injected V6, gasoline
Redline (rpm): 6,600
Horsepower (hp @ rpm): 285 @ 6,400
Torque (lb-ft @ rpm): 260 @ 4,800
Brake Type (front): 11.9-by-1.1 inch Ventilated discs with single-piston sliding calipers
Brake Type (rear): 12.44-by-0.47 inch solid discs with single-piston sliding calipers
Suspension Type (front) Solid live axle, shock absorbers, coil springs, stabilizer bar
Suspension Type (rear): Solid live axle, shock absorbers, coil springs, stabilizer bar
Tire Size (front): P225/75R16 (104S)
Tire Size (rear): P225/75R16 (104S)
Tire Brand: Goodyear
Tire Model: Wrangler ST
Tire Type: All Season
Wheel size: 16-by-7.0 inches
As tested Curb Weight (lb): 3,865
Test Results:
Acceleration
0-30 (sec): 2.8 (2.9 w/TC on)
0-45 (sec): 4.7 (5.0 w/TC on)
0-60 (sec): 7.1 (7.4 w/TC on)
0-60 with 1-ft Rollout (sec): 6.9 (7.1 w/TC on)
0-75 (sec): 10.8 (11.3 w/TC on)
1/4-Mile (sec @ mph): 15.4 @ 89.3 (15.6 @ 88.3)
Braking:
30-0 (ft): 35
60-0 (ft): 140
Handling
Slalom (mph): 55.7 (55.4 w/TC off)
Skid Pad Lateral acceleration (g): 0.63 (0.63 w/TC on)
Db @ Idle: 49.4
Db @ Full Throttle: 81.0
Db @ 70 mph Cruise: 73.2
Acceleration: Long-travel, high-point engaging clutch is great for off-roading but horrible for a drag strip. With TC off, in 2WD it'll light the rear tires. A little spin works, but too much is too much. Upshifting to a different zip codes with the long-neck shifter takes time, but it'll still chirp 1-2 and 2-3 if done quickly enough. Tall gears let the engine pull (for a long time in each gear) all the way to redline where power fades slightly.
Braking: Lots of dive, lots of wiggle and some directional change even requires steering to keep straight. Tires howl every time. Moderate fade.
Handling
Skid pad: Silly, really, considering how low the threshold is for non-defeat ESC. So low that the Jeep barely leans at this slow speed. Steering barely loads up. Barely a measurable difference with TC off.
Slalom: Also silly with early onset ESC intrusion — best run was with minimal steering input and staying below the ESC's radar. Also essentially no reason/difference with TC off.
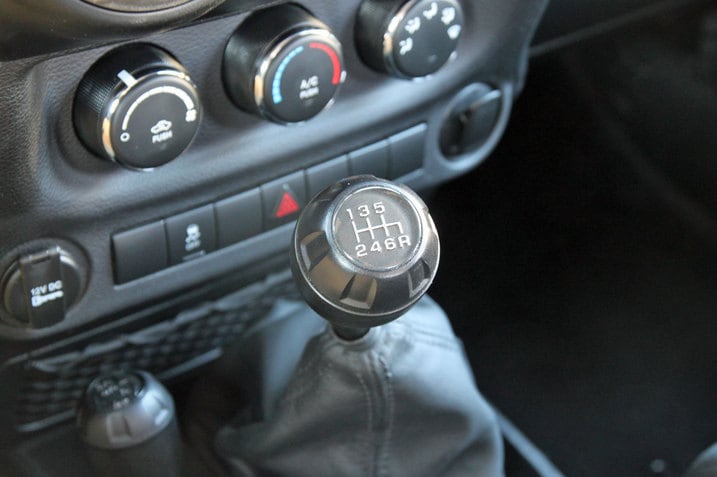
I really liked the idea of getting a dirt cheap Wrangler. Getting a six-speed manual? Didn't like that idea as much.
Sure, I prefer driving vehicles with manual transmissions as much as the next guy, but my prior experience with manual gearboxes in Jeeps didn't leave a great impression. They were just too vague and disconnected to feel good going through the gears. I never found it very satisfying.
The six-speed in our Jeep is not like those old gearboxes. It actually feels reasonably precise, and I mean that in the best possible way. There's no wrist wiggling required to get this thing in gear, it just slides right in with a firm push. It doesn't rattle or vibrate when you're cruising, either. It's like a properly sorted manual from a midsize sedan. Glad we didn't pay up for the slushbox.

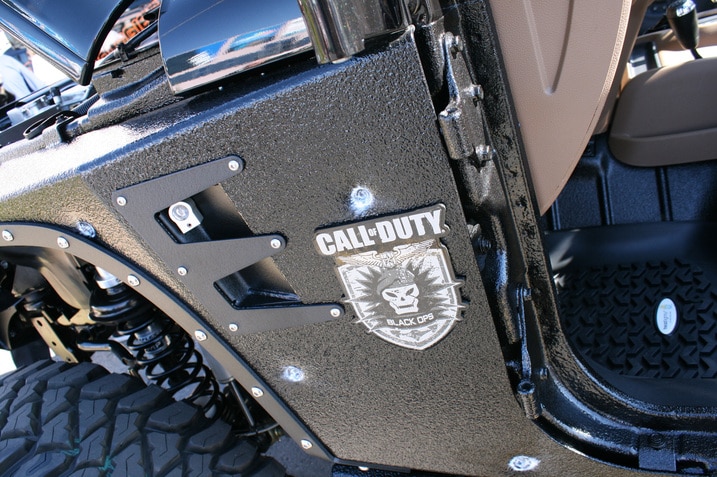
Just when I was starting to think our long-term Wrangler Sport was particularly cool, Jeep releases the lastest Call of Duty, based on the Wrangler Rubicon.
What's more is Chrysler is hosting a Facebook contest, and winner gets the first Wrangler Call of Duty: MW3 Special Edition to roll off the production line.
I'm not sure why I need one, but I do.
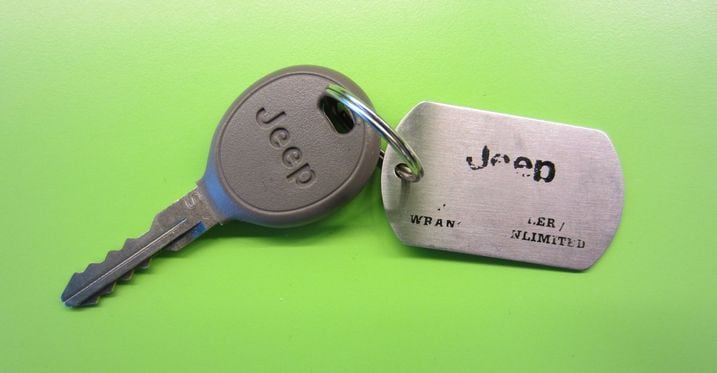
Tonight will be the first time for me to roll in our new long-term 2012 Jeep Wrangler. My first impression, even before I get in it, is with that key. It's just a simple metal key with a dogtag attached so it doesn't fall out of your pocket. No smart key or even a remote keyfob.
I suppose this Jeep is what some would refer to as Basic.
Luddites rejoice.
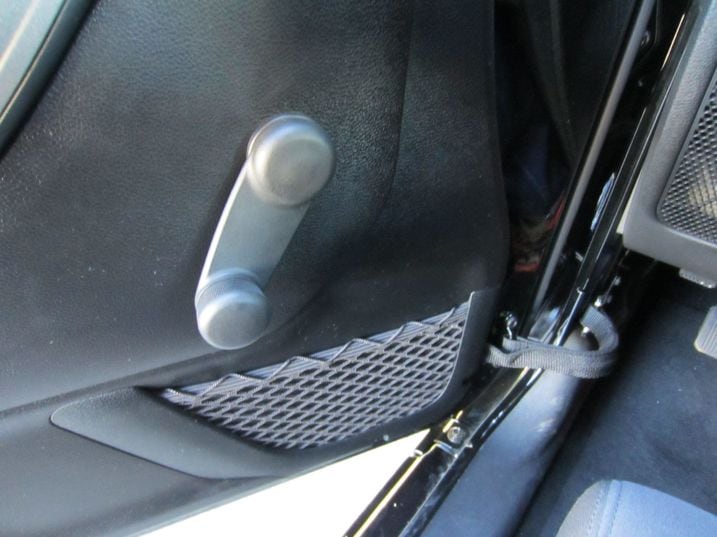
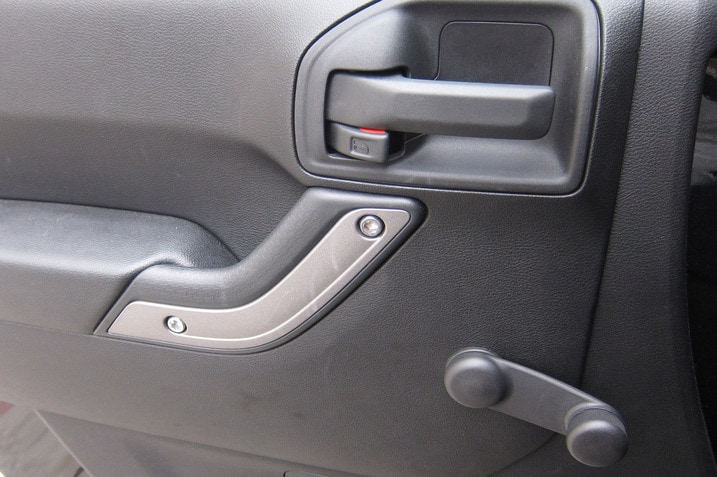
When I took our long-term 2012 Jeep Wrangler for the first time last night, I wasn't surprised by the old-school crank windows. I'm sure they'll come in handy when wading across streams or whatever.
But I was surprised by that door check. It's just a piece of canvas cloth. I wonder how that will hold up over a few years...
And the mirrors surprised me too. No power or remote adjust, which isn't a big deal for the driver's side. But the passenger mirror? How are you supposed to adjust that by yourself? That's a lot of iterative walking around to the other side of the vehicle. I just left it.
I suppose some people think that the absence of features is what makes a Jeep a Jeep.
How romantic.

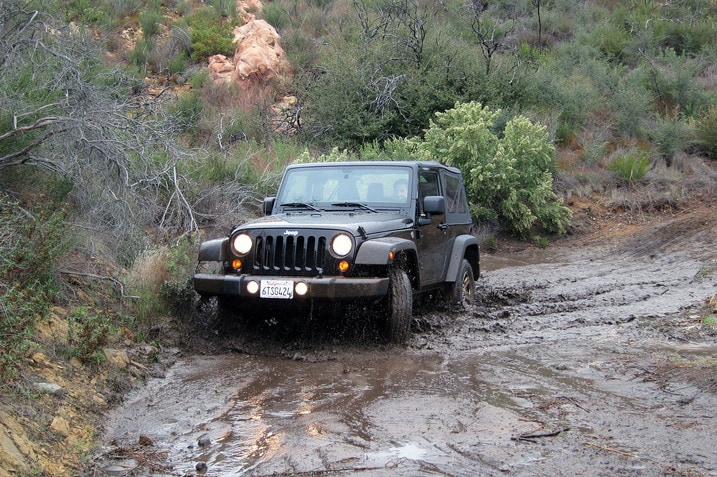
It rained here Friday night. So on Saturday a friend and I decided to get our long-term 2012 Jeep Wrangler muddy. It was a blast. We even used the low gear in the transfer case, which is rare for us city boys.
Besides this sippy hole, we also climbed some hills, did donuts in dirt and basically acted like idiots until we felt the Jeep was sufficiently dirty.
Meanwhile, this thing is awesome, even with those dinky tires.

Not the most illustrative photo, sorry. I had to recreate the moment from the other side of the Jeep. The point is this: I reached for the glovebox in search of the Wrangler manual (missing, incidentally. Another story). Instead, I got five fingers full of glovebox. The box had literally come unhinged, no doubt shook loose by the previous driver - who shall remain nameless - feeding a steady stream of Jenny from the Block through the dash speakers at high decibels.
The plastic tabs snapped back into the plastic hinges easy enough, but it was disappointing. Not exactly the toughness you expect from Jeep. Then again, neither were the hamburger carton glovebox liners on the old CJ's, but hey, at least the door and hinges were metal. Still, worse things could shake loose when you're bouncing off boulders in Moab, I suppose.

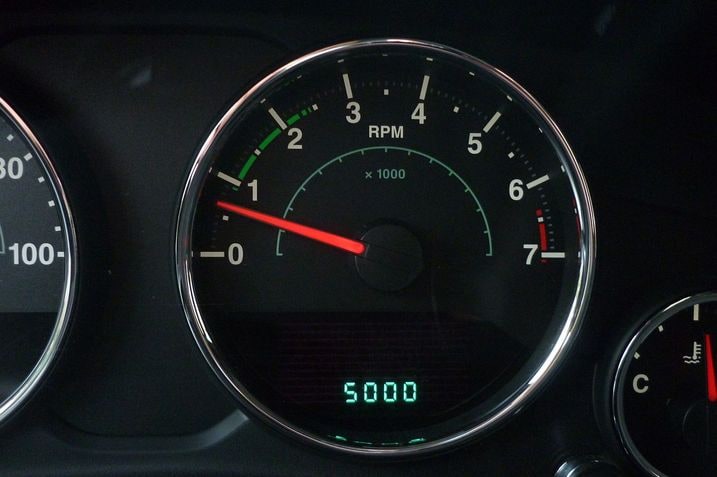
In a rare stroke of observation, I actually noticed our Jeep Wrangler hit the 5,000-mile mark. It helped that I had just gotten home when it happened. So there it is, the spot-on milestone mark for ya.
Here's something else I noticed over the weekend:
Those stock tires have surprisingly little grip in the rain. Not that you could actually lose control, as the overly-sensitive stability control system (which can't be fully defeated in 2WD) very quickly cuts in when it senses the tires have lost grip. But it's shocking just how little it takes for the front or rear tires to break loose in a turn when the road is wet.
Another observation: The Wrangler looks dorky with its base wheels and tires.

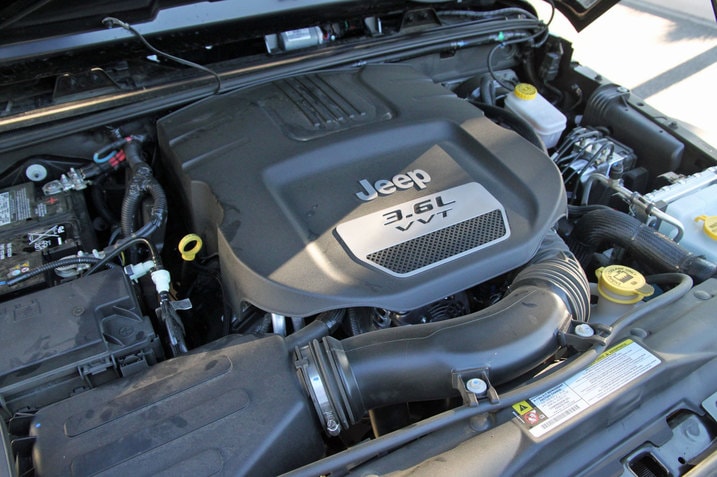
Obviously I'm referring to the plastic-cover clad engine in our Wrangler and not the Jeep as a whole. It's a fine-looking machine even with its pizza cutter tires.
One of the main reasons we decided to get a Jeep Wrangler was this new engine. It may be smaller in displacement than the old 3.8-liter V6, but its delivers far more power and torque. This is not unusual for newer engines, but in this case the new V6 is a huge leap forward for the Jeep. As torquey as the old motor was, it sucked wind at any moderate rate of speed.
This new engine is stronger across the board. So strong in fact that our Wrangler is actually pretty damn quick for a 4x4. It runs form 0-to-60mph in 7.1 seconds and the quarter mile in the mid-15s. Not bad for a brick.
Obviously, the Wrangler is no street racer, but the engine makes it far more enjoyable to drive no matter how you use it. Gets better mileage, too, a definite win-win.

Now here's an area where the four-door Jeep Wrangler Unlimited has a clear advantage over the regular-wheelbase model: Utility.
So, how easy/hard is it to get a bike in the back of our new Jeep?
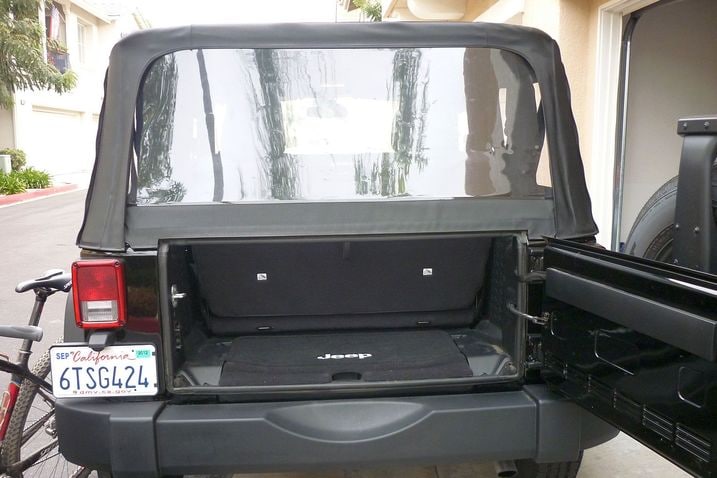
Obviously the rear seats need to be folded down (even then, they still stick quite high up off the floor), and the rear window needs to be unzipped.
Since we're going to be making upgrades to this Wrangler, I'm officially requesting we get both a hitch and a hitch-mounted bike rack for it.
On a separate topic, driving with the rear window unzipped lets you hear a rasp from the Jeep's exhaust that I had never heard with the top/windows in place.
For eight out of the past 10 days I was driving a 2012 Mercedes-Benz C350, which has elevated itself onto the list of my absolute favorite new cars. I just love the thing. If you were to drop me in that forever, I'd be perfectly content.
However, when a car is that good and I like it so much, it's easy for everything else to be a letdown. As such, I need an automotive palate cleanser, something so radically different than whatever it is I've been driving for an extended period.
And nothing is more radically different than whatever than our Jeep Wrangler. Driving it is like unplugging my modem for 5 seconds. The ride, steering, driving position, gear change, noise, plastic windows, handling and the utter back-to-basics approach to everything means there's no way you can realistically compare it to whatever newish car you were driving before.
So after a night in the Wrangler, hopefully my automotive palate has been cleansed. Sure beats lemon sorbet.
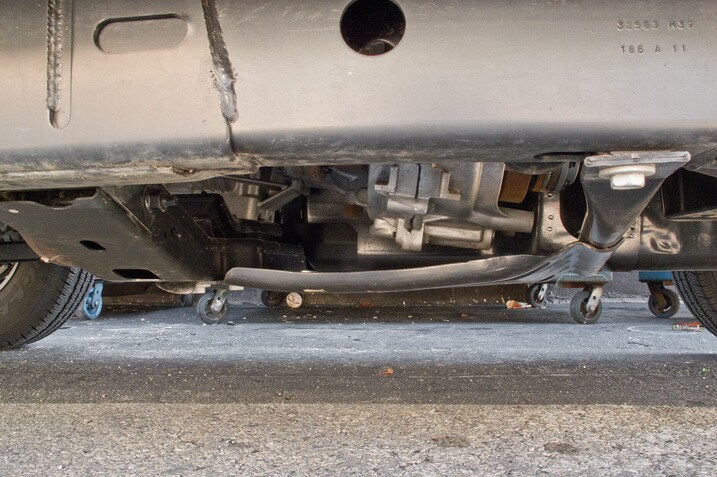
Nuts. Bolts. Clips. Welds. Spin-y bits.
Look at the bottom of almost any modern car and you'll see the miracle of packaging at work from the drive train to the fuel system to the exhaust. Or not.
It's a shame, because most of that highly engineering parts stuffing is hidden behind smooth under-body paneling or splash guards. The stuff that makes a car, or a truck, move is increasingly hidden from view. So you'll forgive me for noticing the Jeep's sharp stuff.
See that? That's the transfer case, just hanging out there. I guess when the shiny side of the Jeep resembles a barn door, there's not much point in improving under-body aerodynamics, is there?
And this? That's the front differential. With the addition of our bigger wheels and tires, you should be able to get a little better view of all this mechanical stuff on the road.

Am I the only one that finds moving parts mesmerizing?

As I was heading out to the parking structure the other night after work, I was thinking that this was probably the wrong night for my first experience with the Wrangler. Too tired, too cranky. Not in the mood to be bounced and jostled. Not in the mood to bump elbows with all those hard surfaces.
But by the time I got home, after 20 or so minutes in the Wrangler, my mood had lifted.

One reason: The Wrangler's seats were way more comfortable and supportive than I'd expected. Contoured just right for my frame; felt like I'd melted right into them.
Another: That high seating position. Reminds me of when I was a kid and my dad would hoist me up on his shoulders; felt like I had a bird's eye view of the world. Put a smile on my face.
Nice to meet you, Wrangler. Looking forward to getting better acquainted.
In 1987 my dad went to Maple Leaf Gardens. After the game, he returned to his new Jeep Cherokee to discover the parking lot behind him was jammed. Sitting in the driver seat he looked forward to see a curb, a strip of grass and a wide-open Jarvis Street. He shrugged his shoulders, said "What the hell?" and plowed forward over the curb, across the grass and on to freedom.
Last night, I went to Cheviot Hills community park. After my softball game, I returned to "my" Jeep Wranger to discover the parking lot behind me was, well, pretty much empty. Sitting in the driver seat I looked forward to see a curb, a strip of grass and the rest of the parking lot that was also pretty much empty. I shrugged my shoulders, said "You know, I'm not really feeling reverse right now," and plowed forward over the curb, across the grass and on to freedom.
Then I remembered I should probably take a picture. So I did it again. Yay Jeeps.

You tend to think of the Wrangler as being a nimble friend on wild mountain terrain, but it turns out it's quite the helpful amigo on civilized hills of the paved variety, as well.
The reason? Well, a standard feature with its six-speed manual transmission is hill-start assist. The feature works exceptionally well, keeping the Wrangler super-glued in place with nary a hint of rollback.
Made for a stable and stress-free experience during a recent trek up and down some steep roads.

I've had either work or family obligations through a long string of weekends. This past weekend my dance card was empty and fortuitously the Jeep was available.
I had cabin fever. I needed the Jeep.
We had a bit of a cold snap here in SoCal. No, not a wus-like "had to switch from shorts to jeans" kind of SoCal cold front some might imagine. As I stepped outside my house at 4am with gear in tow, local weather had it at 38 degrees. That's right on the coast. It was a bad portent because where I was heading was undoubtedly going to be much worse.
I have said it before, I'd love to have a hard top for our Jeep. This time it was because of the cold. When I got to my destination, it was 18 degrees and the wind was howling. That's cold no matter where you're at. The soft top offers zero insulation and the powerful gusts of chilly air seeped through the gaps. I had the heat cranked for a good chunk of my trip, multiple layers of clothing (including rocking the long johns), and drank some hot coffee I picked up on my way through the Mojave Desert. While these measures helped, I was still a bit cold.
I know a lot of Wrangler owners that actually experience a real winter have the hard top to swap into. A brief taste of the cold has given me a greater appreciation for their dedication to the Wrangler. I think for the kind of adventuring I do in the deserts that surround LA, keeping out the dust, keeping the heat in, and the abrasive resistance to the desert flora is of greater importance than the versatility our soft top offers.
Despite the cold, I still was able to wheel out to a canyon deep in the Mojave where passenger cars wouldn't have made it. Romped over rocks, ruts, and had a great ol' time. Even bagged a couple of quail in the process. After looking at our dirty Jeep sitting my my driveway Sunday night, I thought to myself, "What an antidote." I definitely cured my cabin fever.

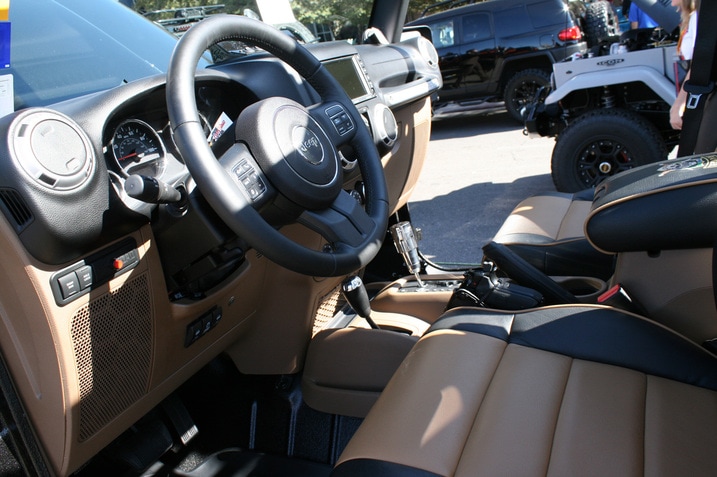
Forget the fact that these exposed screws could be nothing more than decoration for a moment. I like the way they look. They give the interior of the Jeep a visible sense of solidity.
Every new car interior these days covers over every nut and bolt so you can't see any of the real guts. It's fine for the most part, but sometimes you would like to know that there's something solid holding everything together, especially in a Jeep.
One of these days I'll get industrious and pull a few of these screws to see if they really do anything. Or maybe not. Sometimes it's better not to know how the sausage is made.

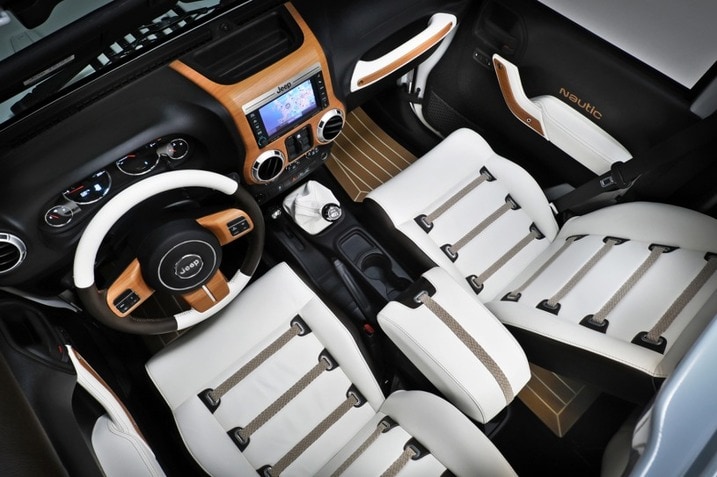
All in favor of adding teak bits and pieces to our Jeep Wrangler to make it match our long-term yacht say 'aye!'


I saw this clever vanity plate on the way to work this morning. Knowing that we're going to modify our Wrangler with some suspension and tire upgrades, here's a hypothetical question for y'all. What would you suggest for a vanity plate for our basic black bomber?

We have plans for our 2012 Jeep Wrangler, plans that include modifying the suspension with off-the shelf parts for better off-road performance. A key predictor of off-road potential is suspension articulation (the degree to which the front axle can hang out of phase relative to the rear axle) and many off-road mods strive to improve articulation, not just ground clearance.
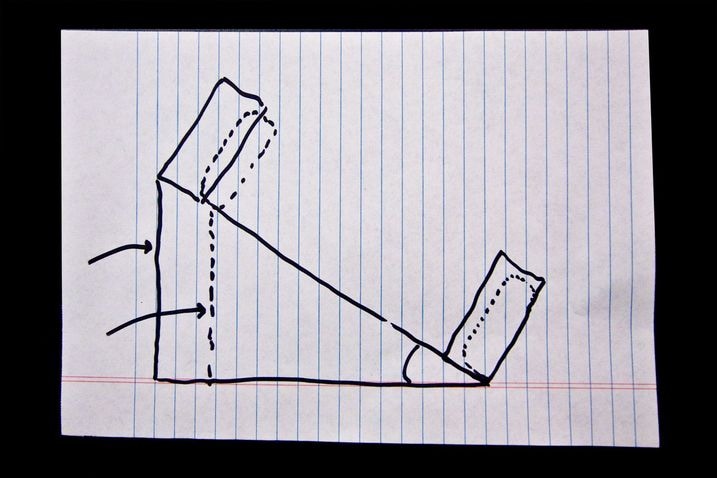
One way to quantify this is by measuring a vehicle's Ramp Travel Index RTI using a purpose-built RTI ramp. The measurement is made by driving the driver's side front tire as far up the ramp it will go before the right front tire and/or left rear tire lifts off the ground and the vehicle starts teetering.
At this point you measure how far up the ramp you got, divide that number by the wheelbase and multiply the result by 1000. Stock vehicles never get to the point where the left rear tire touches the ramp with four on the floor, so they always come in with an RTI less than 1000; less than 400-500 is more like it.
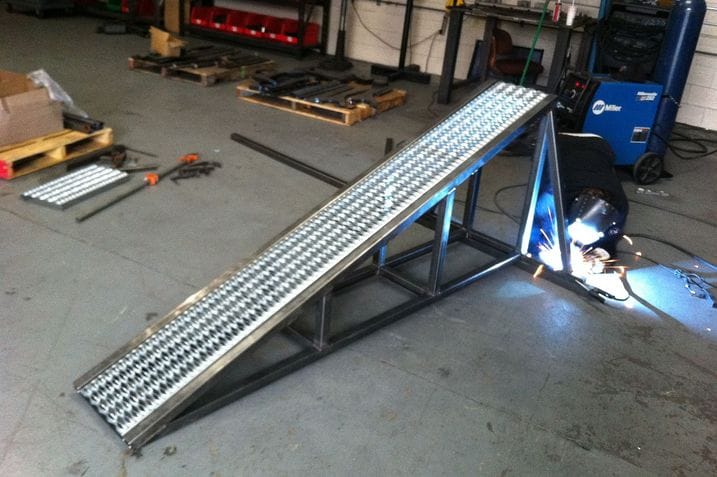
Turns out it's easier to build an RTI ramp than it is to buy one, and in any event I wanted a traditional 20-degree ramp that could accomodate the approach angle of the sorts of stock unmodified vehicles we see all the time. RTI ramps of 30 degrees and up are favored by rock-crawlers that go completely sick with modifications, but they have to back-calculate their results using the 20-degree standard.
To I get what I wanted I made a few sketches and some stress calculations and headed off to my local metal store. Schmidt's buddy Shaun knows his way around a welder, and he agreed to spend a Sunday with us cutting and welding the pieces together. It came out very nice. Thanks Shaun!
The mods we have in mind are not likely to boost our Jeep all the way up to an RTI of 1000, but if they do this ramp can take it because its deck is longer than our Wrangler Sport's 95.4-inch wheelbase. As soon as we get it set up back at the shop we'll measure project Jeep's "before" RTI measurement so we can see what each and every modification does for suspension articulation.

I like the fact that Wranglers have big ugly tow hooks sticking up from their bumpers. It's one of those features that only a Jeep could get away with. Anything else looks like it's trying too hard with stuff like this, yet on the Jeep it seems perfectly reasonable. Sure, it would probably look even more purposeful if it wasn't sticking out of a plastic bumper cover, but you can't have it all.
On a more mundane note, I still like driving this Wrangler and its six-speed manual. Thought that thrill might wear off after spending more time behind the wheel. Instead, I still appreciate the easy to find gates and smooth clutch action. The gutsy engine helps too.
I got the keys to our Jeep this past weekend hoping to make it out to the Mojave for another fun run. Family, weather, and just plain feeling sick conspired to sabotage my plans. Sadly the Jeep spent the majority of the weekend parked in front of my house as I sofa surfed.
Come Sunday morning, I needed to get out and get some meds. I jumped into the Jeep, started it up and got a big surprise.
I cranked the wheel hard to pull a u-turn. With the street clear of traffic, I came around slow. Didn't hit the trash cans in front of me so I kept going.... I cleared the car parked on the other side of the street! I love the turning circle in our Wrangler.
The high seating position, short wheelbase, and excellent maneuverability give you the illusion it pivots on itself. The Jeep is built to move through tight spots, so I guess that a turning circle of 34.9 ft shouldn't be too surprising. I'm betting this might be more of a challenge with new tires before we get the lift kit. Any takers on what the radius will be with the new tires and lift kit?
Our 2012 Jeep Wrangler Sport has a set of five new tires and wheels ready to install. But first let's see how good you are at weight guessing.
A few hints:
The tires — BFGoodrich Mud Terrain T/A KM2 radials, size LT 285/70R17. In off-road language they're 33 inches tall and 11 inches wide. (Aside: Doesn't 33x11x17 make a lot more sense?) Tirerack.com gets $265 apiece for them.
The rims — 17-by-8.5-inch 5-hole deep dish aluminum wheels sold by MOPAR for $259 each. Built with off-road use in mind, their valve stem holes are deeply recessed so the valve stems are less likely to get snagged on rocks or roots.
And then there are the old tires and wheels that are on their way out...
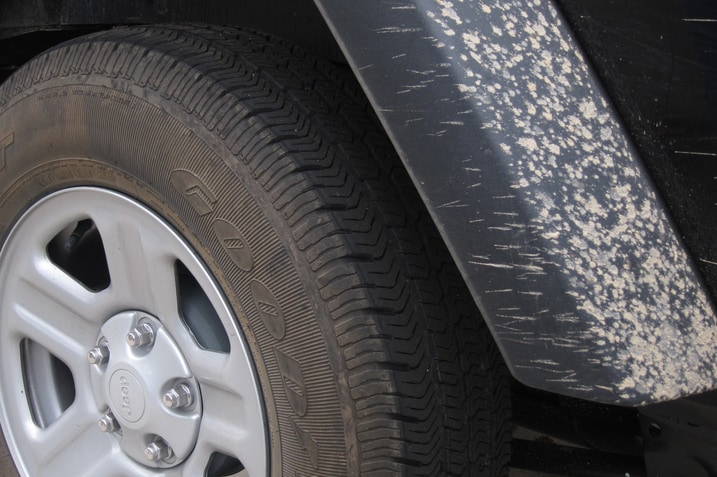
The skinny originals are P225/75R16 tires (something like 29x9x16) riding on 16-by-7-inch steel wheels.

And they weigh 51.4 pounds mounted and ready to go.
What am I bid? How much you figure one of the new mounted tire and rim assemblies weighs?
Dan Edmunds, Director of Vehicle Testing @ 6,100 miles

Our Jeep Wrangler was not the first entity to don those new, beefy, heavy, off-road-ready tires. No, no.
We thought it wise to have Bryn MacKinnon try them out since ... well, because there wasn't a RamBox around to put her in.

Our 2012 Jeep Wrangler has new shoes. Man, what a difference. In no time at all we've gained about 2 inches of ground clearance owing to the larger radius of these tires. And the dorky mail truck look is long gone.
We of course mounted the BFGoodrich KM2s white letters out, in accordance with IL reader poll results. Frankly, I like it better than I thought I would. We'd have had too much black otherwise.
Of course gearing has suffered. And the speedometer is now off by about 10 mph at freeway speeds — the wrong way. It read 60 this morning when I was going about 70 mph. New axle ratios are in the cards, but we're going to live with this awhile and measure the ill effects at the track.
On the road, acceleration isn't near as bad as I expected. Maybe that's because the 3.6-liter engine packs 83 horsepower more than the 2011 edition, has 23 lb-ft more torque. It also has a 6-speed manual, which means the gears were never canyons apart to begin with. With these tires it feels pretty natural if I ignore 6th alltogether and drive it like a 5-speed.
Yeah, there's more tread noise, but not as much as I expected and it's not that evident until 40 mph. Our soft top isn't helping, of course. Braking doesn't seem too bad in normal use, either.
We'll quantify all of this when we take it to the track next week. Should be interesting.
But you wanted to know how much these babies weigh...

That's right, each wheel and tire assembly weighs 91.4 pounds, exactly 40 pounds more than the originals. According to Price is Right rules, aspade called it with a guess of 90 pounds.
And so our Wrangler gained 200 pounds in one go; 40 pounds of pure unsprung weight per corner and another 40 for the spare. The ride is a bit more "clompy" over rough stuff at speed, but it's not a dramatic change because the Wrangler's solid axles didn't exactly represent a Lexus starting point.
Upgraded shocks will help and we're just beginning to play with air pressure. With a higher rated load capacity, we can safely run these tires at a slightly lower pressure than stock if we so desire.
In corners the extra tire footprint and the increased track width seem to make it feel more planted despite the extra height. The track is about 4 inches wider at the center of the tread and something like 6 inches wider from outside rib to outside rib. (We'll measure these numbers later.)

At just over 50 pounds, the old rubber came off rather easily.
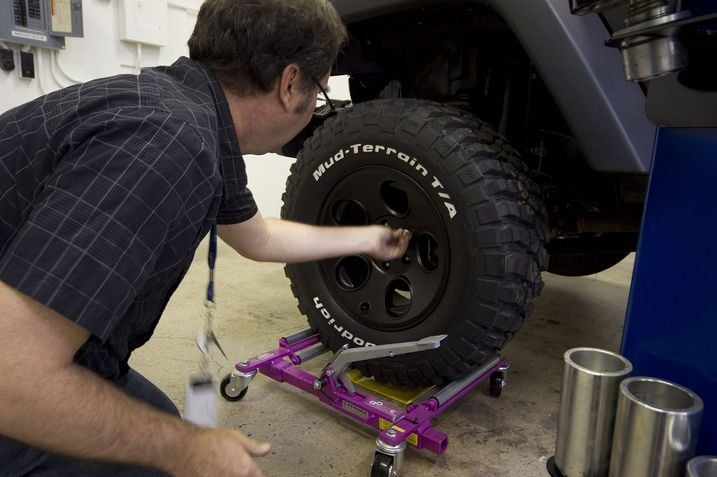
But I was glad to have a Go-Jack roller jack handy to save my back the hassle of lifting a 91.4-pound replacement into place while the Jeep itself was suspended at knee height by our Rotary lift. Here the tire sits on rollers that allows me to clock it into position and line up the studs. These jacks are usually used four at a time to move cars around in tight spaces, but we've figured out a couple of other ways to make them pay for themselves.
Dan Edmunds, Director of Vehicle Testing @ 6,155 miles

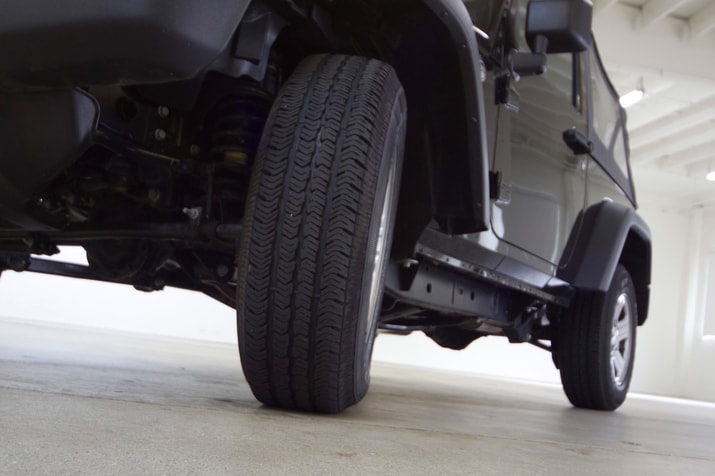
A trip up the RTI ramp was the first order of business after installing new Mopar wheels and BFG tires on our 2012 Jeep Wrangler.
With no suspension mods, we expected zero change in Ramp Travel Index. Instead we saw this as a clearance test to see where the new tires would rub on our Jeep, which hasn't been lifted yet. Rubbing inside the fender wells might even limit articulation, reducing RTI for the time being, we thought.
Funny thing, thinking.

Despite expectations, our Wrangler went further up the ramp this time, achieving 20 7/16 inches of wheel lift while making it 59.8 inches up the slope. That works out to an RTI of 626. It was 561 in bone stock form.

How can this be? You have to turn your perspective 90 degrees and imagine what's happening along that tilted front axle.
With no suspension mods, it's easy to imagine that the Angle of the Dangle (AoD) has not changed. But two things that have changed (and dramatically so) are the track width due to wheel offset and the width of the tire tread itself. Those filled fenders represent a wider base of operations, which generates more wheel lift for a given AoD.
That's most of what's going on, but the effect is not quite large enough on its own to explain the 2 1/8-inch increase in lift we're measuring.
The other factor also relates to the wider track width. The increased leverage ultimately compresses the left front spring a little more, generating a bit more maximum twist in the stabilizer bar. This amounts to a slight increase in AoD and front axle articulation.
Meanwhile, there are no clearance problems up front. There's plenty of space at this point, but things are getting closer. At first this seems surprising, but it shouldn't be.
Our Wrangler Sport's original skinny tires are far from the largest ones Jeep installs at the factory. And it turns out our new 285/70R17 (33-inch) BFG tires are not that much bigger than the Rubicon's 255/75R17 (32-inch) factory rubber.
They are wider, though, and that seems to have pushed things to the limit at the rear. The tread is contacting the fender liner along the outside block of tread, although by and large the tire does tuck under the fender flare quite nicely.
In short, these tires fit just fine for everyday driving. They clear well enough to do some light to moderate 4-wheeling, too. But the rear tire will rub through the rough stuff, and there's no telling how hard it's making contact, how much further it would go if it wasn't touching. We'll go easy on the hardcore wheeling until we install a lift kit.
RTI #1 561 (box stock)
RTI #2 626 (wheels and tires)
RTI #3 ???

Wheel locks seemed like such a good idea at the time. After all, our 2012 Jeep Wrangler had new wheels and tires to protect.
Buying mag-locks in packs of five was not as easy as I expected, so I stopped at a local Jeep dealer where they still 'get' the whole external spare tire thing.
Now that they're on, I'm having second thoughts. Visually, they stick out too far by almost three-quarters of an inch. Better ugly than stolen, I guess.
Meanwhile, I'm on the lookout for shorter ones.

The TPMS warning light is on in our 2012 Jeep Wrangler. We were so eager to mount our new wheels and tires when they arrived that, frankly, we didn't give much thought to TPMS sensors. We decided to revisit the subject.
We figured we could just drive down to the tire shop, have a set installed, extinguish the pesky light and be on our way. Piece of cake. But a conversation with our local tire shop made it clear things were not so cut and dry. "TPMS sensors are about $100 apiece," our tire guru explained. He added, "And that is our cost. Heck, we installed two new sensors on a Lotus the other week that were about $400 each."
That was the moment when the light bulb went off overhead. We asked, "Any reason we can't just remove the sensors from the old tires and put them on these new ones?" His response was short, "I'd recommend it." It might be a hassle to get 10 tires (including 2 spares) down to the tire shop, but that is exactly what we're going to do. And save ourselves $500 in the process.

I like Chicago style deep dish pizza. I like home runs that go deep into the stands. I like meaty wheels that go deep. Our Jeep has 'em and they're awesome.

We just came back from the test track, where we put our 2012 Jeep Wrangler Sport through its paces on its new LT285/70R17 BFGoodrich Mud Terrain T/A KM2 off-road rubber.
Before I tell you how it did, here are few facts to consider as you make your predictions:
- It stands 1.9 inches taller on account of the larger rolling radius of the BFGs. But the Wrangler's center of gravity increase has to be something less than 1.9 inches higher because...
- It weighs some 200 pound more, and, with the exception of the high-mounted spare, this weight increase is low down. Each wheel and tire assembly is 40 pounds heavier.
- It rests on a track width that's more than 4 inches wider at the center of the tread, and that track width increases to something over 6 inches if you measure from outer tread rib to outer tread rib. (We still have to confirm these estimates with real measurements.)
Here's how things shook out.
Acceleration
0-60 (seconds): Stock = 7.1; Big Tires = 7.5
1/4-mile (seconds @ mph): Stock = 15.4 @ 89.3; Big Tires = 15.8 @ 85.6
Not unexpected with what amounts to taller gearing. Comparing actual speed to VBox GPS speed, we measured the difference in effective gearing at 13 percent taller, which more or less matches what I came up with by comparing tire dimensions.
Interestingly, this makes it possible to complete the 0-60 speed run in 2nd gear. On real roads, the close ratio 6-speed manual now drives like an ordinary 5-speed, with 6th gear a useless lug-fest. It still feels stronger than any unmodified 2011 Wrangler would have, on account of the 83 additional horsepower churned out by the new 3.6-liter V6 engine.
Braking
30-0 (feet): Stock = 35; Big Tires = 33
60-0 (feet): Stock = 140; Big Tires = 136
Here it seems the extra tire width (and probably a stickier rubber compound that is less concerned with low rolling resistance and fuel economy) is more than offsetting the increase in rotational inertia. This matches up with the subjective brake feeling on the road, which comes across as no more perilous than before.
Skidpad
100 ft radius (lateral g): Stock = 0.63; Big Tires = 0.65
Once again the extra track width, extra tire tread width and presumably stickier rubber more than offsets any increase in weight and center-of-gravity height. Indeed our re-tired Jeep feels very well mannered (for a solid-axle off-road machine) on cloverleaf freeway off-ramps. It goes down the freeway a bit less nervously and somewhat straighter than before, too.
Slalom
600 ft x 6 gates (t/c off, mph): Stock = 55.4; Big Tires = 53.0
Here the very dynamic nature of this maneuver finally reveals a weakness. The extra "stick" we observed around the skidpad may or may not be overwhelming the stock tuning of the stabilizer bars and shock absorbers, but the extra unsprung mass certainly isn't helping keep the tires planted over the cone #3 bump.
On top of that, the outside edges of the open lug BFG Mud Terrain KM2s are designed to be most proficient at clawing through mud and gripping rocks and sand. Catching a slaloming Jeep in quick transitions and balancing it on a knife edge is not their forte. In deference to that fact Monticello didn't beat a dead horse and repeat this test too many times in order to preserve the outer tread lugs for their intended off-road use. All-Terrain T/As would have done a bit better here, I'd wager.
Noise
Idle (dbA): Stock = 49.4; Big Tires = 43.8
WOT (dbA): Stock = 81.0; Big Tires = 78.7
70 mph cruise (dbA): Stock = 73.2; Big Tires = 72.0
At first, this data made no sense at all. And, frankly, it still might not make any sense. But it does match up to the subjective feel on the road. Yes, there is more tread noise, but it's not as bad as I expected and it's still not the loudest component of the overall sound; it's not the peak the meter is measuring — that's the trouble with meters and peak-only measurements.
Why are the peak measurements (and subjective impressions) lower, especially at idle? The only theory I can come up with has to do with the Wrangler's newfound additional ground clearance of about 1.9 inches. The component of noise that's reflected back at the cabin by the ground will surely be dissipated by this larger air gap. But by 5.6 dbA at idle? I'm not so sure.
Got another theory? Let us know. In the meantime we're going to repeat this measurement to see if it's a real thing or not.
Dan Edmunds, Director of Vehicle Testing
After a few weeks with BFG mudders, our 2012 Jeep Wrangler is returning the sort of fuel economy you might expect. We averaged 17.5 mpg on stock wheels and tires for the first 5,000 miles of the test. Upgrading to the 17-inch rims and 33-inch tires has us averaging 15.6 mpg. Down about 2 mpg.
We don't have a large sample size to work with yet. This mileage calculation includes just over 300 miles and 3 fill-ups with the new setup. But it gives an idea as to the fuel economy outlook at this stage in the modification process.

I found this guy parked while I was driving our 2012 Jeep Wrangler around my neighborhood. Is it me or are all old Jeeps just cool? The Willys era Jeeps are my personal favorites. I'll take mine with a small-block Chevy conversion, please.
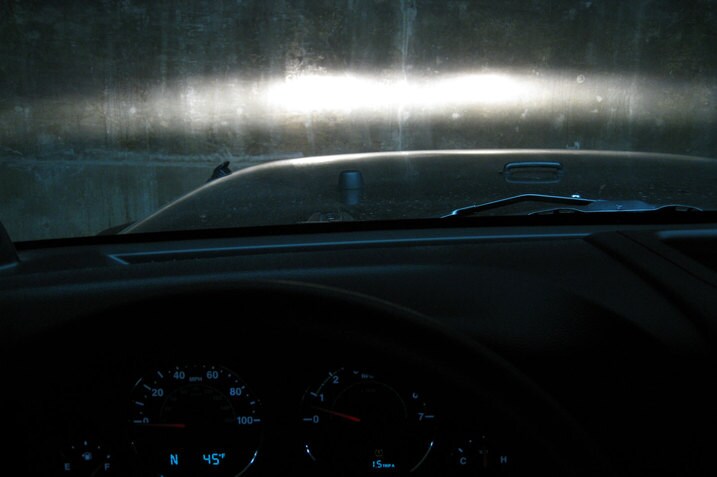
This picture of the headlight projection from our 2012 Jeep Wrangler doesn't express just how poorly they function. These headlights are weak. Do I smell an excuse for an upgrade? Take the jump for more examples...

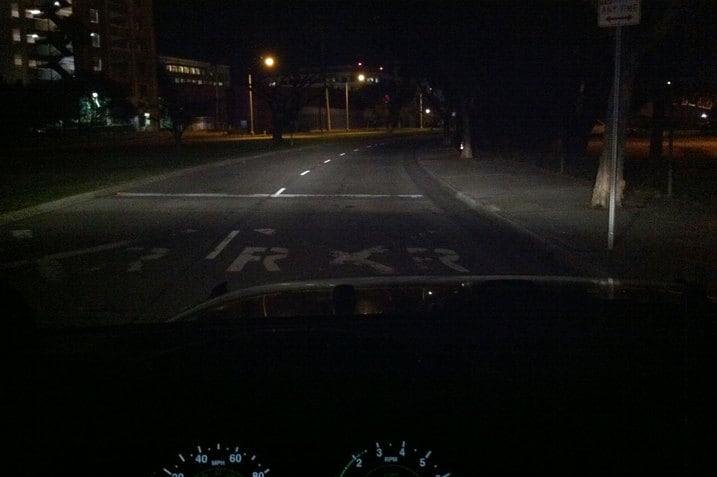
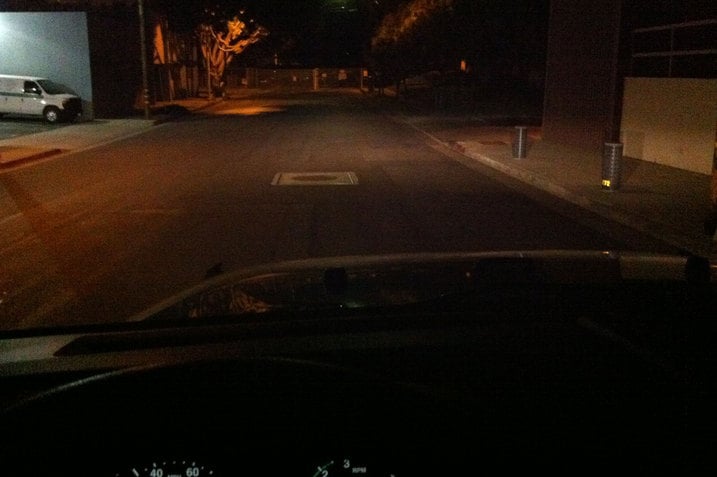
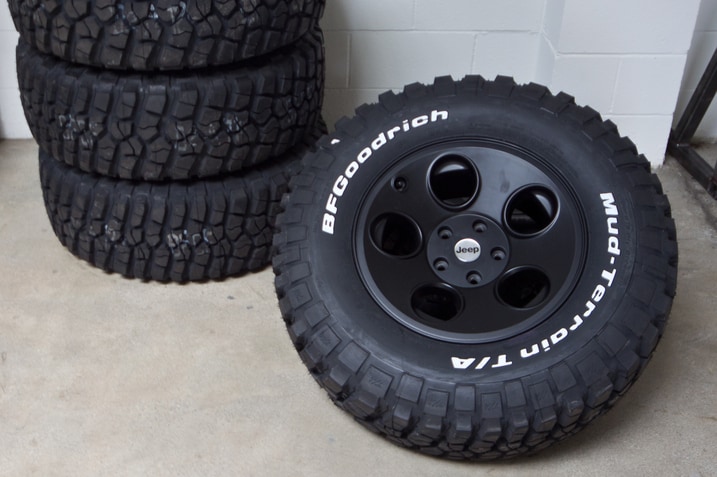
As you already know, we swapped the factory meats with some big mudders. I did a 300 mile round trip over the New Years holiday weekend, so I've got a decent amount of seat time riding on the 33's.
Does it cause more sonic pain?
As you can tell by the video, albeit from a crappy phone camera and limited audio capability, it's really a wash. Yes the tire noise is there, but he soft top still creates more noise than the tires themselves. I'm sure the extra 2-inches of lift provided by the off-road BFG's help soften the reverberated sound.
We'll see if a lift kit will further deaden the sound.
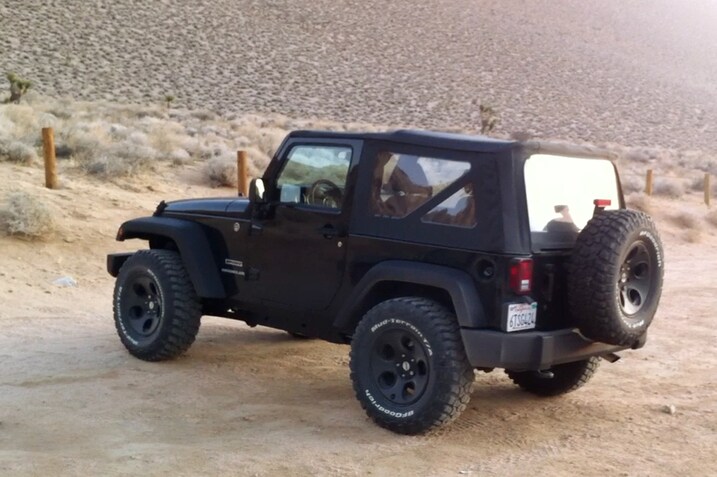
I, like many of you, have been beset by family visits, fighting through throngs of shoppers and and a constant set of obligations that aren't of your choosing. I needed a break and some time to myself.
Mix together our long term Jeep Wrangler, a free day, add my dog and it was a perfect plan.
I have become
fat
festive during the string of holidays due to the abundance of great home cooking and the lack of activity (aka: playoffs, bowl games, etc.). So had my dog. We both needed to get out and hike/adventure about.
In the chilly pre-dawn hours of my free day I drove 150 miles north to a great upland hunting spot west of Ridgecrest, CA. Our Wrangler was probably overkill for the location I drove to because at the end of a relatively flat dirt road I found a parked Camry. No matter. The greater point was that I needed to get out and the Jeep got me there.
After a long day of hiking around the canyons, we got back to the Jeep with enough daylight to casually pack everything up. Looking out east of my location I could see the peaks of the Garlock Mountains. That rugged landscape is my future destination once a lift kit is installed. Not that I think the Jeep in it's current state cannot handle the Garlocks, I just don't want to be responsible for the tires rubbing and possibly damage the fender flares.
The day out was just what I needed both on a physical and mental level. The quote: "Focus on the journey, not the destination. Joy is not found in finishing an activity but in doing it" is so true when it comes to our Wrangler. Not only can it take me to my favorite back country spots to do the things I love, but I really enjoy driving it around town on errands and during the those dark hours of pre-dawn. Besides, it looks great sitting in my driveway. While not for everyone, I feel the Wrangler is a winner.

The plan was to take the girlfriend and one of her friends out to dinner after work last night. Then I got into our Jeep and realized that someone had removed the rear seat.
I remember one time a few years back I went to take our Long Term Jeep Wrangler Unlimited and somebody had taken the doors and roof off. Surprise!
Just one of those things you have to deal with when sharing a car that's so easy to disassemble.

Base Model Upside: No power windows means you get this handy little bin that holds an iPhone/iPod in a very convenient place. Also, I appreciate the simplicity of this head unit rather than Chrysler's old touchscreen thing with the tiny screen and annoying menu structure.
Base Model Downside: The stereo sucks. Yes, I've been driving the Shaker-equipped Mustang for a week, but it's just awful. With all those hard, flat surfaces and the abundance of noise coming from everywhere, I'm pretty sure it's impossible to create a sonic cathedral inside a Wrangler. Still, some semblance of bass would be nice. As such, I would definitely pay the extra money for the Sport S trim (includes 17-inch alloys, A/C, leather-wrapped wheel) and $395 above that for the seven-speaker Infinity sound system. I can't speak to its quality, but it's got to be better than the standard one.
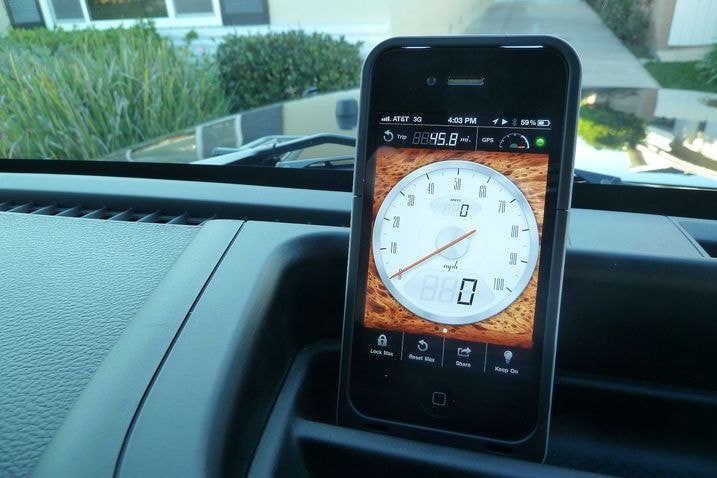
Our 2012 Jeep Wrangler now wears big aftermarket tires and wheels, but the diff ratios have not yet been changed.
Track testing showed that this didn't do terrible things to performance. But while we were at it our VBOX was able to confirm what I'd predicted by comparing tire sizes: the actual speed our Jeep travels at any given time is now 12 percent faster than what the speedometer is telling us.
That's a recipe for a speeding ticket, that is.
At first I considered a conversion chart taped to the dash. And then I found Speedometer+, an iPhone/Android app that uses the phone's GPS capability to produce a speed readout. There's a choice of knots, mph or kph.
I found it in the iTunes store a few days before the new year for free, but that was an introductory offer. They get a whole 99 cents for it now.
Worth it.

It lags a second behind reality, but thats no big deal on account of I usually don't care until I'm at cruising speed. Point is, I know exactly how fast I'm going now.
An indicated 60 mph on the Jeep's speedo is 67 mph as far as the Highway Patrol is concerned. That's a ratio of 1.12-to-1, the same 12 percent error we came up with using the VBox.
Everyone in the office with plans to drive our modded Jeep should get this app. Any smartphone user who has changed their tire and wheel sizes enough to change the height of their car or otherwise suspects a speedometer error should get this app. As an added bonus, the Jeep's dashtop bin contains a small ridge that helps the phone stand up at a useful angle.
OK, Mr. Newcomb, I think this just about takes care of this week's Automotive App of the Week.
You're welcome.

It doesn't get any easier than this. Changing the oil in our 2012 Jeep Wrangler requires no floor jack, no jackstands — just my trusty drain pan, a funnel, and a wrench each for the drain plug and oil filter.
This is a sub ten minute job if you're not taking pictures. Next time I bet I can do it in five.
Step One: You know the drill; crawl under, position pan, lefty loosey, drain plug out, glug glug. If you can avoid dropping the drain plug into the pan you won't even need any gloves.
And this drain plug has a rubber seal built in to it, so there's no washer to lose — or replace.
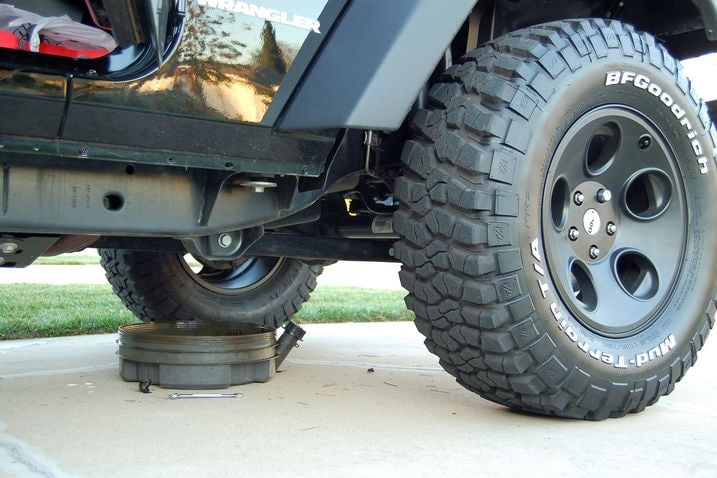
Even with stock tires a jack would be unnecessary, but the extra 2 inches of ground clearance provided by the 33-inch BFG Mud Terrain tires made it a no-brainer — literally.
It's time to go topside once the oil is out because the oil filter isn't down here.

That's because the Jeep's new 3.6-liter V6 uses a cartridge oil filter, and it's hiding under that engine cover. The cover pulls up and off with no tools.

There it is, right on top and right in the middle of the vee.

The long ratchet is overkill, but the only 15/16-inch socket I have is 1/2-inch drive. At least the flexible ratchet handle makes for good swing clearance, but an extension would do the same.
The pressure from a single finger is enough to loosen the cap because it's not something that has to be uber tight. The o-ring is on the barrel, as we'll soon see — it's not a crush seal like you see on regular oil filters.

The filter comes straight out with the cap because the two are snapped together. Hold it here for a few seconds so the majority of the drippings fall back into the housing. You'll still want a rag, though.

I bought a new filter at the Jeep dealer, but they're available most anywhere. Separate the oil filter from the cap by pulling hard enough to overcome the snap-together clip.

A new o-ring comes with the filter. Pull off the old and put on the new. A small flat-blade screwdriver may help.
Here you can see how the o-ring seals on the side. Tightness has nothing much do with it in a design such as this — as long as you have the cap screwed in all the way.

The end that goes in the cap is the end with the snap-in fingers. Push until they click into place.

All set to go back in.

Lower it in the housing and spin it by hand to engage the threads. At some point you'll switch to your 15/16-inch socket to screw it in the rest of the way.
You'll feel a step up in resistance as the o-ring starts to make contact but at that point you'll still see daylight between the housing and the lip of the cap. You'll keep going a turn or so past this point until the cap truly bottoms out. Resist the temptation to crank it down super tight. Snug with a extra tweak is all we're going for.
For this reason a 3/8-inch drive standard-length ratchet is a better choice than the monster I used, but even with one of those it's best to choke up to prevent over-tightening.
Don't forget to reinstall the drain plug down below before you start adding six quarts of your favorite 5W-30 motor oil. Yeah, it takes six, not five. A Jeep's oil pan is extra deep so the oil pickup will continue to operate with the truck heeled over at odd angles.

The gates were open. The dirt roads up to Santiago and Modjeska peaks, together known as Saddleback, were fair game. I called my buddy Mike (not that Mike, or that Mike, or that Mike — you don't know him) to see if he wanted to ride shotgun in our 2012 Jeep Wrangler and head up there for some geocaching.
Mostly, these are fire roads that any cute ute could tackle. But there are always washouts and the place is sprinkled with tall water-bars. Good approach and departure angles are nice to have. Knobbly tires and 4-Low aren't strictly necessary if you stick to the Main Divide Truck Trail, but there are always spurs and side roads to investigate.
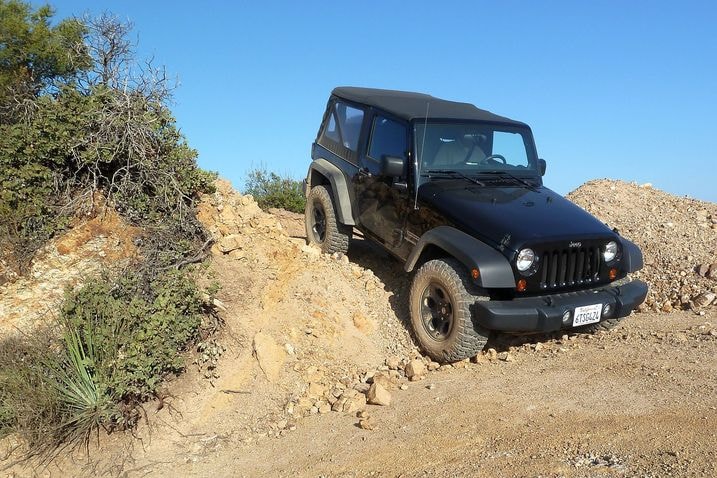
This particular side trail might have been beyond reach with our Jeep's original stock tires. Remind be to build a tool to measure how much our approach angle has improved with these 33-inch BFG Mud Terrain T/As and the extra 2 inches of lift they provide.

This is one of many Forest Service helipads that are sprinkled atop the numerous peaks along the ridge. It's steeper than it looks here and the lip is taller than a curb. The muffler actually kissed the asphalt (no harm, no foul) as the rear tires dropped in.

Easy hillclimb. Yawn.
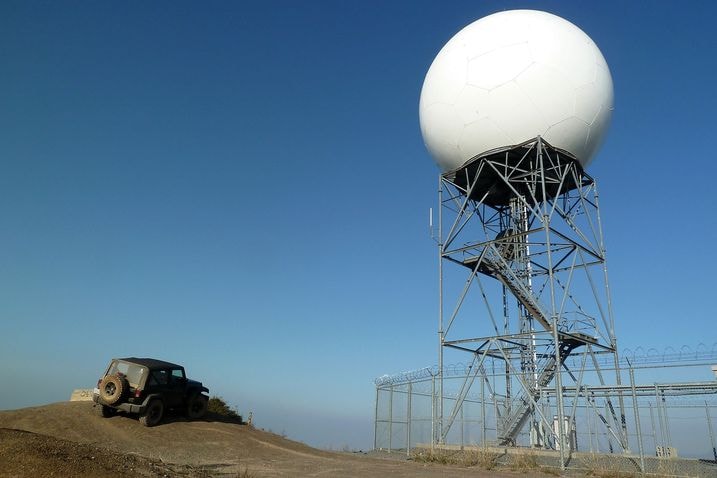
You can see this soccer ball thing from many parts of northern Orange County. It sits at the top of Black Star Canyon. Called Beek's Lookout, informally.
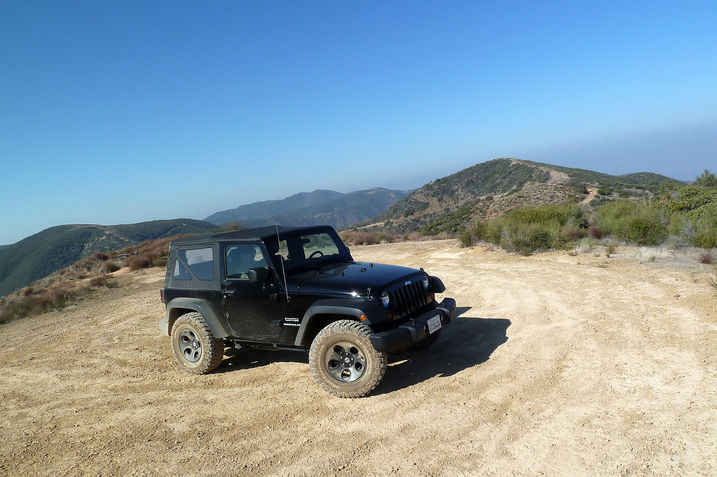
Another random hilltop helipad.
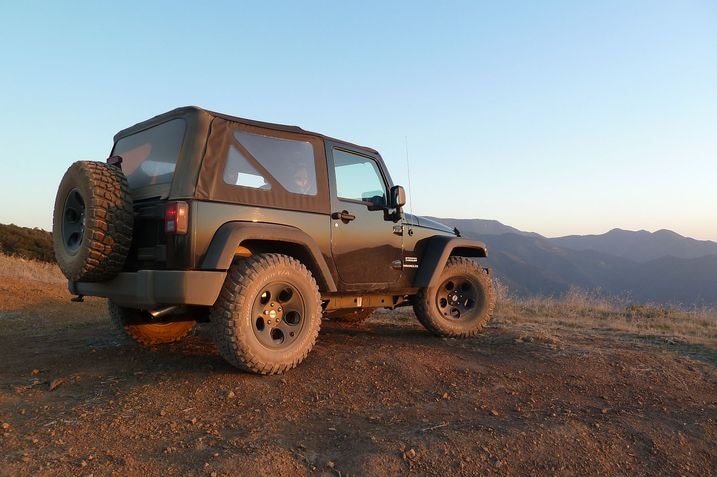
Shadows started to get long before Mikle and I hightailed it back down the mountain to the Silverado gate, some 20 miles distant. It was pitch black by the time we got there.
Admittedly, this wasn't much of a challenge for the Jeep, but a few things became clear:
The stock final drive ratios have got to go. I spent most of the time in 4-Low, not because of the steepness, per se, but because of the combined effect of the factory gears (which are fuel economy specials to begin with in the 6-speed Sport) and the bigger tires.
It needs new shocks and springs. When I opened it up a little (a whole 30 mph!) the heavy unspring mass of the new tires had their way with the suspension as we crashed over the bumps. A big hike in damping is needed to keep them planted on the ground.
A lift kit would be nice. The rear tires rubbed inside the fender wheels a couple of times. Not very often, mind you, and certainly not very hard, but enough to tell me that I could have a problem if I got into some serious frame twist action. This is not so much news as it is confirmation of our earlier RTI ramp results.
All in all, it was a good day. We went where we wanted in the knowledge that the vehicle wouldn't be the thing that held us back. That's what Jeeping is all about.
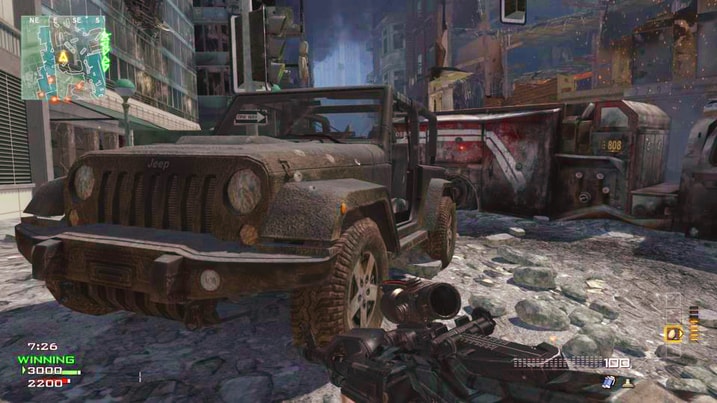
Forza 4 isn't the only video game that has tie-ins to cars in the real world. After figuring out how to get a screenshot from Call of Duty Modern Warfare 3, I can finally show you what our Jeep Wrangler has in common with my carpal tunnel.
The Jeep really doesn't play a major role in the game itself, nor does it stand out as a blatant product placement ad. It just sort of sits there in some of the multiplayer maps. I was, however, a little surprised that it's susceptible to in-game damage.
Just after the image at the top of the page was captured, an opponent blew it up with an RPG; along with myself, unfortunately. Below are images of the burned-out husk of a Wrangler.


Oddly enough, the in-game Jeep doesn't completely line up with the MW3 Edition Rubicon that is selling for $36,880.
For the $6,000-plus premium, you get special black wheels and spare tire cover, a Mopar hood with scoop, Mopar Front Bumper (winch ready) with fog lights & Mopar rear bumper, rock rails, a black fuel fill door, black tail lamp guards, a black interior with black Sedosa fabric w/hex embossment & unique "MW3" Logo, a unique IP cluster & IP grab handle with new logo and slush mats.
Worth it? I don't think so. As our Wrangler currently sits, I think I prefer it to the special edition.
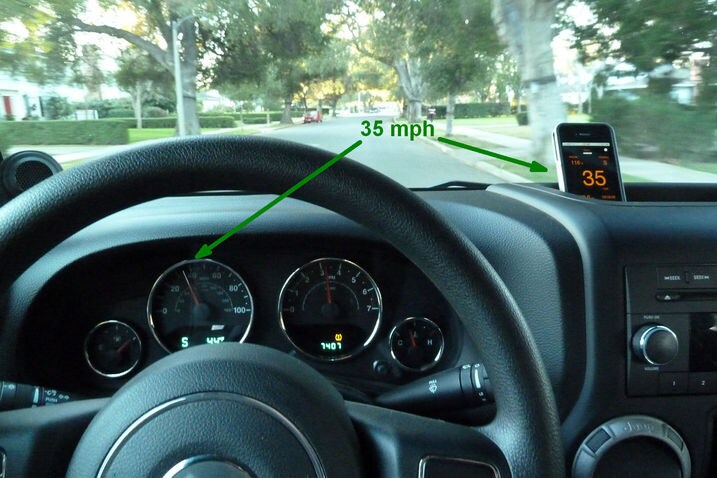
The speedometer in our 2012 Jeep Wrangler is accurate once more. Even with the big tires, 35 mph is now 35 mph, 70 mph is now, well, 71 mph according to my GPS speedo app ( a free one called Car Dashboard this time) but that's close enough.
My local dealer, Glenn E. Thomas Jeep, did the trick in about an hour — 50 minutes of which was spent waiting for a service technician to become available. All he needed from me was the circumference of the new tires, expressed in revolutions per mile. A quick check of the BFGoodrich website showed that number to be 630 revs/mile for our LT285/70R17 Mud Terrain KM2s.
For reference, our Wrangler's smaller stock tires rotated 705 times per mile. Yep, that's 12 percent more.
We made the tire swap 1,268 miles ago, so the 12 percent error during that time amounts to 152 miles and won't grow any larger.
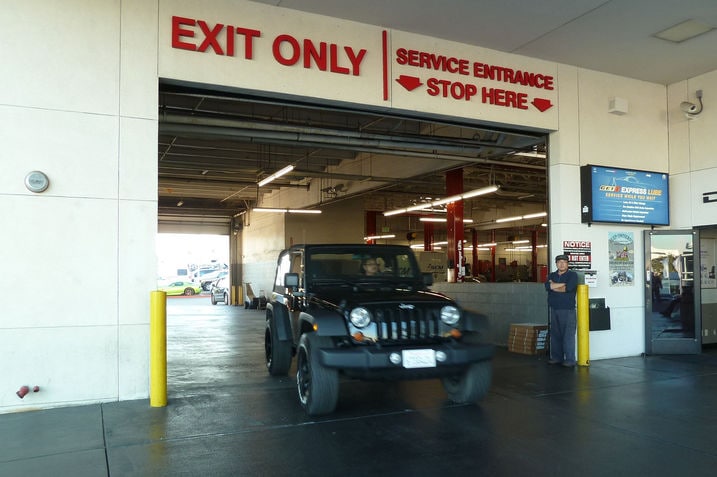
I wasn't allowed to go back into the service area to watch or photograph the procedure, but I'm told it was performed through the OBD-II port. Jeep of course offers a variety of tire size and differential options on the Wrangler, so there's a changeable tire circumference parameter built into the ECU programming.
According to what I was told the spectrum is stepped, not continuous (it isn't possible to notch the number up or down in 1 rev/mile increments) and there are upper and lower limits. Our tires apparently sit right at the cutoff because my service writer told me the technician used the last available choice.
For these reasons the service ticket reads "recalibrate speedo as best as possible." This may also be why 71 mph on the GPS reads 70 mph on the speedometer. Close enough, but not spot on.
The service writer also told me there isn't a similar ECU parameter for the gear ratio in the diffs. When we swap out our 3.21 units for something more sensible we'll need to pretend we put on smaller tires instead and figure out what the equivalent recalibration factor would be in revs/mile. Luckily, that will push us back in the direction we just came from.
Total cost: $52.50, all of it labor. Plus tax, of course.

I took our Jeep home last night. Mostly for the lazy reason that I had left the rear headrests in my garage and needed to put them back. Once I crawled into the rear seat area, I noticed a red puddle.
I ran my finger through it to make sure it wasn't cheetle (noun: The orange, cheesy residue left on the finger tips after eating a bag of Cheetos). Nope, it was rust. I tried to find the source of the drip, but couldn't locate it. Being a soft top, I would bet there are gaps so it could be from many sources.
Is this something that other Jeep owners have noticed? Should we be concerned?

When I heard we were putting some real meats on the Jeep I was pleased. Figured anything would be a huge improvement over the donuts that come from the factory, at least in terms of looks.
Turns out, the new tires make it drive better too. It feels more controlled over bumps and it's far less jumpy on the highway. The noise is pretty minimal for mud tires, too, far quieter than the original Mud-Terrains I had on my F-250 a decade ago. I don't even mind the "taller" gearing as the new V6 still pulls just fine.
I don't think there's any doubt that they look better too. In fact, if it were my Jeep I might even go without a lift, at least until I could get a feel for it in the backcountry. I'm guessing it would be just fine in anything but the most extreme circumstances.

I climbed into the Jeep this morning for some investigation unrelated to this post and noticed that, well, it stank. Literally. Smelled like mildew.
In a soft-top vehicle like this one, I was pretty sure that could mean only one thing.

I was right. When I opened the tailgate to dig around behind the rear seat, the problem was obvious. Water had penetrated the roof and found its way into the small cargo bin that's built into the floor behind the rear seat. This small tray was retaining maybe a half-inch of water and the floor mat which covers the bin was soaked.
Turns out, Chief Car Wrangler Mike Schmidt had, earlier in the day, found the seals between the top and the tailgate to be misaligned and straightened them out before I arrived. We're unsure if this is residual water from last weekend's brief rain or perhaps the Wrangler went through the car wash on Monday in this condition. It's likely the latter.
Either way, this appears to be user error. However, in our defense, this is an easy mistake to make without careful attention to every seam, zipper and seal when reassembling the top.
I took everything apart, left the tailgate open and flipped off the interior light in an attempt to let it all dry out before it goes home with Dan Edmunds tonight. I'm sure he will update the situation if it's justified. If not, I'd expect no issues once things dry out.
Dan changed the oil on our 2012 Jeep Wrangler last week. He explained just how simple the process was. High ground clearance. Centrally located oil filter cartridge. DIY oil changes on the Wrangler are pretty straightforward. Another element of the oil change he left out of the last blog was how easy it is to reset the onboard oil monitor...
Step 1: If you're not already familiar with the process, open up that owner's manual.
Step 2: Turn the ignition switch to the on/run position but do not start the engine.
Step 3: Fully depress the accelerator pedal slowly 3 times within 10 seconds.
Step 4: Turn the ignition switch back to the off/lock position.
A friendly chime greets you once the procedure is completed. The monitor resets to the factory default interval. If for some reason the maintenance light remains lit, you did something wrong. Try again. But honestly, you will find it difficult to mess this up. Very simple. Very Jeep.

By now you know about the new wheels and tires on our 2012 Jeep Wrangler Sport. That means you also know we have yet to install the TPMS sensors since the BFG upgrade. There was a delay due to some significant misinformation regarding the cost and availability of these black rubber thingies.
A (once trusted) source for all things tire warned us of prices in the $100-each range for new sensors. That put the purchase on hold until we could do more research. Our gut told us he was blowing smoke, so we dug around...
MY2010-current Wranglers use a newer 315 Mhz unit, which replaced the 433 Mhz system used in models prior to 2010. We shopped 4WheelParts.com but they didn't offer anything compatible with the new system on our 2012. Same luck on Amazon. Our local Jeep dealership, NAPA and Tire Rack did have parts in stock, however:
Dealer: $82.80 each
NAPA: $49.99 each
Tire Rack: $37 each
Which would you choose? Multiply that cost by 5 tires. It sure beats the $500 stab-in-the-dark quote we received originally. We've spent $192.42 (with shipping) so far. Next step is to get these suckers installed.
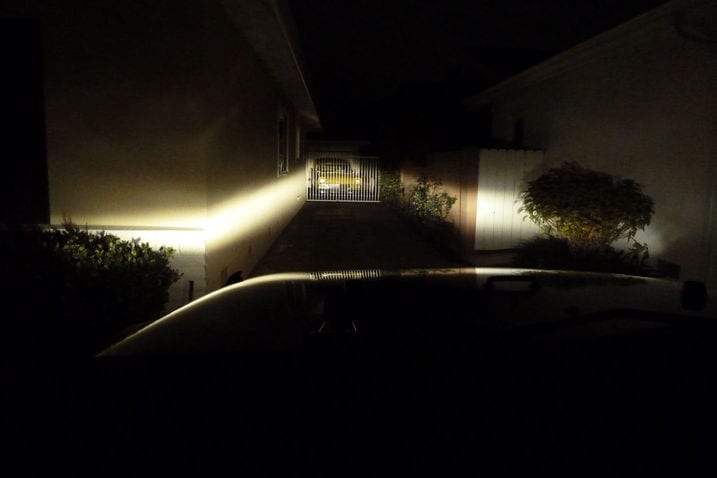
Our 2012 Jeep Wrangler's low-beam headlights were never very good to begin with. Folks around the office have compared them to lanterns on more than one occasion.
But its more than just their general dimness. The light seems to pour out of a slot, as if our Jeep was fitted with World War II blackout covers, the kind that used to be mandatory to lessen the chance of being seen by the enemy flying overhead.
Any shot of the front end will show that our Jeep has driving lights in its front bumper, but those don't ever do very much, right? Might as well try them.
Now, if I can only find that switch. It's dark in here, and the location of switch isn't obvious. There's certainly nothing backlighted to find.
This all happened while Mike and I were coming down from Santiago Peak in the pitch dark last weekend. With no owner's manual in the glovebox to consult, I pulled over and hunted around with a flashlight until I found the switch. As you can see it was staring me in the face the whole time — sort of.
Oh sure, it's easy to see when the headlights are off, but that's not when I needed to find it. Once the headlights were on the icon I was seeking had rolled up to the top where it wasn't that visible — especially inside a dark cabin on a very dark trail.
But that only applied this first time. Now that I know it, I know it.
What a difference! The total amount of light jjust about doubled, with all of it illuminating the dark spot where the rocks, water bars and the edge of the road were hiding. The near distance was now fully illuminated.
That thin line that separates the two only appears close to the vehicle; the height difference between the upper and lower beams quickly resolves itself as the beams converge. Still, a small adjustment wouldn't hurt.
Because none of the new light goes up, oncoming drivers on the road are not getting blasted with any more light. Anyone who flashes their brights to complain is simply counting lights and coming up with a result greater than two.
But this one-two combination still doesn't add up to awesome on the street. As for the high beams, they're junk. The driving lights wink out when they come on and the weak slot of yellow light simply moves up higher. Josh's Camry high-beam photo is ten times more impressive. (OK, maybe three times.)
An upgrade is still in the cards, but until then I'll be using the driving lights all the time.
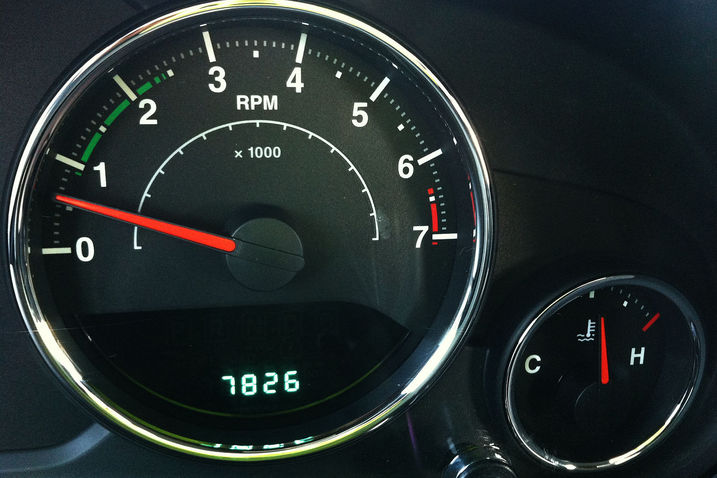
What's right with this picture? The TPMS fault lamp is no longer glowing on the instrument panel of our 2012 Jeep Wrangler Sport.
I brought the Jeep and Mike's sack full of five sensors to a Just Tires store I pass every day on the 405 freeway while motoring through Carson, CA on my way home.
These TPMS sensors are of the simpler rubber-stemmed variety and they pop into the rim just like any regular rubber valve stem would. Our BFG tires not need be fully dismounted from the rim to make the swap; a broken outboard bead gives the tech enough room to reach in there.
"How much to install these?" I asked William, the friendly guy behind the counter.
"Three dollars and fifty cents apiece," said he.
I'll do the math for you: that's $17.50 for all five. Pretty cheap.
But the sensors do add a little weight where there was nothing before, so I had them rebalance the tires. That brought the total up to $104.85 — just slightly over $20 per tire for everything. Necessary? Perhaps not, but I didn't want to have to come back.
And it is a lifetime balance — the tire's lifetime, anyway. That could come in handy later on with big off-road tires like these.
Many TPMS systems require new sensors to be formally introduced to the vehicle's ECU with a special tool that plugs into the OBD port. But a 2012 Jeep learns the ID numbers of new sensors by merely driving for 10 minutes (or less) at a speed of 20 mph (or more).
Apparently "or less" is the operative phrase. The technician's test drive lasted no more than a mile before the lamp winked out.

Our 2012 Jeep Wrangler Sport did not come equipped with a fancy pants electronic front stabilizer bar disconnect-o-matic system. To get one of those you need to step up to the Rubicon.
A few minutes with a pair of wrenches will take care of that. The main problem with this approach is remembering to reconnect everything before you take it out of low-range and head back onto the pavement. Forgetting to do so could land you in a world of hurt.
As long as one remembers that, the manual stabilizer bar disconnect strategy is a very effective way to increase off-road articulation in rough terrain. But how big is the benefit, exactly?
I grabbed a couple of 18mm wrenches (yes, they're metric) and pointed the Jeep up our RTI ramp to find out.

The easiest bolt to remove is found at the lower end of the stabilizer link, the end that bolts to the bracket on the front axle tube. The bolt is a bit longer than it needs to be, so a standard-length socket wasn't quite going to work. I probably could have made it work, but this gave me a chance to try out one of my newest wrenches.

It's a hollow pass-through socket that's externally driven by a special matching ratchet. Craftsman calls this contraption by the name Max Axxes.
The socket is short but utterly hollow. Any extra bolt length sticks right through so there's no need for a separate set of deep sockets. Also, because the socket is short (shorter than a normal one, in fact) I don't have to steady it with my free hand to counteract the sideways torque that can be generated by the very length of a deep socket. Pretty clever — and effective.

After the bolt was gone I simply pivoted the link up on its remaining bolt. A tie-wrap is certainly called for, but I didn't bother since I was merely making a quick measurement.

The good news is the disconnected stab bar allows the left front suspension to bury itself (yellow) in the front bump stop. We're getting everything there is this time — the stab bar is no longer holding us back.
But farther down things are looking sketchy. The floating stabilizer bar end and the stowed link (blue) are banging into the steering arm. It's doing this because I did not disconnect the other link on the other end of the bar. Strictly speaking, one disconnected link is enough to defeat a stabilizer bar. The problem is the free end wants to droop in lock-step with the opposite side.
In the field I'd solve this by removing both links and tying the bar up high out of the way with tie wraps. Two bolts removed instead of one; no big deal if a serious off-road slog is in the cards.
Or I could install some purpose-made links that have a quick disconnect built into them. Yeah, that's already on our to-do list.

The view at the right rear looks about the same as before, with the big 33-inch tire crammed neatly into the wheel well. But that front end is looking a bit more dramatic.
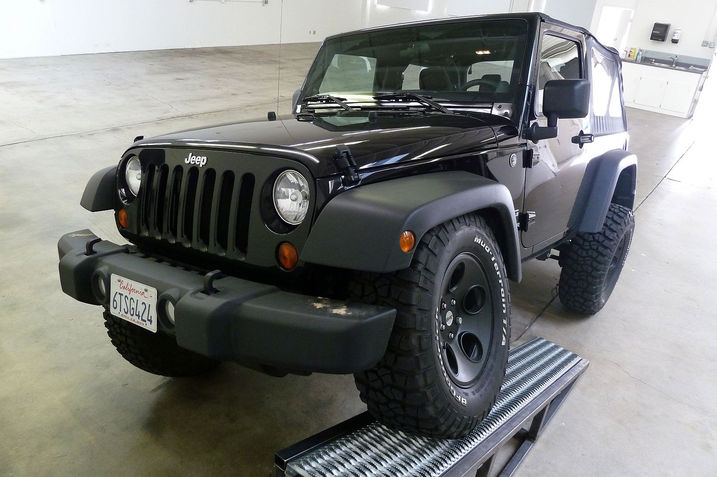
But just how far did our Jeep make it up the ramp? Time to break out the measuring tools.
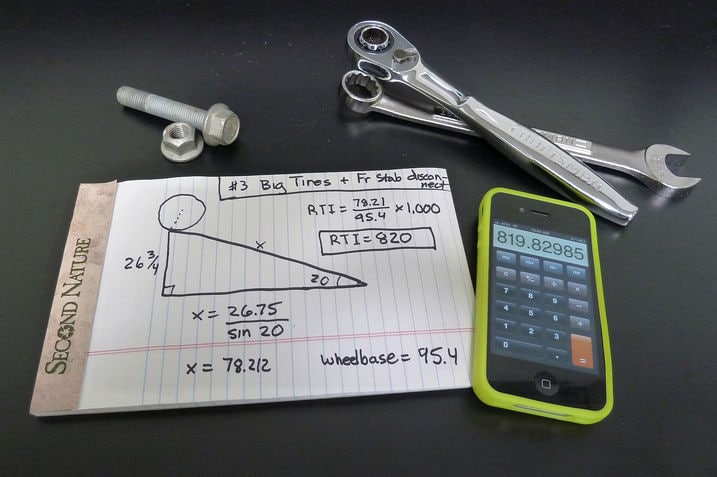
I measured wheel lift at 26.75 inches, well over SIX INCHES more than RTI measurement #2.
This works out to 78.2 inches up our 20-degree ramp instead of 59.8 inches. Yowsa.
And the RTI? How does 820 grab you? That's almost 200 points better than the 626 it generated last time out with the same big BFG tires and a working front stabilizer bar.
I expected a big improvement — 100 points, at least — but I never suspected it would amount to anything approaching 200 points. Clearly, the pent-up flexibility of our Jeep's live axle front suspension has been unleashed.
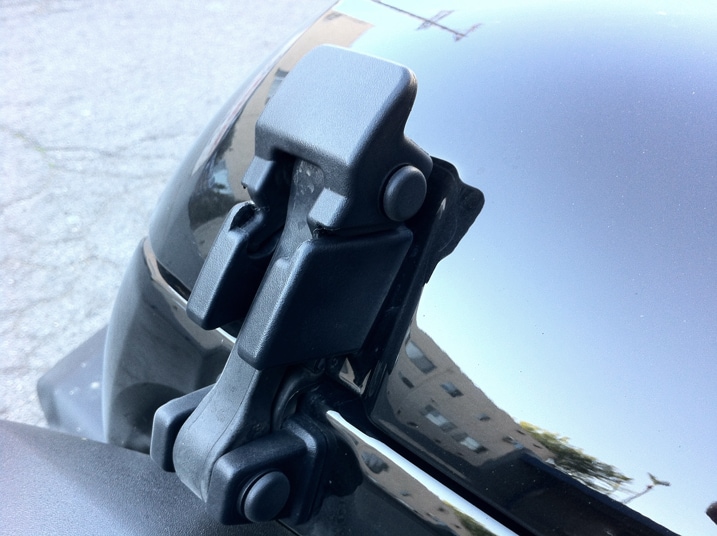
Southern California can get quite windy from time to time. This past Saturday through the Agua Dulce Canyon was no exception. As I made my way the grade, I was hit by a fierce headwind. Being shaped like a brick, the Jeep was rocked and buffeted the whole time.
What had me concerned the most was that I saw the hood slapping up and down. Most of the time it was chattering as if it got the cold shivers. But a few times I was hit by gusts of such force that I could see the rubber fasteners stretch a good distance then slam the hood back down with a loud thud. I was worried that another good gust like this might loosen a fastener and throw the hood back at the windshield.
Maybe I was freaked about something that was very unlikely, but just in case I pulled in behind a truck lumbering up the hill as a shield. Though the hood still chattered, it didn't pop up and slam down any longer. It made me wonder if a metal fastener would be better than a rubber one.
Am I too paranoid, or would you want metal too?
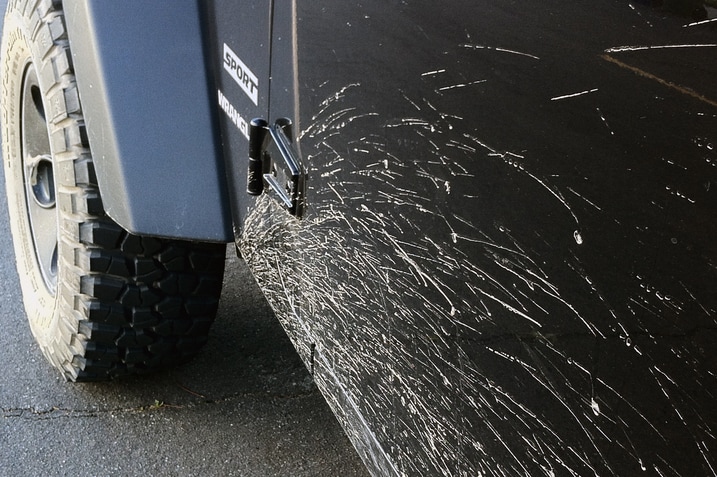
The drive home Sunday night from a weekend camping adventure can be a long one. Most likely you're tired, dirty, and just want to sleep in you own bed.
To keep myself
from falling asleep
motivated, I usually listen to some good tunes, drink (regrettably) an energy drink and take in the scenery. More often than not the scenery involves checking out other cars on the road. You can make a game out if to see what they did that weekend by the type of vehicle is is and the condition it's in.
Fortunately the Jeep was available this past weekend. I took out the rear seat, packed in my gear along with my dog, then headed north to the desert. I met up with Sr. Multimedia Editor John Adolph in his Toyota Land Cruiser (which you've probably seen in other places on this site) in the city Mojave.
Our plan was to hike up to the top of the Five Finger Mountains. To make the most of our weekend, not only were we going to hike to the top of the Five Fingers, but we decided to roll in a trip to yonder valley. Best way of doing it with minimal fuss in our opinion was to parking a vehicle on each side.
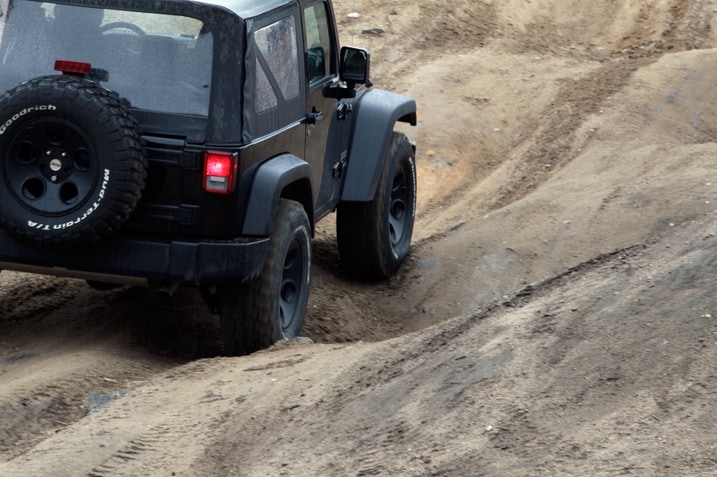
We drove out to the opposite side of the mountains to set up camp so that we'd only have to make one trip in the morning. To get to our finishing point, we had to drive over some easy cheese fire roads. Eventually we had to navigate over some nastier bits where 4WD and some clearance were a must. The deeply scored ruts we had to traverse were no problem for our Jeep. At our destination we found a nice alcove in the rocky hillside to set up camp.
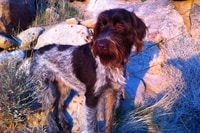

Come sunrise, we got ready to head out. Leaving John's Toyota behind at the end point, we took our long term Jeep around hill to the beginning of our hike. Streams, rocks, deeply scarred roads and steep hills along the way were not a problem for our Jeep. After a bit of searching, we found a suitable spot to start our cross country hill climb.
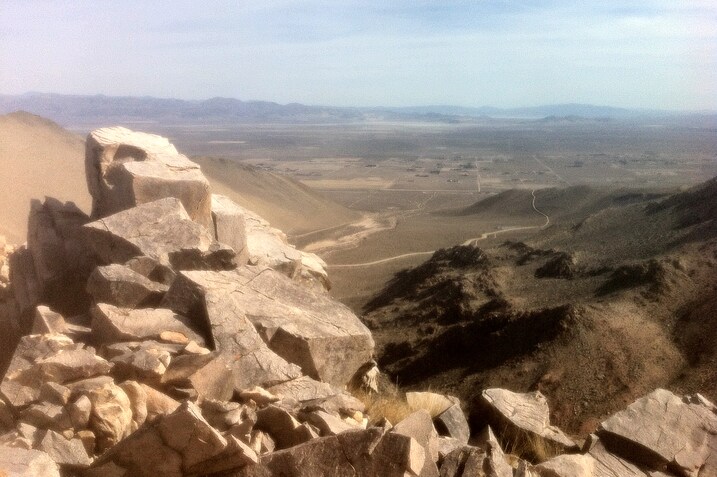
Our hike was a tough one, but it was a great feeling of accomplishment when we cooled our feet in the stream of yonder valley. By the end of the day, I was dirty, tired and hungry. After packing up camp I turned south for home.
Somewhere on the 14 during that journey south, I passed a filthy FJ Cruiser. As I looked over, the guy smiled and gave me a thumbs up. Looks like he had a great weekend adventuring too. To me, the spray of mud and dirt is an unspoken bond between like minded folks. Having this Jeep in our long term fleet has been an absolute joy. It's my ticket to anytime adventure.
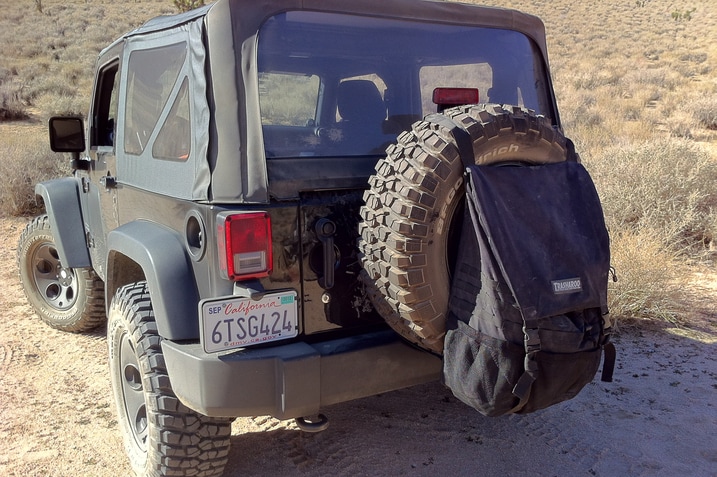
Let's be honest, one of the best parts of camping is that first beer in front of the campfire. Come morning, there is usually an assortment of cans strewn about. If you're responsible you bide by the credo pack it in, pack it out.
As a result, one of the worst aftermaths of a good camping weekend is the trash. There is nothing worse than stale beer funk mixed with the smell spoiled food in the car. Thankfully during my last outing Sr. Multimedia Editor John Adolph loaned me his spare Trasharoo. I'll consider it my personal mod to our Jeep.
On the way up to our campsite it help two bundles of wood. On the way home it held the trash in a secure pouch, free from highway "dispersal." I realize that a lot of people will have ready access to a dumpster near where they car camp so the stink isn't as much of a concern. But when you do remote camping like we do and the nearest dumpster is an hour away, this is a great idea.

Took our Wrangler to career day at the local elementary school. Not surprisingly, it was a hit.
I think much of its appeal rested on its lack of a roof, but the ability to climb inside by stepping on the rear tires surely boosted its appeal.
Plenty of kids said they would love to have one when they get their licenses. So much for kids not caring about cars anymore.
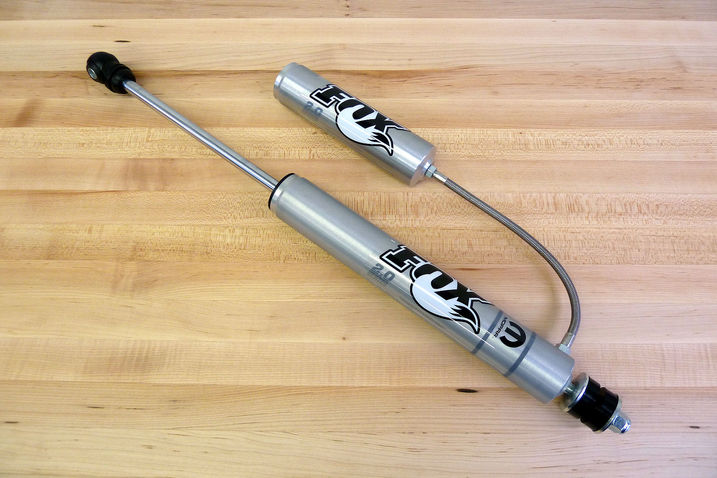
Our 2012 Jeep Wrangler is begging for new shocks, and a mild 2-inch lift kit has always been on our "to-do" list. There are many options out there that achieve both goals at once, but these remote reservoir Fox shocks sealed the deal.
Aren't they pretty...awesome?
They come as part of Mopar's new JK Wrangler Pre-Runner Suspension System, along with springs, new control arms to maintain proper alignment and driveshaft angles, new stabilizer links, limit straps and bump stops. And the front bump stops are TeraFlex Speedbump hydraulic units.
As the name implies, this so-called Stage-III kit isn't just for rock crawling; it's also meant to keep the tires planted in the comparitively high-speed wheeling environment found in Southern California's open deserts and fire roads — something our Jeep sorely needs. If you want to draw parallels to the Ford Raptor, go right ahead. I'm not going to stop you.
Thing is, this is a 3-inch lift kit — slightly more than I had in mind. But at least it's not 4-inches. That would have been too much.
As a former OE suspension development engineer myself, I like the idea of going with a kit the Jeep's Mopar division had a hand in. It's been tested and blessed by the folks that built our Wrangler in the first place. Few other such kits can say that.

I had a very enjoyable top down weekend in our Jeep. Between cruising L.A.'s beach towns with my kids and canine, I broke out the heat gun and the Goo Gone and rid our Wrangler of its unnecessary decoration.
The photo above illustrates the "before". The "after" is on the next page.

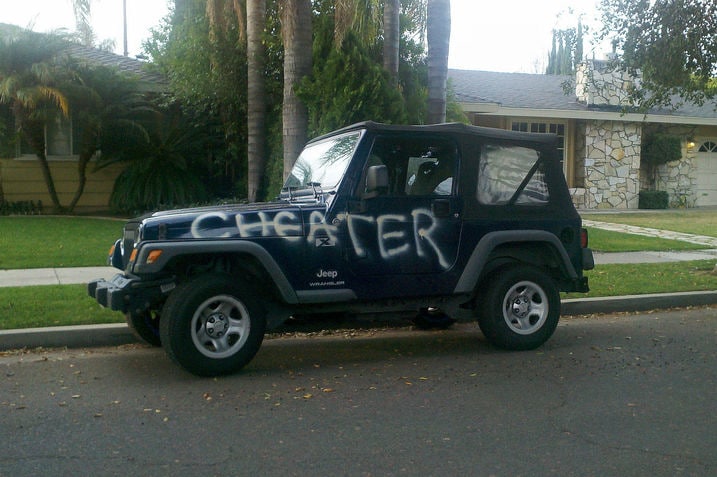
Let's make one thing perfectly clear: This is not our 2012 Jeep Wrangler Sport. No one here at Edmunds has ever seen this Jeep before. We swear.
But alert reader Tracy (aka my wife) saw it whilst taking the kids to school this morning, mere blocks from my house.
The possibilities are endless. Before you go to the obvious place, consider these: perhaps this person competed in a cycling event and was later found to be doping, or maybe he (or she) was caught counting cards at the Pechanga Casino; it's also possible this person's Ford-Riley passed through tech after the 24-hours of Daytona and was found to be 75 pounds underweight.
Or maybe...
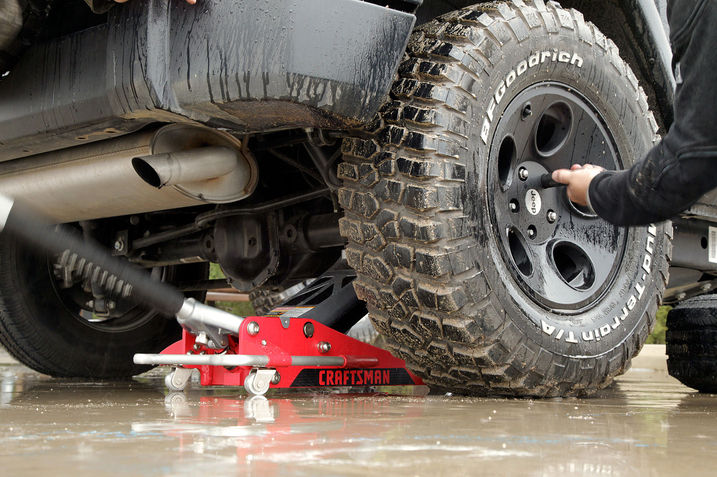
We thought we could dodge the rain, but we were wrong. The plan was to bring our 2012 Jeep Wrangler to the obstacle course at Hungry Valley with both sets of tires for a shoot out.
Our goal was to see how the performance of our Jeep would change over the same stretch of ground — see if the extra RTI and ground clearance afforded by the big 33-inch BFG tires would be obvious to the naked or camera-aided eye. Scott Jacobs came along to take stills while John Adolph shot video.
But things began looking gloomy when we finally arrived, so we dialed back our plan to push the Jeep to its absolute limit and settled for a simpler back-to-back comparison we knew we could finish before we all got dumped on.
The big BFG Mud-Terrain KM2s went first, for no other reason than they were already on the Jeep when we arrived.
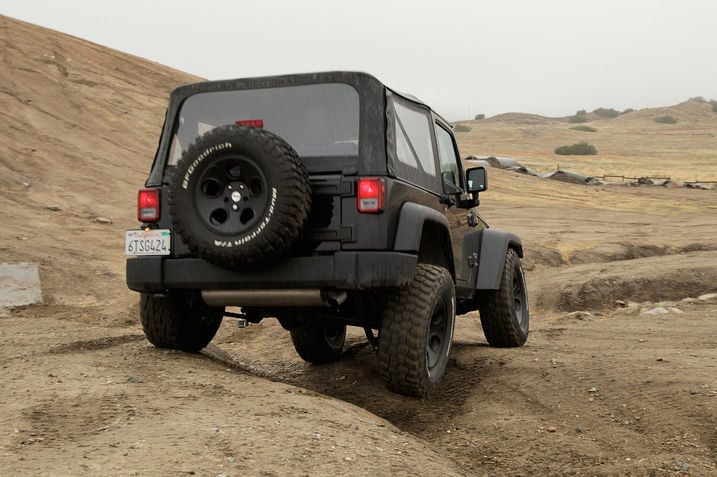
I walked the Wrangler and its 33-inch BFGs through this ditch in low range, crossing at about 45 degrees. About 30 minutes later I followed my own tracks as precisely as possible with the OE Goodyear 29-inch rubber bolted on.
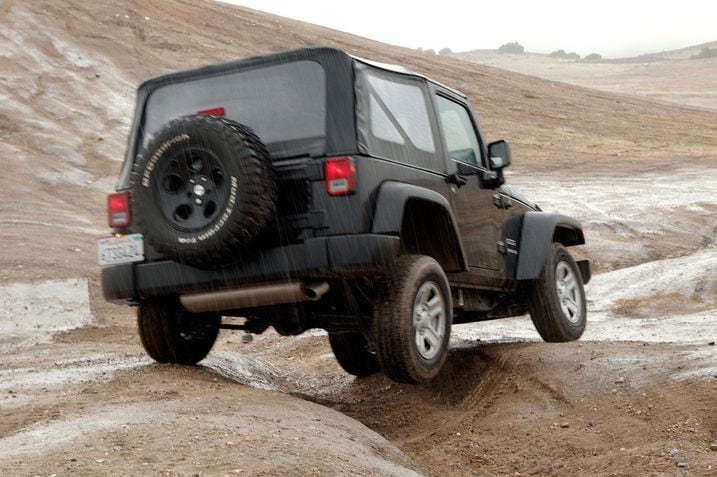
The rain started as we were changing tires. Even though Scott is standing in a slightly different position, he caught the Jeep at the same moment. The lower RTI value of the stock setup shows itself here as a lot more rear wheel lift.

The frame twist section is made up of alternating humps of dirt. The 33-inch tires have no trouble staying planted.

Once again, slightly different camera angle, same spot. The smaller-diameter tires look like they're working harder because they are.
And now for some split-screen video.
In general, the Jeep moves around more on the small tires, there's more head toss inside the cabin. In part that's because the smaller diameter tires dip farther into holes and hollows. And don't forget the narrower track that results from skinnier tires and a substantial difference in wheel offset.
There's also less clearance, of course. This becomes easier to see in the following Go-Pro camera shots.
The skinny Goodyear OE rubber had a tough time with the rain. Aside from the wheelspin you can see, the Jeep felt pretty greasy behind the wheel.
At this point Scott and John (not to mention their cameras) were getting drenched, so we packed it in. And even though we weren't able to push the Jeep as far as we wanted, we were still able to grab some cool photos and video.

What you see before you will soon be bolted to the underbelly of our 2012 Jeep Wrangler Sport. It's Mopar's new 3-inch "JK Wrangler Pre-Runner Suspension System - Stage III Performance" and we're going to DIY the installation and document the process.
No welding is involved, but there is a wee bit of cutting and drilling. Maybe some swearing. It should be fun.
Mopar sells two versions: part number P5156141 for the 2-door and P5156140 for the 4-door. Each costs $2,400 and includes everything shown on this bench.
The flyer I have here before me figures it take 6 hours to install assuming you are a Jeep dealer mechanic in full possession of the required skill, tools and equipment. The implication for those not looking for a DIY challenge is you can buy this setup at a Jeep dealer and pay them to install it for a nominal fee that probably amounts to whatever they charge for 6 hours of labor.
We fully expect it to take longer as we photograph the process for what should be the ultimate suspension teardown walkaround.

Go ahead. Try to not watch the video. I dare you.
Slow build up, I know. But the payoff. Oh, the payoff.
Jump videos are like a homing beacon for hoons, of which I am the worst. Turns out, hours of fun can be had by typing "Jeep Jump" into YouTube. Hours, I say.
Ok, so that one didn't work out so well. But here's one set to House Of Pain's Jump Around. And this guy sticks the landing.
Happy hooning.

I like a lot about our Wrangler. I like its manliness. I like its raw talent in the rocks. I like leaving its top down at night. I like its unvarnished indifference to modernity.
But I don't like its headrests.
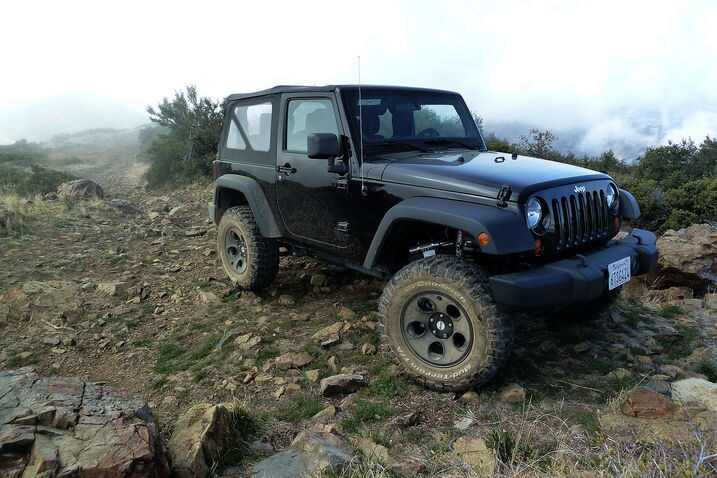
Our Jeep has a brand new stance, and I like it. As you can see, I finished installing the Mopar Pre-Runner Suspension on our 2012 Jeep Wrangler last week. You can just make out a Fox shock and its remote reservoir in the front wheel well as our JK poses atop Modjeska Peak.
I made a quick run up Saddleback, the local OC name given to the twin peaks of Santiago and Modjeska, in order to shake things up a bit. To make sure everything is tight and as it should be before I put the Wrangler back in general circulation.
It passed with flying colors, but I'm still going to put it back on our Rotary lift and go over everything once more with a torque wrench.
A full description of the installation process will be coming in the next few days, and a selection of opinions about the performance change brought about by this kit will no doubt trickle in over the next few months.
Here's my quick take:

It's firmer around town, but then it would be with stiffer springs and more damping force in the shocks. In many situations that's preferable to the way it was before when the stock suspension had its hands full with the 90-pound unsprung mass of these large wheels tires. That's no longer a concern as the big Mud Terrains now stay firmly planted all the time. Despite the 3-inch lift and the higher CG that results, the Jeep corners quite securely, even when mid-corner bumps rear their ugly head.
But the key word is firm, and I think there's something to be gained from a slight tire pressure drop. We're still running factory pressures, but these humungous BFG's can no doubt match the load-carrying capacity of the skinny originals at a lower set point.
As expected, the ride is hardest on pavement cracks, concrete joints and other small imperfections, but control and impact absorbtion are dramatically better over larger stuff that gets the suspension really moving. I can now roll through nearby dips, ones I had to tiptoe through last week, without slowing much at all. Generous rear rebound damping has utterly eliminated the expected donkey kick.
The change is transformative on Saddleback's fire roads, where it soaks up washboard and big water bars with equal ease. I can bomb around without feeling like a random bump or hole will send the Jeep skittering sideways.
Approach and departure angles look to be dramatically improved by the three inches of lift, and we still have to measure the "after" RTI. And I can't wait to get it out in the open desert and hunt me up some whoops.
This is a real off-road kit, make no mistake. It's probably not the best choice for those who simply like the idea of driving a high-riding Jeep up PCH to Zuma Beach, but I'm sure we'll hear more on that score from others on the team.

Incidentally, I saw 7 other Jeeps during my short Saddleback run, and all of them had two doors. Three were old CJs and four were JKs like ours.
This is how our Jeep Wrangler really looks.
But this is how I see it:
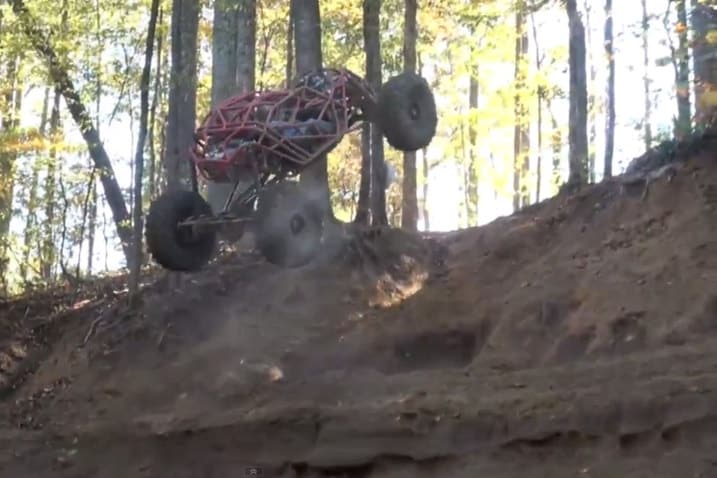
There's no good reason for this. Partially, though, it's that ever since Magrath discovered Tim Cameron's big-block-powered rolling ego last month, I've had a serious off-road jones. "Showtime" as it's known, is a one part rock crawler, one part Saturn V rocket and three parts unmitigated chaos. And I love every chaw-fueled inch of the thing. It goes about its backwoods business with all the subtlety of a sand-and-tobasco enema.
Yee. Haw.
So what's all this have to do with our Jeep? Not a lot, really. On some level, though, both these things are made for crawling rocks. Now, if you haven't already witnessed the unbridled ass-kickitude Showtime is cabable of unleashing on Mother Nature then you need to first click the above link. Then you can decide for yourself where Cameron ranks on the Sierra Club's hit list. But if you want to see him use more brains than horsepower (Who cares, really?) to climb the unclimbable, just click below.
And be amazed.
Hey Wrangler...you and me. We got a date.

This rolled into the swank Mr. C Hotel parking lot yesterday while I was awaiting a Fisker event to start. I was told it was Philadelphia Eagle DeSean Jackson's, and given the brief glimpse I got of the driver, I'd buy that.
As you can see, it's a Wrangler Unlimited Rubicon that's been modified. Check out the badge pictured after the jump, however. That thing got a Hemi?
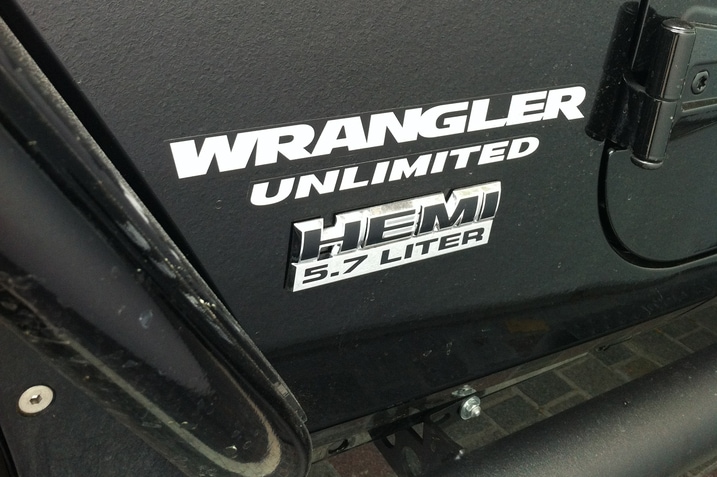
In this world of morons putting AMG badges on their C240's, you'd be inclined to say it's just a stick-on. However, this thing had a warble to it completely not in keeping with either the current or old V6s. We couldn't exactly look inside, but looking around, there was definitely something different going on.
So I'm going to give Mr. Jackson credit and say that yep, it's got a Hemi. And it is possible.
I know the Pentastar is new-and-improved and all, but should we do it too?
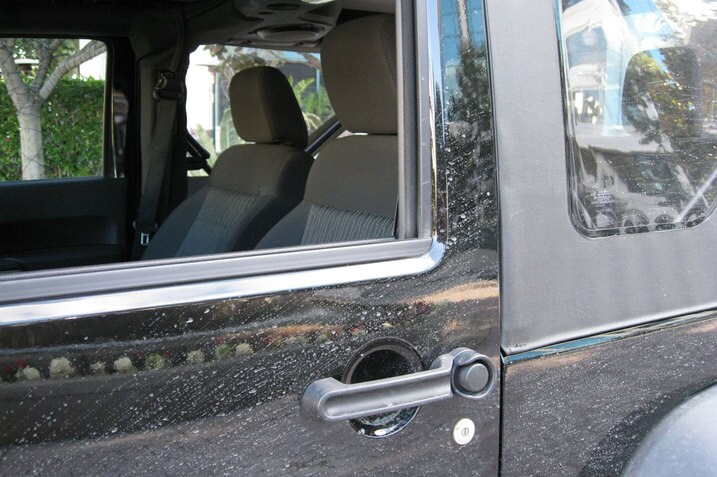
Our 2012 Jeep Wrangler was clean before I drove it last night. Sporadic downpours during the day pooled into numerous opportunities to get the Jeep dirty again. And with the BFGs and Mopar Pre-Runner suspension installed, she sends up some kind of rooster tail...
Even slow speed driving generated a tall enough spray to soak the elbow I had perched on the window sill. The Jeep soiled my new shirt, which actually made me smile. It reminded me of the days when I owned a Wrangler. No matter my intention, I was prepared to get dirty at all times. There is something inherent in these cars that attracts filth. Its kind of awesome.

I drove through this puddle of red arrows to portray just how high the spray travels. The water spots would be mud if I did my job better. Next time.
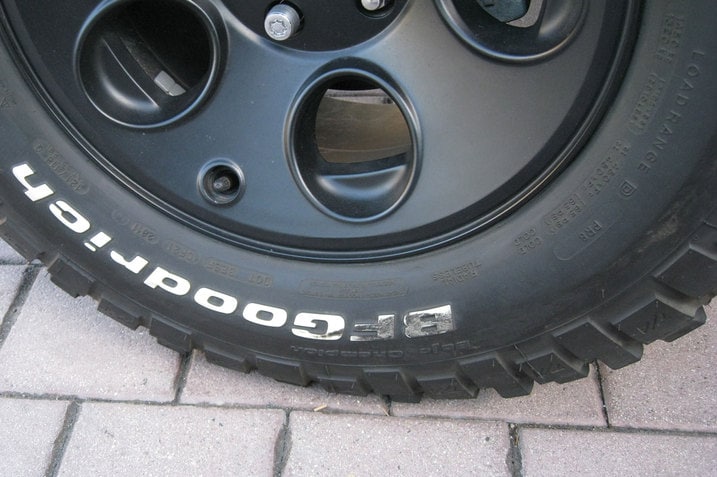
Take a look at the tire on our 2012 Jeep Wrangler. We decided to go whitewalls out, which looks cool paired with the black paint job. But it is harded to hide when you curb the tire. The good news, it scrubbed clean with a little effort.

Here's the deal: I've never owned or driven a Jeep Wrangler and never — before today — dealt with a Wrangler soft top. But this weekend I intend to drive this thing around with no top. So, today is the day I learned how to do it. Despite what you might have read or how you feel, it is a learning experience.
I even got the bright idea to time myself on the top's reassembly. After all, anyone can take things apart. So, being a mission-focused male, I paid little attention to how it came apart. One quick glance at the soft-top guide in the glove box and I arrived here in a few minutes.
Care to guess how long it took to put it back together?
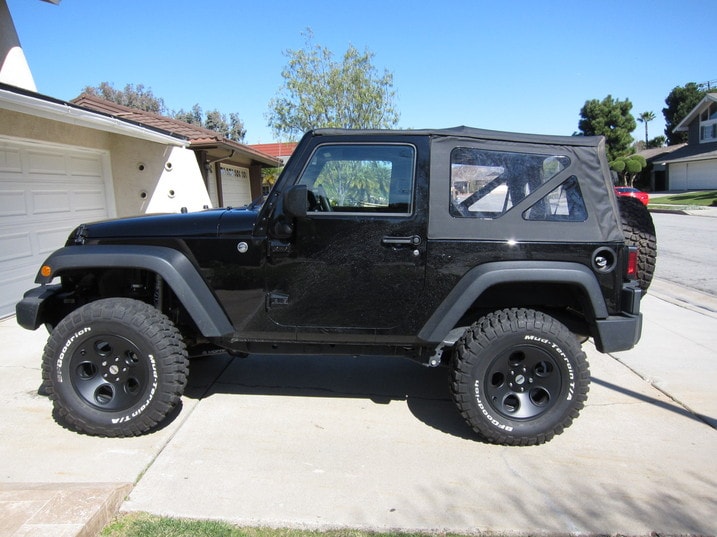
After about 20 minutes of futzing with the rear gate/window interface — what I thought should be the first step in reassembly — I called resident logic specialist, Dan Edmunds. Mind you, I did have Jeep's very own soft top instructions in front of me. These instructions advise (logically, I should add) reassembling the top in the reverse order used to take it down. So that's what I was doing.
Dan, however, pointed out some tricks which at first seemed counterintutive but ended up paying big dividends. Step one, he said, was to fasten the top to the windshield header. Now that's the last step if one follows the lowering instructions in reverse order, but it worked. This, I suspect, is because the it's about 75 degrees today and the top material is quite flexible. Dan also mentioned that our resident jammer, who shall remain nameless, shweckled the rear window zipper some days ago and that it was in need of love. He advised silicon spray lube. So I obliged. The tiniest squirt when the zipper began to slow made things smooth again:

The only other sticking point were these plastic brackets which locate tailgate bar against the body. It's not obvious at first which way they go, but they'll only work one way, so trial and error solved that problem fairly quickly:

Here the tailgate bar isn't fully seated. It pushes into the mouth of the bracket easily enough.
In total, after my phone call with Dan, I spent six minutes and 28 seconds reassembling the top. And there's ample room for improvement.
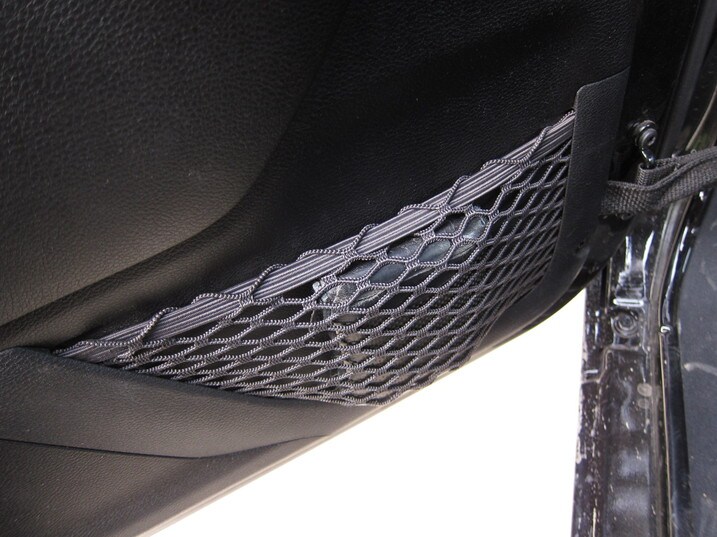
I discovered yesterday during my adventure (more on that later) that our Wrangler has many places to put the things that accompany an adventure. You know, cameras, gloves, phones, drinks...the list goes on. These elastic door nets — one one each door — are useful for relatively flat items.
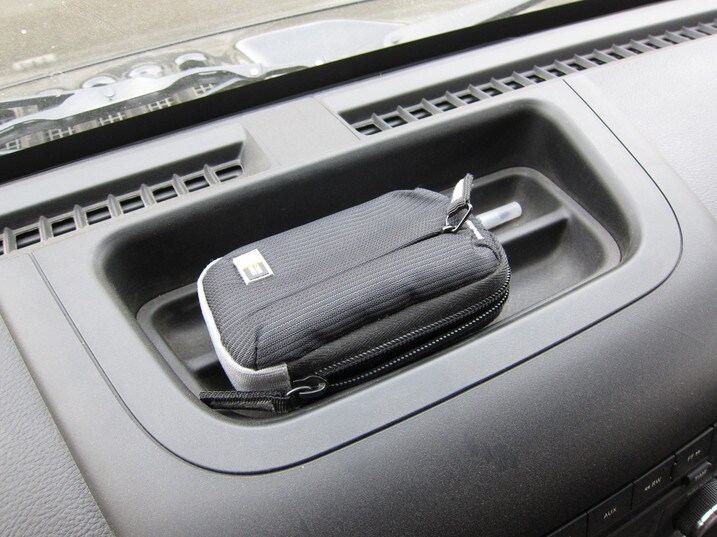
Also, there's this cubby on top of the dash.

This one in the dash which is big enough to hold an iPhone.
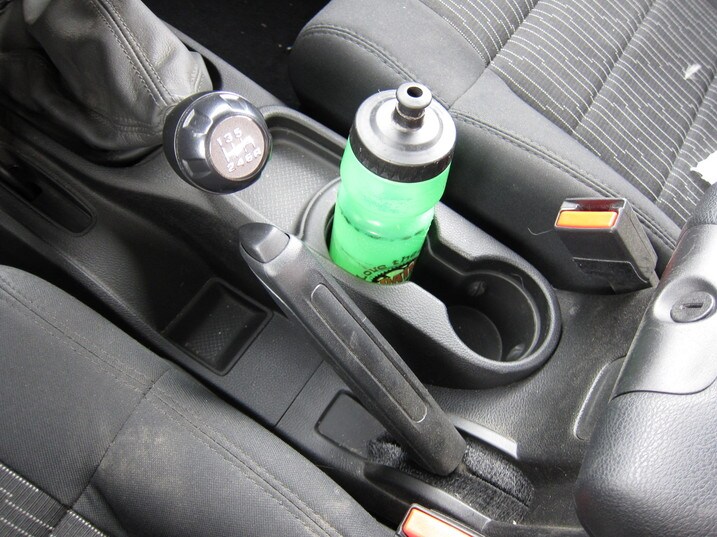
These two next to the cup holders.

And another net in front of the shifter.
That's a lot of small-item storing goodness.

On Sunday afternoon I loaded up the kid and headed for the nearest off-road play land. Not that I'm any good at off roading, but its appeal does seem to be rather univeral. The plan was to drive up the wash for about five miles and then unload, hike a few more miles and check out a waterfall which only runs (trickles, if I'm honest) in the winter. It's been a dry one in SoCal this year, but with snow in the highest reaches of our local mountains last week, I was hopeful.
Turns out, the Wrangler is refreshingly fun in its element.

About half way up the wash we stumbled into this Bronco. This guy's combination of
genius level driving and heavy footedness
youthful indiscretion and enthusiasm landed him up to his axles in rocks. Physics, it turns out, apply to Fords as well. One quick snatch in four low and the Bronco was free. He was thankful and we had fun.

And then this happened. Doesn't look like much, but it stopped the Jeep on our first three attempts. That, of course, was before we unleashed our inner Tim Cameron and decided more throttle was the solution. Now, in fairness, this photo doesn't fully illustrate the hill's looseness or its frame-twisting nature which would simultanteously lift opposite front and rear wheels causing the Jeep to spin its tires and lose grip. Next stop: locking differentials. Or, at the very least, a disconnected front stabilizer bar. Spending the five minutes to make that tweak would likely have kept the tires on the ground.
After the hike we saw this:
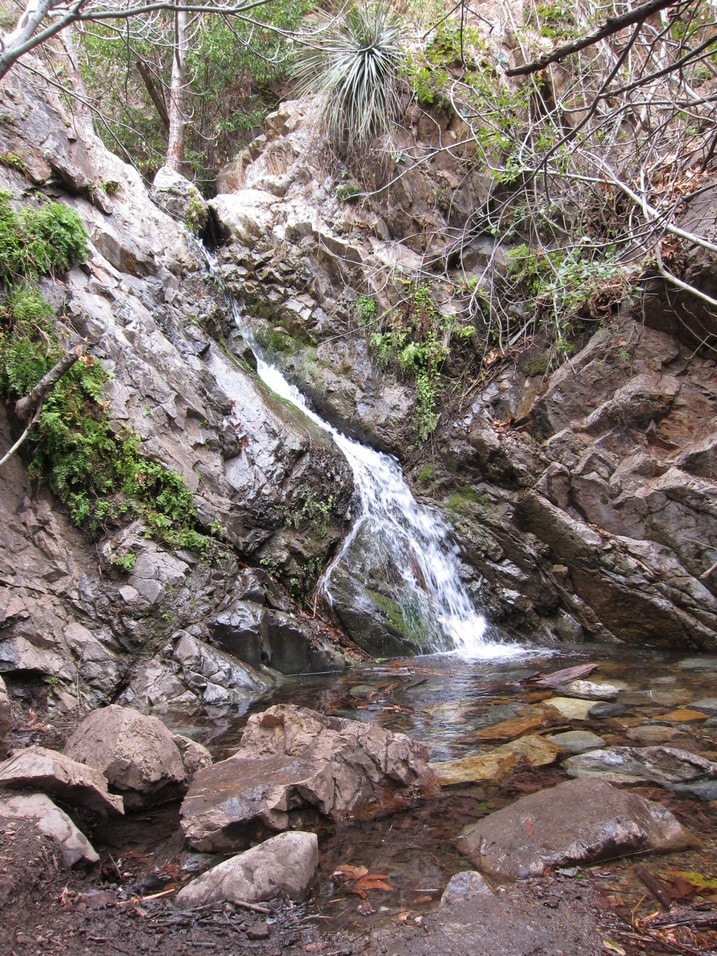
It wasn't much. But it was enough to produce this:
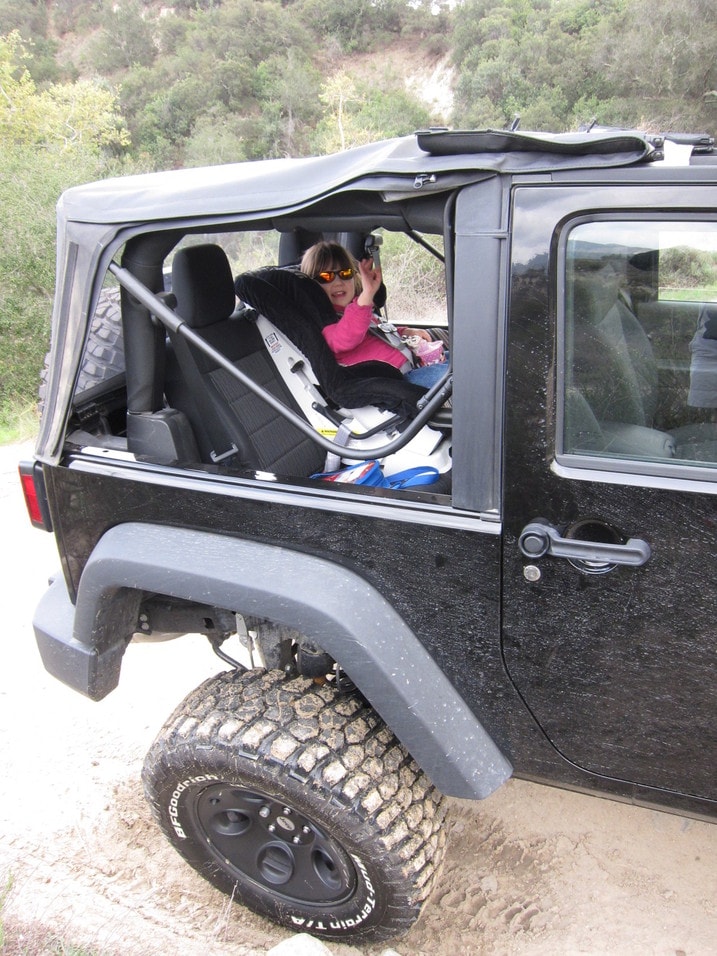

They really don't look like much, but these are great seats. Providing equal parts comfort and support, they are probably the nicest part of the Wrangler's interior. I know this after spending several hours in them bouncing around in the rocks earlier this week. No off-road butt. No hot spots. No lumbar issues. They just work.

With the addition of the Mopar Pre-Runner Stage III Suspension System, a 3-inch lift kit, our 2012 Jeep Wrangler Sport is fast approaching the limit of our 20-degree RTI ramp. But not quite yet.
The smidge of daylight under the left-rear in the above pose indicates this shot was taken just before I backed it down the ramp slightly to find the official measurement point where the BFG rubber barely kisses the concrete.
This time I made the measurement two ways: once with the front stabilizer bar connected and once with it disconnected.
The results were surprising.
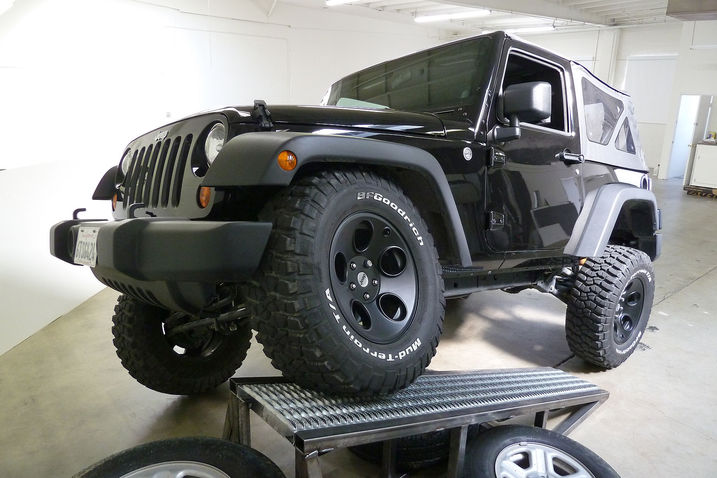
You'd think that three inches of lift and remote reservoir shocks would add up to a healthy bump in measured suspension articulation. With the front stabilizer bar disconnected, at least, you'd be right.
So configured, our lifted Wrangler produced 29-5/8" of left-front wheel lift, a number that corresponds 86-5/8" of progress up our 20-degree ramp. That works out to 908 RTI points when compared to our 2-door Jeep's 95.4-inch wheelbase.
The same measurement was 820 before I installed the Mopar Stage III kit.
But a funny thing happened when I measured RTI with the front stabilizer bar connected: It was worse. And by that I mean worse than the stock un-lifted suspension with the front stabilizer bar in the same state.
With the bar in full effect, the Stage III kit hiked the front wheel 18-3/32" and generated an RTI of 564. The stock suspension allowed 20-7/16" of lift and 626 RTI points.
How can this be?
Turns out, the Mopar Stage III kit employs springs that are not only taller — they're also stiffer by about 25 percent. Articulation is limited by roll stiffness, and roll stiffness is generated by the stabilizer bars and the springs. For a given stabilizer bar size, stiffer springs produce more overall roll stiffness. And so the stiffer stage III springs restrict RTI somewhat when the stabilizer bar is connected.
But the stabilizer bar still represents the lion's share of the roll stiffness, and when it is disconnected the stiffer springs don't produce enough to limit articulation on their own.
And so we see pictures like this...

The front spring is impressively compressed, but there's still a fair amount of daylight.
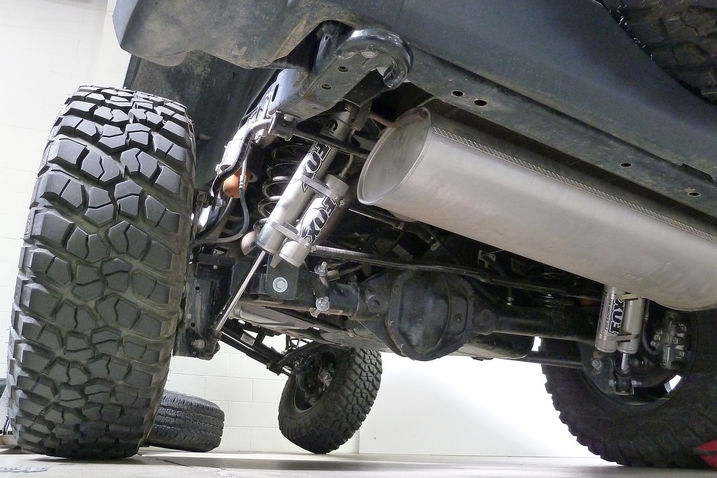
We may yet be able to squeeze more RTI out of this suspension. After all, we have not yet disconnected the rear stabilizer bar, and we have not yet played around with tire pressures on the RTI ramp. We may yet get to 1000 — or beyond.
But we will probably have to institute our Plan B for the RTI ramp before we cross that threshold.

Turns out, like most things in life, there's a right and wrong way to arrive at a rolled up Wrangler window. Some of you — those who own or have lived with one of these things — already know the routine. For me, it's new.
This photo is taken several steps into the process after unclipping the window flaps from the body and rolling the tailgate bar, which is attached to the bottom of the window, out of its fasteners (stupid-huge red arrow). There are two pulls on the single zipper which runs around the entire rear window. When zipped, one pull is at each end near the tailgate. Unzip each pull until it's slighty into the horizontal plane and stop. From there it's easy enough to slip the elastic straps inside the roof around each end of the rolled top. It hangs down about 8 inches when all is said and done.

Also, there's this. When raising or lowering the window, it's vitally important to unzip the side zippers before attempting to fasten or unfasten the tailgate bar. Look carefully at the silver engagement tab on the window side (right side) of the zipper. It's clearly been gnarfshweckled by someone who didn't take the time to be certain it was aligned evenly with the tab on the other side. If it's misaligned, the zipper will often still engage, but it will be nearly impossible to unzip all the way should you need to. Now gnarfchweckling is something that happens easily with the zipper on a Wrangler top, so I'll cut whoever did this a break.
There are, I'm certain, variations on this technique. And those who are familiar should share them.
The point, of course, is that you needn't ever remove the rear window. Leave it in to drop the top. It's quicker. And you're less likely to become a gnarfschweckler.

Tachometers have had red zones forever, but our Wrangler also has a green zone. As you can see, the green zone is nestled on the other side of the spectrum from the red zone. Looks to be from around 1,000 rpm up to 2,500 rpm.
It's a nice gesture and all I guess, but in all practical terms it's utterly useless.
For one, 1,000-2,500 rpm isn't exactly this engine's — or any engine's — sweet spot, so good luck trying to keep in the green zone. Second, do we really need a green zone to tell us that we'll get better mileage by running the engine at just over idle? I would hope not.

Sunday morning I walked out to our long term Jeep Wrangler to see a bright green ticket on the window.
This was odd for two reasons: 1) I was parked in secure, private, underground parking. (I drove out to get a better picture.) 2) Parking tickets aren't usually green...

Seriously? It's a Jeep. That top will only stop the laziest thieves. The same casual pickers that would be thwarted by a locked door. I guess the LAPD didn't read my first Jeep post.

Sometimes, I'm a simpleton.
By this I mean it doesn't take much to make me happy. Two weekends ago it was as simple as looking at the decidedly badass Wrangler with a little mud on its rockers sitting in my driveway.
Of course, there are other cars in our fleet — now and in the past — that have served well in this regard.
You might recall a similar experience I had with our old Ferrari 308 in 2008. That car was a truly beautiful piece crap that I loved to look at but hated to drive. Come to think of it, there's another beautiful piece of crap in our fleet right now. The 911, however, I really, really want to love. The Ferrari was beautiful, but nobody was ever going to love driving it.
The Wrangler, though, I love for different reasons. It's not exactly beautiful in a traditional sense, but there's an undeniable purpose to its look that I can't help but be attracted to. Functionalty is something that sells itself to me. Doesn't really matter if it's a miserablly ugly turd. If it's a wildly functional yet miserably ugly turd, there's a good chance I'll like it.
Make it a big black wildly functional Jeep Wrangler with some dirt on the sides and I'm in.

You might remember my mini adventure from a few weeks back. It involvolved driving up a rocky wash, getting stuck (sort of, on this silly hill), getting unstuck, pulling out a Ford Bronco and visiting a waterfall with a three-year-old.
That's a lot of activity for a three-year-old. And don't ever let anyone tell you a Wrangler — even a Wrangler with big, dumb tires and a soft top — is too loud inside for a toddler to fall asleep.

Because that's exactly what happened on the way home.
Yes, there's an entire orchestra of racket inside the Wrangler at 60 mph — tire noise, top noise, wind noise — but I'd guess it's still better than Wranglers from ten years ago. And she certainly didn't care. After all, she had her zebra.

"Rex, I need to ask you a question I haven't asked anyone since 2003. Do you have a blank CD?" I was operating under the assumption here that my computer had a CD burner and that I had any idea how to use it, but still, I was going to make this Jeep thing work.
I don't drive without music. I'll keep it off during evaluations and hard drives, but to me, music and cars are intertwined. Rex didn't have one, but our IT guys did.
It worked well, but was inconvenient and slow. I can put up with CDs on something like our 911 or the NSX, but not the Jeep. The Connectivity Package is $460 and includes a USB as well as Bluetooth. The CD thing worked, but being limited to one album without having to change discs is something I'd honestly forgotten about. (Yes, yes, first world problems.) $400 is not a friction point on something that I will own for more than a year.
So it's a bit of change in my habits to have to plan ahead for what I want to listen to. But when this tune popped up as I was cruising PCH that first night with the top down, I had one of those "This is why I love Jeeps" moments. Everything was going exceptionally well, I felt extremely cool and all was forgiven.
Until the album was over and I had to listen to it again that is.


Crummy picture notwithstanding, our 2012 Jeep Wrangler quietly passed the 10,000-mile mark late last week. It happened on a nondescript residential street with nothing humourous or notable in the background.
It's running just great, but later that same day I did order up new headlight refelectors and bulbs in order to remedy our Wrangler's worst shortcoming. Expect to see more on that later this week once the parts arrive.
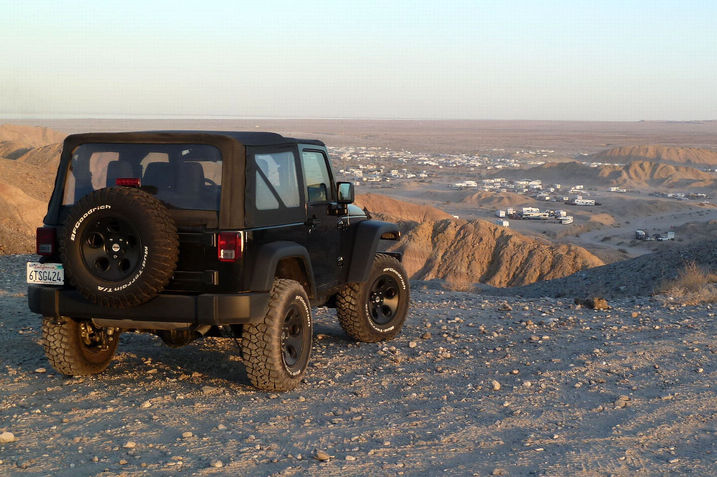
I hadn't registered our 2012 Jeep Wrangler for the 50th annual Tierra Del Sol Desert Safari because I originally had somewhere else to be that weekend.
And we weren't quite ready anyway: no lockers, no rock rails, no winch, no axle gears worthy of a steep climb. I didn't want to muck up the place and perhaps clog up a trail run with a noobish lack of preparation. After all, over 1,500 Jeeps were expected, and almost all of them would be BUILT and/or battered from regular off-road use.
But then my plans got cancelled and I ended up with a one-day window of opportunity to at least head down to the Truckhaven Hills for a few hours to check it out.
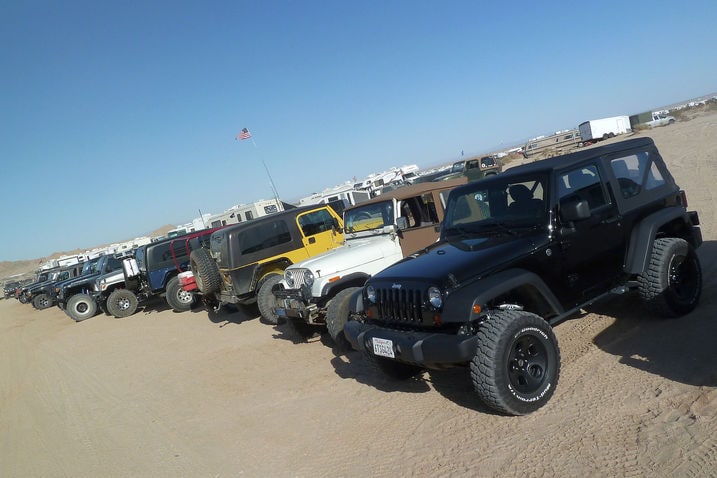
There were Jeeps as far as the eye could see. Hundreds and hundreds of them were strewn about the desert, clumped around a like number of motorhomes and campsites or zipping this way and that. The event spawned a temporary city that no doubt dwarfed the population of nearby Borrego Springs. My weak-sauce picture can't possibly to it justice.
And though the following clips aren't specifically from this past weekennd, they do represent the sort of stuff that goes on at TDS.
Watch this one all the way to the end.
This is just plain weird.
Last thanksgiving this "bronco" was the first vehicle to make the climb up the tube obstacle. There's a longer version of this on the interwebs that shows him gradually building up the courage to try it, but the person holding the camera in that one can't seem to shut up and let the V8 do the talking.
What goes up must come down.
Truckhaven is only 2 hours from my house, so you can bet I'll be bringing the Jeep back down here when I have a full weekend to camp out and do it properly. I also need to make sure I bring along a buddy/spotter so I can produce photographic evidence of the Jeep's antics. I don't think any of the above obstacles are in the cards, though.

Our 2012 Jeep Wrangler Sport ran across something odd in the desert on the way home from Truckhaven. It seems the heir to the Avery label fortune (or perhaps the original creator of it — I don't know) has decided it would be a good idea to buy a bunch of undeveloped land in Borrego Springs, Ca. and sprinkle huge steel sculptures all around. Said private land is open to a certain amount of public use, so in theory I could camp right here.
Most of them are animals of the prehistoric variety that used to roam this part of the world, and they could be described as "actual size" if not for the pure mythicality of this Chinese dragon/serpent. It loops in an out of the ground like some giant for at least 250 feet and terminates on the other side of a paved road.

There are maybe 40 or 50 such sculptures scattered widely around the outskirts of the city, and Mr. Avery keeps adding more. Their number has doubled or tripled since we came across in our 2009 Dodge Ram pickup.
But not all of them are prehistoric animals in a bad mood. With the curious exception of our dragon, the subject matter has recently morphed into the history of Borrego Springs, be it animal, dinosaur or...
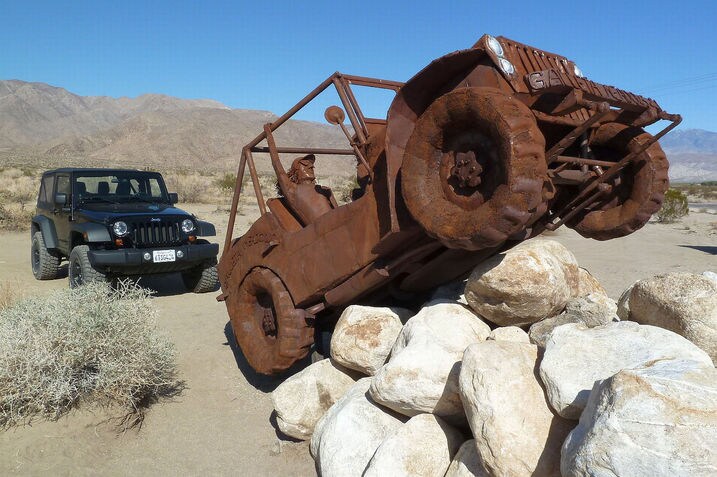
Jeep.
Kinda neat. It's definitely worthy of a side trip if you find yourself near this part of the world.

Tonight my wife and I discovered a quirky downside to the lift kit (+3 inches) and tall 33-inch tires (+2 inches) I've installed on our 2012 Jeep Wrangler. The undercarriage is now too far off the ground to trip the inductive coils that control the lights of at least one nearby intersection.
We sat there with no other cars behind us waiting in vain for our green light while cross traffic, opposing traffic and left turn cross traffic alternated amongst themselves for at least three full cycles. I was about to give up and tiptoe through — with an excuse pre-loaded in case I was observed by the law and pulled over — but then a second car rolled up behind me. I decided to continue waiting to see if that made any difference.
It did. Immediately. We got our green and were on our way on the very next go-around.
About 45 minutes later I came back to the same intersection — with a camera this time — and the exact same thing happened. I tried rocking forward and back a bit in an attempt to get my relatively low-hanging differentials directly over to the underground inductive coils, but once again I was stuck until a second car finally came up behind and tripped the signal for me.
Traffic being what it is around here, this shouldn't happen often. And I'm sure there's a trick to it that I haven't yet learned.
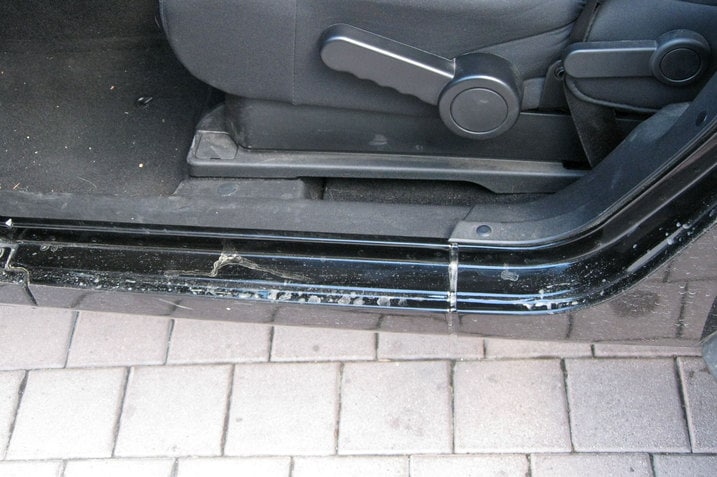
I discovered a downside to the raised ride height of our 2012 Jeep Wrangler. She's just tall enough that the backs of my legs drag across this filthy door sill when climbing in and out. Ordinarily I wouldn't care. But I just did laundry.
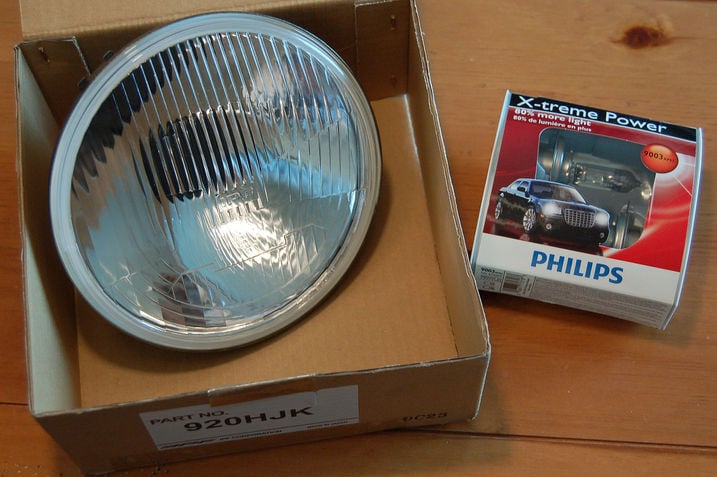
No, I'm not referencing the 1998 Grammy Award-winning hit by the Wallflowers, which, by the way, I have just ingeniously implanted into your brain for the day because you can't remember how it ends. It may even lodge itself there for a week.
Instead I'm talking about the new headlights I'm attempting to install in our 2012 Jeep Wrangler.
ARB, manufacturer and distributor of a whole range of kick-ass off-road accessories, sells a nifty H4 conversion kit for the Wrangler. The kit includes a pair of new IPF reflectors to better aim the light, a pair of pigtails that allows the standard 55/60w H4 bulb they take to connect to the Jeep's factory headlight connectors, and a couple of decent H4 bulbs. 4Wheel Parts sells the ARB/IPF H4 kit for $176.99.
Thing is, I had my eye on some highly recommended and well-reviewed 55/60w X-treme Power H4 bulbs from Philips, but those aren't what comes with the kit. So I bought the bulbs on Amazon for $28.79 (P/N 9003-XP S2, marked down from $66) and ordered the ARB reflector and pigtail from 4Wheel Parts (P/N ARB-920HJK.)
And that's where I outsmarted myself. The all-inclusive conversion kit comes with pairs of everything. My Amazon-sourced bulbs came in a two-pack. But when you buy the ARB/IPF headlights separate from the conversion kit you get headlight, as in one. At just $44.99, I should have recognized this as an "each" price well before I failed to notice the fine print which, now that I look back on it, wasn't all that fine.
This makes perfect sense for those who just lost an IPF headlight to a stone and want to replace just one. I wasn't paying attention. That's what I get for using my dinky iPhone screen to make a purchase.
On the other hand, "One Headlight" didn't earn the Wallflowers just one Grammy. They received two: One for best Best Rock Song, and another for Best Rock Performance by a Duo or Group with Vocals.
So now I'm stuck waiting for the UPS-man to deliver the second headlight. I'll still be ahead when the dust settles because I'll have paid just $118.77 for what amounts to the same conversion kit with H4 bulbs of my own choosing that are, by most accounts, better in terms of the number of lumens they throw out there at the same power draw.
We'll see.
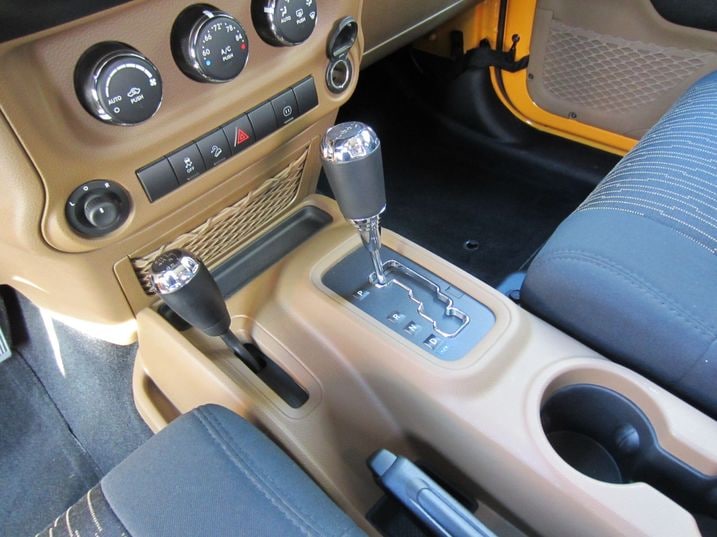
My off-roading knowledge is limited to:
- When you go uphill, go straight up, never diagonally
- Watching the Dakar Rally (if I can find it on cable)
Having said that, last night, when I rolled in a short term 2012 Jeep Wrangler Rubicon that Dan is going to test, I was pleasantly surprised to find it was fitted with a 5-speed auto transmission.
While others here love our long-term Wrangler's 6-speed MT, I don't. It's got long throws and has vague engagement of most of the gears. It's a chore in traffic. Now I'm the guy that wished for the 6MT in our Mazda 3, and prefer manual transmissions in small cars, sporty cars, and in general.
But not in SUVs, pickup trucks, or Jeeps. Isn't an AT better for off-roading anyway? I would think an AT would have less chance to burn up the clutch and be better for crawling.
Not necessarily, I found out...
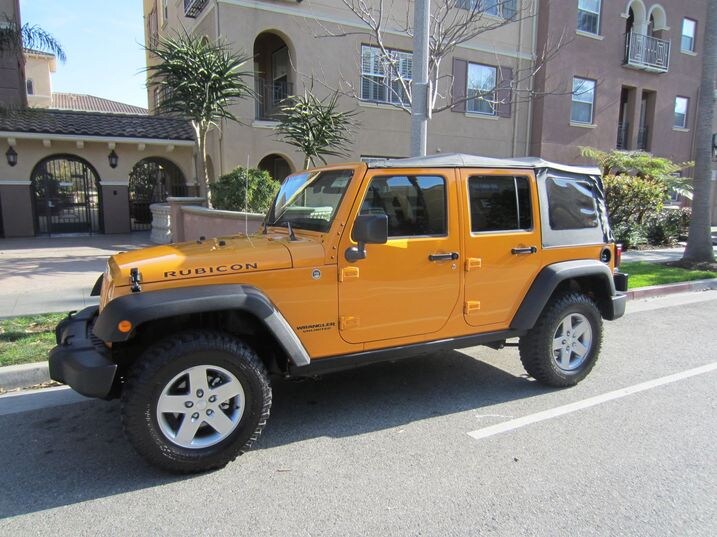
I spoke with JKav, and he informed me that our long-term 6MT Wrangler Sport is equipped with Hill Start Assist and Speed Control, both standard. When climbing or descending, you just remove your foot from the brake, let out the clutch, and only steer as the Jeep takes over for you. No worries about rolling back or burning up the clutch. I knew these features existed on high-end SUVs with ATs, but was surprised they were standard on our inexpensive Wrangler.
I suppose the MT gives you better control of the Jeep for the hard-core guys, but the AT would make the Jeep more liveable in daily use.
OK you Jeep guys — what do you prefer: Manual or Auto?

Parts and tools strewn everywhere. At one point — check that, at pretty much every point — this was the scene as I stripped the factory suspension from our 2012 Jeep Wrangler and systematically replaced it with a Mopar Stage 3 Lift Kit with Fox Racing Shox.
This new kit was introduced at last October's SEMA show. It comes in two flavors that you can order from your local dealer.
Part Number P5156141 is for the 2-door JK Wrangler and P5156140 fits the 4-door. Each one costs $2,400, not including installation. Whether you intend to do it yourself or pay someone else depends on how you feel about the following images.
But the following photos are worth looking at even if you don't have a Jeep or are not considering a lift kit. It's the ultimate Jeep Wrangler suspension teardown walkaround.
Mopar figures the job will take six hours for a seasoned dealer mechanic with a complete set of tools. For us the job spread over parts of three days as trusty photographer Scott Jacobs and I made frequent runs for certain tools and automotive ointments like RTV and Loc-Tite that our new shop has not yet accumulated. Also burritos.
Everything is harder the first time you do it, and installing a 3-inch lift kit is no exception. So I read the instructions early and often and spent long periods playing with the new parts while staring blankly at the old ones. Imagine that scene in Top Gun where Cruise is dog fighting with a toy airplane in the classroom then remove the A-list celeb, the model jet and the cleanliness.
This Stage 3 kit is just now making the transition from dealer-only sales to public catalog sales, so the accompanying instruction sheet I had was still in the revision stage. There's a companion DVD video walkthrough too, that makes it look oh so easy.
For the most part, it is — if you have the right tools and experience. That said, on the DIY difficulty scale this is no mere oil change or brake pad swap; it's a 7.5 or 8 level job.
The dealer flyer for the kit says "no welding" and that's certainly true, but my first read-through of the instructions revealed a certain amount of drilling and cutting. Yee-haw.
What follows is not meant to be a step-by-step substitute for the instructions, but you will get a glimpse of all the major steps.

In order to do this you must first support the entire Jeep and then cradle the axle you're working on with separate stands. All told that's six points of support.
Depending on what you have, it can be a stand-up job (lift and tall 6-foot adjustable axle stands), a sit-down job (lift and 30-inch jack stands) tall or a bit of a crawl (tall jack stands for the frame and near-ground supports like wood blocks for the axle.)
I'm going with option two. Our Rotary lift easily supports the Jeep at any elevation, and these 30-inch (maximum) 12-ton stands from Harbor Freight hold the axle at a working height that suits me.
The 2-post Rotary lift really helps here because I can raise the Jeep and leave the axle on the stands when it's finally time to remove the springs.
Now that the tires are off and everything is properly supported the real work can begin. And yes, I'm starting up front.
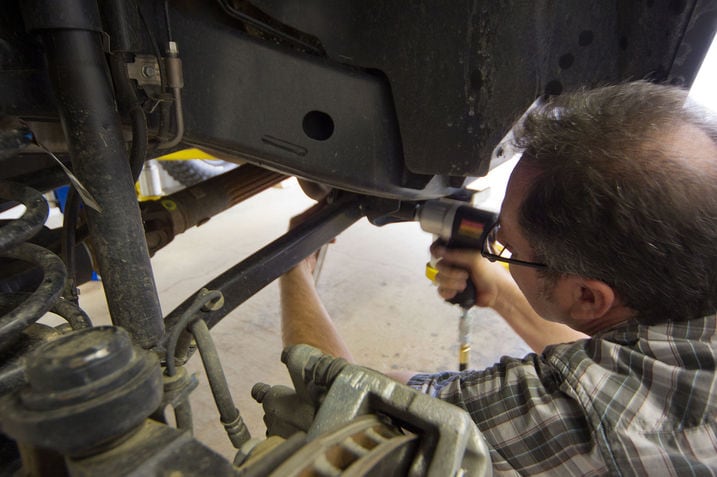
The first order of business is to loosen, but not remove, all of the bolts associated with all five links that hold the axle in place. There are two upper trailing links, two lower trailing links and a track bar (a.k.a. Panhard rod). Each has a bolt on each end, so that makes ten in all.
But I'm only loosening eight of them because the rear bolts on the upper links are too hard to get at. This decision won't cause trouble later on. Also, I'm staying away from all the steering components: the tie rods and drag link bolts can and should remain tight.
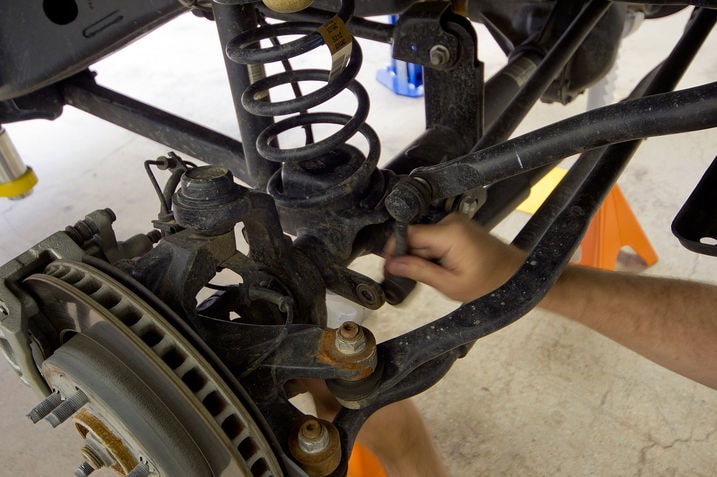
The front stabilizer bar links are next to go. These get removed and tossed in the scrap pile because the kit includes new ones that are about three inches longer. But I'll save and reuse the nuts and bolts later.

Now it is time to remove the shock absorbers. The lower bolts are destined to be re-used but the upper ones can go in the trash can along with the shocks.

Next up is the front driveshaft. I've removed four bolts and suspended it with a daisy chain of tie-wraps. I can always zip them up tighter if I need to hike it further up out of the way later on.
Incidentally, I like to mark the driveshaft and flange before I separate them so they go back together indexed to the same holes. It's probably overkill in this case, but it's not a bad habit.

Here it is, the first swearworthy step of the entire process. I struggled for some time with a tool that wasn't quite right before I gave up and headed out to locate and buy a better one.
The little silver bracket I'm looking at has to go. The thin ABS sensor wire is easy; that'll clip free from it's tie-wrap moorings in two seconds. But the rubber brake hose itself is another matter because it is completely enveloped by the silver-anodized steel bracket.
Employing a technique I learned by watching LOST, I'm going to skip around in time to make better sense of things. Do not concern yourself with the magical reappearance of the shock I removed two steps ago.
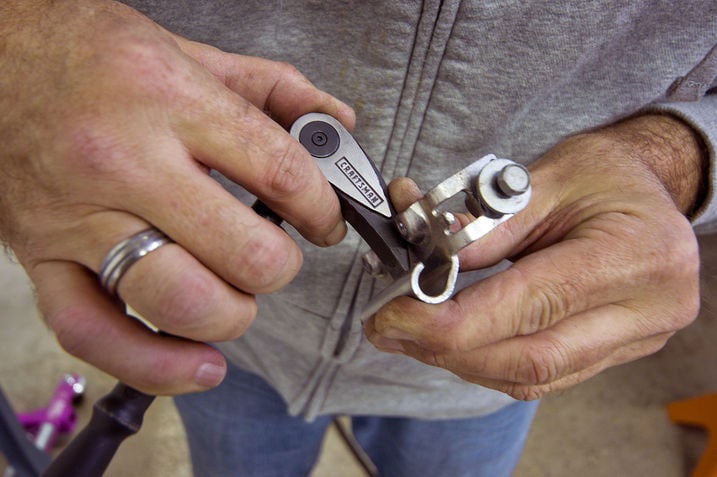
This is what the end game looks like. To get here I need to unbend some fairly thick steel in order to squeeze the hose through the gap. But there's precious little edge to grab onto, especially since I must prevent the sharp end from digging into the hose. Worse yet, that small bolt was never intended to hold the bracket in place while someone attempts to bend raw steel.
My pry bar kept slipping off; nothing built for demo work with a nail removal slot will do. I needed something more solid with with a more distinct and unbroken edge. I found just the tool at my local Sears, a Craftsman Locking Flex Pry Bar with 11 head-angle positions. But I got cheap and bought the small 8-inch one; I should have spent 10 bucks more and bought the 16-inch version.
Note: I was tempted to use my cutoff wheel to score the back side of the area to thin the metal I was trying to bend, but I was concerned about cutting through and nicking the hose. That would be bad.
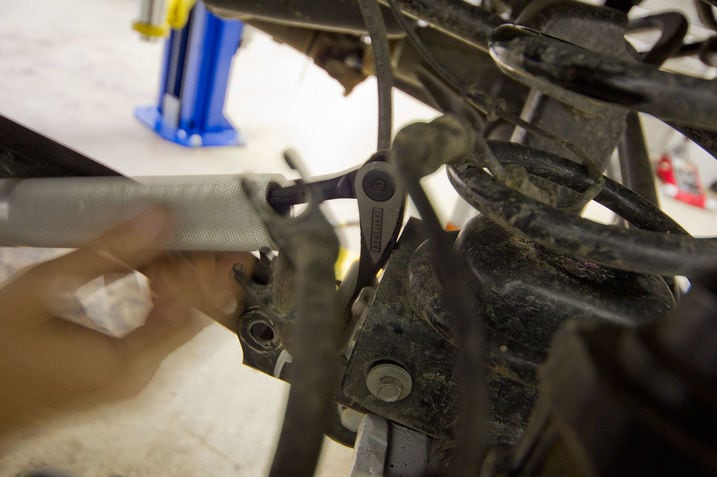
My floor jack's hollow handle works well enough as a cheater to make up for the leverage I lost by buying the smaller version of the tool. Still, the steel is stubborn and the lip is small. The process involves numerous incremental "bites" all along the edge to gradually open the gap.

The brake hose and ABS wire (black) are now free from the bracket, which extends their effective length for the three-inch lift to come. This also allows them to grow long enough as I raise the Jeep in relation to the axle to get the springs out.
But first I have to temporarily disconnect the front diff breather hose so it doesn't get taut during the process.
With the Jeep finally raised a few inches the spring can be lifted up off its axle seat, shifted to one side and pulled out from below. The rubber spring isolator that had been atop the spring needs to be pulled down and removed, too.
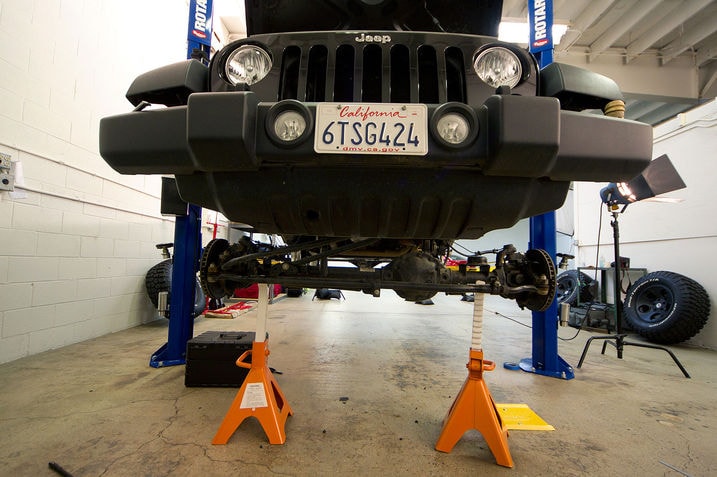
Burrito break!

Now we install the new limit strap. This is a Nutsert, a sort of slow-motion extra-large pop rivet that uses the tightening-action of a bolt to crush and expand the barrel inside a properly sized hole, leaving an embedded nut behind. In this case it goes in an existing hole in the frame rail.
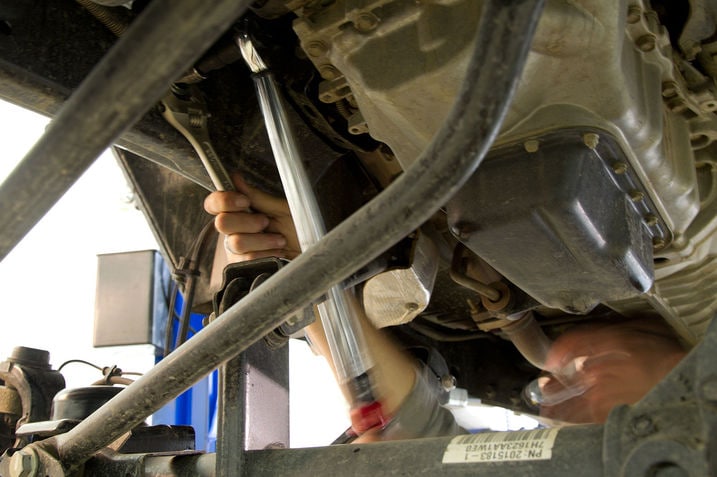
It takes quite a few turns to slog through the crushing process, and a torque wrench is needed when things start to firm up in order to make sure it's tight enough to be fully seated but not so tight that it strips out.
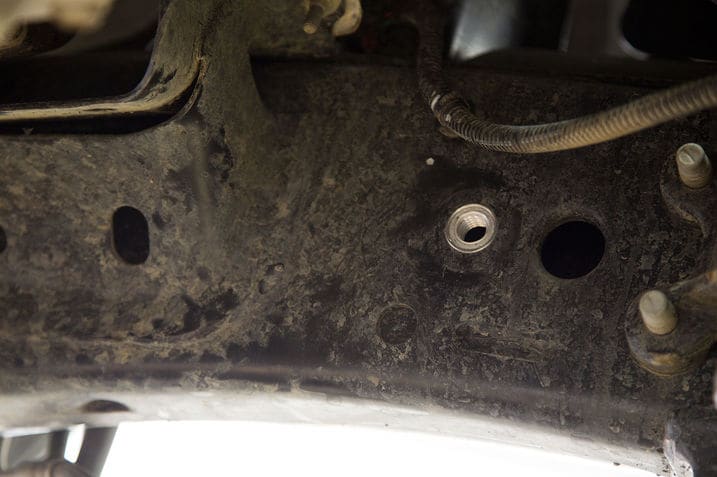
Finito! The Nutsert has landed. Now I can hang the limit straps.

The straps are in place, but they won't be attached to anything until much later. Meanwhile, the yellow arrow is pointing out the breather hose I unfastened a couple of steps ago.

The time has come to break out the power tools. I'm punching a hole in the side of the lower spring perch that will eventually be used to attach the lower end of the limit strap. I won't install the bolt until later, but with all of the parts removed the time to drill is now.
This drilling job — and many others to come — requires a heavy-duty center punch, preferably a spring-loaded one, to make sure the drill starts in the right place and doesn't walk. In large part that's because it's crowded down here and I'm not able to square the bit up with the flange. That's doubly true on the driver side version of this hole.

Our Mopar Pre-Runner kit includes Teraflex SpeedBump bump stops, so the original urethane ones and some of the structure that supports them must be cut off.
Here I'm using a steel rule and spring-loaded center punch to mark out a cut line some 3.5 inches below the upper surface of the spring pocket. Once I get a decent line of dots I'll connect them with blue painter's masking tape to mark a clear cut line.

Are you sure about this? Very sure. Measure four or five times, cut once. I've chosen to use an air-powered cutoff wheel. The noises it makes are cool. So are the sparks. And I can accurately follow my tape line and make a controlled cut.
But the round cutting disc can't get to the back 20 percent of the tube because the frame is too close. To finish the cut I'm forced to break out the efficient but less accurate...

...Sawzall. The cut it makes wanders a bit, but the reciprocating blade chews through the last remaining bits of steel in short order.
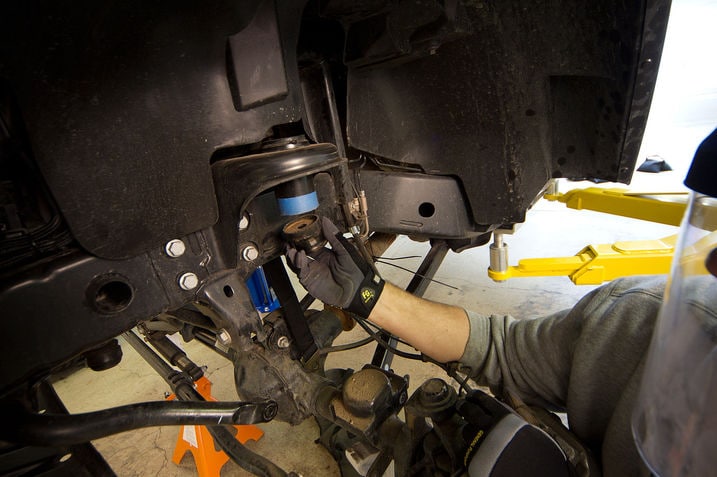
With the internal baffle cut away, the remaining hollow tube is almost ready for the SpeedBump to slip into place.

This hat-shaped reinforcement slips over the remaining section of tube to double the thickness. This, after all, is where the new bump stops will transfer their impact energy into the frame. The flat edge goes up against the frame and, yes, I pinched this particular image from the Mopar installation DVD.
.
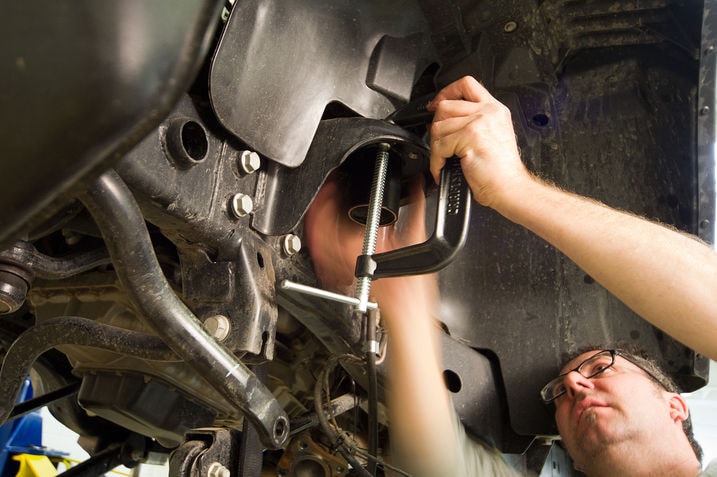
With the reinforcing tube clamped in position I can use my transfer punch to mark the center of the three holes I must drill. Deep punch marks make the next steps easier because the drill is less apt to walk off-target.

A stepped drill bit works quite well here. The hat can be bolted into place for good once the drilling is complete and the holes are de-burred.
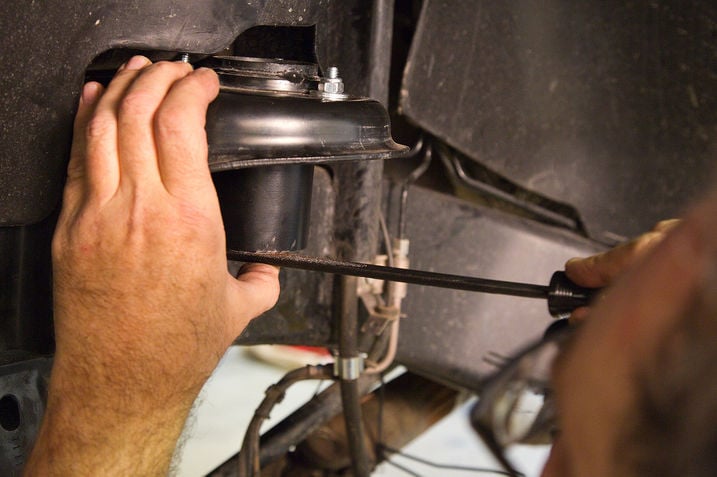
The fractionally longer inner tube, the one I cut to length earlier, must be filed or ground down to match the length of the added hat. This is why an accurate initial cut can save time.

A thin coating of RTV helps keeps moisture from getting inside the tube. It also prevents the bump stops from making rattling noises. Yeah, this is a borrowed DVD frame, too. I used blue RTV.

It is finally time to push the bump stop firmly into position until it seats. About an inch of it will protrude out the top.

And that's where I install the retaining clamp (orange) to keep the bump stop in the desired position. The SpeedBump installation is complete once the original rubber spring isolator is put back where it came from.

Now I can hang the Fox Racing Shox using the new hardware that came with them.

Two small holes need to be drilled in the frame itself. They'll hold the bracket that holds the remote reservoir in place. Keep telling yourself that Jeep said it was OK!
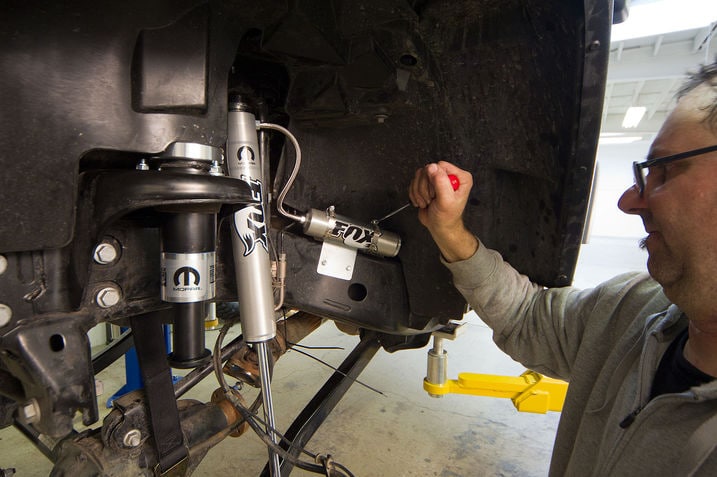
Two simple hose clamps hold the remote reservoir to the new bracket.

What's this? Another new hole? Yep. This one will eventually accommodate a spring retainer clip.
Meanwhile, it's important to make sure the brake hose (orange) runs between the spring and the shock.

The spring clip (yellow) is staged and ready for the spring, but first I need to replace the lower trailing links with the new longer ones from the kit. Their extra length compensates for the 3-inch lift to keep the front suspension's caster angle the same as it was when I started.

Almost there! This is starting to look like something.
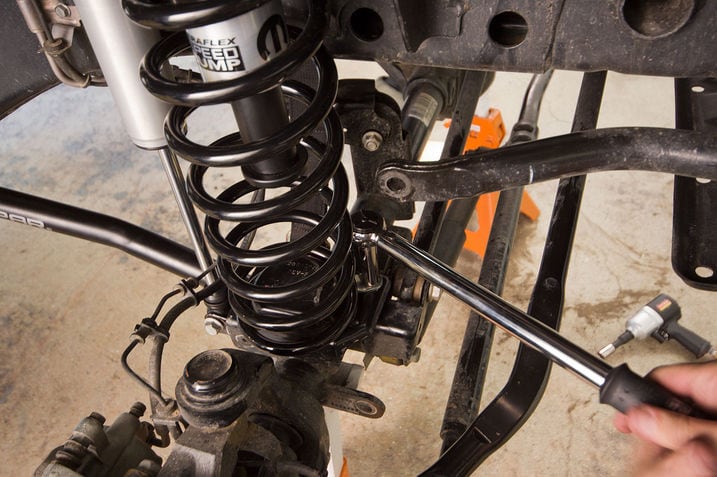
Now I can position the spring clip over the lowermost coil and torque it down.
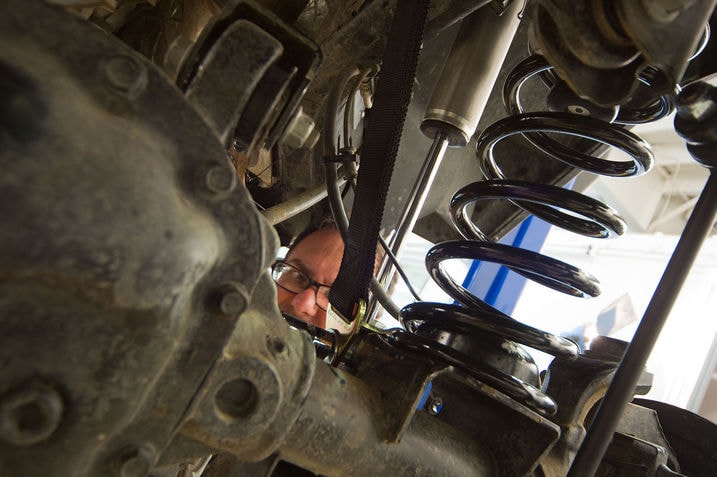
It's finally time to connect the lower end of the limit strap. Once that's done I'll tie-wrap the brake hose to the convenient slot in its gold-colored fitting to keep it from running afoul of the shock or the coil spring.
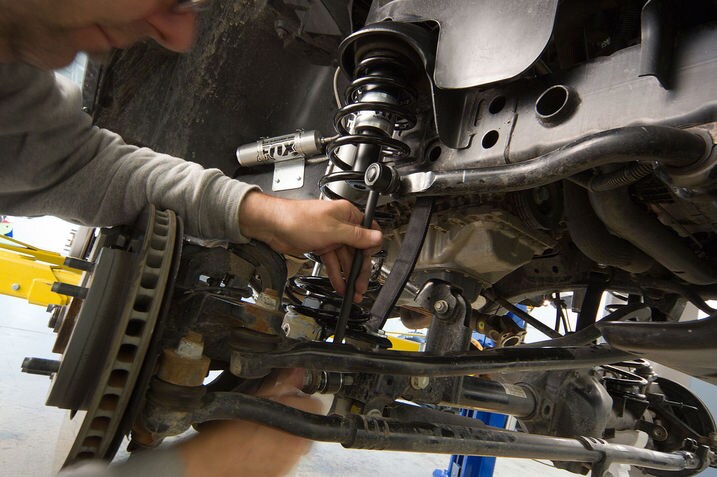
New front stabilizer bar links go on next.

Can it be? Yes, the front is done — for the moment. I won't torque the control arms until the rear is finished and I can finally put the Jeep back on the ground. Why? Suspension bushings need to be in their neutral curb-weight state when they're tightened so they're not pre-loaded.
Time for a five minute break before I start working on the rear axle.
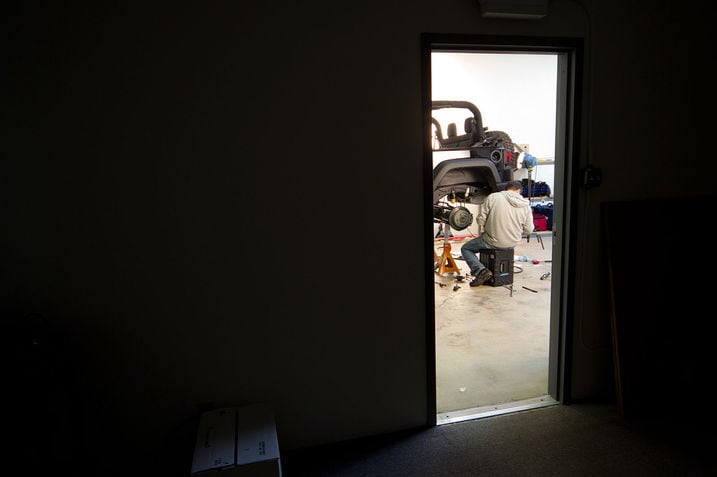
Break time is over. It's time to install the rear half of the Mopar Stage 3 Lift Kit with Fox Racing Shox on our 2012 Jeep Wrangler.
The front suspension installation, Part I of our story, appears one blog below this one. The front end installation involved the drilling of 14 holes, the mechanized removal of two bump stops and the intentional destruction of two brackets. There's not near as much metal manipulation back here. This end is a cake walk in comparison.

First I need to reposition the two tall jack stands and lower the Jeep's rear axle onto them with our Rotary lift until the axle's weight is supported and the rear shocks are compressed ever so slightly.
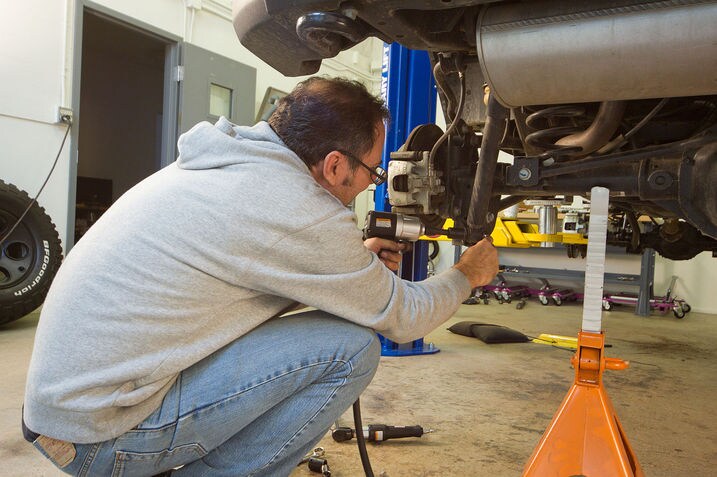
The rear shocks are the component that defines how far the axle can hang, so they need to come off right away.

The stabilizer links are next to go. They're destined to be replaced with longer ones, so they can go in the trash can alongside the shocks.
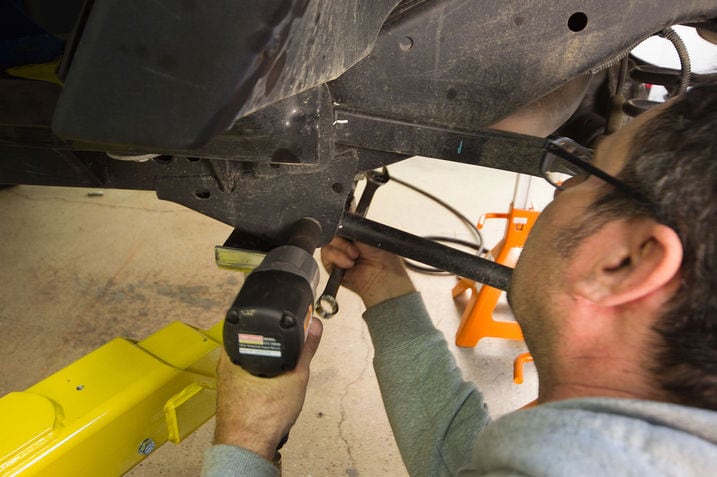
Like the front, the rear axle is located by 4 trailing links and a lateral track bar (a.k.a. Panhard bar.) Once again their 10 bolts are to be loosened, but not removed.
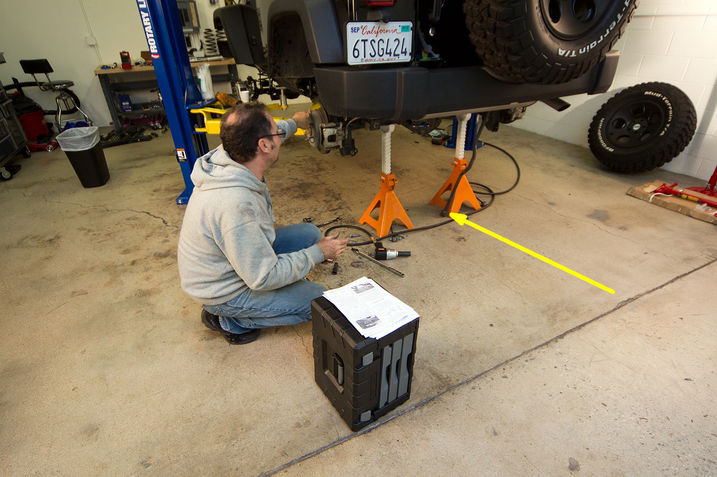
The sole exception is the bolt on the left-hand end of the track bar (yellow.) It gets taken out so the track bar can hang out of the way for the next few steps.

The parking brake cables will still be long enough once the 3-inch Mopar lift is installed, but only after I remove and discard the factory retaining bracket so they can hang down a bit more.

The brake line retaining brackets are disconnected, too, but no parts will be thrown away here.
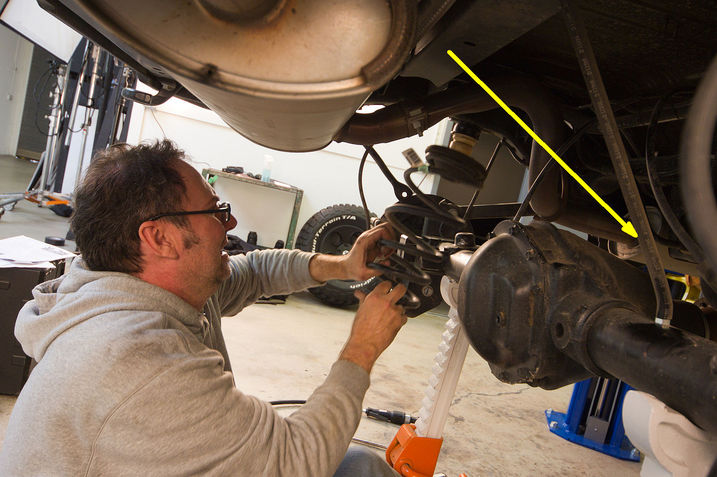
Once the brake brackets are loose it's time to raise the lift enough to take the weight off the coil springs and open up a gap so I can pull them out. The rear differential breather hose (yellow) doesn't like it much, but I'll deal with that later on.
The rubber spring cushion seen on the uppermost coil will be reused, but the springs are now boat anchors.

Now the lower trailing links can be removed and replaced. The new ones are longer in order to keep the rear differential pinion angle at the proper angle with respect to the driveshaft. The extra length also keeps the wheelbase from shrinking.
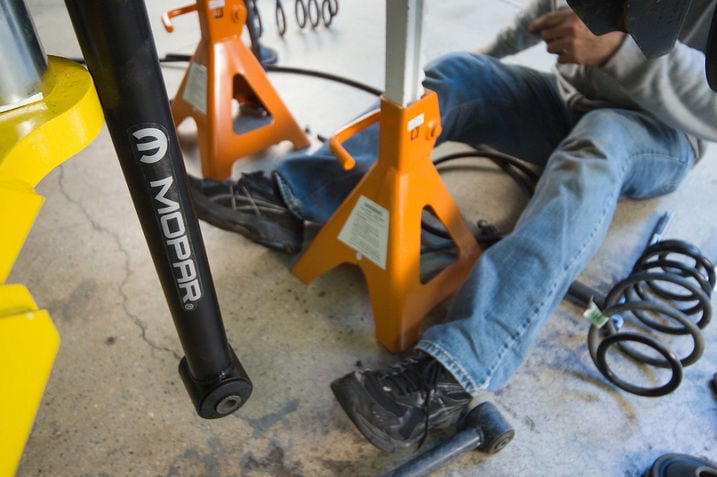
Both ends of the one on the passenger side can be bolted (loosely,) but the one of the driver side needs to hang out for a couple steps while I do something else with its rear mounting bracket.

This new bracket moves the left pointing point of the track bar up three inches so it will run at the same angle (nearly flat) after the three inch lift is installed.
One of its mounting holes (yellow) will share the bolt used to mount the link we saw in the last photo.

Here the trailing link has been installed with its mounting bolt also running through the new track bar bracket. Meanwhile, I'm installing a u-bolt around the axle tube to hold the other end of the track bar bracket in place.
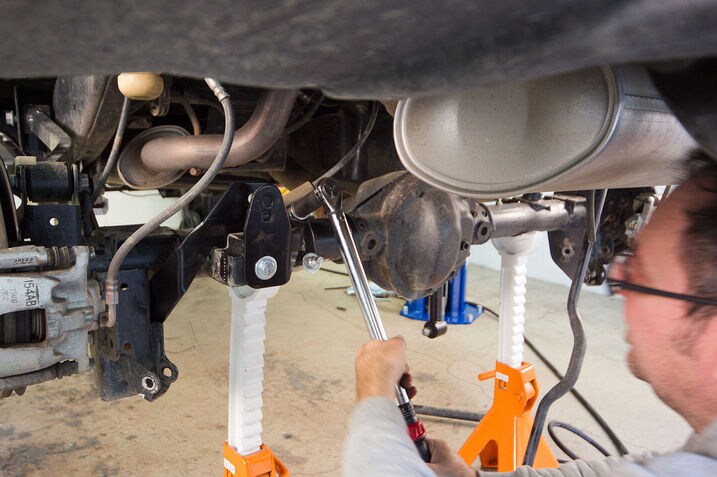
Unlike the suspension link bolts, the u-bolts can be torqued to their final tightening spec right now.
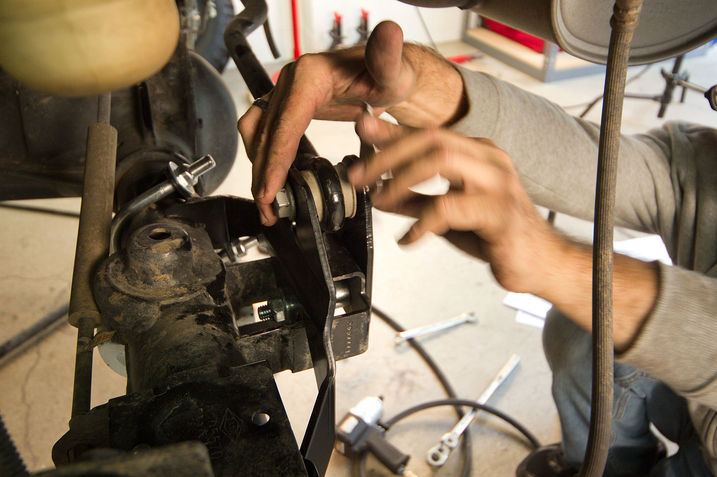
Now it's time to re-mount the left end of the track bar in the new bracket.
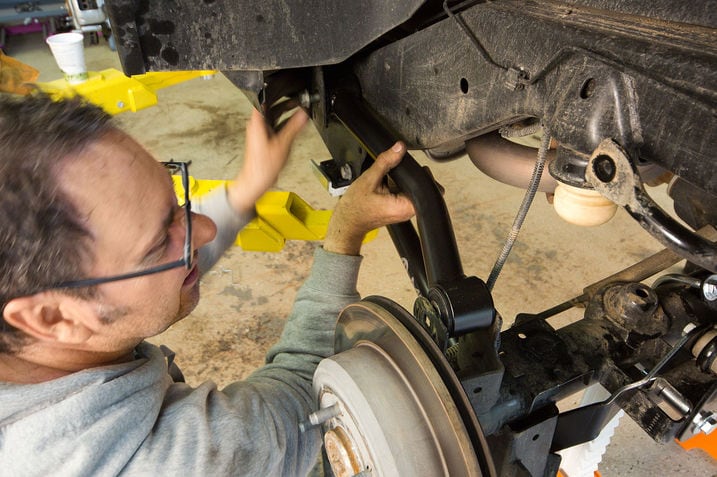
New upper trailing links go in next. Keep your eye on the urethane bump stop because it's about to disappear.
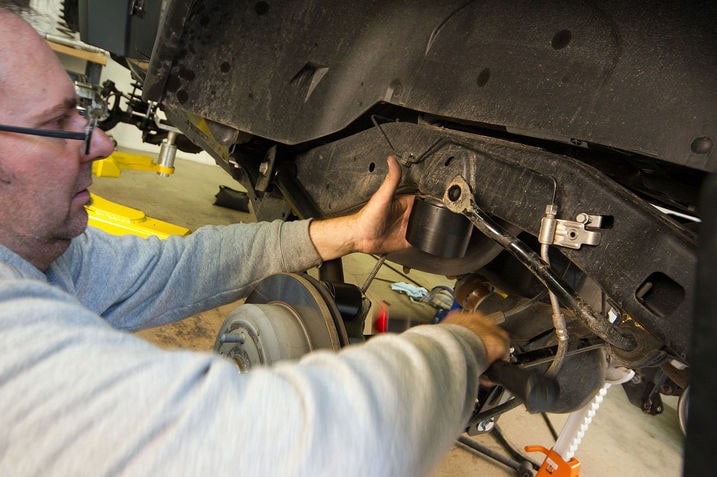
No, the old bump stop is not in there. I removed it before installing these new cups. They snap in place over the old bump stop retaining bracket.

A new longer microcellular urethane bump stop will snap into the original bracket; the cup's job is to keep it lined up vertically. Silicone spray helps it snap into place.
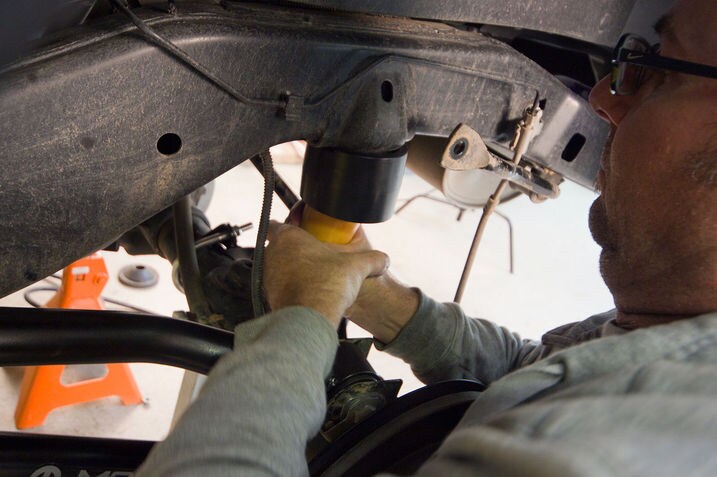
But it still takes persistence to finally snap it home.
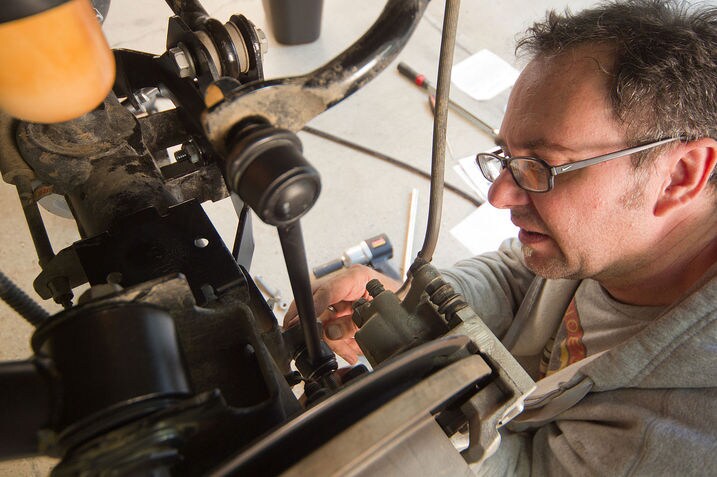
Things are moving along quickly now. It's already time for the new longer stabilizer bar links to go on.
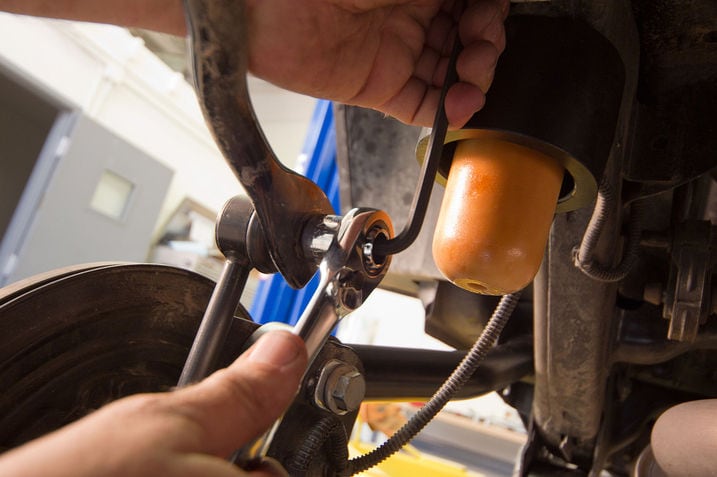
I've bragged on the Craftsman Max Axxes external drive socket set before as a good deep socket alternative, but this is brilliant. Stabilizer bar ball joints and many strut tops feature an internal hex you're supposed to hold still while you tighten the nut, and it's always a bit of a hassle.
Ratcheting end wrenches work, too, but you have to buy them one size at a time. Owning a whole range of them is not cheap. The Max Axxess socket set is a lot less expensive, and it works great as a regular ratchet, a deep socket alternative, as well as this particular situation.

These brake bracket extensions drop the hoses down so they'll still work with the lifted suspension. I haven't cracked open any brake lines, so they'll be no brake bleeding later.
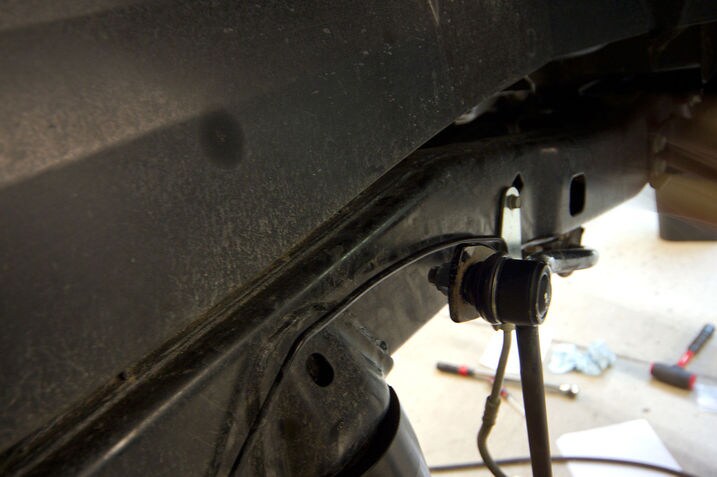
I do have to reshape the hard part of the brake line by hand to make sure it clears the stabilizer bar end link, though.
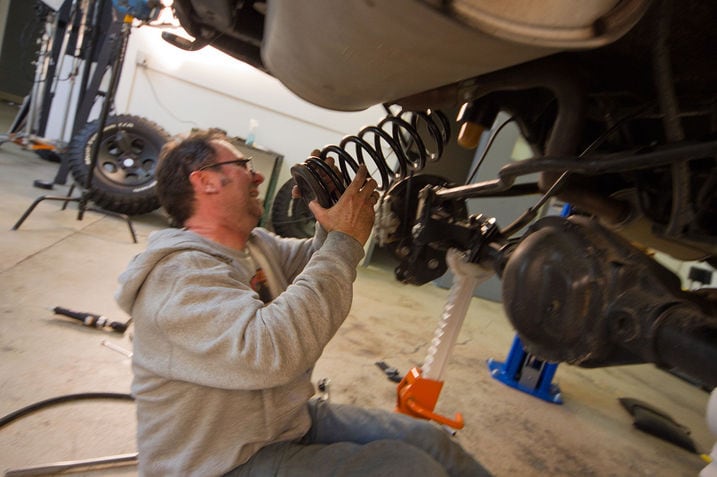
This is moving along fast. It's already time to install the rear springs.
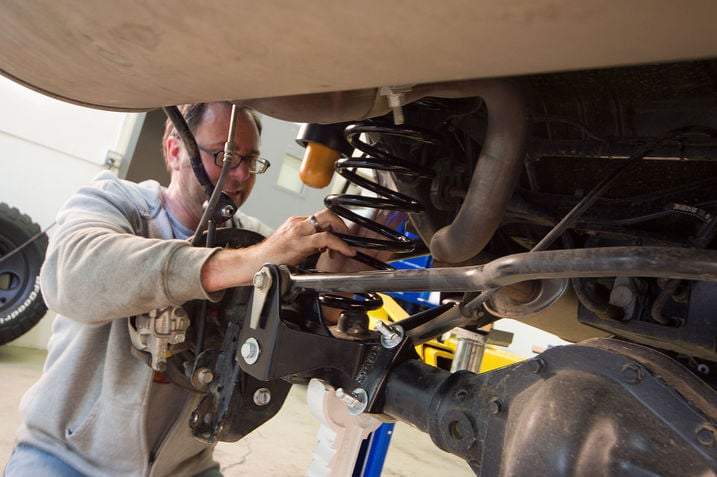
The lower end of the spring drops easily onto its seat.
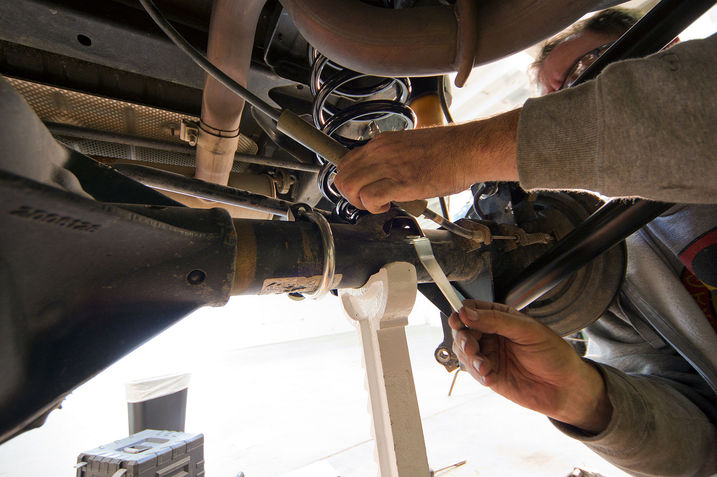
Mopar's kit comes with the special tool that helps get a retaining nut up in behind the spring seat...

...so I can install this spring retainer.
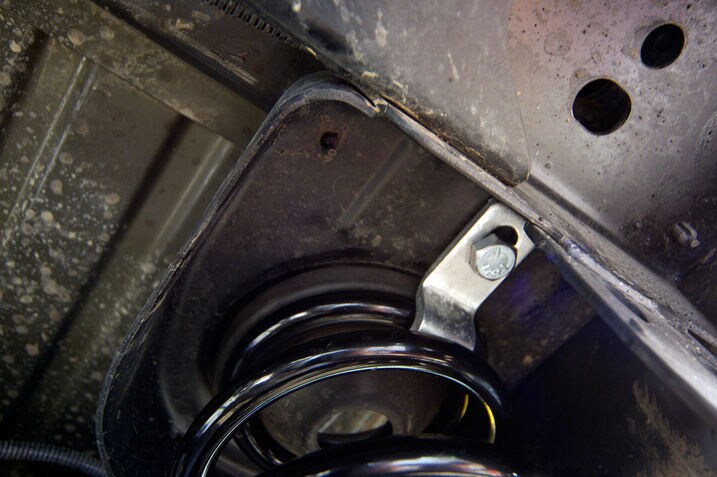
This spring retainer holds the spring in place at the top, and the bolt goes into an existing hole. That's right; I still haven't cut or drilled anything at the rear axle.

Here's another of those Nutserts we saw during the front suspension installation. This one goes into another existing hole in the frame for the rear limiting strap.
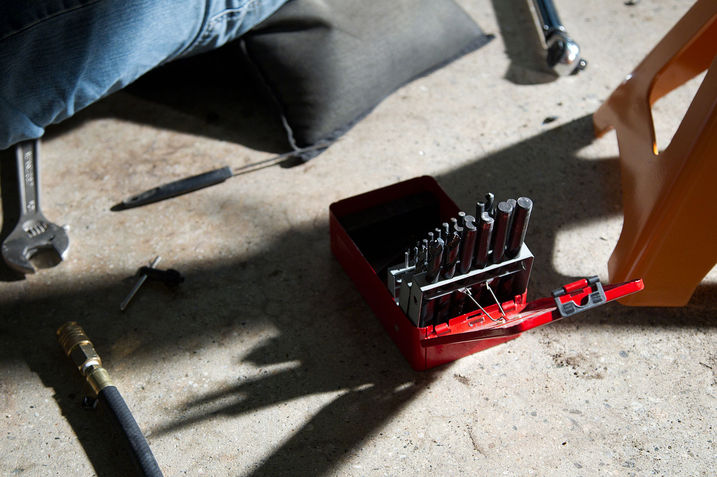
You can bet what's coming next.
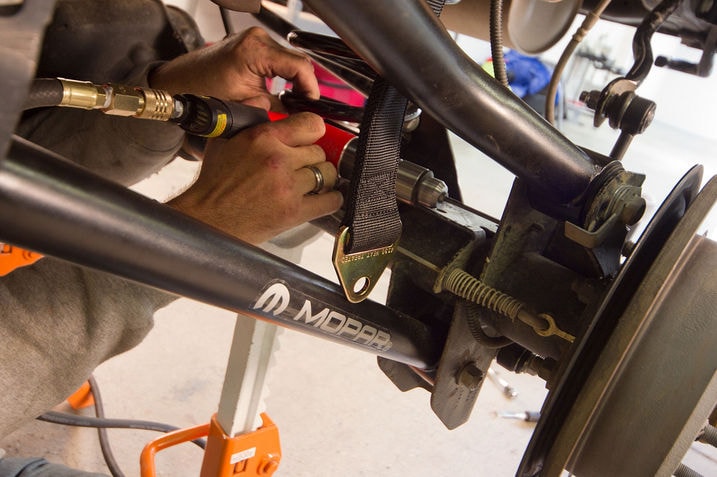
That's right, the rear limit strap needs a hole to connect to, so I've got to make one. Two, actually, because I'm doing all of this on the other side, too. But you knew that.
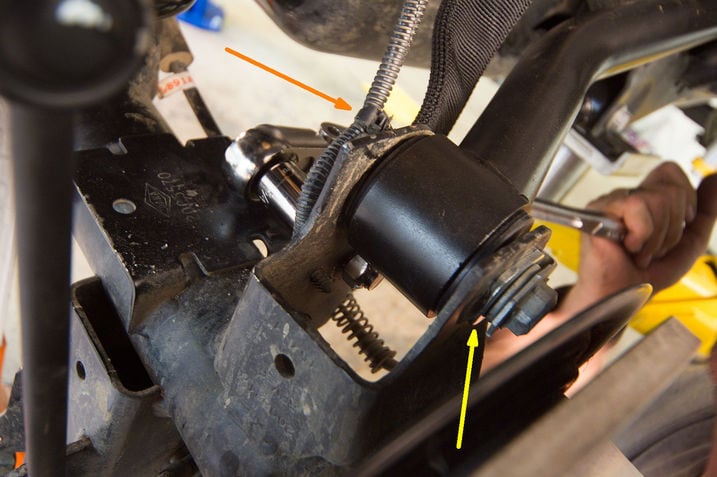
Now I can tighten the lower limit strap bolt. Incidentally, the hole I drilled made it necessary to remove one of two clips (orange) holding the ABS wire in place.
On an unrelated note, all of the trailing arm bushing bolts, front and rear, get these rectangular positioning shims where they bolt to the axle. Mopar says these lock the links into just the right position so no wheel alignment is necessary after the kit is installed.
The only adjustment needed is a small change in the length of the drag link to re-center the steering wheel, and that's a cosmetic adjustment that can be eyeballed.

Now it's time to install the Fox Racing Shox. There's a simple trick that makes it easy: compress the shock fully on the floor, then quickly swing it into the lower bracket and let the internal gas pressure "grow" the shock into the upper mount.

One of the last steps in the process is the installation of a new rectangular landing pad for the rear bump stop. It bolts into existing holes.
This is probably my favorite picture of the bunch. Clockwise from the left we have: upper trailing link (with the lower one partially hidden below); limit strap; ABS signal wire; bump stop (with the spring partially hidden behind); track bar and in new bracket; Fox Racing Shock; rubber brake hose; stabilizer bar and link.
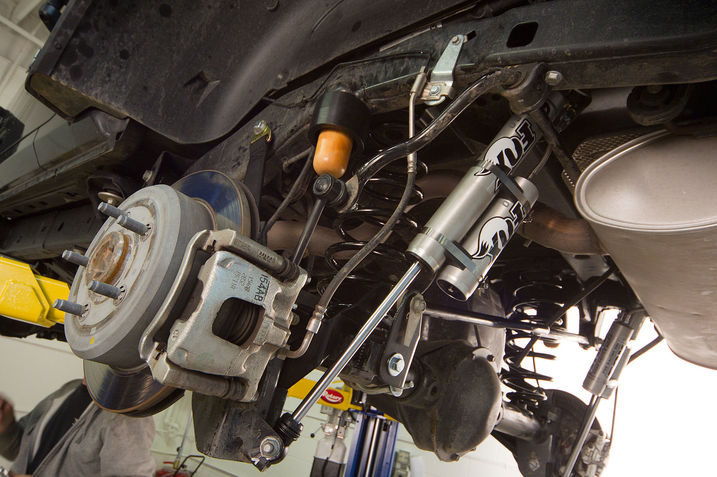
Can it be? Are we done? Not quite. There are a few more things to take care of. But for those we must lift the Jeep high up on the lift and retire our trusty orange floor jacks.
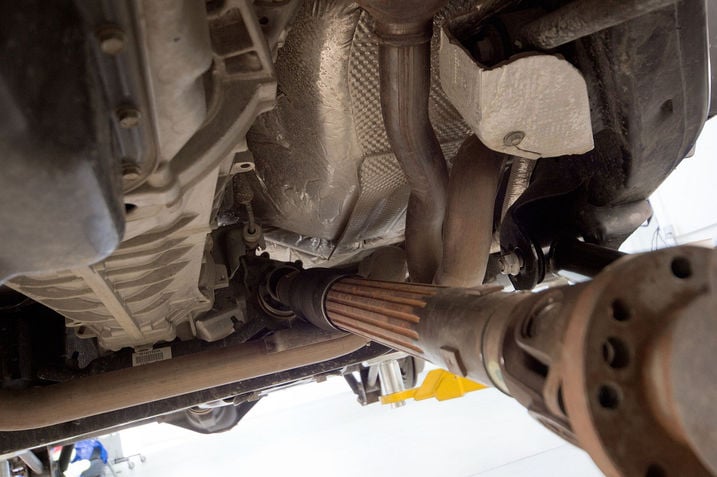
There's still the matter of reconnecting the driveshaft, and there's a small issue. A 3-inch suspension lift requires the driveshaft to hang down at a steeper angle. But here it's hitting the exhaust system.
This is only an issue with 2012 Wranglers like ours, the ones with the new Pentastar V6 engine. 2007-2011 JKs with the older engine don't have the same exhaust routing and there's no interference. The next couple of steps apply only to 2012 JK Wranglers (and later if you're reading this in the future.)
These are exhaust spacers. It's hard to tell, but the one on the left is a little longer. These parts are fairly new, and their installation isn't described in the draft set of instructions I'm working from. So, after careful study of the parts and the vehicle, I'm making this up as I go along.

They bolt to the forward legs of the central y-pipe in order to push it back and allow the driveshaft to clear. But pushing the y-pipe back has knock-on effects farther downstream. Theoretically, the rear pipes and the muffler would also get pushed back the length of the spacers, and I figured that would put pressure on the exhaust hangers and move the pipe close to my new springs.
I decided a little adjustment is in order.
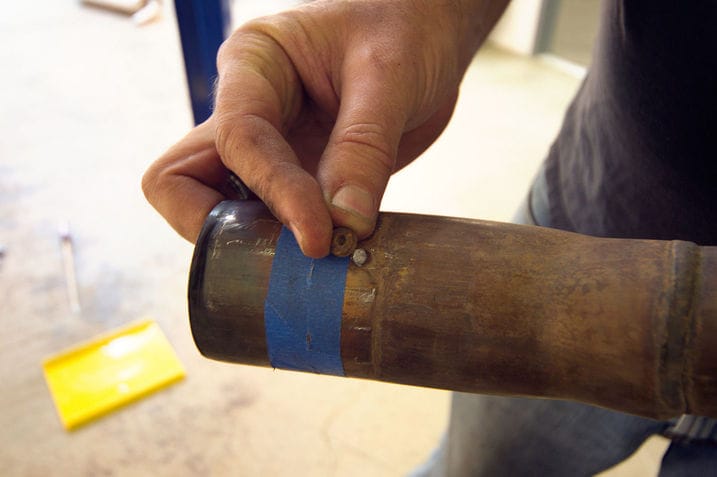
For the pipe to go back this indexing nub has to come off.
Scott and I had this plan for a dramatic action shot, with me swinging a hammer while holding a chisel. While he went for another lens I made a gentle exploratory tap ... and it came right off. Oh well.
That blue tape contains a scratch mark for the next step.
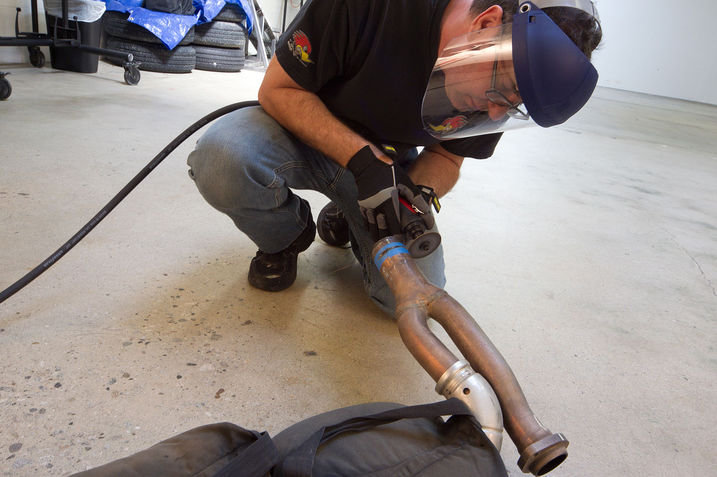
Yes, I'm cutting off a bit of the pipe. The dimension I chose corresponds to the length of the shorter of the two spacers — the reason for that will become clear in a moment.
Mopar later told me this cut wasn't necessary, that removing the nub was enough on it's own and I could do that with the y-pipe still in the car. Removing the nub, they say, allows the y-pipe to telescope into the rear pipe a little bit, and the flex in the rubber hangars would make up the rest.
Maybe they're right. (Of course they're right.) But this way isn't wrong, it's just more time consuming. My exhaust hangars will hang exactly as they did before and the pipe slip-joint will engage exactly the same amount.
The long spacer goes on the passenger side, where the exhaust pipe runs at a downward angle. Because of this angle, only a portion of its length contributes to a shift to the rear. And the magnitude of that shift is exactly equal to...
...the length of the short spacer, which goes on the driver side where the pipe points straight back. And that's why the length of my cut equaled the length of the short spacer.
Notice how the y-pipe's cross tube runs just ahead of the frame cross member. It's close, but there's still a good half inch of daylight.
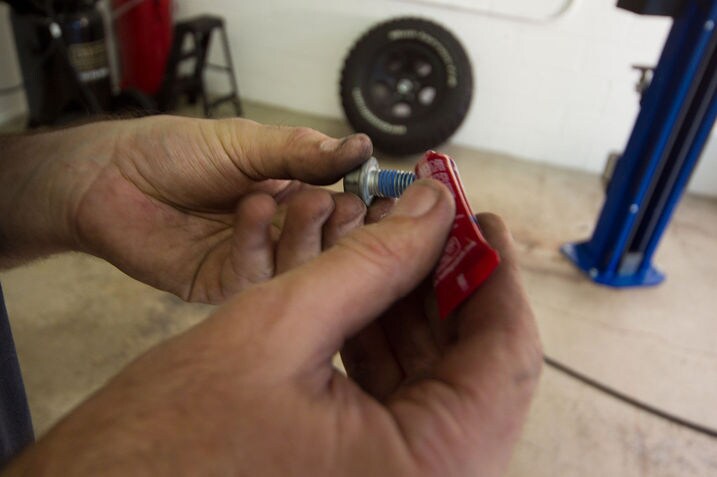
Now the driveshaft can go back together. But first I need to put a dab of fresh thread locking compound on the bolts.

This concludes the driveshaft detour part of our show.

Here I'm splicing in an additional section of breather hose I bought at my local auto parts store. Technically speaking I bought fuel line hose, but it's the same size. Mopar later told me it's also possible to unfasten the upper end of the hose from its factory mount and reposition it with tie-wraps, but my hands wouldn't fit up in there.
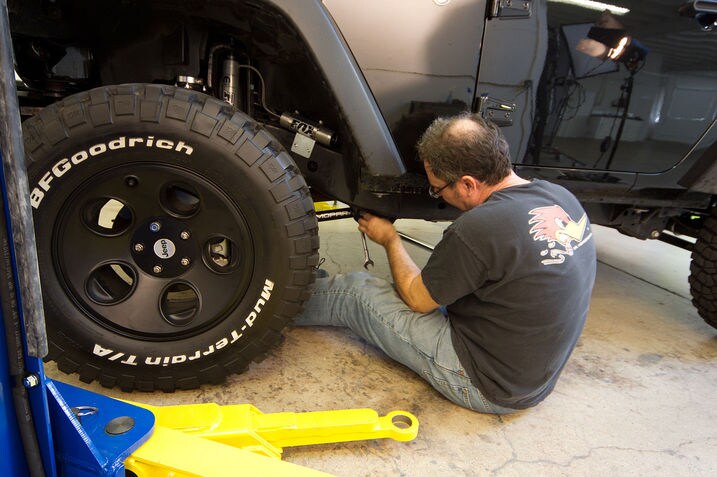
All of the trailing arm and track bar bushings get tightened and torqued once the Jeep is back down on its tires. I'll spend a lot of time crawling around underneath to get it done, but three extra inches of newfound lift make it fairly easy.

OK, now we're done! I made the steering drag link adjustment to re-center the steering wheel while you weren't looking. (In my driveway after driving it home, if you must know.)
If you thought the rear installation looked easier than the front, you're right. Now that I've done it, this isn't ridiculously difficult with the right tools. Thing is, the "right tools" is no small list. And our Rotary Lift certainly helped. I'm sure it could be done without such a lift, but it wouldn't be easy.
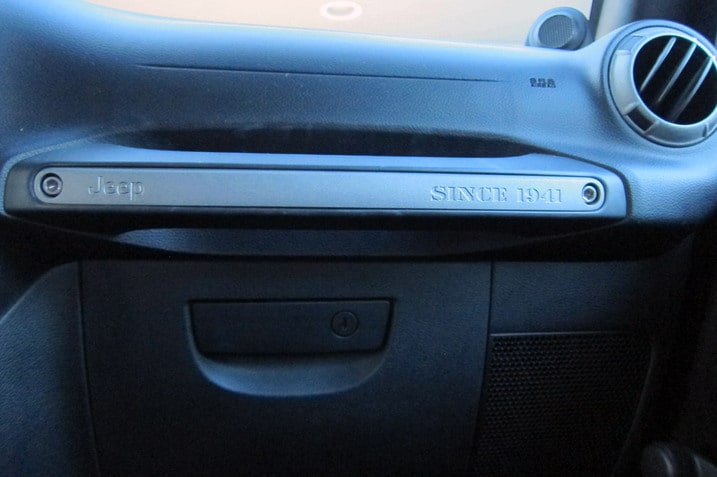
I think this is a very cool touch. The grab handle ahead of the passenger in our long-term Jeep Wrangler reads Jeep Since 1941. And it's not some cheesy decal or a lame dash plaque, it's carved into the fake aluminum-look plastic. Even the retro military font is cool.
Somebody at Jeep gets it.

HVAC, if you don't know, is a car's, heating, ventilation and air conditioning. And our Jeep's HVAC may be the very best around.
First of all it's controlled by three very simple knobs, one for fan speed, one for temperature and one to control the direction of the air flow. This is as it should be, simple, attractive and functional.
But what makes the Jeep's system so special is its power. It will roast you if you let it, even when the Wrangler's top is down. And its air conditioning will freeze you out on the hottest of days, even when the So-Cal sun is beatin' down on you.
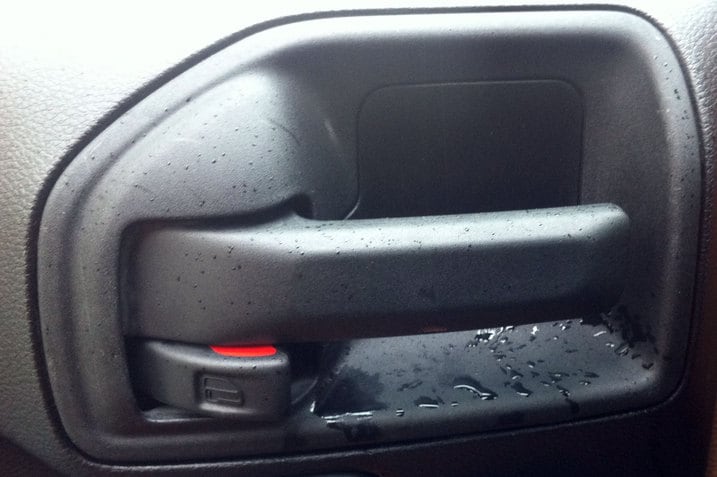
This is what happens when you drive a 2012 Jeep Wrangler in the rain. I'd have thought the guys over at Jeep would figure this one out by now, but not quite. Even with full-sized doors the Wrangler leaks in the rain. I'm going to bet the hard top is water tight. But this soft top can't say as much.
Don't get me wrong, I'm not worried that it leaks. Honestly, It brings back memories of the YJ Wrangler I owned in high school. Any time the skies opened the dash would fill with water. I used to remove the interior windshield support bracket, roll up a shop towel and stuff it inside just to siphon out the rain. Otherwise it was mildew skanky for the next week.
Oh, the good old days.

We may have found a new accessory for our 2012 Jeep Wrangler. The Action Camper. The T-1000 supermodels make this illustration a bit creepy. Take the jump for exterior and interior photos of the camper in its element. What do you think?


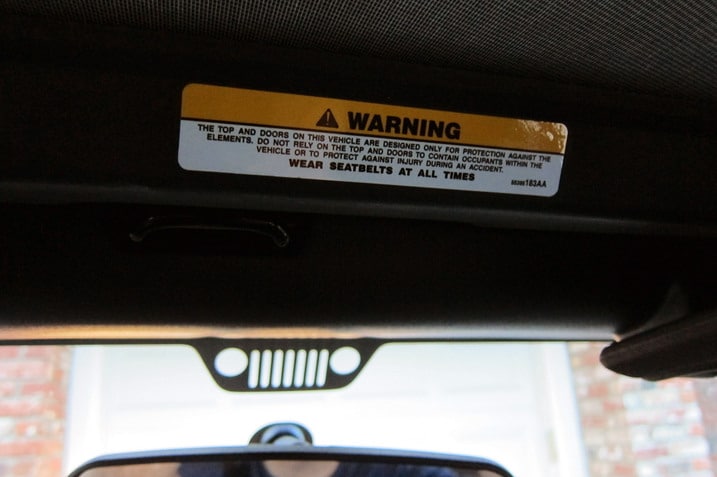
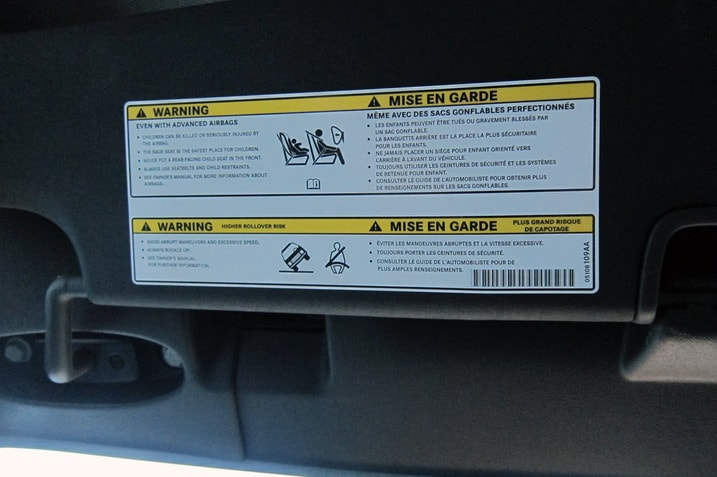

Our 2012 Jeep Wrangler is a of course a short wheelbase 2-door model, and we've run it up the RTI ramp in many configurations. But how does a long-wheelbase 4-door compare?
I recently got my hands on a Wrangler Unlimited. It's a Rubicon, so it's equipped with a factory front stabilizer bar disconnect mechanism.
A word about the color: It's Dozer Clearcoat, a.k.a. bright orange. It may look like some kind of white-to-orange fade, but that's just my point-and-shoot and the overhead skylight butting heads.
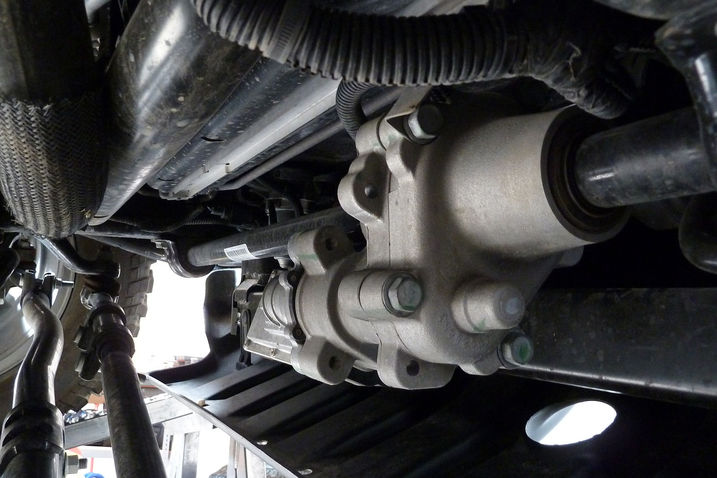
The Electronic Stabilizer Bar Disconnect acts as a bridge between the two halves of a stabilizer bar that has been split in two. It's one of the off-road features you get when you buy a Rubicon. I have my 18mm wrenches, Rubicon owners have a switch on the dash.

Stabilizer bar connected. Wheel lift = 20.56" Distance up ramp = 60.12"
RTI = 518

Stabilizer bar disconnected. Wheel lift = 27.25" Distance up ramp = 79.67"
RTI = 687
| Vehicle Configuration | Wheel Lift | Ramp Climb | Wheelbase | RTI |
| Wrangler Sport, BFG, stab off | 26.75 | 78.21 | 95.4 | 820 |
| Wrangler Unlimited Rubicon, stab off | 27.25 | 79.67 | 116.0 | 687 |
| Wrangler Sport, BFG, stab on | 20.44 | 59.76 | 95.4 | 626 |
| Wrangler Unlimited Rubicon, stab on | 20.56 | 60.12 | 116.0 | 518 |
This chart compares the 4-door Wrangler Unlimited Rubicon with our 2-door Wrangler when it still had its stock suspension but after we fitted similar BFG tires. The wheel lift is virtually the same in both conditions, but the 4-door's longer wheelbase does a number on its RTI value. Both vehicles gain about 7 inches of lift once the stabilizer bar is out of the picture.
| Year | Make/Model | Wheel Lift | Ramp Climb | Wheelbase | RTI |
| 2012 | Wrangler Unlimited Rubicon, off | 27.25 | 79.67 | 116.0 | 687 |
| 2010 | Toyota Land Cruiser | 24.81 | 72.55 | 112.2 | 647 |
| 2012 | Jeep Wrangler Sport | 18.31 | 53.54 | 95.4 | 561 |
| 2011 | Lexus GX 460 | 20.19 | 59.02 | 109.8 | 538 |
| 2012 | Wrangler Unlimited Rubicon, on | 20.56 | 60.12 | 116.0 | 518 |
| 2012 | BMW X3 | 12.19 | 35.63 | 110.6 | 322 |
| 2011 | Nissan Juke SL AWD | 8.75 | 25.58 | 99.6 | 257 |
The Wrangler Unlimited Rubicon tops our list of stock vehicles if we focus on the RTI number measured with the stabilizer bar disconnected. We can do that because it's a factory-installed stabilizer bar disconnect system. The Toyota and Lexus SUVs have a factory stabilizer bar disconnect systems too, but their KDSS system is automatic so they have just one RTI value.
Before: Stock 2012 Jeep Wrangler headlights, low beam.
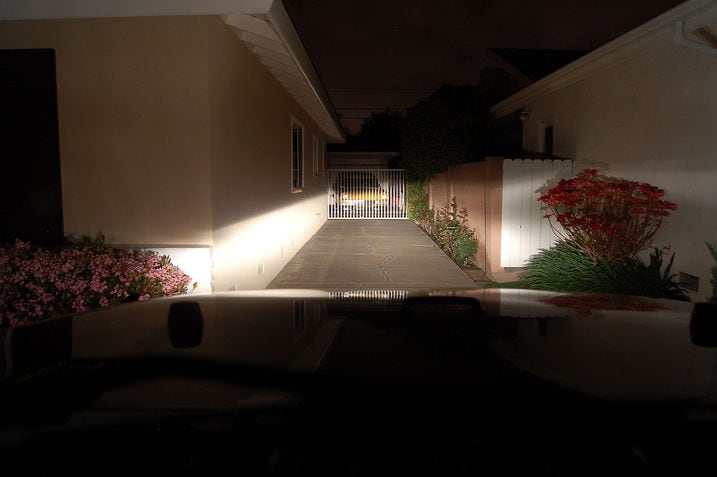
After: IPF H4 reflectors and Philips Xtreme Power 55w bulbs, low beam.

Old on the left, new on the right.

Installing new headlights in a new 2012 Jeep Wrangler (or just installing new bulbs in the existing ones) isn't terribly difficult or time consuming, even though the best approach involves taking the front grille clean off.
I'm replacing the reflectors for two reasons: to modify the light pattern to gain a sharper cutoff and to gain the ability to use any number of widely available DOT-approved H4 bulbs.
The results are amazing. After doing this it seems like I've got twice the coverage and much whiter light, but the new pattern's sharp cutoff doesn't blind oncoming traffic. I'm still trying to quantify the improvement, but there's no question in my mind this was a good move.
Time spent: less than 30 minutes.
Tools required: Thin flat-blade screwdriver, T-15 Torx screwdriver
Cost: $118.77, — Two IPF H4 headlight reflectors, part number 920HJK, $44.99 each from ARB USA through 4 Wheel parts; 1 pair of Philips Xtreme Power H4 bulbs, $28.79 from Amazon
Let's get started.
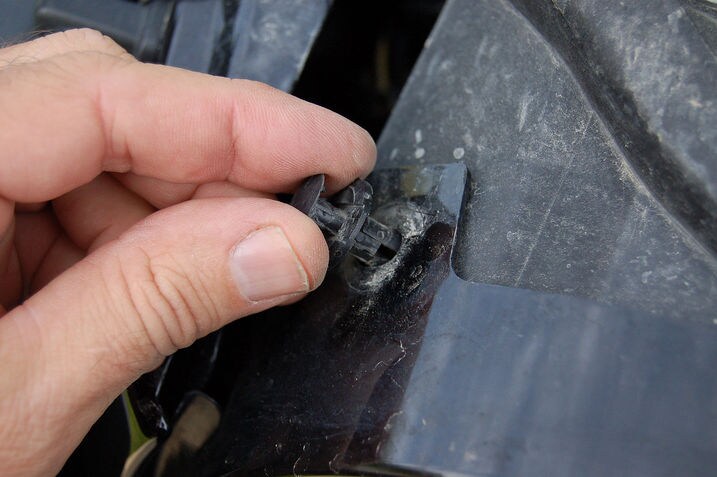
Eight of these clips hold the grille in place along its top edge. They're easy to locate once you open the hood. Use the thin flat blade screwdriver to fully extend the center plunger of the each clip, then pry on the base and pull the whole thing out in one piece. Don't worry if the plunger pops out; it can be snapped back into place later.

Next you have to tug gently forward along the bottom in order to detach a row of spring clips (yellow) along the bottom and near each turn signal. Do this with the grille still nearly vertical. The trademark Jeep grille bars make good handholds for this.
Once these are free the trun signal wiring (green) will be the last thing keeping the grille from coming off.

Here you have two choices: unplug the connector hidden beneath my thumb or rotate the light assembly out as if you were changing the bulb.

That wasn't so bad.
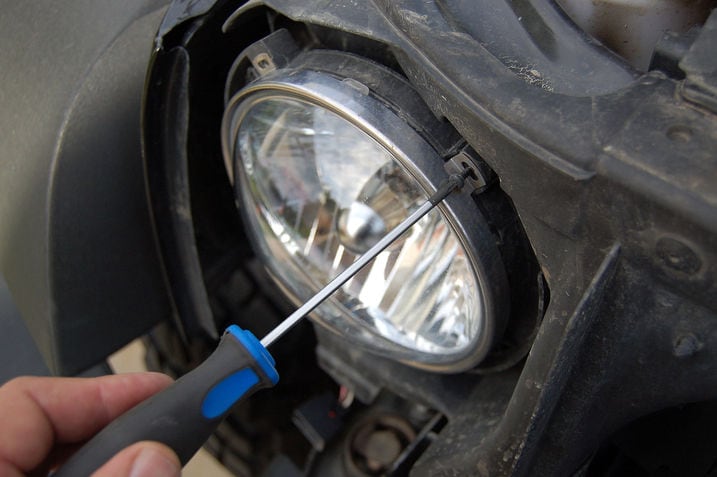
Use the T-15 Torx screwdriver to remove the four perimeter screws that hold the retaining ring in place. A skinny one like this is useful because the aiming screw you need to access once the grille is back in place is also a T-15, but access to that one is impossible with any sort of socket or hex-drive multi tool that's much fatter than this.

Once the ring is off the headlight practically falls out. Disconnect the harness thusly: slide the red locking tab back, press in on the green tab behind it and the wiggle the harness off the back of the light.
If you're just changing bulbs in the stock reflector you can do that now and then reassemble everything. In our 2012 Wrangler, at least, the process of removing the grille to get at the back of the headlights this way looks far easier to me than trying to access the back of the headlights from under the hood.
But here we're replacing the reflectors altogther, so these headlights are history.

Jeep's headlight connector won't plug onto to an H4 bulb, so first we've got to install these pigtails that came in the box with the new IPF reflectors.

Also included in the box is a little vial of dielectric grease to protect the connector terminals from dirt and moisture. A little goes a long way.
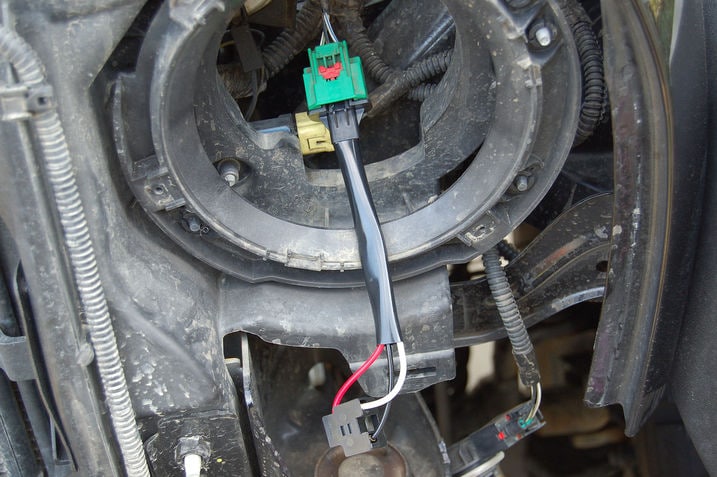
Make sure the gree tab snaps home fully. You'll know this is the case if the red locking tab slides all the way down until it bottoms out in the locked position. I had to use an exacto knife to trim a tiny amount of flash from the new connector's locking tab to make this happen.
Now we're ready to prepare the new headlights.

The metal retaining clip will hold the new bulb in place. For now we'll fold it out of the way so we can insert the bulb.
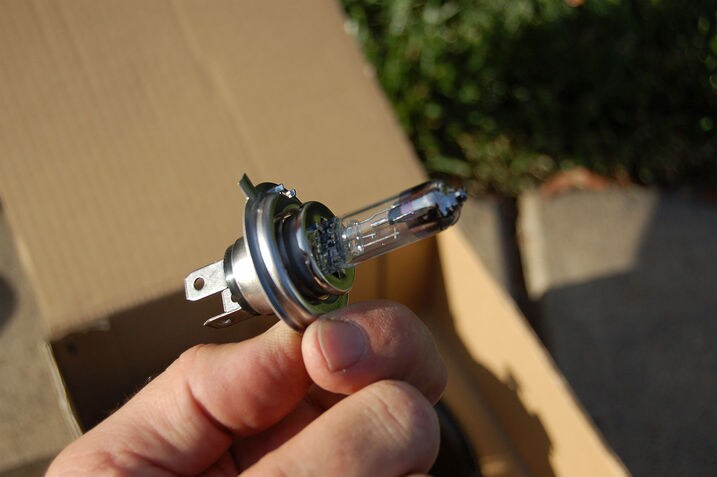
Handle the bulb by the base or by the connector — never touch the glass. This makes getting the bulb out of the packaging a bit tricky, so take your time. If you do touch it, a very soft and clean lint free cloth is needed to remove any oils or fingerprints you transferred to the glass.

The bulb can only go in one way. Once it's seated, fold the retainer over the top of it and engage the catch.

Snap the included rubber gasket into place. The "top" label should line up with the flat center terminal on the bulb. It should also make sense when you look at the front of the bulb with the IPF logo right side up..

More dielectric grease goes on the bulb terminals before they get plugged in to the pigtail harness.

Use the "top" label or the IPF logo to get the headlight assembly in the right orientation, then engage three tabs like this one with same-sized notches in the Jeep's headlight bucket.

The retaining ring goes on next. It's helpful to wear the ring like a bracelet during the previous step so you can slip it on here without letting go of the headlight.

Finally, the four Torx screws go back in. They screw into plastic, so don't tighten them much beyond snug.
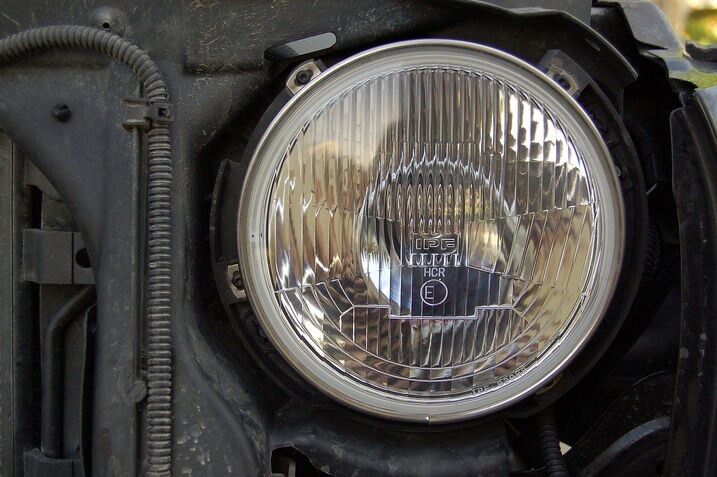
Done. Now the grille can go back on. Don't forget to reconnect the turn signals as you replace it.
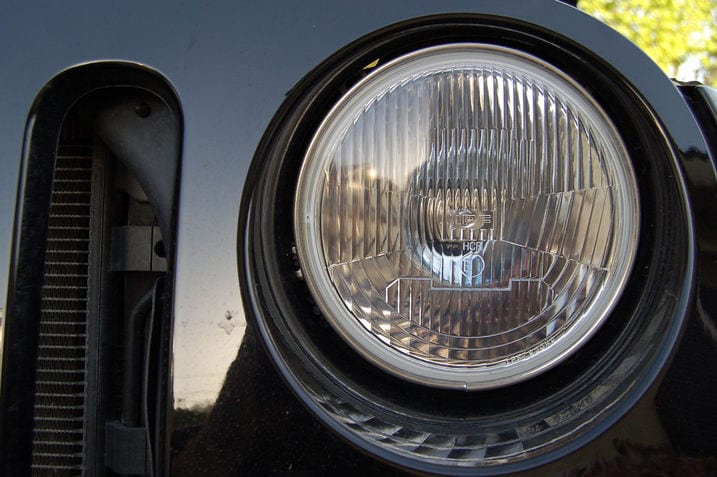
Now we're really done.
Aiming will have to wait until nightfall.
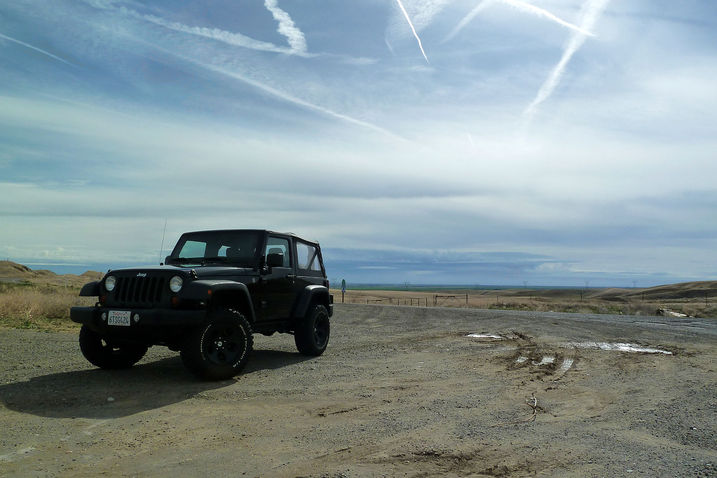
Our 2012 Jeep Wrangler is making an appearance at the Easter Jeep Safari in Moab, Utah. I'll be there for the first half of the week-long event. I have 4 trail days on my schedule.
Even though it doesn't kick off until this weekend, I've already left SoCal. I'm making a 750-mile detour to northern California right now to attend the super-secret preview of a car I can't tell you about just yet.
What would have been a 1,450-mile out-and-back run up I-15 has turned into a big 2,200-mile triangle. This should be good.
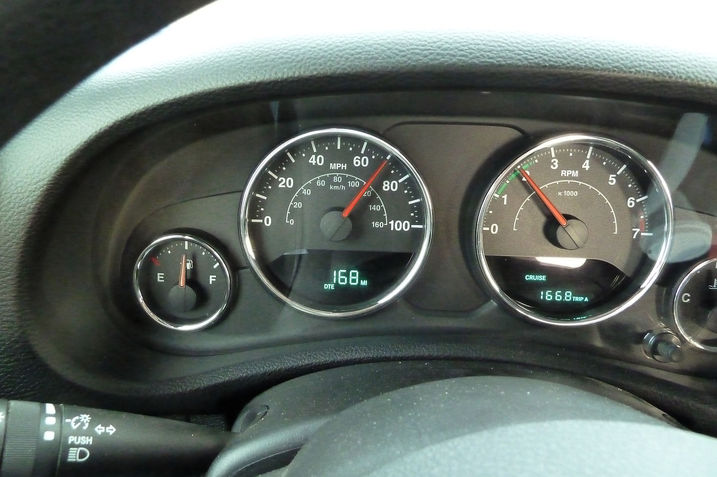
Once you clear Tejon pass, the run up California's Interstate 5 between LA and San Francisco is mostly straight and entirely dull. You pretty much head north and set the cruise, then settle in and pass the time while the odometer rolls up and the fuel gauge sinks down.
Most such gauges are hopelessly non-linear. The majority of cars I've owned seemed to stay bolted near "F" for the first hunderd miles and then plummet before hanging out near E for awhile. Not so in our 2012 Jeep Wrangler.
Here I'm at the half-tank mark — it may look a shade low but the needle is actually dead-nuts on the line with my eye square with the gauge. At this point the trip meter and distance to empty (DTE) meter read more or less the same. The number of miles I've come equaled the number of miles I could still go, which is what every geeky engineer like me wants to see when the gauge reads half full (or half empty.)
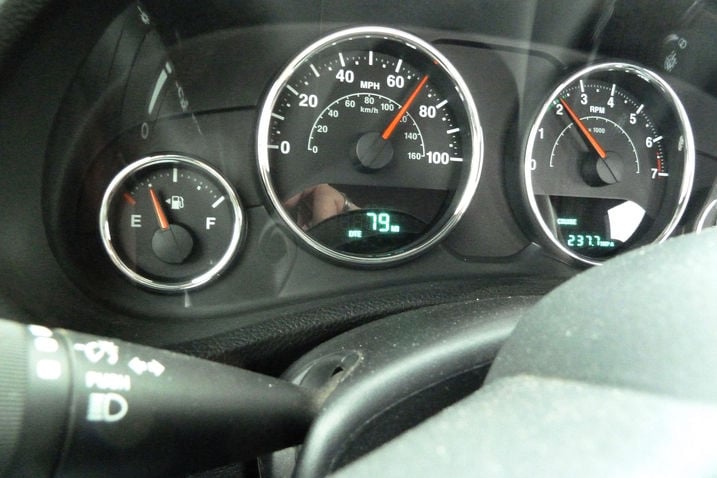
It gets better. Said linerarity (or accuracy, or truthfulness — whatever you want to call it) was still in play at a quarter tank. 79 miles is exactly one fourth of the total you get when you add DTE to the trip odometer reading.
The low fuel warning came on at 1/8th of a tank, and those numbers worked out, too.
Of course it did help that I spent the entire tank on cruise control over flat ground. Big throttle fluctuations or changes in engine load, had I made them, would have caused the DTE number to dance around and perhaps plummet as the computer re-evaluated my driving and delivered a more pessimistic prediction that would have screwed up my perfect ratios.

The trip up and over the Sierra Nevada was a painless one in our 2012 Jeep Wrangler. Its new Penstar V6 makes good power, but our combination of 33-inch tires and 3.21 axle gearing does suck the life out of 6th gear. Cruising in 5th is a better option when the terrain tilts up very much or if the prevailing speed falls below 70 mph.
But interstate 80 isn't the only way to make it over Donner pass. The old road is still there. I doubled back for a look.
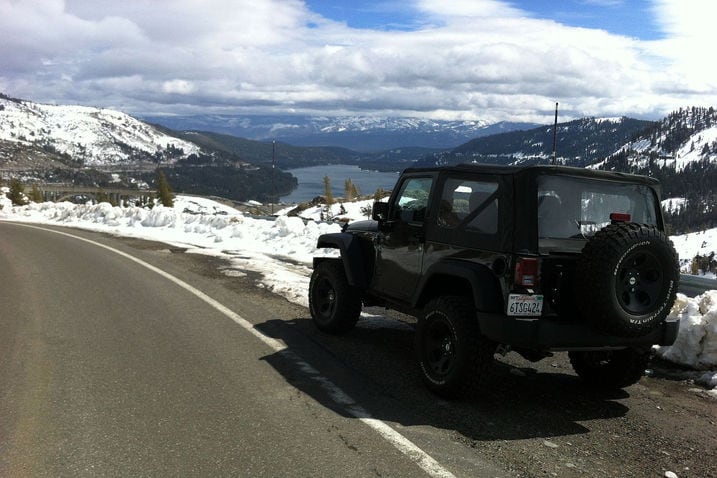
The old road is a tight and twisty two-lane good for no more than 35 mph. Today it's the primary access to two ski resorts. It's also a good route to take if you want to stop for great views of Donner Lake and stop at historical points that commemerate the unpleasantness suffered by the early settlers that gave this pass its name.

The notch in the upper left is Donner Pass as far as the old road is concerned. After a dozen breathtaking miles the old road rejoins the Interstate, where this happened ...
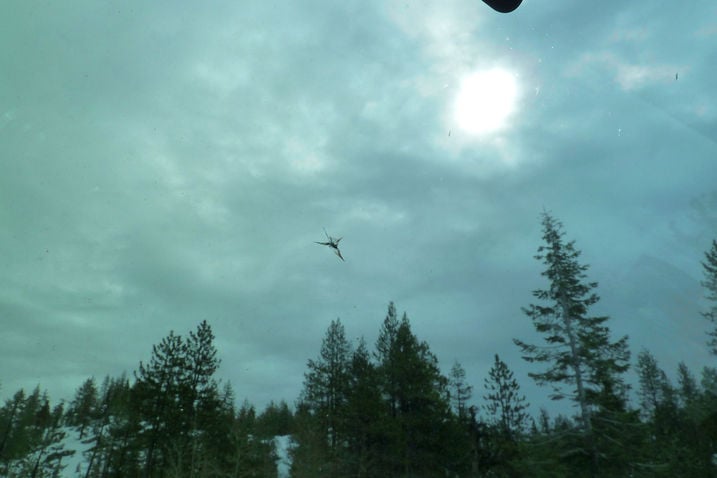
I was startled by the sharp sickening crack of a stone striking the windshield. It came from a passing Lexus CT200h, which isn't really fair because it came from the road itself. Tire chains are used extensively up here (for good reason) when it snows and the road surface gets chewed up. Also, the California road department is fond of spreading sand and pumice instead of salt.
That said, nobody needed chains on this day and the road surface looked clean and devoid of gravel. It's just one of those things.
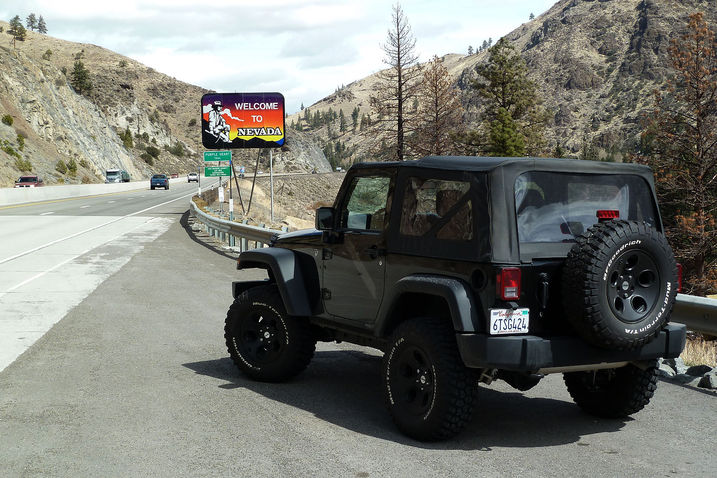
Soon I was over the Sierra Nevada and crossing into Nevada proper, where there was a little turnout for dweebs like me that want to stop and take a commemorative picture.
Strangely, the leg from wine country through Sacramento and up and over a 7,200-foot pass yielded the best fuel economy so far: this tank was 19.0 mpg. The two tanks that got me from Orange County to wine country a couple days ago had been only 17.8 and 16.4 mpg. I'm guessing that was because my average speed was about 5 mph higher.

Right now our Jeep Wrangler is with Dan Edmunds at the Easter Jeep Safari in Moab, UT. But two weeks ago it was gettin' muddy on a rainy Saturday with the Oldhams. I packed the family into our Wrangler and headed for the closest Off Highway Vehicle (OHV) Area, which is up in the San Gabrial Mountians off Highway 39 in Azusa Canyon.
With my kids in the backseat, I wasn't going to do anything too serious, but we climbed some hills, dug around in some mud and drove through several raging water crossings and muddy puddles. Low gear probably wasn't necessary, but we used it anyway.
It made things much easier. How easy? Well, that's my wife who has zero off roading experience driving the Jeep through that water crossing. I had to hop out to shoot the above photo and the videos of the action, which appear on the next page. By the way, my wife rocks.
And when we were done, the Jeep was muddy enough to look just right.
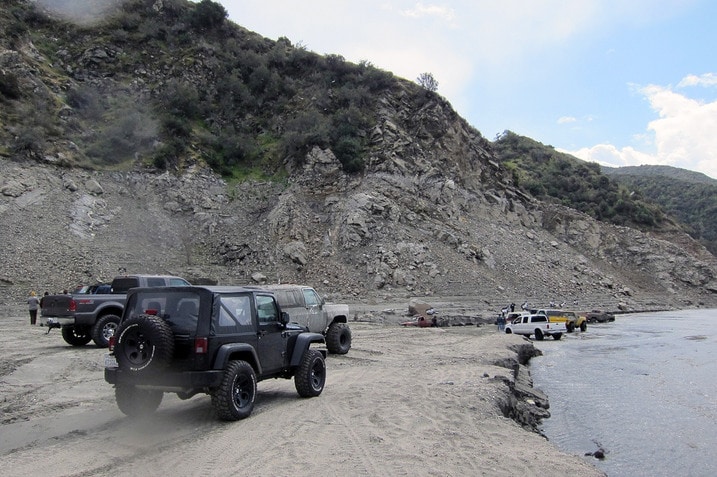
And we weren't alone. Hanging out with these guys quickly squashed any delusion that our Jeep was serious and my off-roading skills were high.
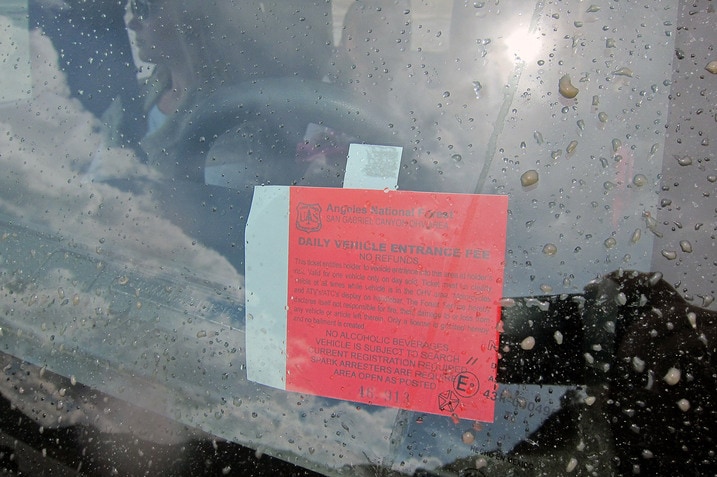

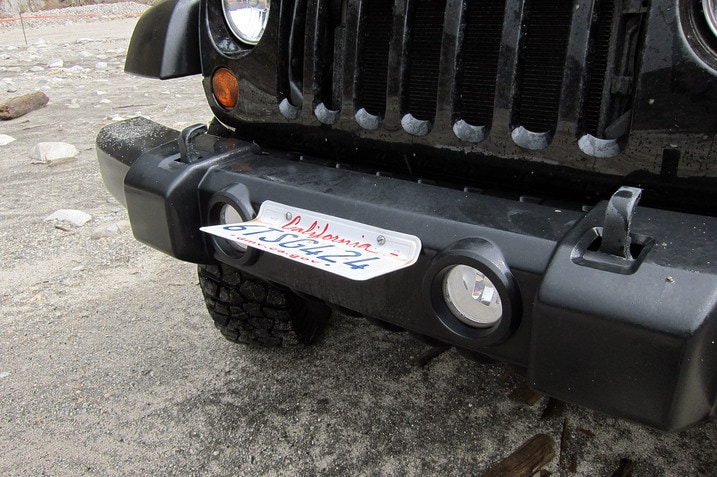
It costs $8 to abuse your vehicle in the OHV Park. We off-roaded for two hours. It was a ton of fun and the only damage to the vehicle was the reshaping of the license plate.

Sure, I could have taken Google Maps' advice and driven our 2012 Jeep Wrangler from Reno to Utah using Interstate 80, but interstates are boring. Besides, I-80 loops far to the north and adds miles to the trip.
Nevada's highway 50, otherwise known as the Loneliest Road in America, is more of a straight shot. Also, Nevada's rural two-lane highways tend to have 70 mph speed limits, and highway 50 is no exception. That's about as fast as I wanted to go, anyway.

It's hard to argue with the Lonliest Road nickname. Once I left Fallon, which is only 20-something miles past the point I left the interstate, the number of cars coming the other way dropped dramatically. Several time I sat parked and waited 5 minutes or more for another car to come by.
But the thing that really does it is the utter lack of buildings. There's nothing out here but miles of barbed wire fence and a smattering of pullouts where they've put Nevada state historical markers.
I didn't know this until I started reading some of them, but Highway 50 mostly follows the Pony Express route. I also didn't know that the famous Pony Express was a total failure that lasted less than 18 months, ran in the red the entire time, and went out of business 4 days after the first transcontinental telegraph was sent.
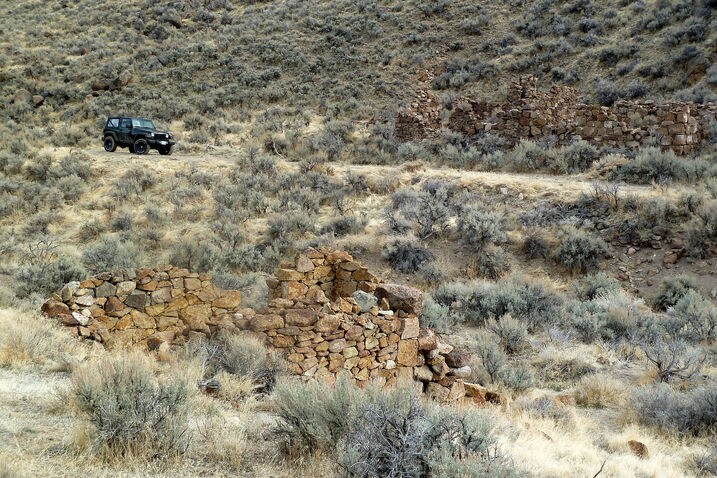
The route continued on as a stage coach road, though. In the 'teens it morhped into a primitive auto route, the Lincoln Highway. I'm led to believe these ruins were once some sort of wayside rest. Today's highway 50 runs about a quarter-mile away from this point, cutting through a hill instead of winding around it.

Signs of recent human activity are pretty much limited to the shoe tree.

The first town of any size is Austin, population 192. It comes up 111 miles after leaving Fallon.
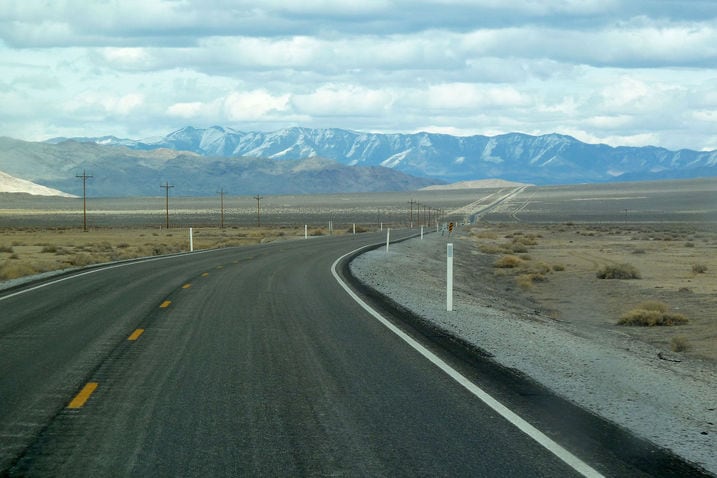
Mostly, Highway 50 looks like this: miles and miles of straight road with the occasional bend to miss a mountain. Surprisingly, the asphalt out here is fairly smooth and the Jeep's Mopar Stage 3 lift kit rode sure and steady.
The Jeep tracks pretty straight most of the time, but the short wheelbase sometimes demands a little attention. The longer wheelbase of the 4-door would certainly help. On top of that, the steering feels a bit vague, like there's a dead spot and a touch of lag on center — there's a reason why sedans have rack-and-pinion steering. The Jeep, with its solid live front axle, doesn't.
Despite all that, I wasn't fatigued by driving this road in the least.
Also, there's no radio out here. At all. We didn't opt for the audio system that offers satellite radio, so I survived on podcasts and playlists on my iPod.

Highway 80 road sees snow in winter, but I didn't see any except on distant mountaintops. That's some sort of salt in the foreground. Don't tell anyone.
It got dark before I passed through Eureka, the next tiny town that comes up 71 miles past Austin. At 8:30 pm the place looked deserted. I kept going.
I continued another 77 miles to Ely, Nevada before calling it a day. In between darkness fell and I saw NOTHING. No distant lights in any direction, no signs of habitation at all. It was eerie. It was ... lonely. It was also enjoyable, and I'd do it again.

Our 2012 Jeep Wrangler embarked on the last leg to Moab, Utah after spending the night in tiny Ely, Nevada. But Nevada had a few more tricks up its sleeve. I was going to stop in Great Basin National Park, of which the peaks in the photo above are a part, but I decided to press on.
Mainly this was because I'd already made a side trip to a ghost town called Osceola, situated high up near the park's northern flank.

The wind was really howling by the time I got there, so I paid my respects at the ex-town's cemetery and moved on.
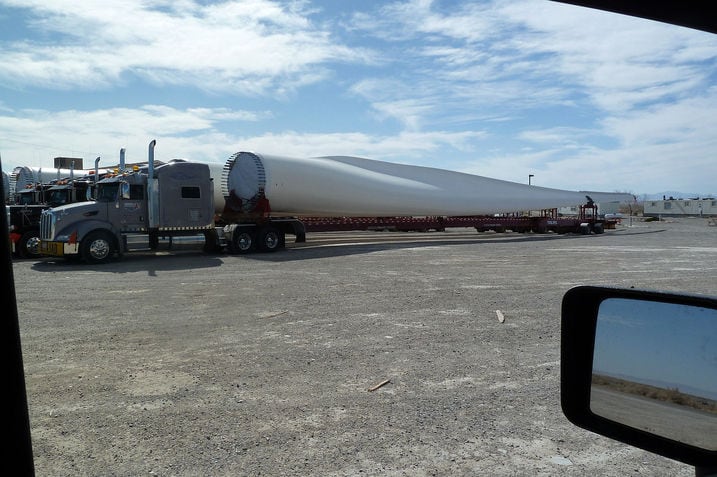
How windy was it? Windy enough that they're installing dozens of humungous windmills in the valley just below. I caught up with these semis hauling individual blades at the Utah border.
The strong crosswind made driving the short wheelbase Jeep a bit more entertaining, and Utah's baked asphalt stood out as rougher as soon as I crossed the border.
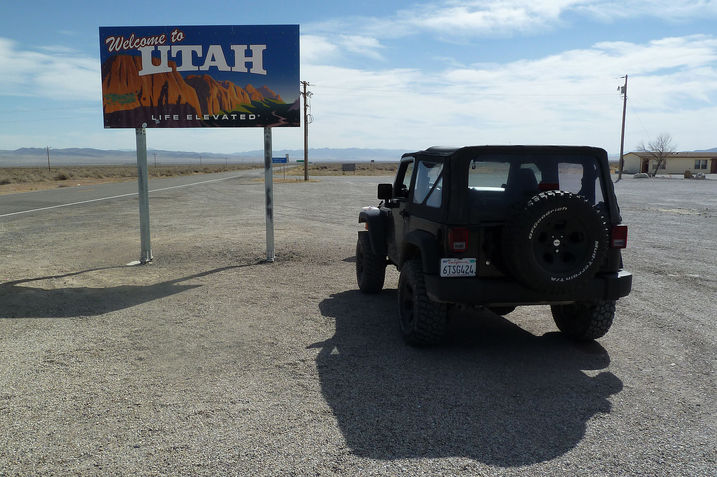
The Nevada-Utah border really does feel like you're crossing into another place. Sure, Nevada's highway 50 crosses through desert too, but the basin and range character of the land and the altitude make it feel less harsh.
Once in this part of Utah the mood changes. It feels bleak, dry and hot, as if the last shreds of moisture had been squeezed out of the atmosphere as the prevailing winds passed over the last high ridge in Nevada.
Highway 50 stays mighty lonely for the next 70 miles, but things perk up briefly as it nears farmlands west of Interstate 15. A few dozen miles after crossing I-15, highway 50 eventually dumps into and becomes Interstate 70, which runs just north of the Moab region.
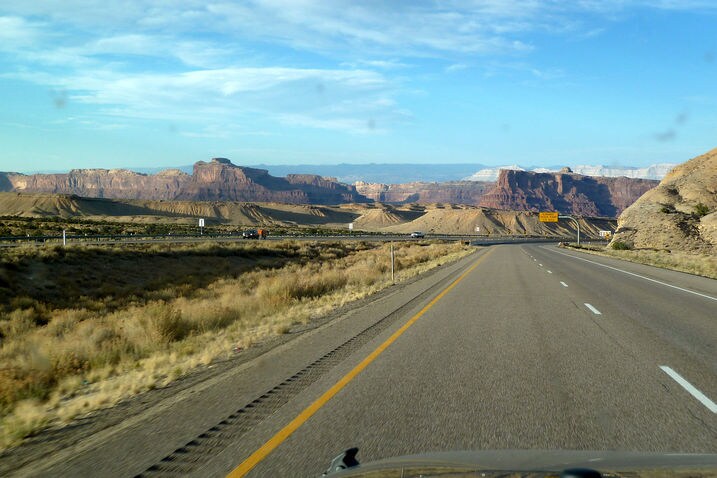
You know you're in eastern Utah when the landscape turns all Wile E. Coyote on you. I love this part of the world.

There's time for one more picture at the Colorado River just outside of Moab before I check in to my hotel for some much-needed rest. Two solid days on the road will do that to you. Sure, they'll be driving tomorrow, but I won't be going anywhere but here.

I decided to take it easy on my first full day in Moab and get the feel for the place. I'm here a day earlier than I had originally planned, so I'm not pre-registered for a spot on any of the official Easter Jeep Safari guided runs. That's OK. There are umpteen trails to choose from in all directions. I chose a path that would eventually take me to the Island in the Sky district of Cayonlands National Park.
My route up Long Canyon would take me from the Colorado River shoreline to the top of the Island in the Sky Mesa. Imagine driving up from the bottom of the Grand Canyon and you get the idea. In the process I'd be traversing the myriad layers of different sorts of sandstaone that create the dramatic terraced landscape of cliffs, towers, fins and the occasional balanced rock.

Meep! Meep! Free ACME birdseed.
The top of the mesa is at the same level as the top of the highest formation in the distance.
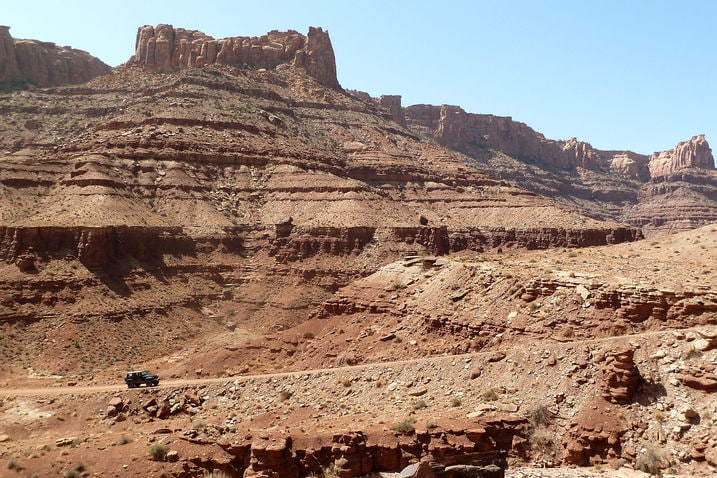
The going is fairly easy in the lower parts of the canyon, where eons of fallen rubble from once-towering cliffs make it easy for roadbuilders.

The trouble with driving alone is there's no one to take any action shots. The upper reaches of Long Canyon, the part where the cliffs get really vertical, contain tight switchbacks and this final slot canyon. This was rough and stepped. It would have been easy to screw up and get stuck, but I was too busy to stop and take pictures.
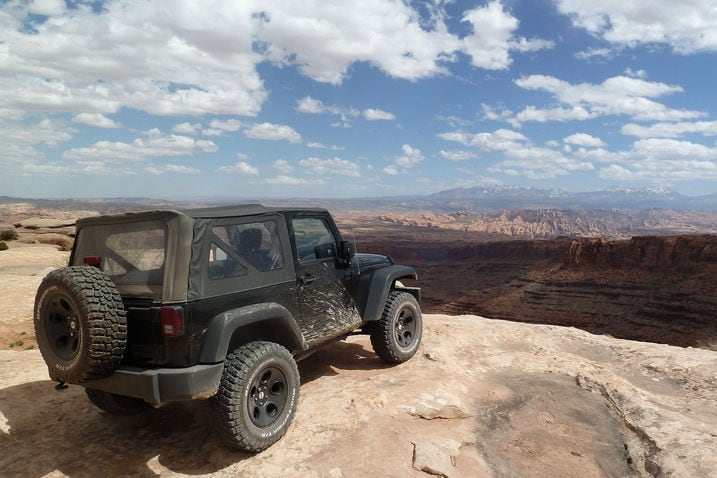
Once on top it's possible to park right at the edge. This could very well have been one of those overhangs, but I wasn't about to lean over and check. You could parachute from up here.
Those are the snow-capped La Sal mountains in the distance. Closer in is the Fin District, so-named for obvious reasons.
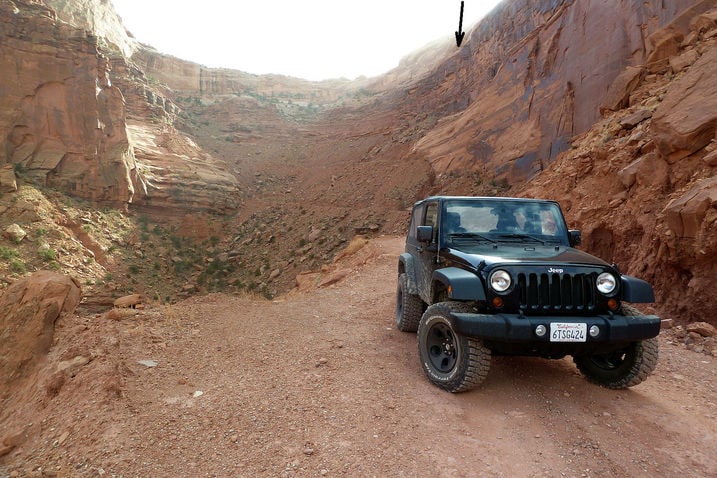
After a few hours in Canyonlands it was time to get back to Moab. I descended back down toward the river via Shafer Canyon Road, a sacry series of five nearly full-lock switchbacks just barely visible in the bowl above. The first starts at the arrow after a lengthy traverse along the edge of the cliff.
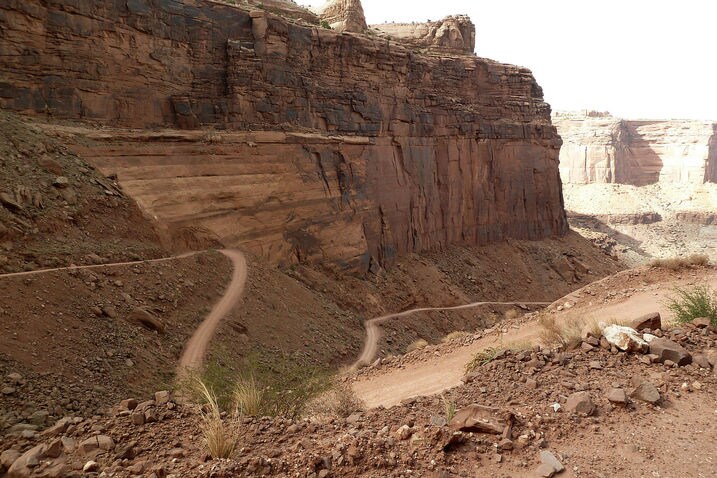
This picture, taken halfway down, doesn't begin to do it justice.
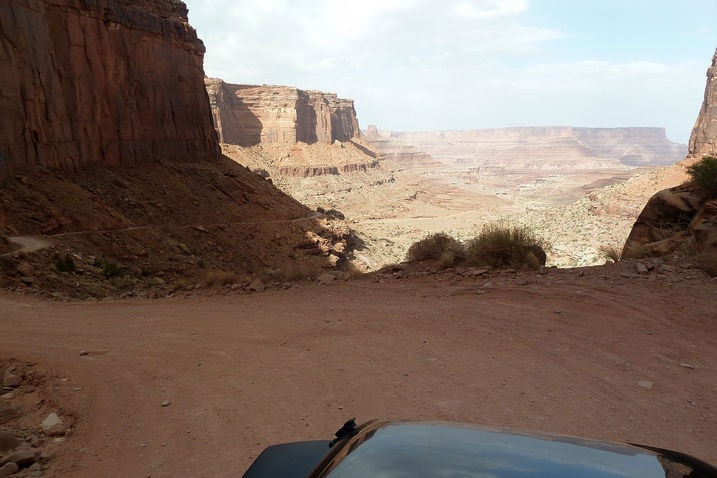
After the last bend the road straightens out and reaches a plateau, but this is merely the White Rim, a formation of sandstone that dates back to the Permian era. The White Rim is only the halfway point in our descent to the Colorado River.
The White Rim Jeep Trail starts about 2 miles ahead of me, and it runs clockwise for 103 miles as it encircles the Island in the Sky mesa. It's like being halfway down the Grand Canyon, with awesome views — and sheer cliffs — overhead and down below.
I tried out 5 miles of the White Rim road before doubling back and taking Shafer Canyon the rest of the way down. It's rocky, it's slow, and the view is breathtaking. They say White Rim is a 3-day trip by Jeep. Someday I'll be back to see if they're right.
Tomorrow I step things up a notch. I'm paying a visit to Jeep and Mopar, and they have some surprises in store.

Our trusty 2012 Jeep Wrangler sat parked at a nearby ranch while I went off to drive other Jeeps. And these were not just any Jeeps, they were Jeep and Mopar concept and show vehicles put together for this event.
A light dusting of snow fell overnight in the higher elevations, but that tapered off to a light drizzle as we left the ranch.

The Jeep Mighty FC Concept harks back to the forward control Jeeps built in the late 50's and early 60's. Thing is, this one was built from a 2012 JK Jeep Wrangler 2-door like ours. Well, it started out that way; the front half of the frame was lengthed to pull the axle forward while leaving the engine behind.
Squint real hard and you'll see the windshield, A-pillars and doors are identical to ours. The roof panels come from the factory hardtop and the back half of the cab comes for the JK8 pickup conversion kit that Mopar already sells. Inside, the dash looks just like our Wrangler, but it sits much closer to the driver; I barely fit. The Mighty FC Concept is an automatic because there's not enough space to work a clutch pedal.
Someone said it's a carinval ride, and they're right. Sitting this far forward you see nothing but sky when cresting a hill. Downhill, especially when the slickrock transistions back to flat, all you see is the cold hard earth directly ahead as your forward-hanging feet, which reside just below those headlights, feel like they're going to Fred Flintstone the into ground.
They could never build this, of course; a frontal impact would not be pretty. But that's not the point of the Mighty FC. It's pure awesome, pure fun, pure OMG.

But the FC isn't merely a design exercise. The FC's so-called portal axles are something you can actually buy from Mopar. But you'd better be quite serious because you'll pay $12,500 for the front one and $11,000 for the rear. Yes, a pair of these axles costs almost as much as our entire Jeep.
Notice that the axle centerline sits far above the wheel cetner. This dramatically increases ground clearance — I didn't measure it, but there's at least 5 inches of offset there. Furthermore, each hub also features a 1.5-to-1 gear reduction. With 4.56-to-1 gears in the front and rear differentials, this additional hub reduction brings the effective final drive ratio to a staggering 6.84-to-1.
The hubs are so big that two smaller brake calipers (gray, at 4:30 o'clock and 7:30 o'clock) are used per wheel instead of the usual one.
Unsprung weight of course is off the charts, but who cares when extreme low-speed rock crawling is your primary reason for existence?

The FC's engine sits well behind the front axle. I believe the new wheelbase is 117 inches. A 2-door JK starts out life at 95.4 inches, so they've added almost 22 inches ahead of the front motor mounts.

This JK8 conversion kit, allows a Wrangler 4-door to be morphed into a pickup, and the result is way cool. The back of the cab, which is the same part we just saw on the Mighty FC Concept, provides plenty of storage behind the front seats.
The kit costs $5,499 (plus installation) and comes with a 3-year 36 kilomile warranty when installed at a Chrysler group dealership. I don't know if I'd install such a kit on a brand new JK, but it also works on used ones dating back to 2007. Mopar has apparently had several hundred takers so far. I've been seeing quite a few running around Moab.
The strong interest Jeep has seen makes it quite possible that a factory-built pickup version of the next generation Jeep might see the light of day when it breaks cover in a couple-few years. If that comes to pass you might see me buying one.
Incidentally, those high clearance fenders and the rock rails are not part of the kit — they're yet another Mopar Jeep part. For my money, I'll keep running the stock fenders unless and until a rock tears one off, but the rock rails are high on my to-do list.

This one is called the Traildozer, and not just because it's painted Dozer Clearcoat, one of Jeep's newer colors and the second of two shades of orange you can get. No, the thing to note here is the 470-horsepower 6.4-liter HEMI V8 stuffed under the hood and the incredible noises it makes.
The Pentastar V6 in our 2012 JK has plenty of power and torque to work with and doesn't beg for an engine swap, which is fortunate because the AEV (American Expedition Vehicles) kit only works for 2007-2011 JKs anyway. Owners of the anemic 2007-2011 V6 are much more in need of such Hemi-fication, and for them AEV sells this kit for $5,299. That figure does not, however, include the actual HEMI V8 engine itself or the transmission necessary to handle all of its power and torque.
And so the floppy 6-speed manual we have in our Jeep has been replaced here by the Getrag 6-speed manual that comes in a Dodge Dakota. To me that's a huge difference. For one, the shift lever does not flop around over bumps and smack me in the thigh. Also, the more close-set gates are well-defined and the lever snicks into place much more accurately. I almost appreciate this tranny upgrade more than the V8 power. Almost.
There were a couple of other modded Jeeps on hand, but I didn't have time to drive them. Clearly, though, Jeep and Mopar have a lot of tricks up their sleeve and they enjoy tweaking the formula to keep the Jeepers at Moab on their toes.
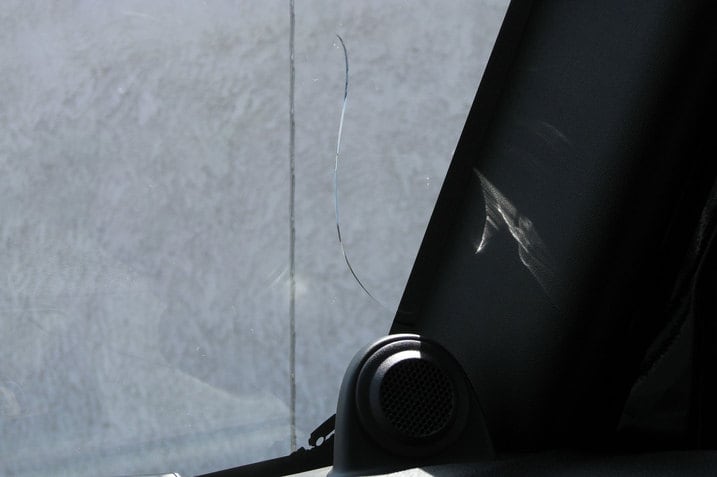
Sometime over the weekend this happened to our 2012 Jeep Wrangler. The windshield started to crack. On Saturday alone the crack grew from just a couple of inches in length to this beauty you see above. We'll price out some new glass and let you know how it goes.

It was inevitable that the engine compartment of our 2012 Jeep Wrangler would end up in a world of filth. After all, these cars were built for it. Dan's trip to Moab dusted the Wrangler with a respectable layer of grime. It is in need of some TLC.
When it comes to engine cleanliness there are many schools of thought. I've met some "close the hood and nobody will see it" types. There are the white gloved, toothbrush detailers. Still others wait until the engine bay is begging for it before diving in. What is your approach to engine cleanliness?

Driving the Jeep Mighty FC concept may have been fun and all, but I was here to drive our 2012 Jeep Wrangler on some Easter Jeep Safari trail runs.
This year some 30 trails were available throughout the 9-day event, and the usual way to tag along on a formal guided run and be part of the event is to register online ahead of time with the Red Rock 4 Wheelers via their website and pay $50 per trail. Industry rides simultaneously occur on trails the RR4W isn't using on a given day, and a well-timed Facebook like might get you a spot in a smaller group.
I was able to tag along on a small 9-vehicle run hosted by Superwinch on the Top of the World trail.
The Top of the World route starts at Dewey Bridge, some 25 miles up the Colorado River form Moab itself. Bill Burke, a Camel Trophy participant in 1991, led the day's activities from his well-worn Range Rover. Yes, the Easter Jeep Safari
tolerates
welcomes non-Jeeps.
As for Dewey Bridge, it is/was a wooden-deck suspension bridge that was built in 1916. At some point in the 80s it was replaced with a more modern bridge and fell into disrepair. In 2000 it was restored, reopened for foot traffic and added to the National Register of Historic Places.
Just four years ago, however, a runaway campfire destroyed it once again. All that remains now are cables and an ironic plaque proudly commemorating its restoration, saying "Dewey Bridge is Utah's longest suspension bridge." Sadly, was seems to be the operative word today.
We had time to contemplate all of this while we dropped the air pressure in our tires for the rocks to come. Folks that run BFG Mud-Terrain KM2s like mine say that 15 psi is a good place to start. I would simply have to ignore the low tire warning on the dash until I aired up again later.

The Top of The World trail was fairly easy most of the way and scenic for its entire length, but there were several 12-inch rock steps and ledges as well as a couple of moderately difficult rock and frame-twist obstacles. Our Wrangler was able to tackle all of them with its open diffs and I didn't have to unbolt its front stabilizer bar to get through any of it.
They tell me that at one point my left front hiked itself 18 inches in the air as I teetered over a particularly large rock, but you'll have to take my word for it. The trouble with driving without a passenger is you can't take pictures of yourself.

Top of The World trail is and out-and-back loop, and the turnaround is a dramatically overhanging ledge that you've seen in commercials. I wasn't first in our congo-line of Jeeps, so I didn't arrive soon enough for the prime parking spot on the precipice which, come to think of it, is no bad thing.

Even the guy who hogged the prime spot didn't get too close.

On the way back down we took a detour on a very easy graded dirt road to visit some old cowboy graves. My picture didn't come out, so I'm substituting a photo of some cowboy caves I saw the day before when I was driving all of those Jeep concepts.

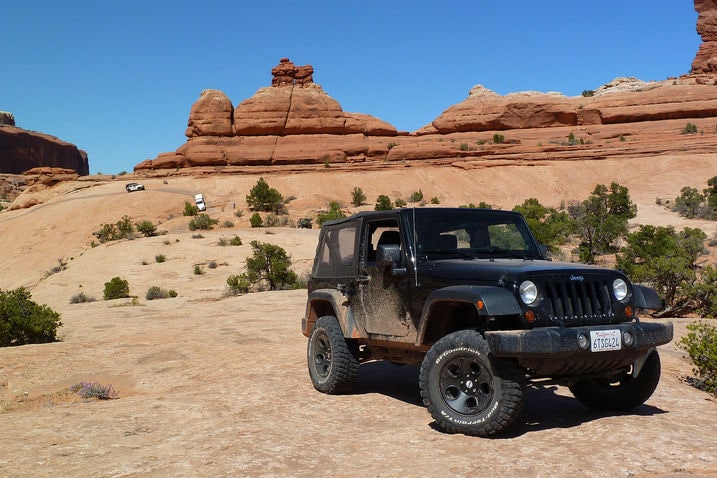
The Superwinch bunch was all set to go out again the day after completing the Top of the World trail, and they had some open spots. This time it would be 7-mile Rim and Wipeout Hill, a route northwest of town with plenty of slickrock. With no particular desire to wipe out, I eagerly raised my hand anyway.
Bill Burke wasn't around to lead on this day, so Nena Barlow of Barlow Jeep Rentals in Sedona, Arizona stepped up. Jeep renting for those who want to try off-roading before they buy or spice up a visit to spots like this is apparently a decent business, as I saw other such companies renting out late-model Rubicons here in Moab.

Today's group was smaller, just 6 vehicles. This is about the perfect number; the group moves along and covers ground without ever losing touch with one another, no obstacle takes much time to get past and there's enough other Jeeps to watch to add to the fun.
All but one of our party were piloting Jeep Wranglers, and all of those were lifted at least two inches. The sole holdout was the Australian-market 70-series right-hand drive diesel Land Cruiser some of you spotted in yesterday's photographs.
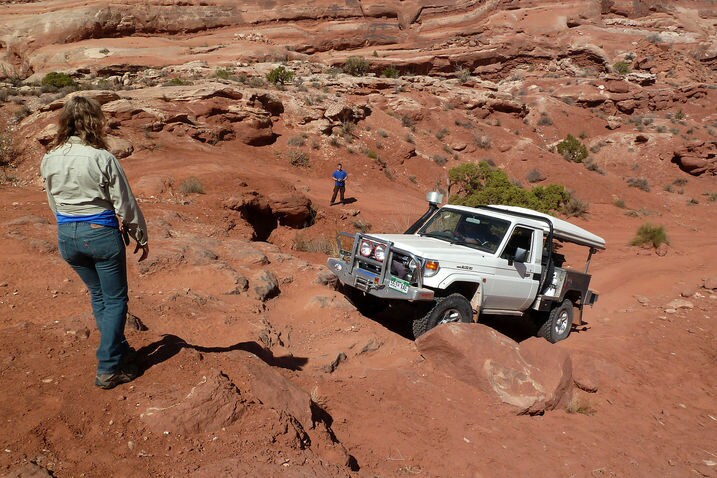
Today's obstacles were no more numerous but a bit more difficult than Top of the World had been. Trail leader Nena stepped out of here Jeep to offer spotting advice because that's what trail leaders do. This un-named climb brought our vehicles up onto the slickrock from the mostly sandy desert floor below.

Wipeout Hill was next after everyone made it onto the slickrock-level of 7-Mile Rim. That Orange Crush Jeep Rubicon, by the way, is typical of the Jeeps for rent in Moab and Sedona. It has a 2-inch lift and of course sports the Rubicon's factory lockers and stabilizer bar disconnect.
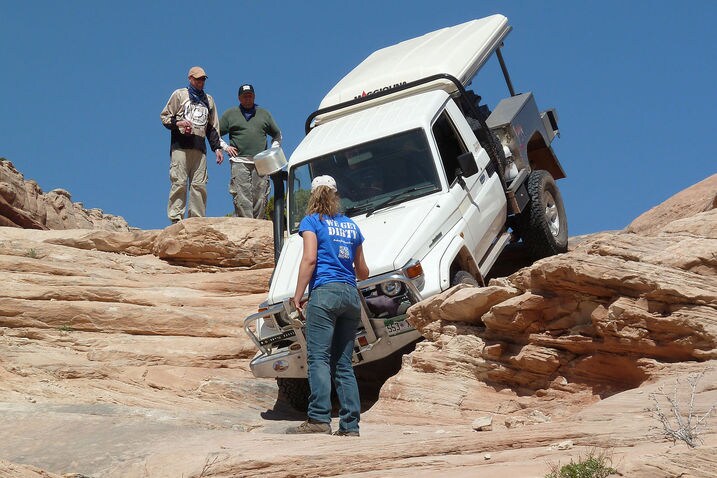
Wipeout Hill is aptly named. It is very steep and overuse of the brakes when your front tires hit the crook at the bottom of the ledge can send you over.

Wipeout consists of two big drops, the second of which is a bit less stepped and a little shorter. The longer 4-door Wranglers have an easier time of it. Any angularity you see here or in the previous photo was more dramatic when our 2-door Wrangler and its stubby 95.4-inch wheelbase came through.
The other thing about Wipeout is this: it's a cul-de-sac if you plan to complete the 7-Mile Rim trail. Don't go down unless you can go back up is what I'm saying. At this point I was starting to wonder if the Superwinch bunch allowed my Jeep and it's ultra-tall 3.21 gears and 2.76 transfer case along to demonstrate their product line.
I'd have to wait until after we all ate lunch to find out.

Speed is the enemy. You don't want to bash your way up the hill and break something. But our Wrangler Sport came with the aforementioned 3.21 gears and a 2.76 low range transfer case. In first gear I'm looking at no more than 8.86-to-1 gear reduction.
A Rubicon comes with a 4.00 transfer case gearing and either 3.73 or 4.10 final drive gears in the diffs. For a given tire size and trnasmission, one of those babies has either 14.92- or 16.4-to-1 gear reduction.
What does this mean? My "walking speed" at idle rpm is almost twice as fast as theirs. Any attempt to creep up the slope bogged the engine into a stall when I tried the gentle approach. The engine won't run under this much load at 700 rpm. With Rubicon gearing the same vehicle speed would come at 1,300 or 1,400 rpm and there would be no drama.

I discovered something surprising when I tried to back down to the mid-level ledge for another go.
Remember the hill hold feature our Jeep has, the one that holds the vehicle stationary when you attempt a manual transmission hill start on an upslope? Turns out it works beautifully at crazy angles like this. It works so well that I had to wait a full three seconds before the Jeep would start to roll back to line up for another try. There is no reason to fear a manual transmission Jeep Wrangler for off roading of this sort.
After two stalls in the same spot I decided to approach the climb with a little more aggression and a little less mechanical sympathy than I had planned.

The third time is, as they say, the charm, and with a slightly higher dose of steady throttle and a bit more speed I burned out across the top of the climb. There you go, Scott: a Jeep can do a 4WD burnout on solid rock.
Still, this wasn't a wide open attack. The 2012 Wrangler's Pentastar V6 makes good torque down low, and even though my gearing wasn't ideal, this was still a low speed climb at no more than 1,800 revs.
I think. Who looks at the tach at a time like this?

After climbing Wipeout I had to wait for the rest of the group to climb out before we continued on. The monument above is either the Monitor or the Merrimac — whichever one has the turret. The other one stands just behind it, and that's the direction we were headed.
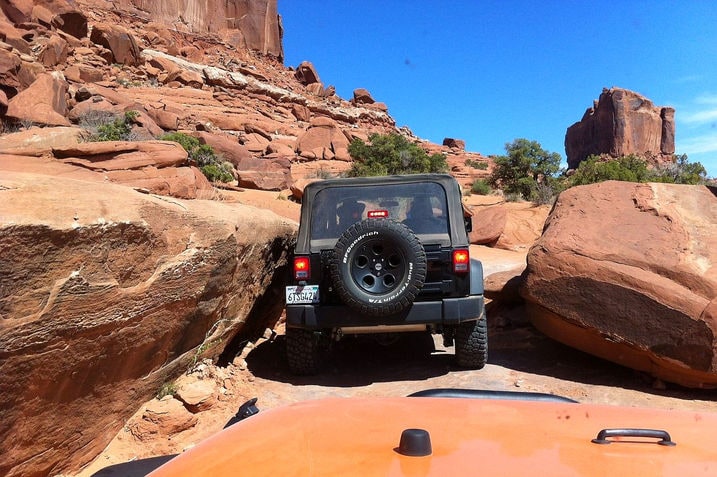
A tight pinch stands between the Monitor and Merrimac. Thanks to Zach at Superwinch for the photo.

There's a broad flat slab of slickrock just beyond the pinch, which was perfect because that's where we met an official RR4W run coming the other way. I counted 29 vehicles, one of them a massive Dodge Ram Power Wagon. According to Nena this bunch wasn't destined to do the Wipeout Hill option.
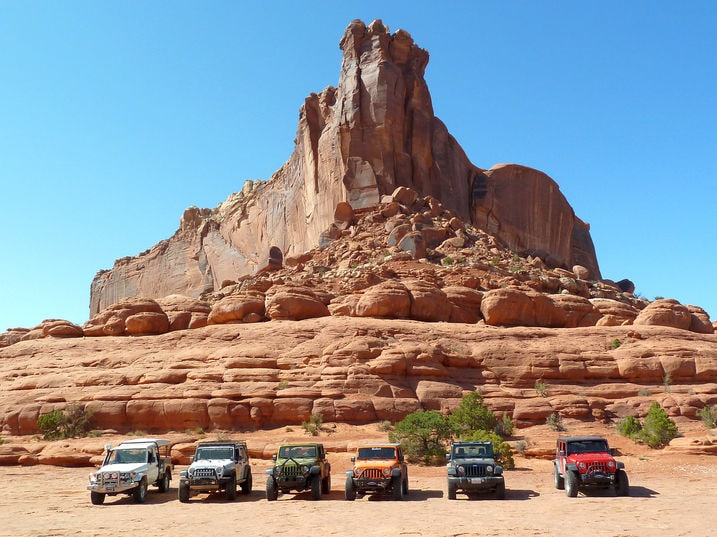
We stopped between the Monitor and Merrimac for one last group photo. From here the trail dropped back off the slickrock into sandier terrain. We all aired back up to highway pressures before saying our goodbyes and heading off in seperate directions.
For me, at least, that direction would be southwest toward SoCal and home.
You know where I'll be next year.

Last week I posed one of my new favorite videos of all time over on Straightline. It was a Chevy Camaro rolling on horrific set of 32" rims. It was a nightmare.
And then one of you lovely readers decided to raise the bar with a Jeep Wrangler Sahara on 30s.
We just spent a bunch of time chucking a set of 33" BFG Mud Terrains onto our Jeep. If we'd known this was possible, we might've reconsidered....
(Note: In no way would we ever have considered this. Though, like the Camaro, I've got to drive one of these someday.)

Our 2012 Jeep Wrangler has been back prowling the streets of LA for a couple of days now, but I've only just been able to sit down and summarize its performance in Moab.
The big question is this: Did we do the right thing by buying a Wrangler Sport instead of a Rubicon? I've gone an back and forth on the question in my own head, but after Moab I'm certain: For us, at least, a Wrangler Sport was the right move.
The first issue is price, of course. The MSRP of a 2012 Jeep Wrangler Sport with a manual transmission like ours currently stands at $22,045. The 2-door Rubicon version goes for $29,995, almost $8,000 more. Add about $3,500 to each to get 4-door prices.
Lower payments never suck, and a lot can be done with that extra $8,000. A Wrangler Sport owner can spend some of it or none of it, at whatever pace suits their paycheck and priorities.
Of course their are interior cabin differences between the two, and the hard top, but I'm focusing on off-road equipment, the Jeepy stuff I'm assuming is particularly important to anyone considering a Rubicon.
Here's my take on each of the major differences.
TIRES: The Rubicon comes with bigger tires than a base Sport, but from what I saw in Moab few folks who take their Rubicons off road consider the OE tires to be big enough. 33-inch tires seem to be the unoffical minimum size and many Jeeps wore larger shoes than that. The ledges and steps of the Moab terrain favor bigger-than-stock rubber and the approach angle and clearance benefits they provide, but I think that's true in a lot of rocky places.
Also, I think Jeeps attract the sorts of buyers that like to personalize their wheels and tires whether they go off-road or not.
Advantage Sport — If you're going to change the tires (and probably wheels) anyway, you might as well start off with throwaway steel wheels and skinny tires and save money.
SUSPENSION: I don't think I saw any stock-height Rubicons in Moab — or Tierra Del Sol for that matter. Two- or Three-inch lift kits were everywhere, including the rental Jeeps. And Mopar tells me that lift kits are the number one hardware accessory they sell in terms of volume. It was certainly high on my list, after tires and wheels.
Advantage Sport — See tires, above. If you're going to lift it anyway, why pay more going in for something you're going to ultimately strip off and set aside?
At this point I'm not counting our tires, wheels or suspension lift against the $8,000 price differential because I'd have made those mods if I had started with a Rubicon or not. But I can't say that about the rest of my list.
FRONT AXLE: Rubicons come with a beefier Dana 44 front axle, while the Sport and Sahara come with a Dana 30. All of them have a Dana 44 in back. The front axle difference can't be denied, but this is not a change that must absolutely be made before you head out. Oldtimers tell me that a Dana 30 will hold up just fine in skilled hands and a measured appraoch to difficult obstacles in vehicles that produce stock horsepower. I've been advised to not worry about it unless and until I get absolutely serious about going to tough spots often.
Advantage Rubicon — But Dana 44 upgrades are readily available for those of us with a Sport. If it turns out I need it, this is where a couple of that $8,000 could be directed. As for serious rock crawlers, they may want reinforced axles that are even MORE robust than a Dana 44, in which case the Rubicon axle advantage evaporates and this switches to a Sport advantage.
AXLE GEARING: Our Sport 6-speed comes with pitiful 3.21 gearing, and that was part of the reason why I couldn't creep as slowly as I wanted. These fuel economy specials are also a bit too tall when combined with the 33-inch tires we're now running; our 6-speed essentially drives like a 5-speed. Manual-equipped Rubicons come with 4.10 axle gears.
Thing is, we could have paid just $50 for 3.73 gears on our Sport if we had checked that box on the option sheet. In hindsight our failure to do that was a major mistake because it's going to cost me way more than $50 to get to that gearing now.
Advantage Rubicon — A mere $50 for 3.73 gears in a Sport dilutes the case for the Rubicon on a pure axle gearing basis, but the Rubicon manual does come with 4.10 gears. Whichever ratio I choose, I'm going to have to spend some of my $8k savings here. If I had paid the $50 bucks up front for the 3.73s on our Sport I'd stand pat and be satisfied.
TRANSFER CASE GEARING: A Rubicon comes with a 4-to-1 reduction in the transfer case. The Sport and Sahara come with a 2.72-to-1 reduction. This is huge. Of all the things I've listed so far this is the biggest deal. Low range is engaged whenever the going gets rough, and the difference between 4-to-1 and 2.72-to-1 is far more significant, percentage-wise, than the difference between my 3.21-to1 axle ratio and the 3.73-to-1 axle ratio I missed out on.
Advantage Rubicon: I simply must change my transfer case. With that change I might actually be able to live with my 3.21 axle gears. The transfer case dominates the crawl ratio math, after all.
First gear is 4.46 in both versions. But the Sport's 2.72-to-1 transfer case and 3.21 axle gears peg the overall crawl ratio at 38.9-to-1. Yucky. The Rubicon's 4-to-1 T-case and 4.10 axle gears return a 73.1-to-1 crawl ratio.
If I change the transfer case to 4-to-1 and do nothing else my first gear crawl ratio improves 47% to 57.3-to-1. Conversely, if I leave the T-case alone and go for 3.73 gears instead I only get a 16% improvement to 45.2-to-1. 4.10 gears bump that up to 49.7-to-1 by themselves.
Clearly the T-case change gives me the bigger boost, so that's what I need to look at first. And I only have to change one transfer case as opposed to two axles.
If I still need or want more I can add the 3.73 gears after I change the transfer case and bump the crawl ratio up a bit more to 66.5-to-1. I'll also recover some highway driveability with this change.
LOCKING DIFFERENTIALS: Clearly, front and rear factory lockers are a Rubicon advantage. On the other hand, lockers can be overused and they aren't something that's automatically required for a given trail. Automatically locking up at the merest bump in the road can take the challenge out of things.
I'm the guy who drives as far as he can in 2WD before selecting 4WD, then goes as far as possible before engaging low range. Same for lockers (when I have them) and stabilizer bar disconnects. Trail running of this sort is supposed to be a challenge, a puzzle. Lockers should be looked at as a last resort feature to help out in a particularly tight spot.
But if you're going to have them it is nice to have factory ones integrated into the vehicle.
Advantage Rubicon: I can retrofit lockers in my differentials using some of my $8,000. I'm thinking a rear locker is all I'll need at first. I can add one to the front later on if it becomes necessary.
FRONT STABILIZER BAR DISCONNECT: Another built in Rubicon feature that is convenient. Still, I can disconnect my end link with a pair of 18 mm wrenches in less than two minutes and achieve the same result. It's easy. And it turns out that at trail's end we're all waiting around for each other to air our tires back up to highway pressure with tiny compressors anyway. There's plenty of time for me to work my wrenches without holding anyone back.
Advantage Rubicon (I suppose) — But wrenches don't bother me and several low-price manual disconnects that employ a quick-release pin are out there. The electro-mechanical device on the Rubicon doesn't represent a lot of value for me. And though I don't share their views, I actually met a couple of Jeep conspiracy theorists that doubt the factory disconnect fully severs the stabilizer bar after all. Unable to see the workings inside the housing (see photo above), they installed manual pull-pin disconnects on their Rubicons just to make sure!
ROCK RAILS: Rubicons come with small, nicely integrated rock rails at the lower edge of the body, but many Jeepers prefer something more substantial. Aftermarket bolt-on rock rails are common and they only cost a couple of hundred. I'll have no problem eclipsing the OE Rubicon rock rails for two or three hundred bucks.
Advantage Sport — The Rubicon OE rails are OK as far as they go, but beefier ones can be had in the aftermarket for cheap.

All of the above is based on my personal desire to tinker with my machine. I enjoy it. I like the idea of making something that suits me, and I don't like paying for (and making monthly payments on) parts I'm likely to discard early on such as facotory tires, wheels and suspension bits.
I do like going off-road, and the terrain in my neck of the woods tends to be rocky, so the clearance, tires and low range gearing are important to me. On the other hand, my need for lockers is not absolute. I can see myself getting by without them. Well, two of them, anyway. I'm pretty confident I can get the running gear hardware I'm targeting for far less than $8,000.
If all of this sounds like too much hassle, time or calories, by all means the Rubicon is a very capable machine that includes a lot of well executed and well considered off-road hardware. It's a great vehicle on its own and a great modding starting point if you don't mind spending the extra upfront money. I saw plenty of Rubicons running around quite capably with nothing more than bigger tires and a lift kit.
There are no wrong answers here. Jeep's Wrangler lineup truly does have something for everybody. I'm still happy we went with a Wrangler Sport.
I just wish we had spent the extra $50 for 3.73 axles in our Wrangler Sport, is all. How did we miss that?
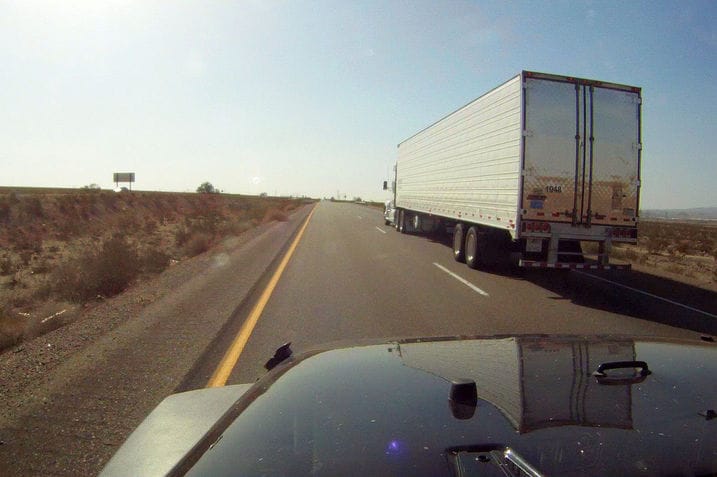
So there I was, driving home across the desert in our 2012 Jeep Wrangler. I was going 70 to 75 mph into a headwind that was blowing at least 25 mph. Probably more.
From the Jeep's perspective, the air flowing over it was traveling over 100 mph. As you might imagine, the wind noise was deafening.
The video on the next page shows how the upper flat surface of the hood was oil-canning a bit just behind the windshield tie-down. And check out how much the hood was moving as the rubbery straps that hold it closed were stretching under the strain. The centrally-mounted metal safety catch was never going to let the hood fly open had anything failed, but still.
This Jeep is new. I wonder how the hood latch bands hold up after they've dried out after 5 or 6 years in the sun and smog of SoCal.
Is it time for the Wrangler to go to a normal hood latch system? And what about the windshield tie down u-bolt and the rubber bumpers that go with it? I saw no JKs with folded windshields in Moab — the windshield hinge itself is an accessory that's not included with the vehicle. Can these legacy hood protruberances be optional, too, as part of some sort of Heritage Package? If they were, would you buy that option?
Would your answers differ for the 4-door? Or does all of this talk represent Jeep blasphemy?

This crack in the windshield of our 2012 Jeep Wrangler is not getting any smaller. We spent a little time shopping replacement windshields at local outlets. You might be surprised by what we found:
Remember that our car has the OEM glass, which means there is a Wrangler silhouette in the lower right corner and the Jeep name/grille logo above the rearview mirror.
Local Independent Supplier 1:
$180 aftermarket, no logos
$280 OE, Jeep name logo only
$350 OE, both logos
Indy 2:
$259 aftermarket, no logos
$409 plus tax OE, Jeep name logo only
Indy 3:
$440 OE both logos
Local Jeep Dealership:
$459 OE both logos
The identical matches are in bold. There is the expected price discrepancy between the dealer and everyone else. But one other thing jumps out right away. These are (relatively) inexpensive windshields. Historically, we have not seen replacements for other long-term cars for any less than $1,000. Then again, there isn't much to this windshield.
Now we get to the important questions. Are the in-glass logos worth the extra cash? Would you pay the premium, or choose the cheaper aftermarket options?

Put aside all of the Jeep's off-road abilities for a second and consider its credentials as a city car, or truck, or whatever you want to call it.
After a weekend of running around on roads that were most often paved, I was continually reminded of how small and nimble the Jeep is when it comes to maneuvering into tight spaces. Credit goes to its 95-inch wheelbase and a turning circle radius of just 34.9 feet. For comparison, a Ford Fiesta's turning circle radius is 34.4 feet.
Now, no one from the Sierra Club is likely to pat you on the back for driving a Jeep, but anyone who thinks a proper city car needs to be a compact hatchback hasn't driven a Wrangler lately.

H4 headlight conversion for Jeep Wrangler: $120.
Thirty-three-inch BFGoodrich tires and Mopar wheels for Jeep Wrangler: $2,200.
Mopar Stage 3 lift kit for Jeep Wrangler: $2,400.
Locking your Wrangler's doors to a drainage culvert at the trailhead: Priceless.

No, those aren't our doors. I made this discovery in the Cleveland National Forest this weekend. They were locked to this drainage culvert right where the road turns from pavement to dirt.
Gotta love it.

How many times have you seen a 140mph speedometer in a car that couldn't hit 110mph if it was getting dragged by a 747? It's most often a case of simple parts sharing, but it's always amusing to hear drivers who think it's an indication of how fast the car will go.
In the case of our Jeep, it's a little different. It probably could top 100mph, but who cares? Unless you're in Baja, this vehicle does not need to be driven over 100mph. Leave all those extra numbers for the Viper.
After Dan racked up some tough miles on our 2012 Jeep Wrangler, we decided it was deserving of a premature oil change and tire rotation. We swung by our local spot, Buerge Jeep.
Although it is our closest Jeep dealer, we don't use Buerge often. Less than desirable service on prior Jeeps kept us away. But its been awhile so we gave them another shot. We requested the tires be rotated left to right, figuring they ought to turn the other direction after miles of highway time.
"We usually rotate the tires on our Wranglers from front to back," explained our advisor. We asked again, "Please rotate ours left to right." Our guy said, "Ok, no problem." Satisfied, we left. And shortly thereafter the car was ready for pick up. It was quick, and a pleasant surprise from Buerge. We changed our minds about them.
Then we checked the tires. They were rotated front to back. We know, because we marked them before dropping it off. It wasn't the end of the world, but it was disappointing. Sorry guys, I don't think we'll be back.
Total Cost: $52.49
Total Days out of Service: None

Shooting a photo of the Wrangler's odometer isn't as easy as it used to be.
Took me two miles to click-off a photo this clear.
Here's to many more miles of off-roading, bumpy Wrangler.

Look what the UPS-man dropped off for our 2012 Jeep Wrangler Sport: It's the Hawse fairlead from a Superwinch Talon 9.5i SR, a 9,500-lb winch that comes highly recommended by a lot of off-road friends and professionals that I trust. I met Zach Bohn and some of the other Superwinch crew at Moab, saw their stuff in action during an impromptu rescue of a dozen ATVs stuck at the bottom of Wipeout Hill and came away convinced.
The rest of the winch is still in the box down at our super-secret test lab, awaiting a bumper on which to mount it. Not all brands of bumper fit all brands of winch, so I need to make inquiries. On that front I'm getting close.
We're going with synthetic rope (that's what the "SR" stands for) instead of a steel cable. Many of my off-roading friends swear by it, and I know one person who has been using the same rope — and he uses his winch a lot — for over a dozen years.
More pictures to come later as we get further into the installation process.

It doesn't look too foreign, but to me, driving our around trail-happy Wrangler puts me completely out of my element. And that doesn't have anything to do with the way it drives.
I'm a car guy. More specifically, I'm a sports car guy. That means I've never done any (intentional) off-roading. So I spent most of my time driving the Jeep hoping no one would see me as an interloper. Does that sound dumb? Maybe, but to me, when you drive something so specialized, you're bound to attract the attention of other people dedicated to vehicles like yours. And having to act like I know what I'm talking about when I really don't? Yeah, I don't like that.
Now put me in the Miata, and it's a different story. But the Jeep? I might as well be discussing 17th century French literature. I think I need to take this thing to the desert.
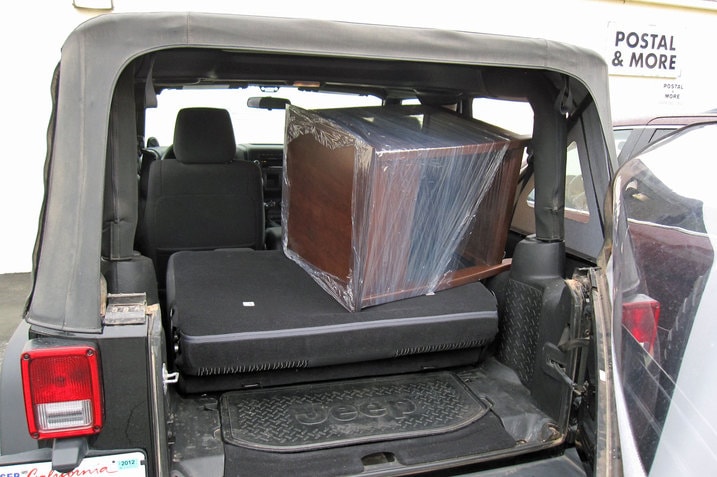
As you can see, I did not plan sufficiently for the moving of this nightstand. In my mind, the Jeep would have plenty of room, and it does. Problem is, that rear seat has to be completely removed to fully utilize the available space and I had no place to stash it.
Instead, I just plopped the nightstand on the folded seatback and drove a little more carefully. No big deal really, just a reminder that this is still a Jeep and the seats are old school.
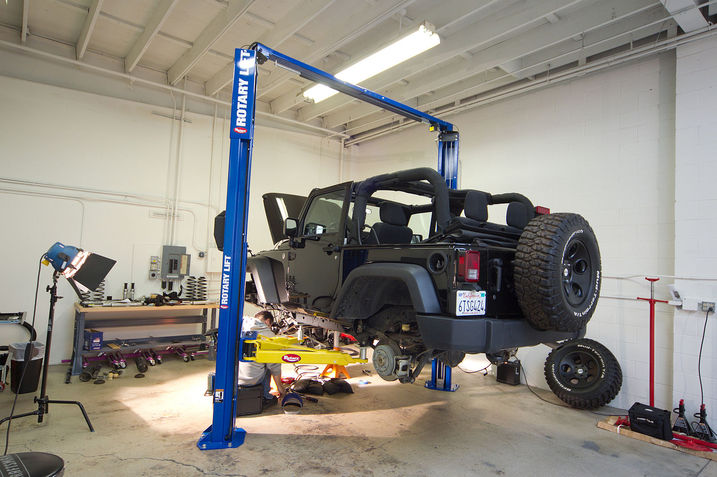
It's true that you sit pretty high in our Jeep Wrangler these days.
But it's not true that when you look down the people look like ants on the ground and oxygen masks drop from the ceiling every time you roll over a speed bump in a parking lot. Actually, it's more like being on top of a Ferris wheel, and my breathing is just fine aside from a certain shortness of breath over said speed bumps.
But it is true that you look down on the window at the drive-thru, and I'm reminded of the Hummer H2 in the technique required to get a Coke through the open window. Forget about the keypad at the bank drive-thru, though.
So there are some consequences to the Dan Edmunds makeover. The Wrangler is kind of like a street-legal track car now.
It's not so bad to drive, really. The engine and gearbox are brilliant, and the squirming from the rock-crawler tires is fairly manageable really. The clutch engagement is a little high, though, plus the chassis winds up like a 1930s baby buggy when you leave the lights, so it takes some care to keep the whole proposition from lurching onto the sidewalk if you make a clumsy getaway.
But aside from the fact that getting into the driver seat reminds me of climbing the monkey bars when I was five, the Wrangler is pretty neat.

Back in the late 1990s, I used to do quite a bit of rock climbing. In the intervening years, other hobbies and activities have pushed climbing off to the side. Just recently, however, my girlfriend found a Groupon for a month's membership at a local indoor rock gym. It just so happens, that it was also the same gym I used to frequent oh so long ago. What better vehicle to show up in than our long-term Jeep? But I didn't just sign out the Wrangler to appear to be a rugged outdoorsman.
I hadn't driven the Jeep since Dan completed all of the modifications. I must admit, it's better than it was in stock form. My biggest complaint in the past was the amount of driveline lash and lurchy nature when changing speeds. All of that is gone now. The stiffer suspension now keeps the Jeep flatter under acceleration and braking. Dare I say, I like the Jeep now.
Once our month-long membership at Rockreation is up, we're planning on heading up to Joshua Tree to do some real climbing (thanks to yet another Groupon). You better believe I'm taking the Jeep out for that.

Do you know what today is? Yes, that's right, it's Star Wars Day! I'll be filling this blog wih pointless, but hopefully entertaining posts throughout the afternoon.
First up: The Jeep Wrangler AT-ST.
Yes, it's true, there is simply some terrain that even our rugged Wrangler can't conquer. And when Mr. Takahashi has a hunger for some slow-roasted Ewok, you can bet some new Jeep mods are in store.
So we headed over to Toshi Station for some radically different suspension bits. While I was there, I also grabbed a few power converters, of course. After a few days on our Rotary lift and some special order parts that were smuggled, I mean, lawfully purchased, the Jeep was ready for action.
It worked so well, I think I'll keep it this way until Gungan season starts up. Sushi, anyone?
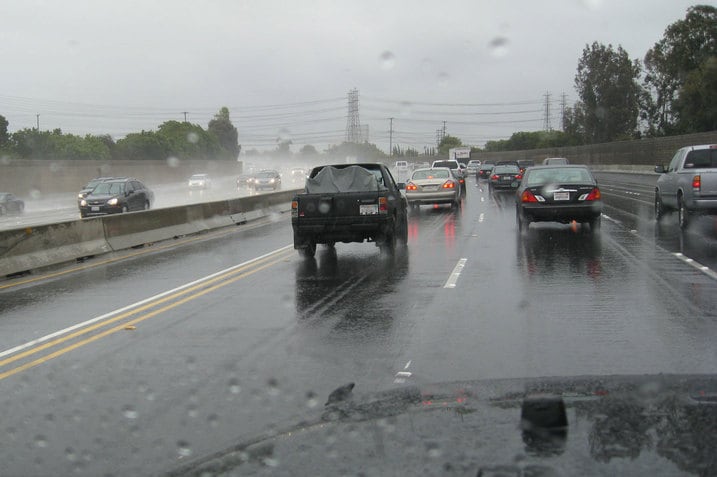
I was driving our 2012 Jeep Wrangler a few weeks ago during a Southern California storm of the ages. In these parts, a storm of the ages makes headline news for days. Yet the actual measure of precipitation from these outbursts ranks closer to a casual sneeze than a deluge.
We just don't get a lot of rain around here. And maybe that is why, driving down the 405 freeway, I see this guy. For the sake of argument we're going to call it an Isuzu Amigo. Did he not hear the reports? Did he ignore them like the rest of us? Or did he not have a choice in the matter? Regardless, he's all wet now.
For almost 30 miles I followed this Amigo in traffic. I passed him. He passed me. Every time I saw the driver and his front seat passenger they were laughing. I had to laugh too. It was a good break from the stress that is rush-hour in the rain.
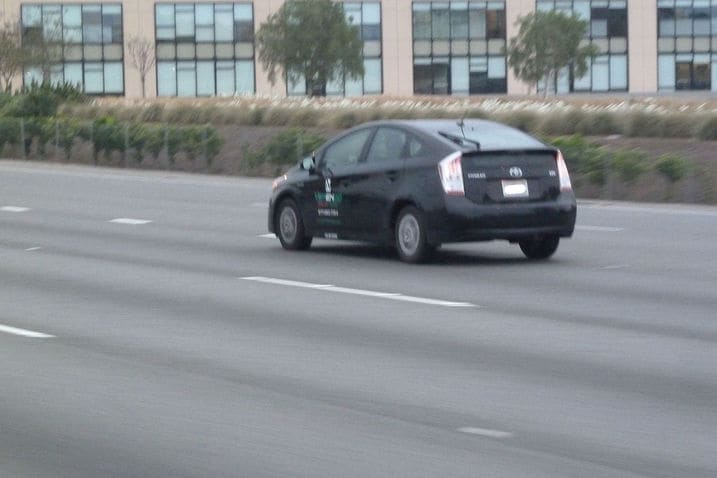
Last Saturday at 6:00 am: I'm sitting in a left turn lane waiting to enter Interstate 5 on my way south to San Diego. I'm driving our 2012 Jeep Wrangler down to Mt. Laguna for a day of hiking.
Taking another sip of much-needed coffee, I hear the distinctive too-cheerful-for-this-hour (or any hour) squeak that can only be a small car's horn. I turn to see a guy to my right in a black Prius with Solar USA stickers (or equivalent) on the door, and he's motioning me to roll my window down. Our Jeep actually has crank windows, so his gesture makes perfect sense.
"Really?" I think to myself "You're going to try and sell me solar panels NOW?"
Thankfully, I am mistaken.
"Are those AEV wheels?" he asks.
"Did he really just say that?" I say to myself. Then, out loud, "Yes, they are. Mopar sells them now, too."
"Nice Fox shocks," he adds, pointing at the be-stickered remote reservoir that sits at his eye level in the Jeep's right front wheel well.
Before I can ask him what kind of Jeep he has the light turns green and we both reluctantly start moving because of cars behind. He roars, after a fashion, down the onramp in the lane next to me, but our Jeep's lousy gearing and oversized BFG tires make it impossible to keep up.
Yes, our Jeep was beaten by a Prius, but I was not bested by a Prius driver, apparently.

Here's the winch that will soon grace the front of our 2012 Jeep Wrangler. It's a Superwinch with 9,500-lb capacity, and it goes by the code name Talon 9.5iSR. If you hadn't guessed already the "SR" stands for synthetic rope. A traditional steel cable version is also available.
Some one asked me how much weight one of these adds to the front bumper. Good question.
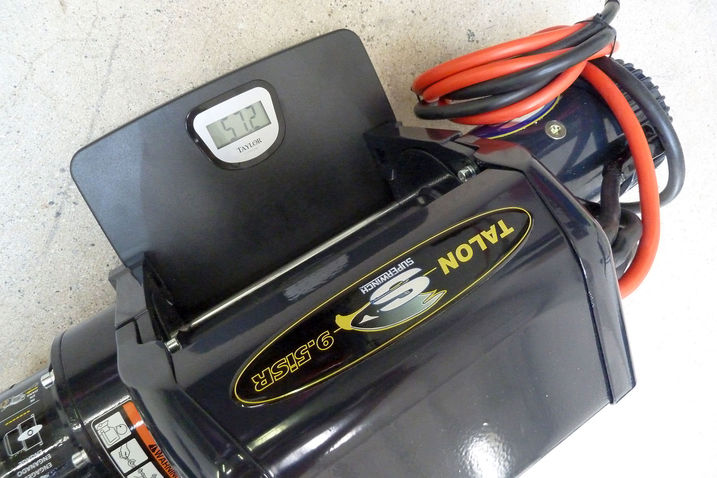
My trusty bathroom scale tells the tale: 57.2 pounds. The 80-foot length of 3/8-inch synthetic rope weighs just 3.2 pounds and brings the total up to 60.4 pounds. Interestingly, that's about 25 pounds less than the steel cable model, the 9.5i.
Add in four mounting bolts, the steel hook at the end of the rope and the fairlead we saw before and we're talking in the neighborhood of 65 pounds of added bumper weight. Superwinch specs claim a 67-pound installed weight for the synthetic rope model, but I'm thinking that includes the remote control unit that lives in the glove box until needed.
The synthetic rope, incidentally, has an average strength of 19,600 pounds and a minimum strength of 17,600 pounds — we're more than covered. Beyond that, the Talon 9.5iSR's electric motor puts out 5.2 horsepower, its solenoid is submersible and there's a gear reduction of 148-to-1 between the motor and the spool.
They get $1,602 for one of these, and for that you get lifetime mechanical and three-year electrcial warranty coverage. The steel cable version is cheaper by just under $500.
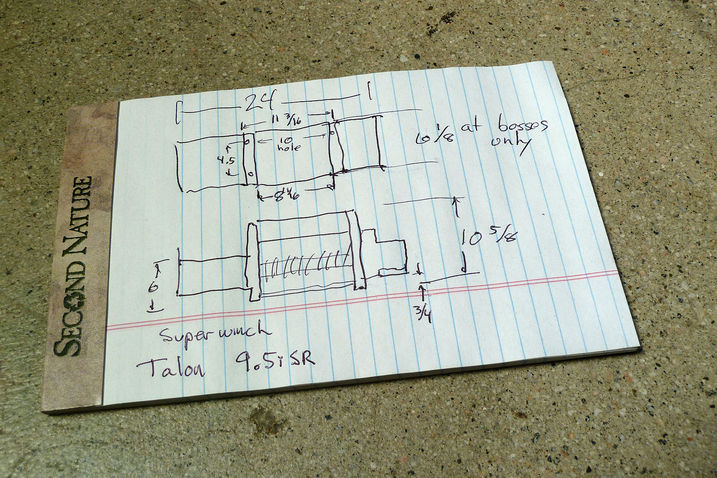
Figuring out which winch fits which bumper is not something you can easily look up on a website. Turns out the bumper makers don't necessarily keep abreast of every winch out there, which is odd considering their symbiotic relationship. The 10-by-4.5-inch mounting hole spacing is standard, but housings and such vary.
So I made a few measurements. Looking at this again I see that I missed an important one.
At this point I've narrowed my bumper choices down to two or three that I like and now I'm simply trying to find the right price, availability (at least one is back-ordered) and confirm winch clearance dimensions.

We are really digging the BFGs on our 2012 Jeep Wrangler. The other week, while securing the lugnuts, we noticed something. There is a potential downside to these big tires. It certainly isn't a deal-breaker, but it does require some extra care. Can you figure it out?
Take the jump for a better angle...
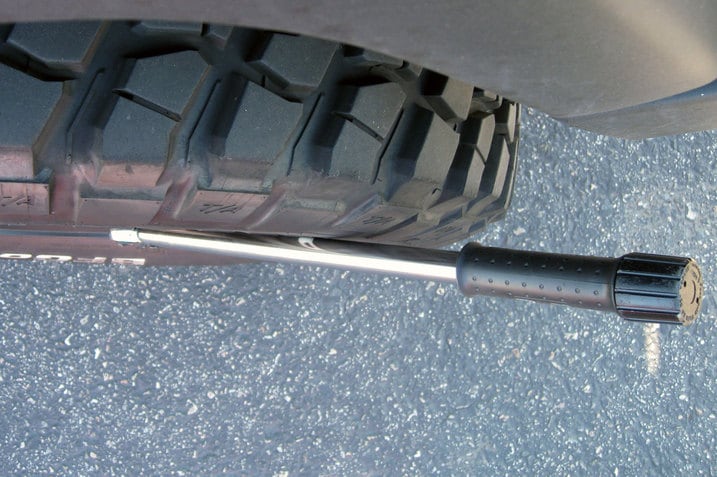
Notice the angle of the torque wrench. It isn't straight. Standard deep sockets don't quite work with this wrench. A breaker bar with a pivoting head fits better. Luckliy for us we already had the right tools. But an upgrade to larger tires could require an upgrade to your toolbox. Be prepared.

Our 2012 Jeep Wrangler started out as a base model 2-door Sport with no options save air conditioning. As such, it has the entry-grade AM/FM stereo with a single-disc CD player and a basic AUX jack. There's no Bluetooth, no USB.
You could argue that the optional $460 Connectivity Group would have been a good deal, as it brings Bluetooth (phone and audio), a USB audio input and a leather-wrapped steering wheel with U-Connect and stereo control buttons built right in.
But let's say you find a new (or used) JK Jeep Wrangler Sport to buy that has everything you want except U-Connect Bluetooth and USB. What do you do? Pass it up and buy something loaded with more options than you want just to get Bluetooth?
You could go aftermarket, of course, but Mopar sells an add-on U-Connect Bluetooth module that plugs right in to the back of the stock factory radio. It provides a means to use voice commands to make calls. When calls come in the sound comes out through the factory speakers. In either case your Bluetooth streaming or USB-docked music gets auto-paused. In short, you get the factory experience from a factory-developed accessory.
The kit costs $368 or thereabouts, with another $37 or so needed for the USB cord. That's slightly cheaper than the Connectivity Group option, but when the dust settles you don't end up with the steering wheel buttons and there's still the matter of installation, which will cost you a little extra if you have the dealer handle it.
But at least you can retrofit a Jeep (or other recent vintage Chrysler product) with U-Connect after the fact. As soon as I carve out time in my schedule I'll install this kit and show you what's involved if you care to do it yourself.

Our shipping and receiving room was overwhelmed by a bulky package that arrived for our 2012 Jeep Wrangler, so Mike and I headed upstairs to claim it. The sheer size of the thing and the Expedition One logo on the box tells me it contains our Jeep's new front bumper.
Expedition One is an Ogden, Utah-based company that makes nice-looking and well constructed bumpers and selected suspension components for Jeeps, Toyotas and Big-3 pickups. I like the look of the Trail Series JK bumper, which you can see for yourself by clicking on the third carousel image here.
The one in the box is the same as the one pictured on the blue Rubicon, except it doesn't have the hoop above the lights. And I know for a fact that our new Superwinch Talon will fit because the winch in the picture is the same one I have waiting on a shelf.
Things are going to get busy in the next couple weeks. DIY installations of U-Connect, this Expedition One bumper and the Superwinch have all landed on my plate at nearly the same time.
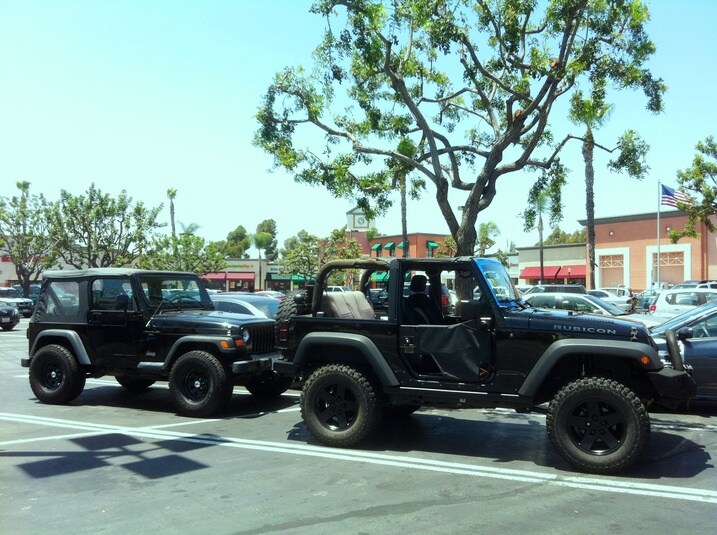
What are the chances? Probably as good as they were for this Kumbaya I suppose.
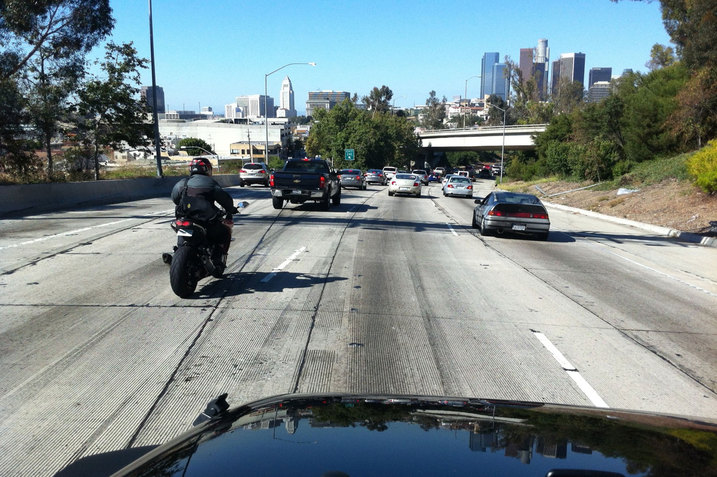
Ah, the morning commute. Twenty miles through the heart of Los Angeles can be maddening, but this time I'm in our Wrangler and my mind starts to drift...
Noisy tires, lane wander, creaks and squeaks don't bother me at all. Crank windows? Who cares. I'm taken to my happy place.

I'm not thinking about getting from point A to B. I want point C. A place where no phones work and everything slows. Dirt. Rocks. Creosote Bushes. A BLM Zen Garden. That's where the Jeep shines and that's where I want to be.
Hopefully I can get this thing dirty soon - at least for my sanity.
With the lift, our Jeep is a little more bouncy. It's not that I'm looking for bumps or cracks in the pavement, it just lets you know every detail of the street.
One side effect, something I noticed when our Wrangler wasn't lifted, has been enhanced. The shifter swings around like crazy, like a batter waiting for a pitch. Once, when I was reaching for it without looking, it smacked my hand pretty forcefully. Having a shifter that fights back isn't so great.
I guess the advice I'd give for my fellow Wrangler drivers would be to be more wary and not to ride so slack legged when in cruise, lest you want a bruised knee cap.

In my life before Edmunds, I lived in San Francisco, a.k.a. Burnt Clutch City. Once you got the technique down to do a start on a steep hill with a manual, it wasn't that big of a deal. But it was still stressful. Especially when you couldn't see beyond the crest of the hill where the stop is or if someone is sitting right on your rear bumper.
I currently live in a part of Los Angeles that has a lot of rolling hills. Nothing like Seattle of SF, but enough of a pucker factor that the Hill Start feature of our Wrangler is greatly appreciated. Granted I know this is mean for starting out on some steep rocky trail, but this has become my new fav feature of the Jeep. This is especially true since I noticed the parking brake, a key part of my manual hill start style, is fairly weak unless at full lock.
According to Jeep, "Hill start assist helps when starting from a stop on a hill by maintaining the level of brake pressure applied for a short period after the driver's foot is removed from the brake pedal." However the engineering voodoo works is cool with me. Just as long I don't roll too far back and smack the bumper of that tailgating jerk in the SLK.

Our 2012 Jeep Wrangler has a new front bumper, and it's a beaut. It's made by Expedition One, an off-road bumper manufacturer doing business out of Ogden, Utah.
This is their Trail Series front bumper, and I decided to go with the hoopless look. A little more of the grille shows, a little less airflow gets blocked (theoretically, anyway,) and I generally like the way it looks. Of course they'll gladly make you one the other way, too, if that's your thing.
The installation preocess was very simple, and thanks to good engineering on Expedition One's part it fits pretty much perfectly with no horsing around to get the ten mounting bolts lined up. It went on centered and level with no adjustment necessary on my part.
And it's a good-looking piece behind the scenes, too. There are finger pockets built in where you can't see them that act as hand holds during installation. There are wrench cutouts that allow access to the back side of certain nuts. The main attachment nuts are paired up in dogbone brackets make it easy to tighten the bolts without the need of a backing wrench on the blind side. They really did their homework, and the result is a pretty staightforward DIY installation.
The only difficulty I ran into had little to do with the bumper itself and everything to do with changes made to the JK Wrangler for 2012. For some inexplicable reason Jeep relocated a vacuum pump to a spot right behind the stock bumper that is prized by aftermarket bumper and winch makers. It wasn't there pre-2012, and over the last few years quite a few parts makers have moved into that open space and made use of it.
I spent the bulk of my time cutting off a bracket and installing a relocation kit that Expedition One supplied along with their bumper. It's a non-issue on earlier JK Jeeps, but I can't help thinking this is something that should have never happened on the 2012 JK in the first place.
You'll be able to see all that was involved in the bumper installation and vacuum pump relocation in a few days because Scott Jacobs was peering over my shoulder with his trusty camera the whole time. Stay tuned.
And you know what comes after that, right? Yep, I now have a platform onto which I can bolt our waiting Superwinch.
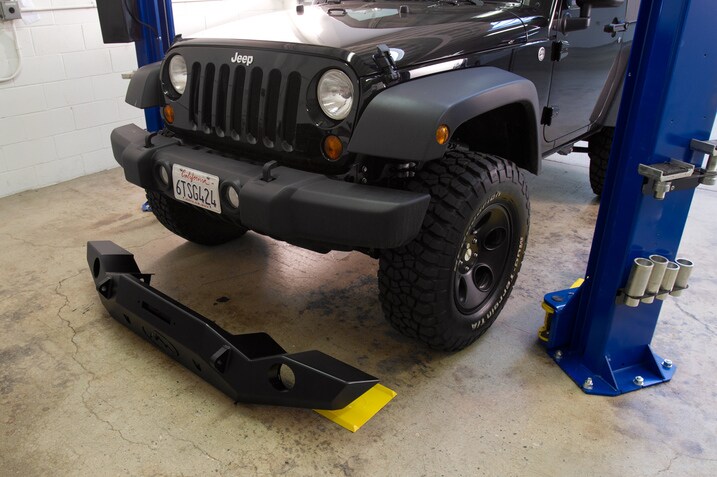
I think we can say that most Wrangler owners would not mod their Jeep like we have. Obviously there are those who go over the top and create monsters, but I think what we are doing looks pretty tough.
You can see the path we are taking with our Jeep. Would you upgrade, just buy a Rubicon, or keep it stock? If you could make upgrades, what would your mod-list be?
I can tell you that I'm itching to take this out for another weekend in the hills. The last time I took our Jeep out, it was bone stock. I'm curious about the difference in feel/capability. Look, even my dog wants to roll!


You already know the end of this story because last week we posted a couple of sneak peek photos that show our 2012 Jeep Wrangler wearing its brand new Expedition One Trail Series front bumper.
Complete with a black powder coat finish like you see here, their JK Trail Series front bumper goes for $1,109.95 — with the hoop. Our hoopless version was $1,059.95 — just $50 less. We went this route for two reasons: 1) I like the hoopless look and; 2) the more popular hooped version was on a 3-week back order. Slice $80 off either price if you want to do without the black powder coating and apply your own finish.
What follows is a description of the installation process, with photographs by our own Scott Jacobs.
In case you were wondering, this is the Expedition One logo.

A thorough read of the instructions is always the best place to start.

The plastic splash guard beneath the bumper is the first thing to go. It will not make a reappearance. Archie the Overlord is unimpressed.
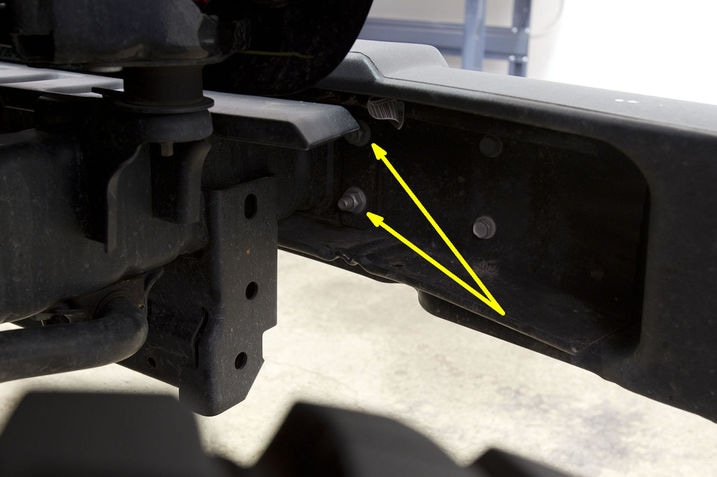
Eight nuts hold the factory bumper in place: two on the outside of each frame horn and two more on the inside. The outer ones are laughably easy to access and loosen.

Access to the inner ones is made easier by removing the trim panel that sits behind the bumper. It's held on with two of these plastic clips. Like the splash guard we removed earlier, this part will not be reinstalled after the new bumper goes on.
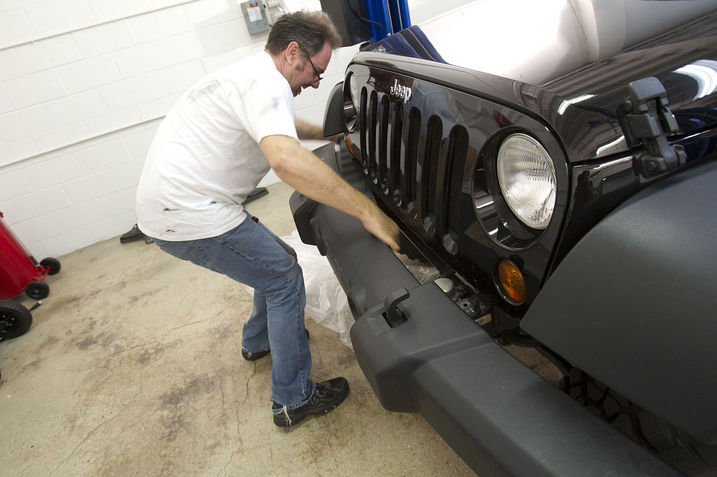
The panel slides out to the side easily after both clips are gone.

An obstacle is revealed once the panel is removed. This vacuum pump occupies prime real estate for winch installations and the bumpers made to carry them.
But this is not a universal JK-series Jeep Wrangler problem — this component did not appear in this location until the 2012 model year.
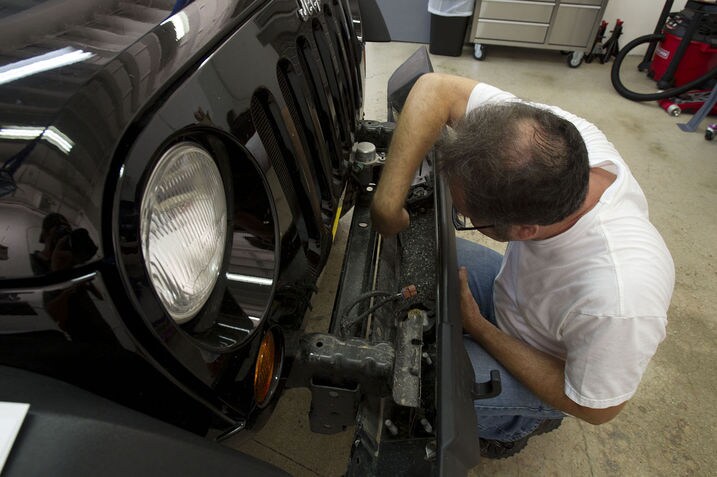
The electrical connections to the two driving lights are the only thing standing in the way once the eight bumper mounting nuts are removed.
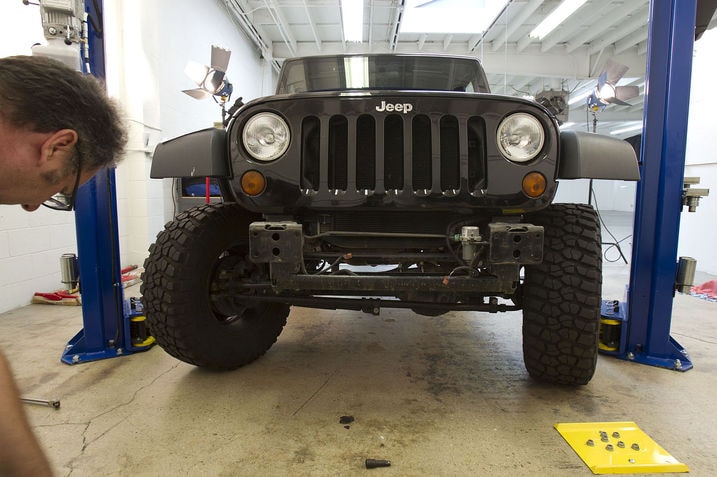
Imagine a winch sitting in there and the unfortunate location of the 2012 JK's vacuum pump becomes obvious.
At this point owners of 2007-2011 Wranglers who may be following along can skip ahead several steps because they don't have to deal with what comes next.

In short, the vacuum pump has to be moved to an underhood location. What's more, its mounting bracket (orange) must be cut off. The relocation kit supplied to us by Expedition One was made by a third party because this issue is widely shared by other 2012 Jeep Wrangler bumper suppliers.
In order to move the pump the main vacuum line (yellow) must be shortened. The smaller exhaust line (white) will be removed entirely. Why? In this low factory mounting location the pump's exhaust port sits below the water level of many water crossings; the exhaust line merely moves the pump's discharge point to a point above Jeep's designed-for water fording depth.
The new pump location sits above that point, so this exhaust line is no longer necessary unless and until an accessory snorkel is fitted at some future date to enhance the Wrangler's water fording depth. At that point a similar line will need to be reinstalled and run up to match the snorkel's intake level. (No, we're not planning on a snorkel — this isn't Burma.)
Finally, the power lead (green) will need to have a two-foot section spliced in to allow me to move the power connector up under the hood along with the pump.

Once removed, the vacuum pump assembly will not be modified in any way. But there is work to do before it can be reinstalled.

Its new home will be just behind the windshield washer tank and the ECU. Lucky for us, Jeep put a slip joint in the main vacuum line in the vicinity, and it's easy to unplug.
The section that runs forward will be abandoned but left in place for reasons that will become clear later. The portion that runs back toward the firewall will connect to the vacuum pump's check valve as if nothing ever happened once everything is set in the new location.

But we're not there yet. The pump's bracket still needs to be sliced off. The cutoff wheel I bought for the Mopar Stage 3 Lift Kit installation comes in handy once more.
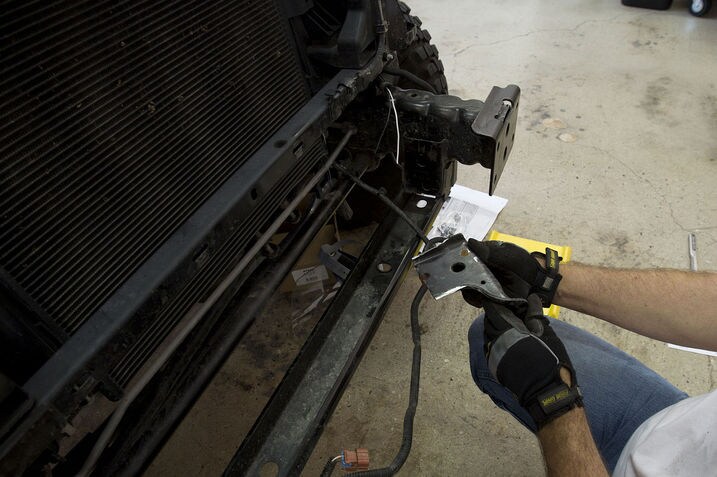
It takes less than five minutes to make the cuts, but there's no need to rush. It is possible to nick the nearby stabilizer bar if you're not careful.

Here I've run the supplied black and white extension wires for the pump's electrical power back up through the main vacuum line I've abandoned. Why remove it when it can offer the new wires protection?
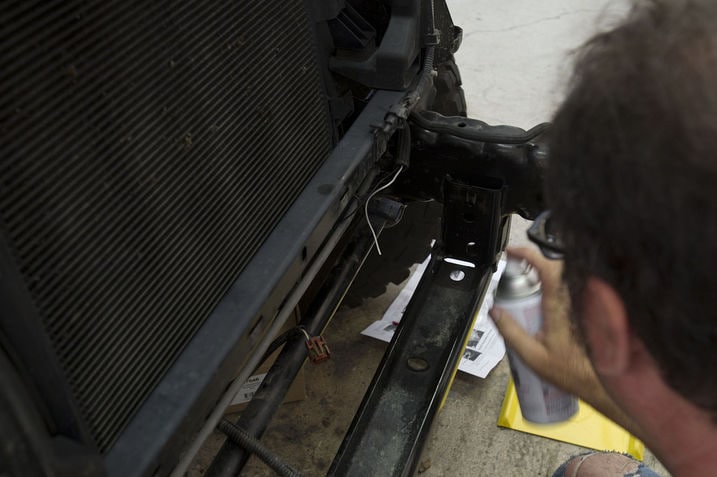
Freshly cut or drilled metal is best covered with rust-inhibiting paint, of course.
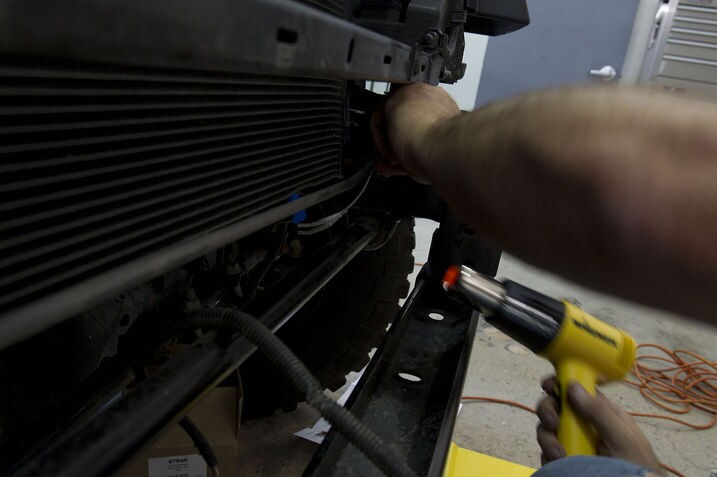
I didn't use the butt connectors that came with the relocation kit. Instead I opted for higher-grade heat-shrink butt connectors, which I covered again with additional heat shrink sleeves. After that I slipped the joint back into the original plastic sheathing, which I then stuffed into the end of the vacuum line. Lastly I wrapped the whole thing in rubberized electrical tape.
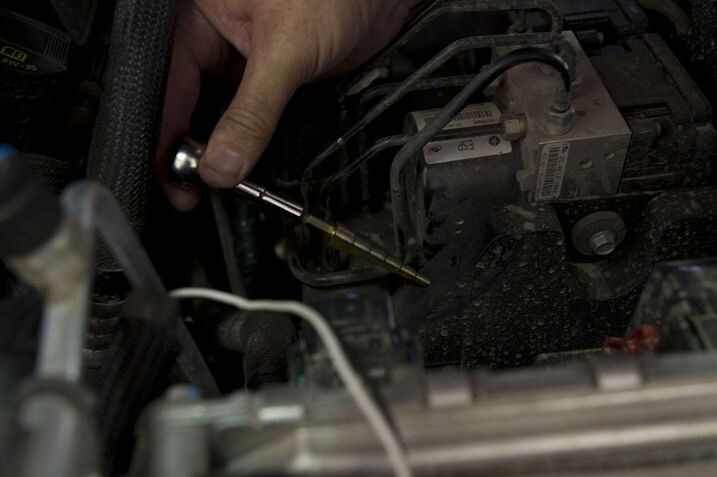
Two 1/4-inch holes need to be drilled to hold the electrical connector in place. A broad ABS plastic flange that's part of the ABS brake module mounting bracket is the perfect location.

The new bolt-on bracket takes advantage of existing bolts. This is the easy part.

More heat shrink butt connectors and heat shrink tubing protect a second splice that joins the vacuum pump power connector to the extension wires.

Except for a couple of tie wraps to clean things up, our work is done here. The new wires emerge from the abandoned vacuum line (orange) and run down to the point where the connector (green) is attached to the new holes we drilled in the ABS bracket. The main vacuum line (white) is connected to the same check valve assembly (yellow) that it connected to in the original location.
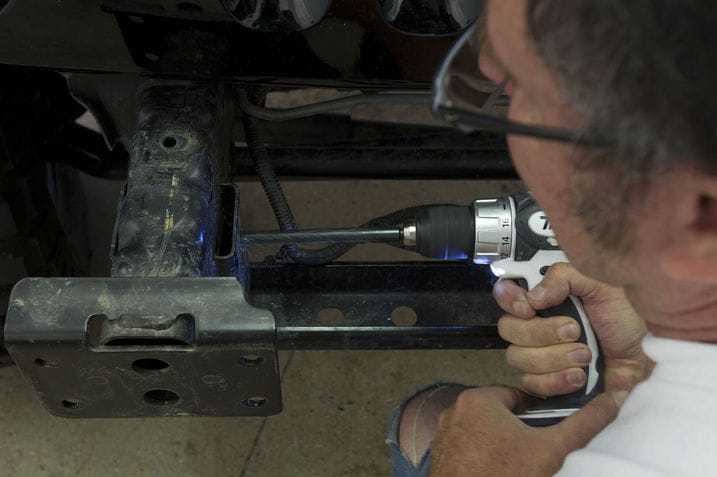
Meanwhile, back at the bumper installation, a small hole that once held the driving light wire harness in place is enlarged to 1/2-inch in diameter — but only through that first thin layer. The same thing happens on the other side where the vacuum pump bracket once lived.
These new holes increase the total number of bumper mounting holes from eight to ten.
This step is shared with owners of 2007-2011 JK Wranglers. Welcome back, folks.

Finally! It's time to test-fit the new bumper. Expedition One has provided hidden hand-hold cutouts that make this easy for one person to do alone.
The strips of blue painter's tape are there to prevent the fenders from getting scratched by incidental contact that may occur while it is set in place.
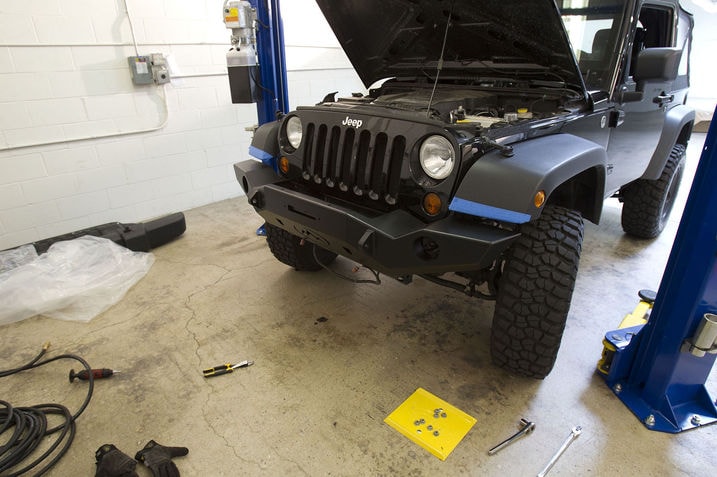
At this point gravity is the only thing holding the bumper in place, but the alignment is darn near perfect. The eight main frame mounting bolts line up perfectly, but the two lateral ones I drilled need a slight adjustment.
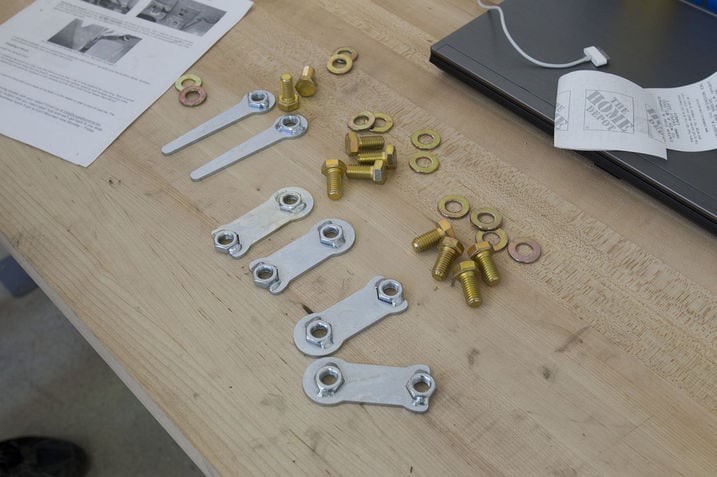
The installation of the eight main attachment bolts is aided by dogbone brackets. The new lateral mounting bolts are blind, but those nuts are welded to long handles that make them easy to set into place. In all cases the brackets eliminate the need for any backing wrench during the tightening process.
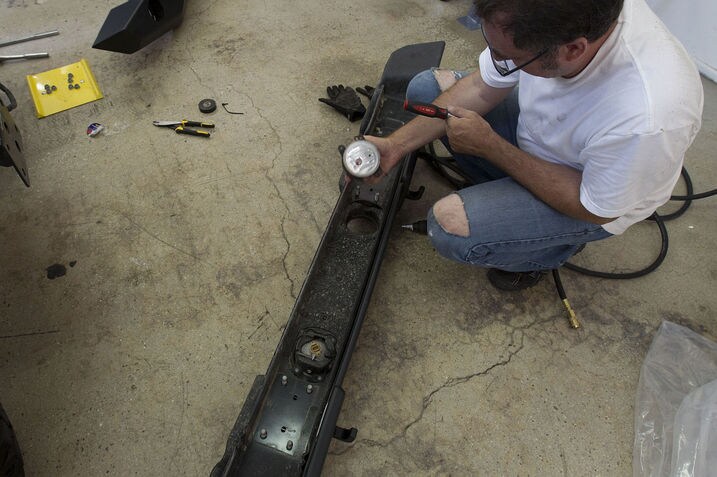
We can't forget to transfer the lights.
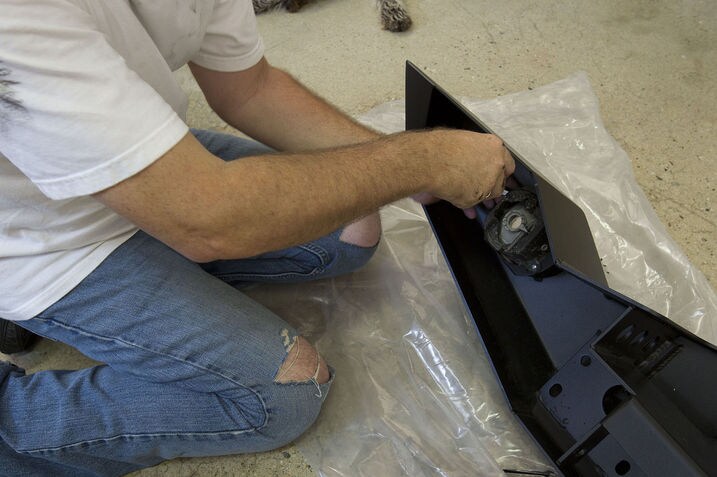
Expedition One provides new nuts and bolts that work with the factory light brackets.
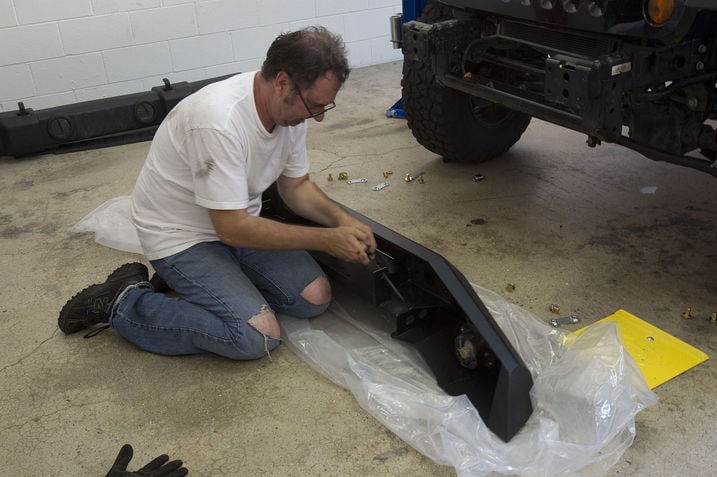
A few seconds with a round file is all it took to add the smidge of extra clearance that would make the lateral bolts go in easy. It was barely necessary — just a millimeter — but the remedy was painless.

The dogbone nut assemblies slip in behind the bumper's mounting flange. The new bolts and washers spin in from this side.

Except for the laying on the ground part, tightening couldn't be easier.
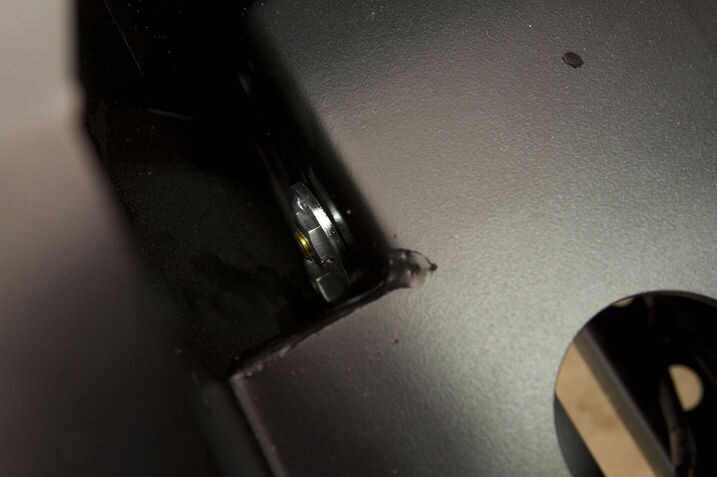
A slot in the winch platform eases installation of the dogbone for the inside pairs of bolts.
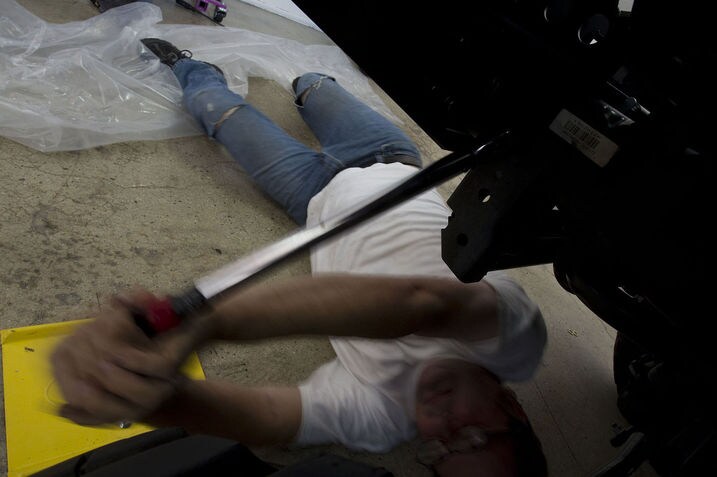
Final torqueing can commence once all ten bolts are started and snug.

All done. Our new Expedition One front bumper is finally Archie-approved.
Next up: Installation of our Superwinch.

Our 2012 Jeep Wrangler received its new Superwinch Talon 9.5 SR winch mere hours after the Expedition One front bumper was installed. Basically, Scott and I drove it out the door for the "bumper done" shot, then rolled it straight back in for the Superwinch installation.
Installation was easy thanks to a commodious and well-designed winch platform by Expedition One. The Superwinch Talon fits with room to spare, and I think it looks great up there. I especially like how it's partially hidden and protected, with a generous portion of spool visible up top for a clear view of what the rope is doing.
Full blow-by blow phots next week, but for now I want to mark it as done so others can post photos of the Wrangler if they take it out somewhere.
Until then, here's a trivia question. Please promise me you won't play if you read my Facebook posts on the topic:
What feature-length film features off road humor, including a prominent winch joke scene?
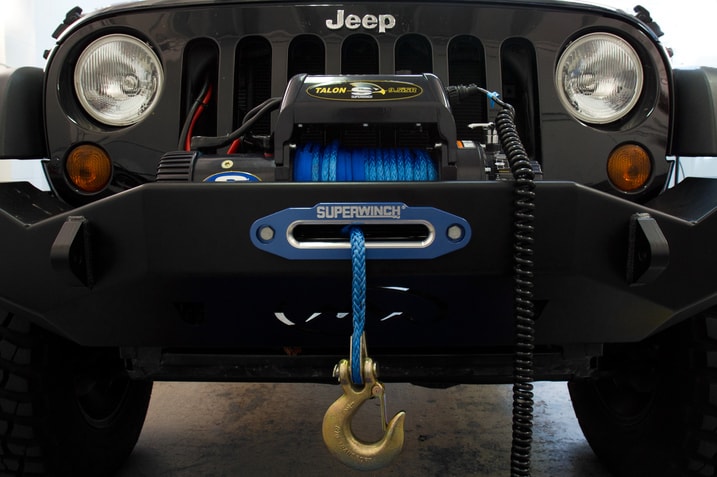
Dan installed a mean bumper. Then he stacked on a Superwinch. Including the lift/suspension upgrade that he installed a few months ago, our Jeep has transformed from you basic base model into a capable dirt machine.
So what did I do to celebrate this machine's metamorphosis?
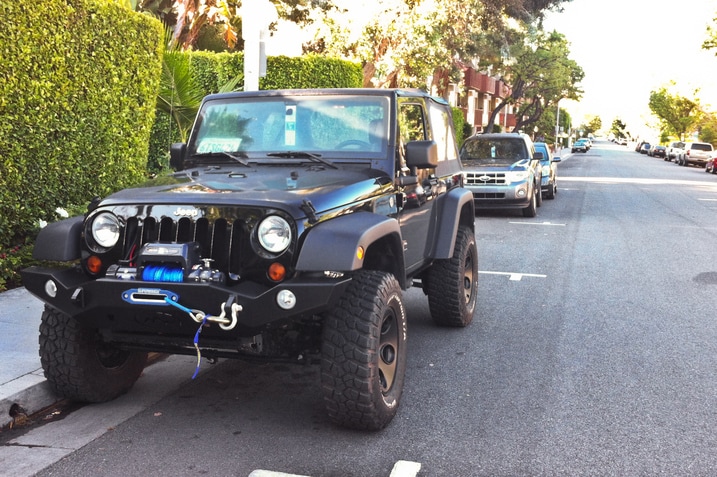
I went to a backyard crawfish boil in wilds of Hollywood. The Jeep wasn't completely wasted on such an endeavor, I came prepared. I packed my cot tent, sleeping bag and inflatable air mattress to camp out in the backyard. I knew that in the midst of this Louisianian smorgasbord there would be a whole lotta beers and cigars. I wasn't going anywhere after.
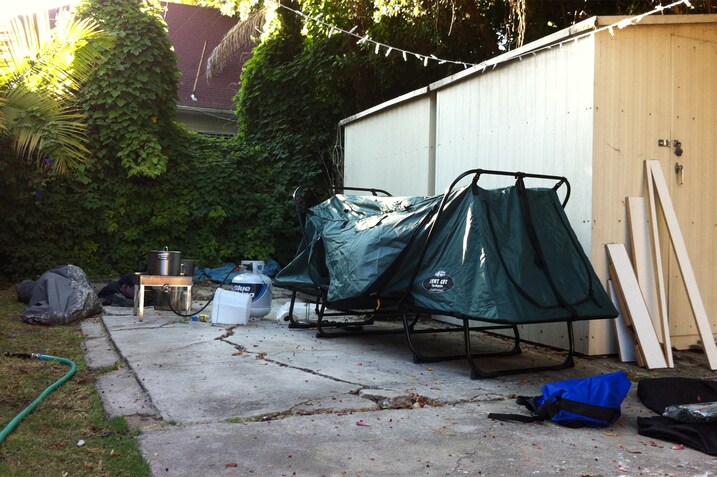
But in all seriousness, this Jeep is a new beast. You can tell there is a lot of weight out front when you're behind the wheel. The weight has tempered the bouncy nature of the big tires. In addition, Dan lowered the air pressure all around to help out even more. Now it's pretty comfortable to drive through all the pot holes and over the cracks of Los Angeles. Driving a black-ops cocktail shaker is a thing of the past.
Now is about the time to really try this thing out in the wilds of... the wilds.
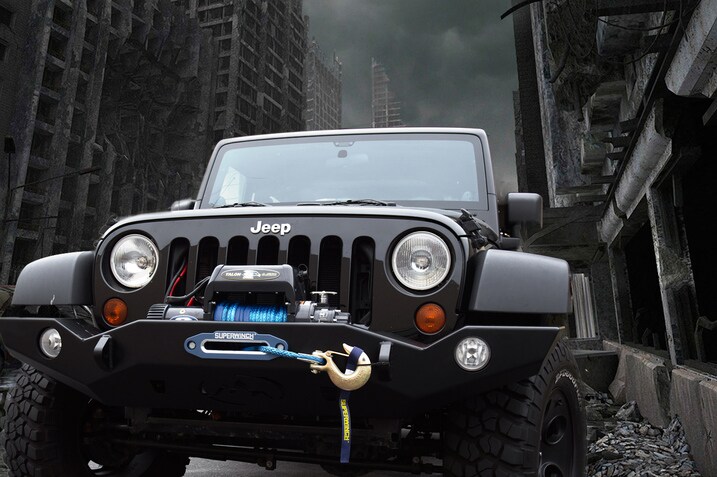
Recently comrade James Riswick wrote that if the shizzle hit the proverbial fan, he hopes he'll be driving our Project Jeep Wrangler. I kindly disagree. Not that I hope I have the Jeep that day and he doesn't, but rather if we're talking fantasy land there is another vehicle I'd much rather have.
There are two vehicles that would come before our Wrangler on my short list. We're talking a post-apocalyptic fantasy land, right? I mean, we watch movies where the cast of 30-somethings are supposed to be believable high schoolers, right? We can bend the rules a bit and not stress the details here. I figure if you're gonna blast your way out of a city filled with zombies, might as well do it in proper style.
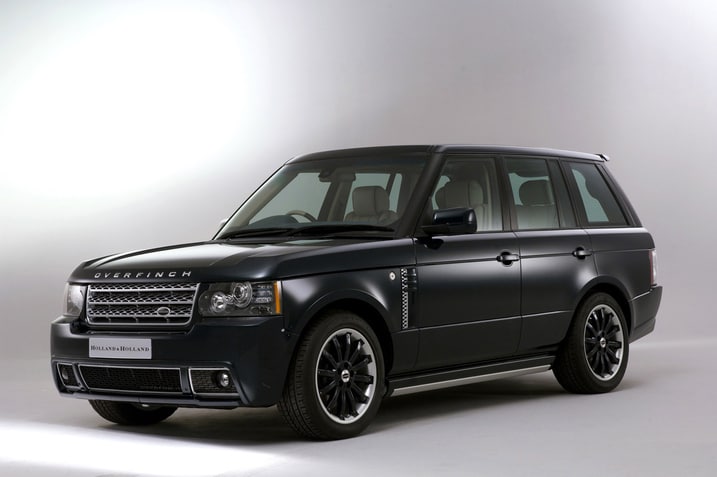
Reader ed341 said it in response to James' post before I could remember the official name of it: the 2010 Holland & Holland Land Rover by Overland. There is something to be said about rolling in a 503 horsepower, piano black luxo-death machine packing custom luggage, a bar, and matched shotguns. You might not get the free booze refill offered if your first year happens to be post-apocalyptic, however.
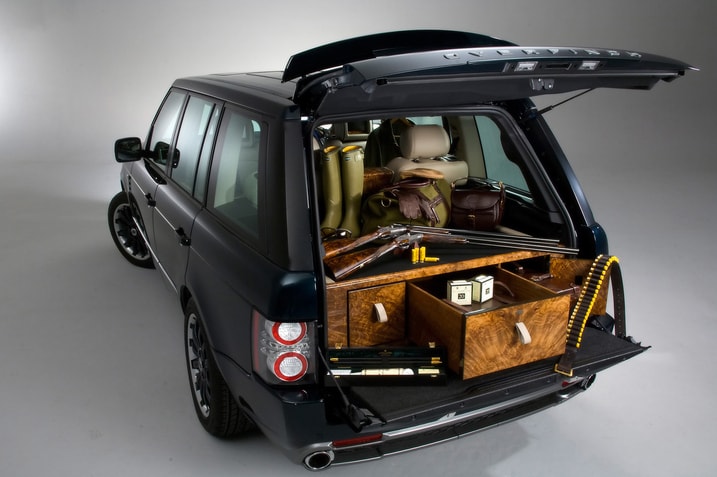

If not the H&H Land Rover, then the recently debuted 2012 Land Rover Defender Xtech Special Edition. Just looking at them I can imagine the Molotov cocktails thrown by irradiated punks bouncing off the sides. The well known capabilities of the Defender will help you traverse the pile of rubble where your local mini-mall once stood while searching for supplies. Powered by a 2.2-liter diesel engine, the Defender comes in 90 and 110 body styles, thus giving you flexibility to accommodate the number of survivors that made it to your bunker.

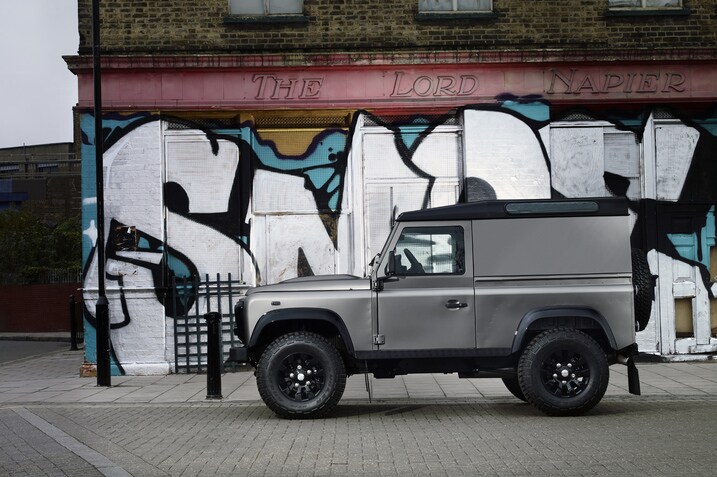


These Land Rovers might not be the most practical for an E.L.E, but damn if I'm going down without keeping my head held high. And if they aren't available, I won't turn my nose up to our Wrangler either. When there is a horde of zombies bearing down on you, beggars can't be choosers, right?
What factory vehicle would you ride into the end of time?
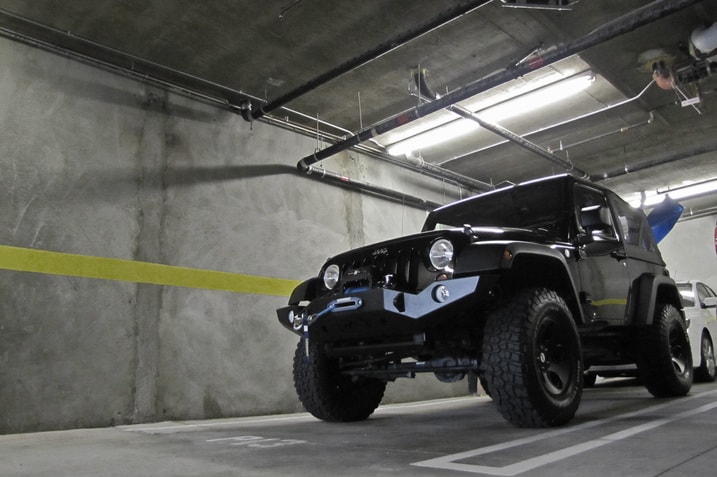
When SkyNet, the Eastern Coalition or whatever those ID4 aliens were called come to destroy us all, I certainly hope I'm driving our Wrangler that day. I mean, just look at the thing. The tires, the suspension, the winch. I'm sure Takahashi could provide some sort of rifle to mount on the roll cage to fend off the anarchic horde as we flee into the hills. Now, I can't know for sure since the Chrysler specs didn't specify, but I'm doubting the roof is radiation proof so that's one downside.
So when the time comes, I really hope our beefed up Wrangler will be ready, because otherwise, it'll mean this interim period of driving such an absurdly cumbersome beast was all for naught. Seriously, kudos to anyone who drives such a thing every day in a place where people outnumber cattle.

Ocotillo Wells sees very little rain. On average just 3.69 inches of the stuff falls all year long, spread over the 15 rare days when measurable amounts are observed and recorded. In reality the bulk of that falls during 4 or 5 days, and a good chunk of the total comes down in the form of "monsoon" events, mid-to-late summer thunderstorms that boil up throughout the day before drenching the landscape in late afternoon.
Sharp-eyed desert veterans will notice that the sand here in San Felipe Wash is much damper and firmer than its usual silty self — our 2012 Jeep Wrangler is not sinking into it one bit. And then there are the thunderclouds, wannabee echos of the ones that spawned heavy rain and flash floods the day before my visit.
It was still humid and swampy when I arrived, but no one was saying, "yeah, but it's a dry heat," like they were three or four days previous, when the weather report talked of 121 degrees (with a wind chill "feels like" temperature of 120 F) and 11 percent humidity.
And so I found myself doing a most ironical thing in our 2012 Jeep Wrangler: mudding in the desert.
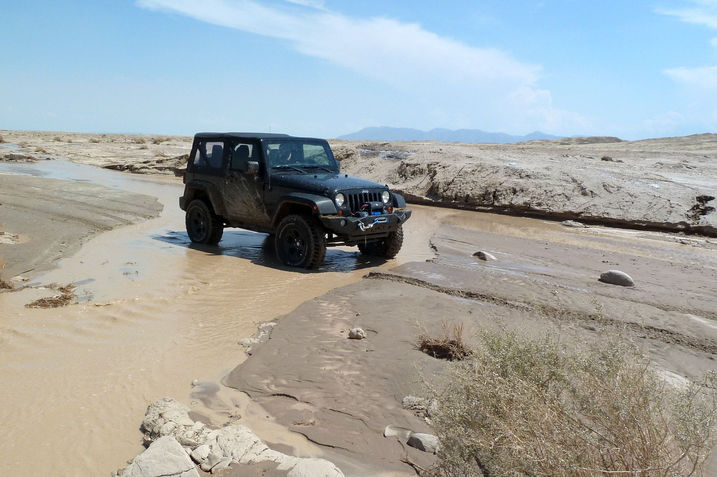
It may not look like much, but persistent flowing water in Tarantula wash some 18 hours after the rain let up suggests one helluva storm. Nearby highway 78 was closed several hours while road crews scraped rocks and mud from the asphalt overnight.
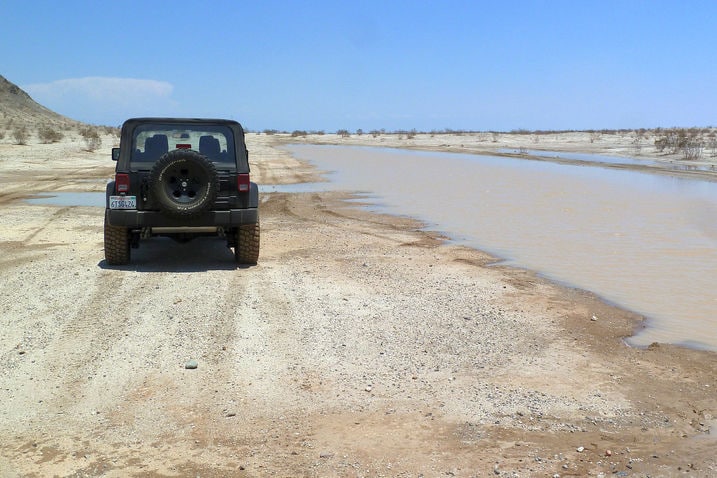
Shell Reef Expressway, a "main" artery in Ocotillo Wells State Vehicle Recreation Area is usually covered with deep silty whoop-de-doos. But it's now a pond in some places, a mud bog in others and burnished smooth everywhere else. To follow the road I had to play connect the dots with signposts.

I never had to use our Superwinch, but then again I was just one vehicle with no one and no thing to hook it up to, so I played it safe. This was after all, a post-storm desert sightseeing trip.
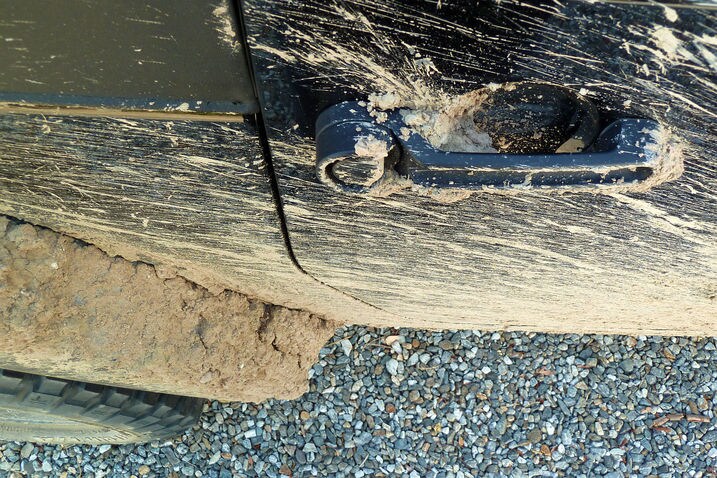
The Jeep's door handles make excellent mud collection devices. Squish.

OK, so this ain't Mississippi. But I still fed $5 worth of quarters into the high pressure wand at the local DIY car wash to make it presentable again (one could argue it's just getting presentable now,) and even at that I ran out of coin before the job was 100 percent done. The stuff was much more like cement than the easily-dissolved sandstone I picked up in Moab, and presenty there are still a couple of persistent hunks of desert hidden up in the fenderwells that should crumble back into sand in the coming days.
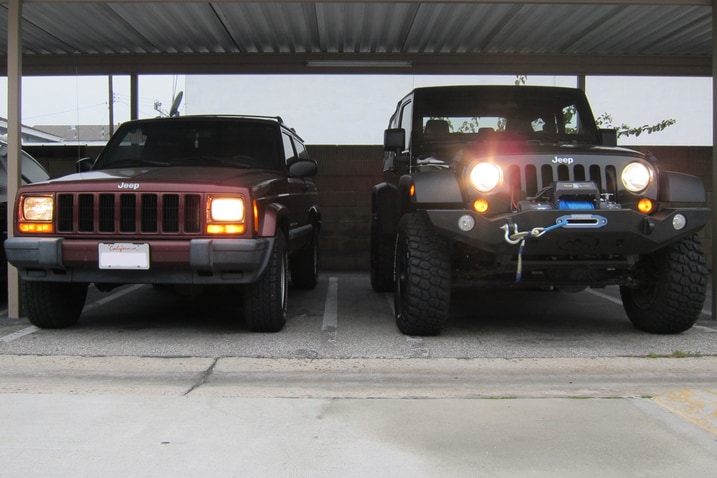
OK, maybe not exactly dwarfed. But the mostly-stock '01 Cherokee sure looks pretty scrawny next to the significantly not-stock '12 Wrangler. Three-inch lift, 33-inch tires, Superwinch - our Wrangler is clearly the younger, tougher jock in this scenario.
No matter. The Cherokee hauls drums, gets muddy when the rains and snow come, and spends most weekend afternoons in the beach lot watching fit wahines slip into their wetsuits. It's a crafty role player. You can keep your Natty Light and boulder-humping, buddy. We'll be over here by the bar.

The other day while cruising down the mean and treacherous streets of Beverly Hills (or was it Beverly Hills adjacent? I forget), I spotted this murdered-out Jeep Wrangler giving off serious gangsta attitude as its driver sipped on an overpriced latte.
What do you think? Better in matte?

We've put up a lot of posts so far on the mods we've done to our Jeep. I figured it'd be useful to have them all in once place. Following is a list of all the posts we've written about the mofications, sorted by topic.
17-inch Mopar wheels and 33-inch BFG tires
Track testing with the new wheels/tires
Off-road comparison testing with the stock and aftermarket wheels/tires
RTI ramp build and testing
RTI testing, stock configuration
RTI testing with aftermarket wheels/tires
RTI test with front stabilizer bar disconnected
RTI tests with Mopar suspension installed
Mopar pre-runner suspension kit
IPF headlight reflectors and Philips H4 bulbs
Expedition One front bumber and Supwerwinch winch
Also, Dan Edmunds wrote a cool post with his thoughts comparing our Wrangler build versus a stock Wrangler Rubicon.

It used to be that most SUVs and trucks came with solid-axle front suspensions. Then, slowly, independent front suspensions (IFS) became more prominent. It makes complete sense, of course. With IFS, you get less unsprung mass, better packaging and a superior ride quality. For the way the majority of people use their SUVs, IFS is the way to go.
But I'm glad the Wrangler, with its old-school solid front axle, is a glaring hold-out. Other than the heavy-duty Ford and Ram trucks (and the Mercedes G-Class), it's the only vehicle left with a solid front axle. For off-roaders who like slow-speed rock-crawling, a solid front axle is considered more robust and better suited to handle the greater stresses occurred when running big off-road tires. There are also fewer parts to wear out and typically simpler steering. There are even a lot of aftermarket companies these days that offer kits to convert IFS trucks and SUVs back to "low-tech" solid axle suspensions.
If there's ever a day in the future when Jeep decides to give the Wrangler an IFS, it's the day I decide the Wrangler's no longer a Wrangler.

Have Jeep, will travel. I've had our Wrangler for more than a week and figured it would be an injustice if I didn't let it play in the dirt at some point. So yesterday I convinced a friend of mine on his day off to head up into the mountains with me for some wheeling.
After doing some research, we chose the Bald Mountain OHV route near Shaver Lake, Calif., as it sounded like it'd be a good fit — not too hard (a good thing considering my novice off-roading skills) but still hard enough that you probably want a modified vehicle and be challenged. And once you're at the top of the mountain, there are some impressive views of the surrounding lands from an abandoned fire lookout tower.
Pictures and observations follow.
(All photos courtesy of Victor Gonzalez)

Clear skies, open trail. It's a good start.
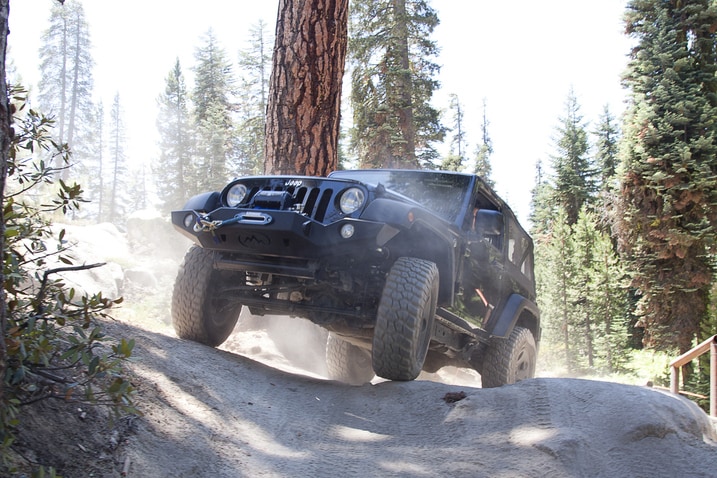
I really like the 33-inch tires and 3-inch lift combo we have on the Jeep. It's enough to make a notable improvement in off-road ability without seriously harming on-highway manners.
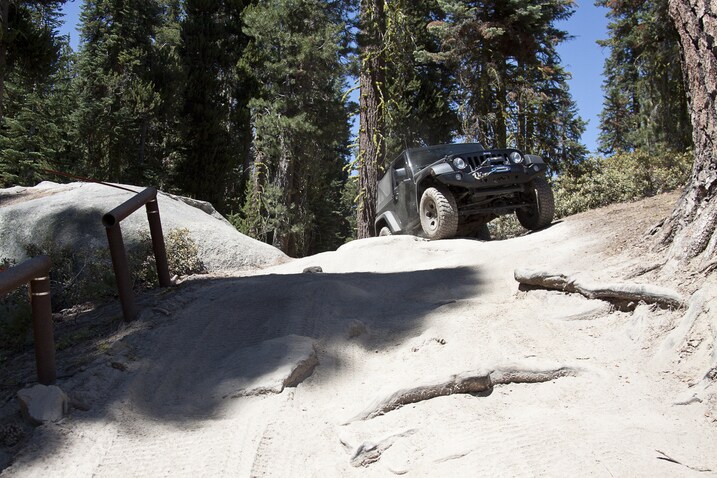
Love the Jeep's hill holder function for the manual transmission. It makes climbing so much easier.
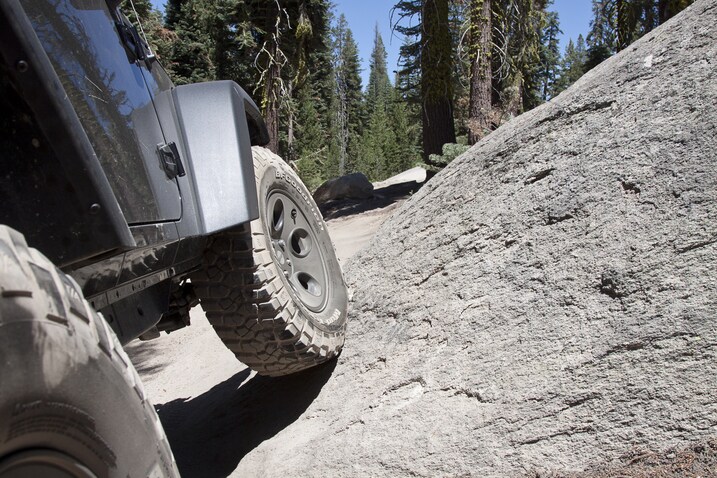
Since I didn't bring an air compressor and it would be a long highway drive back, we decided to keep the stock air pressures unless we found ourselves lacking in traction, at which point we'd air down. Never did have to do that, though.
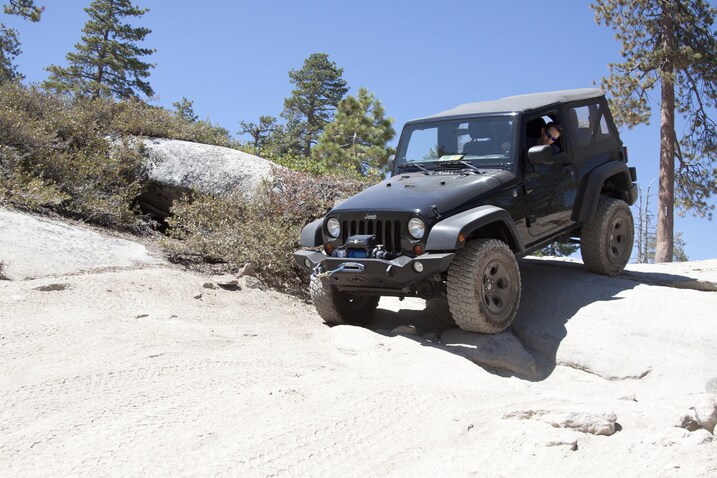
I've heard you look twice as cool if you stick your head out the window.

The top of Bald Mountain is, indeed, pretty bald.
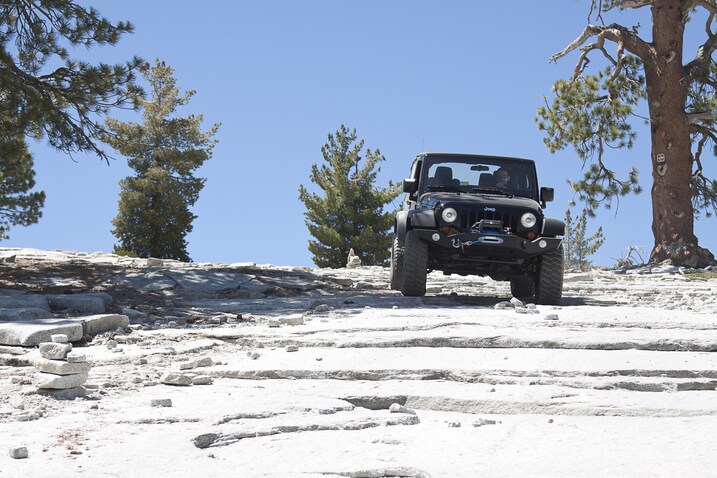
Although this picture was taken when descending, this stepped style of rock formations posed the biggest challenge for climbing. As Dan found out in Moab, our Jeep has a pretty meager crawl ratio because of the regular transfer case, bigger tires/wheels and ultra-tall 3.21 gears. The Jeep even stalled one time as it just didn't have enough gearing to keep the V6 revving enough. After that, I decided to carry more speed than I would have preferred to make it over obstacles. We really need 3.73 or 4.10 differential gears in this thing.
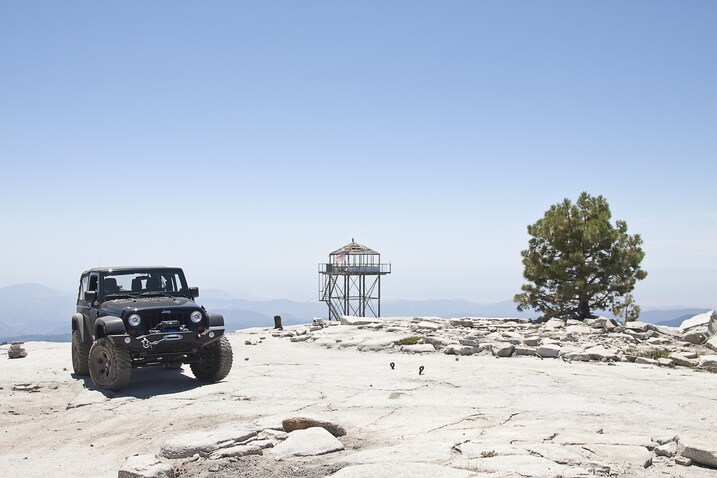
Finally made it to the top.

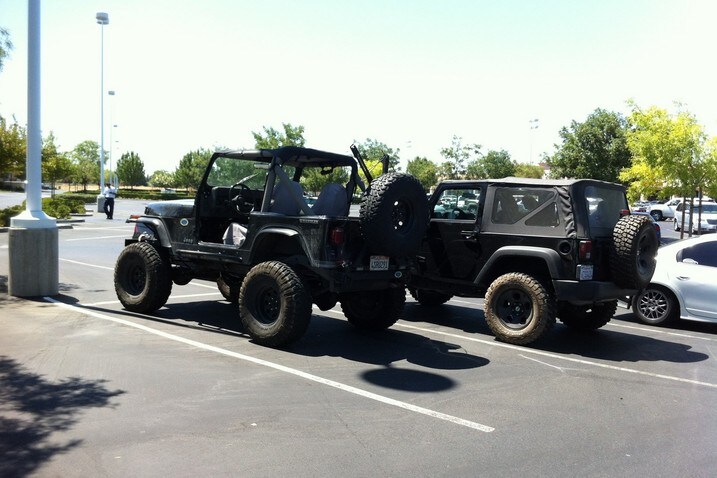
Driving our long-term Wrangler around makes me want to buy one. It'd be quite the impractical purchase, and for now I have more important budgetary things to worry about than another motorized toy. But down the road? For sure. Yet I wonder what year of Jeep Wrangler I'd end up with.
A 2012 Wrangler would certainly tempting. It's fresh, it's got the new V6 engine and I like the look of the latest generation (JK) best. But it's also prohibitively new-car expensive. How much money would be left over for mods, and would I really be willing to risk wheelin' my new ride?
So maybe I'd look at slightly used Jeep, but still a JK. But now I'm stuck with the sucky 3.8-liter engine and a price that could still be uncomfortable.
Alright. Perhaps I'd go even older, say the TJ generation ('97 to '06). More affordable, certainly, giving me more money to spend on mods (or maybe the previous owner already modded it.) I'd probably be less worried about damage on the trail. But, it is an older Jeep. It'd be less useful for daily use, certainly, nor would there be a four-door option.
If you were going to buy a Wrangler, what year or generation would you get?
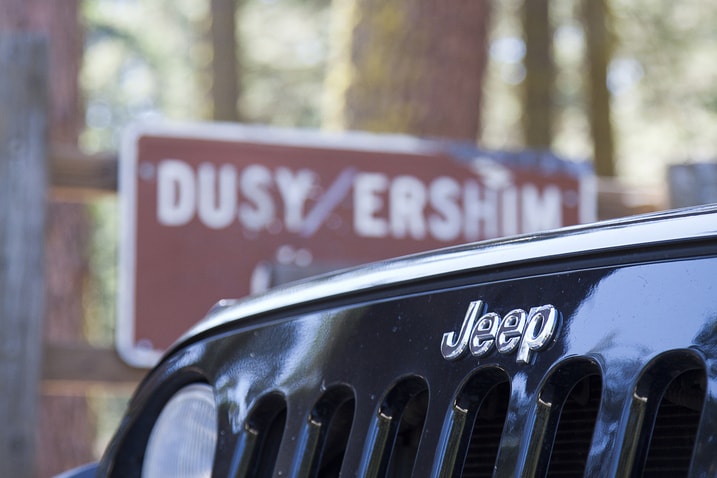
"So have you actually used a winch before?"
"Hey, do you have a portable air compressor we can take? Mine's broken."
"Dang, my water bag is leaking."
"Crap, I forgot the wrenches for the stabilizer bar disconnect."
These are a few quotes from my off-road trip in the Jeep last week. While I knew I wasn't driving a particularly hard trail, it was also obvious that I wasn't as prepared as I should be. My friend and I brought extra food and water and some basic camping gear, but we didn't have any extra tools or equipment.
I suppose this was mostly because I'm not a true off-roader guy; I just get to pretend while I drive our long-term Jeep for a couple weeks.
After the trip, I did some research about the things off-roaders typically bring along. A selective list of gear follows. Feel free to chime in with other suggestions.
Trail jack. This is the big jack that's very common for off-roading. The Hi-Lift brand is pretty popular. It's impressively versatile and can be used for jacking and lifting a vehicle as well as winching.
Tools. You can't bring everything, but the essentials are worthwhile.
Spare parts for your vehicle. Typically the stuff that breaks, like axleshafts, tie-rod ends and U-joints. Extra fuses, hoses and clamps are also a good idea.
Rain gear/overnight camping gear. For when you're really stuck and have to stay longer than expected.
Extra food and water. Same as the reason for rain and camping gear.
Flashlight. A headlamp will allow you to work with both hands.
Gloves. For when you need to make repairs.
Recovery kit. To assist with winching. Snatch block, tree trunk protector, shackles.
Tow rope
Pull-Pal. Used as an anchor point for winching when nothing else is available.
First Aid kit
Fire extinguisher
Tire plug kit
Folding shovel
Bailing wire, duct tape, zip ties
Extra fluids (oil, brake, etc)
Air compressor
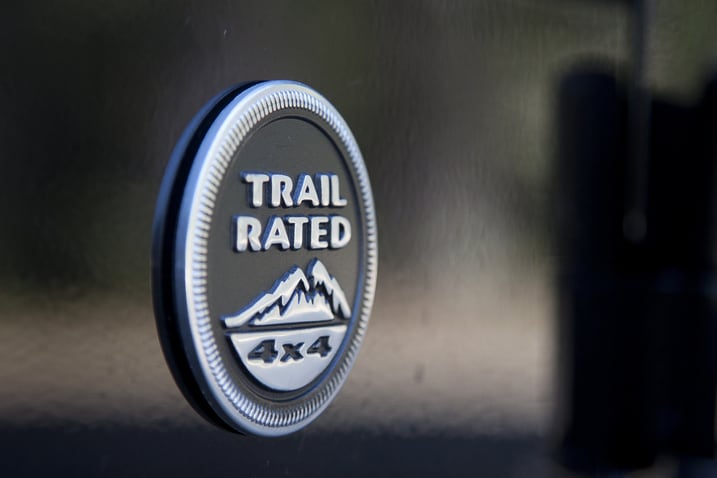
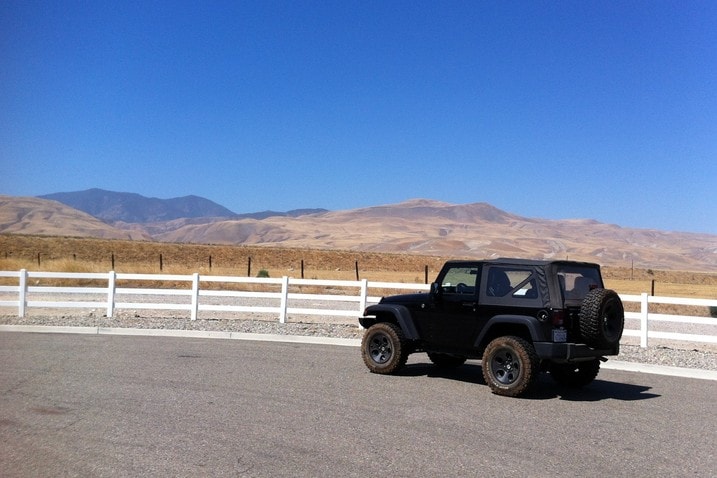
Driving our Wrangler made me think of this question: as a percentage of vehicles on the road, which model is the most commonly modified by its owners? There's probably no real way to tell for sure, but the Wrangler could be number one. It seems like most Jeeps I see have some sort of aftermarket mod.
Then again, maybe that's because the Wrangler's typical mods are all visible (wheels, tires, suspension). The Camaro and Mustang are probably pretty high on the list, too. What do you think?

This weekend I used our long-term Jeep Wrangler as God and my Golden Retriever intended, with its top down. It was three days of roofless bliss. Last night I had to reassemble the puzzle, and I did so in a personal best time of just over eleven minutes. Yes, I timed myself.
Not bad, but I'm sure I can do better. Parking the Jeep on the steep incline of my driveway was not a good idea.
I think it's a five minute job with practice and determination.
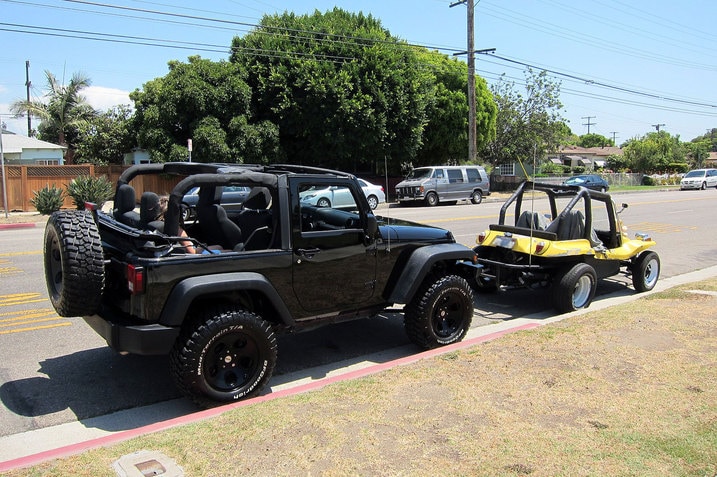


A couple months ago I hinted we'd be adding U-Connect Bluetooth phone and audio to our 2012 Jeep Wrangler. Our 2012 Jeep is unusual in that its base radio lacks any U-Connect buttons whatsoever. Last year that would have been game over, as previous upgrade kits only worked with base radios that had inactive placeholder U-Connect buttons built in.
Now a newly introduced $367 kit allows one to add Bluetooth phone, Bluetooth audio and a USB/iPod input (the kit is ready for USB but it's another $37 for the required cord), as well as the necessary buttons (shown above) to control it all.
The installation process, which will be detailed here in a few days, takes less than an hour. But a crucial step or two — activation of the unit by teaching it your car's VIN — must be done by a Jeep dealer with specific tools. Turns out the one-hour minimum they charge for this step also covers installation — at my local dealership, at least — so in the end the DIY approach didn't save me any money.
But does it work?
In a word, yes. The Bluetooth audio is strong, phone calls come in loud and clear through the stereo speakers, and the iPod connection charges the iPhone while it plays my music.
The limitations of the base radio's tiny display does introduce a few limitations, of course. I'm still learning how to manipulate the iPod, for example, and I haven't yet figured out how to pause Bluetooth audio without going for the MP3 player itself. And I'm not sure there's any way to see phonebook entries. As you might have guessed from this my kit included no usage instructions, so I'm learning as I go along.
Still, I know I can select songs or artists with voice commands, as in "Play artist Pink Floyd," and I have dialed phone numbers in much the same way. I've also dialed people I know are in my phone's directory by name.
For me, the best part is I can ditch the aux cord altogether. My long trip to Moab and back was a nightmare of tangled power and stereo output cords. No more. Our base Jeep Wrangler Sport feels a little less basic and a lot more liveable.
As for those of you shouting "Crutchfield! Crutchfield!" consider this: Jeeps are ridiculously easy to break into, particularly ones that have a soft top. No one wants the factory base radio, but with this upgrade it now does everything I need it to do without drawing attention to itself.

I haven't taken our Project Jeep off road. And while I have my fair share of reasons as to why I haven't, the first, and foremost among them is, I have no experience driving the low speed technical trails that our Jeep has been built to handle.
As a matter of fact, my off road driving experience has been limited to a 20 something year old Camry on groomed gravel roads. I've understandably left that off my driving CV.
So what?
What's the worst that could happen?
It's remarkably free of swearing, but there is a fair bit of screaming. And, it should show you EXACTLY why I'm hesitant to do anything remotely techincal in our Jeep. Oh sure, it might get me a few good blogs, but it would also get me a pink slip.
Also, the dog at ten seconds in is undoubtably the smartest thing in the video.

California is one of 33 states that requires front license plates. This statistic predates the invention of red light and speed cameras, which seem to work quite well anyway in states that don't hand out front plates. Arizona, for example, seems to very proficient at issuing camera-based tickets without issuing residents a front plate.
But I digress. California persists with the requirement. Folks who park on nearby streets in Santa Monica and the West Side — places where meter maids patrol ad naseum — must live with the fact that going without is an easy way to get an inconvenient, expensive and pretty much meaningless ticket.
Thing is, our 2012 Jeep Wrangler hasn't had a permanently mounted front plate since we installed our Expedition One front bumper and our Superwich. Since then the it has been riding inside the windshield, held upright and visible by the protruding passenger side tweeter. When driving it only rattled...a lot.
I finally decided to do something about it, but the spot I was eyeing had no place for me to drill holes. Enter the Velcro.

Yep, the front face of our Superwinch got drafted. It's flat, it's vertical and there's a decent amount of surface area for the Velcro tape strips. Better yet, the span is almost exactly the same as the width of the plate.
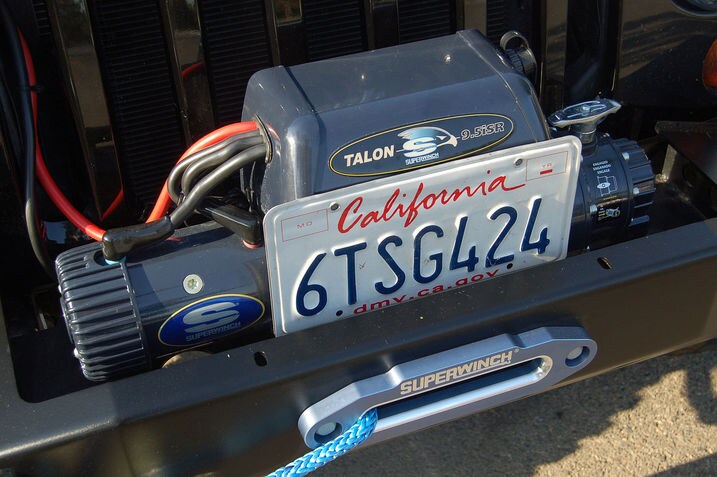
There, that should keep us on good terms with the parking zealots that ride around in their Cushmann 3-wheelers. When I need the winch it'll pop off easily to give me a good view of the rope windings on the drum. Until then I suppose it'll keep the bugs off the works.
Sure, it's a caveman stopgap solution, but it should suffice until I find or fabricate a bracket that's a bit more secure than Velcro.
On the other hand I have a lot of respect for Velcro. Maybe someday I'll tell you the story of the balled-up GTI racecar and it's two underseat stereo amplifiers, one held down by grade 8 bolts, the other by Velcro strips. I'll let you decide which one came loose when the car barrel rolled 6 times.

Our Jeep's skinny 225/75R16 OE rubber was designed to run at 36 psi, but this pressure is brutally high when applied to the stiffer carcass of our 285/70R17 BFG Mud-Terrain T/A KM2 off-road rubber. The firmer ride of the 3-inch Mopar Fox/Terraflex lift kit isn't helping much, either.
So we dropped the static inflation pressure to 28 psi, a pressure our big BFGoodrich tires can live with because of their much higher load rating: 121/118 versus 103. But 28 psi is far too low for the OE 16-inch tires, so the factory-calibrated TMPS system gets all pissy when we do this. After all, it has no idea we've changed to different tires with more load capacity.
I wish there was some way to tell it, a way to reset the TPMS trigger threshold in the computer.
There is — for 2007+ JK Wranglers at least — and it's called an AEV ProCal.
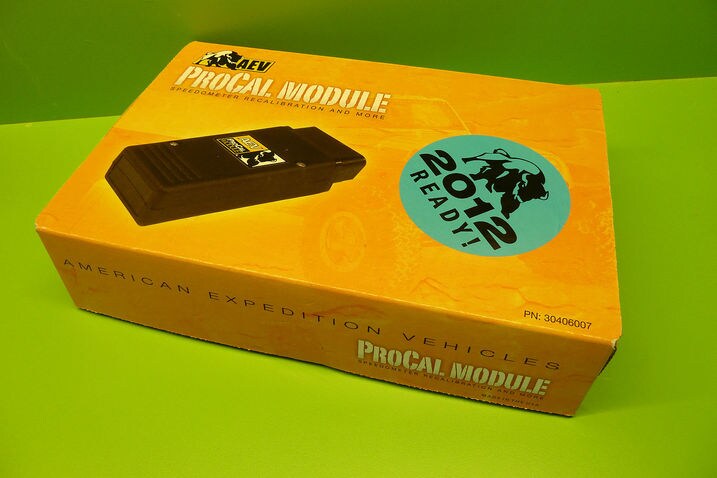
AEV stands for American Expedition Vehicles, and they're the folks that made our Mopar 5-hole wheels. They also make bumpers, a Hemi V8 conversion kit and lots of other outstanding Wrangler products.
But their ProCal gizmo does a lot more than reset the TPMS trigger point. With this device you can tell your Jeep's ECU about your new tires and differential gear ratios so the speedo is accurate and the automatic transmission shift points are correct. You can use it enable or disable DRLs and that 3 blink turn signal feature.
If you get your alignment too far out of whack it can be set to tell you when the steering angle sensor is centered. And it can be set to temporarily raise your engine's idle speed for a few minutes to help out while winching. There are a couple of other features, but you get the idea: if you're going to mod your Jeep you need one.
Best part is it costs $149, which is less than two visits to the dealer to have the speedometer rescaled by a dealer technician. We've already paid the dealer once to adjust the speedometer to our new 33-inch tires to the tune of $85, the one-hour minimun labor charge.
Strangely, that recalibration was lost when I disconnected the battery to install our Superwinch Talon. Jeep operatives tell me that loss of power is not supposed to do that, but in my experience "not supposed to" is small comfort if it happens anyway. Time to take matters into my own hands.
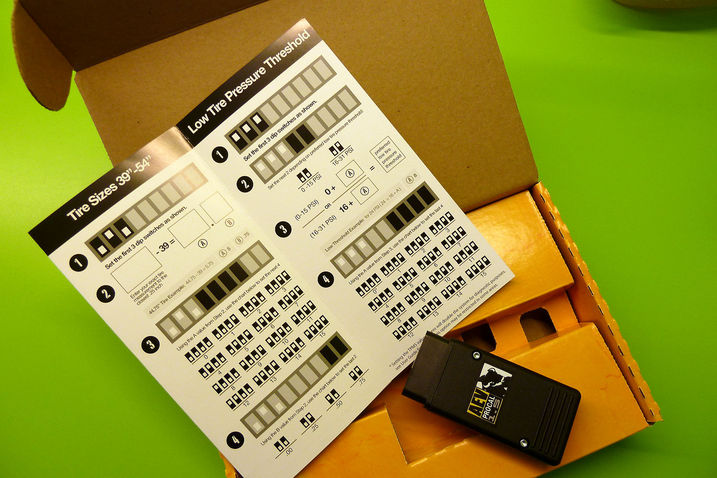
Opening the hardcover novel-sized box is somewhat anticlimactic because all that's inside is an OBD device that's smaller than a pack of cigarettes. And manuals, of course. Gotta have those.
The manual shows how to set the DIP switches found on the ProCal's backside. Setting these switches in the desired position is step one of a ridiculously easy 2-step process.
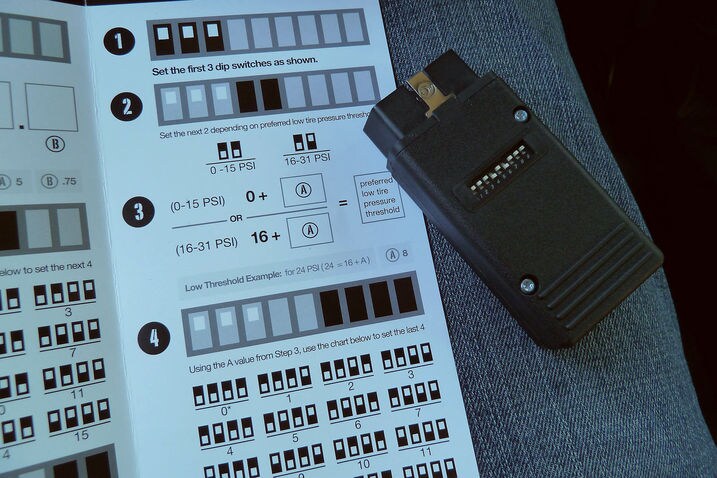
Here the ProCal is ready to go with the DIP switches all set. I'll give you a moment to look at the chart and figure out what our new trigger point is. Hint: It's about 20% below our desired running pressure. The TPMS standard calls for a trigger point that's no more than 25% below the set pressure, so we're good to go.
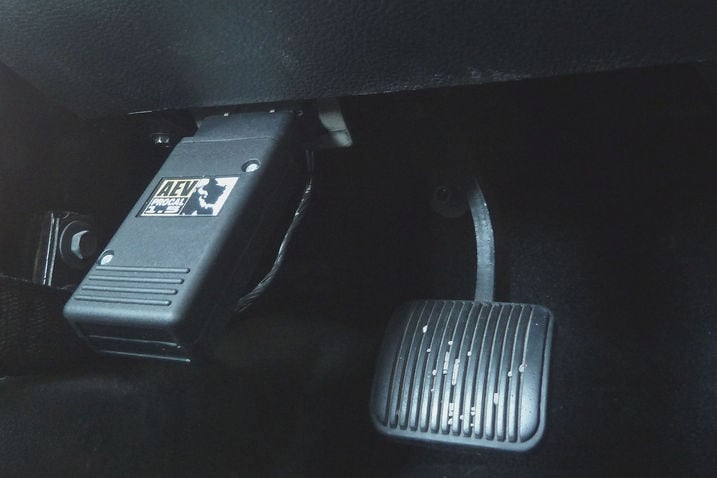
If you guessed 23 psi, you're right. Step two involves turning the key past "acc" to "on" (stopping short of actually starting the engine) and then plugging the ProCal into the OBD port. After a second or two the Jeep's horn will honk two times, indicating the message was received and understood by the ECU.
And that's pretty much all there is to it. The TPMS threshold is now reset. At this point it'll take about three minutes of driving for the light on the dash to go out, the time it takes for all five sensors to report in with their latest pressure readings.
Next on the menu for the AEV ProCal: speedometer recalibration. I've grown tired of using an iPhone app as a stand-in.

Admittedly, my iPhone didn't exactly do a stellar job of capturing what is, in fact, a double rainbow, but the question remains: what does this mean?
It wasn't that loud at first, but in recent days our 2012 Jeep Wrangler's whining accessory drive noise has become unbearable. At this point it sounds like an electric car with open headers.
A serpentine belt at the front of the Pentastar V6 drives the air conditioning compressor, the power steering pump and the alternator. Probably a water pump in there, too, and I'm sure there's and idler pulley and a tensioner.
It could be the bearings of any of those.
For the moment I'm ruling out the A/C and the steering, because the noise doesn't change as those devices apply their variable loads to the system. I'm betting on alternator, based on the fact that the location of the alternator and the noise are pretty much the same.
We're still under warranty, so I'm off to the dealer to let someone else handle it. No point in a DIY when a presumably free repair is waiting there.
Some months back we took our 2012 Jeep Wrangler to the dealer to have its ECU reprogrammed to correct a speedometer error brought on by the fitment of larger 285/75R17 BFGoodrich Mud-Terrain T/A KM2 tires.
No parts were necessary, but we were charged $85 for one hour of technician labor, the minimum charge. It worked perfectly for a few months, but the error returned just after I installed our Superwinch. Apparently the recalibration was forgotten when I disconnected the battery.
This time I'm going to do it myself with the AEV ProCal device I used to rescale the TPMS trigger point last week.

Believe it or not, a tire has three distinct radiuses, aka radii. The most obvious is the unloaded radius, the radius you'd get when measuring a tire assembly laying on the ground or with the car jacked up in the air. Then there's the static loaded radius (SLR), the number you'd get by measuring up from the ground with the vehicle sitting normally with the usual sidewall bulge at the contact patch.
But the one that matters to the speedometer calibration is the dynamic loaded radius (DLR), the axle-to-ground distance that exists only when the car is being driven at speed. If you don't think DLR can be significantly larger than SLR, then you've never seen top fuel dragster do a burnout at a drag race.
As you can imagine, measuring DLR directly is not possible with simple hand tools, but the AEV ProCal gets to the right answer in a pretty simple way: they have you measure and input a diameter instead.
The diameter they want is pictured above. By measuring from the ground up you get one part static loaded radius and one part unloaded radius. Since DLR falls between these two extremes (on street cars, at least) the end result is a diameter that's close enough to two times DLR for our purposes.

The AEV ProCal needs the diameter to be rounded to the nearest quarter-inch, so this sort of tape measure is more than accurate enough.
Adding 3 inches for the body of the tape, our tires measure 32 inches. When I measure the unloaded diameter I get almost 33 inches, which illustrates the magnitude of error I'd have introduced if I hadn't measured in a way that takes the deformation at the contact patch into account.
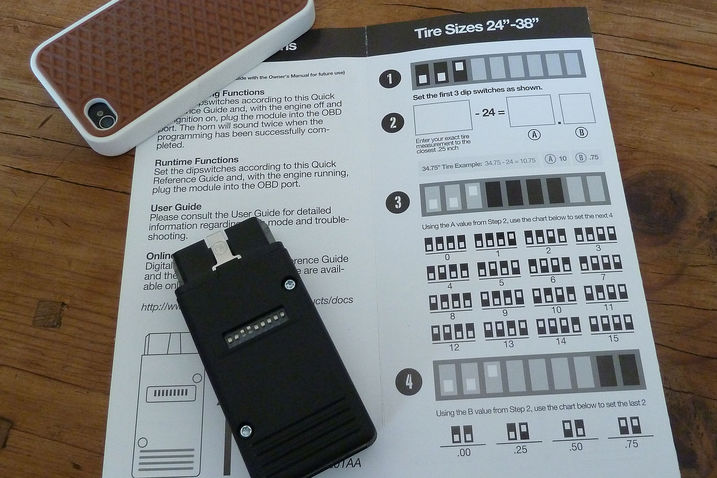
A little math is required before I can use this measurement to set the dip switches. My 32-inch result goes into the left hand side of the equation on line two, which returns an answer of 8.00. This boils down to an A dip switch value of "8" and a B dip switch value of ".00"
With the preliminaries out of the way, the tire size dip switch settings shown above are finally complete and ready to transfer into the ECU via the OBD-II port.
Incidentally, there's another page of possible dip switch settings with a different equation that covers tire sizes between 39 and 54 inches in diameter.

The upload procedure is dead simple: turn the key past "acc" to "on" without starting the engine, then plug the ProCal into the OBD-II port and wait about two seconds for the horn to honk twice.

But tire size alone isn't enough to make a speedometer read properly. The computer also needs to know what axle ratio you've got. We have not yet changed anything in this regard, but making sure can't hurt, especially when it takes no more than a minute or two.
So I dial up 3.21:1 on the dip switches and plug it in one final time.
Bingo. Problem solved. The speedometer now reads spot on.
From here on out we'll have no trouble making further calibration changes when we change the axle ratio or tire size later on. We'll no longer have to visit a dealer and shell out cash if the ECU forgets again for any reason.
Best $149 I ever spent.

Our 2012 Jeep Wrangler is back from the dealer after having its horrible underhood screeching noise dealt with. I could tolerate it no longer. Bad as it had been in the video clip, it had become notably louder in the days that followed.
Because of other work commitments I wasn't able to take the Jeep to nearby Tuttle-Click Jeep in Tustin, California until after lunch on Friday afternoon. The service writer hesitated when he heard that I had no appointment, but I was willing to leave the Wrangler with them if my only option was to come back on Monday.
We briefly debated the source of the noise — power steering, A/C, alternator, idler pulley or tensioner — but there would be no way to tell for certain (and order any necessary parts) until a technician had a look. With no appointment I was told I was looking at a Saturday diagnosis, at best.
They called me Saturday with the diagnosis: a bad bearing in the left idler pulley. But the Jeep parts ordering system doesn't behave like Amazon and can't accept orders over the weekend, apparently, so the order wasn't going to go out until Monday. This, in turn, meant the part couldn't arrive until Tuesday, aka this morning.
The fix was quick once the part was in hand, and I got the call before lunch hour was over. Mike and I arrived to find a very quiet Jeep indeed, along with the expected warranty repair bill for zero, zilch, nada.
As for the time out service, I suppose the moral of the story is don't get sick mid-day on a Friday without an appointment. They were nice about it and they did a good job and all, but the lag time between all the steps was hard to stomach, especially with the central parts wearhouse no more than an hour's drive away
I can't see myself coming back to a Jeep dealer for work like this once the warranty period is over; I have to think an independent mechanic could have turned this around far quicker.
What say you? Do I expect too much?

Our 2012 Jeep Wrangler rolled past 20,000 miles yesterday morning. I wish I could say it happened whilst being winched up a rock face or crossing the the Rubicon trail, but the reality is far less exciting.
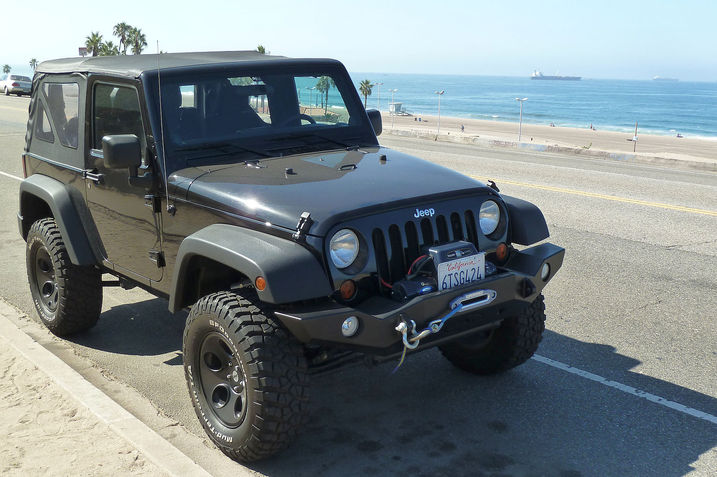
Instead it happened on a strip of asphalt that runs between ships at sea...

...and airplanes taking off from LAX overhead. The abandoned Surfridge neighborhood was condemned and leveled in the 1970s to "facilitate airport expansion and address concerns about noise from jet airplanes."

The so-called Chrysler RES radio is the base audio unit that came with our 2012 Jeep Wrangler Sport. Truly a base radio, it has nothing but a simple AUX jack, and because of that my 4,000-mile trip to Oregon and Moab was a nightmare of tangled cords as I attempted to listen to tracks on my iPhone out on the Lonliest Road in rural Nevada, where few radio signals dare to tread.
Unlike past years the 2012 RES radio has no dormant U-Connect button ready and waiting to be activated by the addition of a U-Connect kit, so previous upgrade kits meant for radios that did have the inactive button won't work with it. And it's not just our 2012 Jeep; '12 versions of the Avenger, Challenger, 200, Compass, Patriot, Durango, Grand Cherokee, Liberty, Ram trucks and the minivans are in the same boat if they have the RES base radio.
A few months back Mopar issued a new U-Connect upgrade kit to offer relief to those wishing to add U-Connect Bluetooth (streaming audio and phone), voice commands and iPod/USB input capability to the RES base radio (w/o U-Connect button) they've already got.
The kit costs $349, and the part number is 82213221 (please verify if you have something other than a 2012 Wrangler). For that you get everything shown above except the USB/iPod cable in the lower right — that's another $35 (P/N 82212160) because, the thinking goes, not everyone has an iPod or iPhone. That's true, of course, but this interface cable works with USB memory sticks and other USB-connected music players, too.
Anyway, I decided to install this myself. Here's how it went.

Some disassembly and reassebly is required, and the upper left garnish that covers the roll bar and a-piller is the place to start. It's held on by two or three bolts and a spring clip.

Another pair of spring clips hold the A-pillar trim in place. These two pieces are coming off to make way for the microphone cable we'll install later.

More clips hold the driver's side knee trim panel in place. It's removal is necessary to fish the new wires through.

The IP surround also needs to come off. Removal of this pocket, which clips on, allows access to one of the screws that holds it in place. Some of you may have power window switches here. They snap in (and out) the same way.
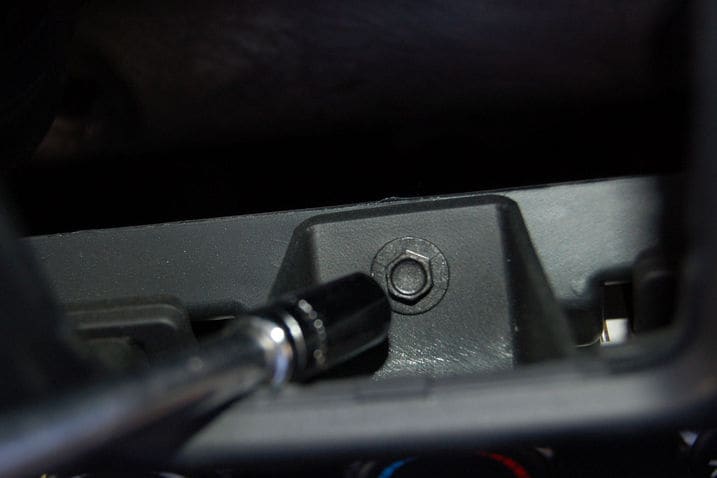
This small bolt is the target of the previous step.

The removable dashtop bin hides another bolt that needs to come out.
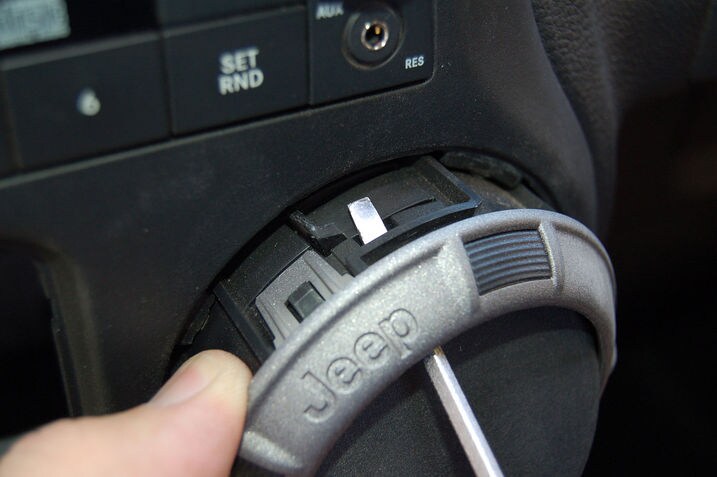
Both center AC vents come out next. Fit the straight blade of a small screwdriver into a barely visible hole at 12 o'clock and depress a small tab. This allows the vent to be rotated 10 or 15 degrees counterclockwise, which in turn disengages the vent from four tabs in the dash so it can be pulled straight out.

At this point it's a matter of pulling back and up against about a half-dozen spring clips, starting gingerly at the bottom and working your way up the sides. But don't forget to remove one more bolt over to the left of the steering wheel before you get too far along.
The whole thing lifts up and out easily once you get to the point shown above.
Note: the pictoral directions in my kit implied the trim surrounding the radio — the piece that needed to come off to get the radio out — was a separate piece from the instrument panel bezel. I'm not sure if that was the case in 2007-2011 or not, but as you can see here in 2012 JK it's all one big piece.
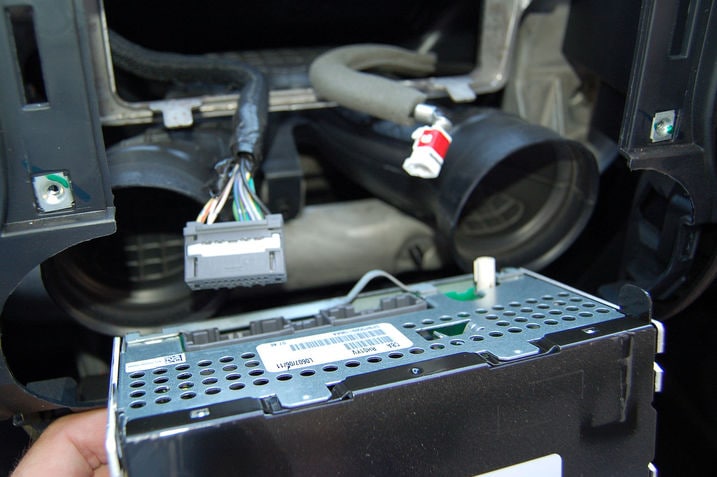
Four obvious bolts hold the radio in, and after they're removed it's time to unplug the main radio harness (left) and antenna lead (right.)

The glove box door needs to come off next. Open the door, flex the sides in where the limiting stop makes contact as shown above, and open it all the way down.

With everything apart it's time to start installing stuff, and the first order of business is the microphone that will pick up voice commands and Bluetooth phone conversations. The business end is destined for a spot on the roof just behind the driver's side sun visor, so I string about 3 feet our atop the dash and stuff the connector and the rest of the wire down into the dash through the a-pillar hole.
From there it goes over the top of the A/C vent tube, then down beow the gauge cluster.

From there it goes under the steering column and gets tie-wrapped to a panel that will be hidden once the knee garnish goes back on.
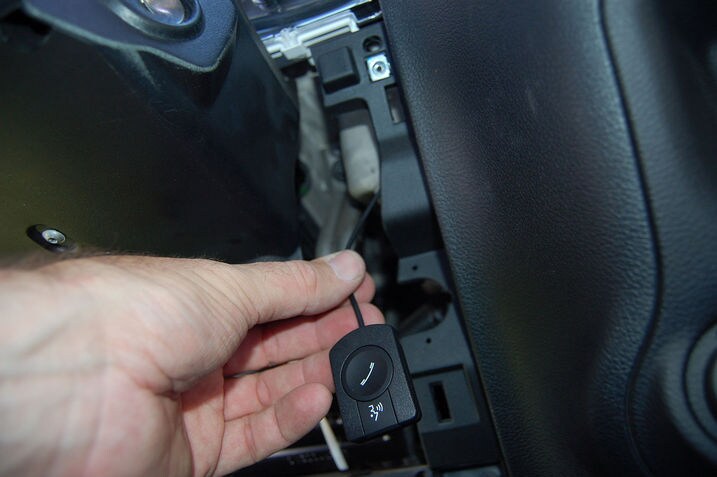
The spot I've chosen for the U-Connect button is just a few inches above the spot where the microphone wire passed by. Later I'll stick it to the knee garnish panel that covers the area with double stick foam tape, but for now I have to route the wires and leave enough slack for me to play with the final position later. Since the microphone wire is nearby I decide to run them both together on their route through the dash from this point on.

The center A/C nozzle tubes are just the ticket for the tie-wraps I have in mind for the wires. From here it's an easy run over behind the dash to the glove box opening. Now I can go back and finish the mic installation.
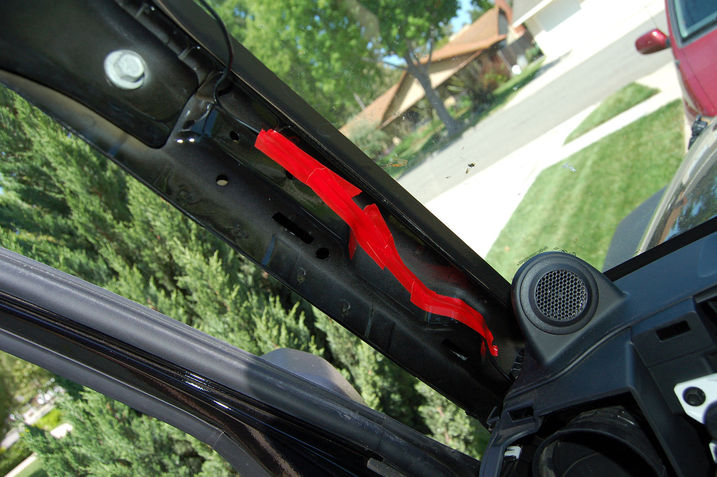
Tape isn't strictly necessary over time, but it keeps the wire where I want it during the installation process so it doesn't get pinched when I snap the A-pillar trim back in place.

The corner trim piece, now reinstalled, has a gaping hole in it to give access to the mirror mount and a couple of other bolts. It's the perfect place for the microphone wire to pass through. Included strips of double-sided foam tape ultimately hold the mic in place.
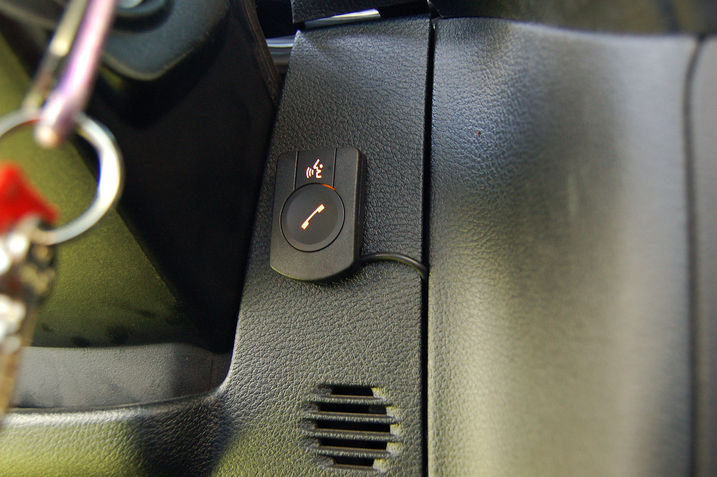
Here I've reinstalled the knee trim garnish and used more double-sided tape to mount the U-Connect button. It didn't stick well the first time out because the surface is slightly curved, so I used two layers of foam-backed double stick tape instead to allow it to tolerate the curve better and stay stuck. Other locations are possible — there's a couple extra feet of wire coiled up behind the panel.

At last it's time to play with the main harness. This is the radio end, and it eseentially represents a plug-in splice between the radio and existing chassis harness, with a 6-foot length in between that heads off to the new U-Connect module.
According to the illustrated instructions — there are no words, just pictures — the leftmost connector goes into the back of the radio an the rightmost one accepts the old chassis-side connector that used to occupy the radio slot. As for the smaller one in the middle, well, there's a bit of a story that goes along with that.
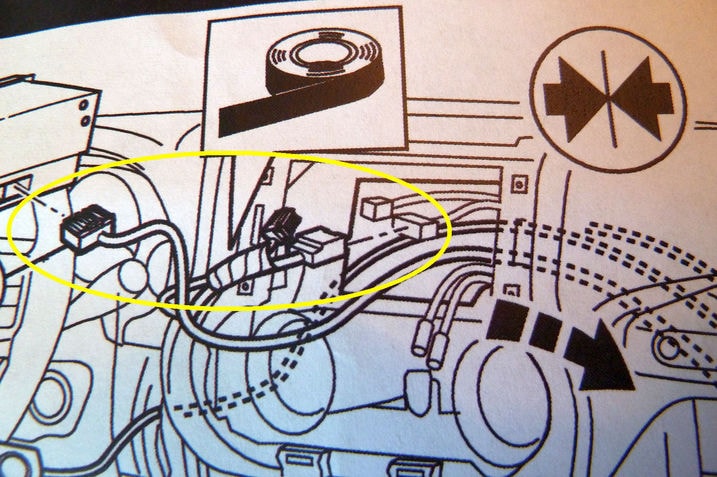
Here's how the harness from the last photo is depicted in the instructions. As you can see the new harness plug goes into the back of the radio (left) and the old chassis-side plug that used to mate with the radio now goes into the socket on the harness (right). As for that third smaller plug, well, it seems pretty clear that it gets taped back out of the way and is unused. Must be for some other application.

So that's just what I did. After feeding the 6-foot lead to the module through the dash to the glove box area where the module will reside, I plugged everything in as per instructions. New plug into radio (foreground), old harness plug into new receptacle (background) and the "third-wheel" spare connector safely taped out of the way with red electrical tape.
All set. The radio is now ready to bolt back into place after the antenna lead (right) is reconnected. The dash top can be re assembled and screwed back together.
FORWARD TIME SKIP, a la ABC's LOST, TO A POINT IN TIME WHERE THE INSTALLATION IS COMPLETE, COMPLETE WITH RECORD SCRATCH SOUND EFFECT
The radio can not be properly initialized. We don't yet know why. Hair-pulling ensues.
The dealer tech tries to initialize the module with the Starscan tool but can not make the system work He checks my installation against the instructions and comes to the same conclusion I did: everything looks fine per the illustrations. Note that this U-Connect kit for RES radios that lack a built-in U-Connect button on the radio faceplate is very new. In fact this is the first one he's seen.
A call to someone higher up (a helpful engineer in Michigan) finally clues us both in to the root cause: the illustration in the instructions is incorrect.
<

Well, the engineer doesn't say that in so many words. What he says is the small connector needs to be plugged into a previously unused slot in the back of the radio next to the main connector instead of being taped aside and left idle.
Fine, I say, but the illustration depicts something else entirely. That the third plug goes into the radio seems obvious in hindsight; it fits properly and leaves nothing unused behind. But I find it hard to ignore instructions when they're so clear. Admit it guys, the cartoon illustration is wrong.
Hopefully this error will have been corrected by the time you do this project. If not, remember this DIY tale of woe.
WE NOW RETURN YOU TO REGULAR TIME, IN WHICH THE INSTALLATION IS STILL IN PROGRESS

Here we're working on the other end of that 6-foot cable, the part we fished through the dash and pulled out through the glove box opening. It plugs into the main receptacle in the center of the new U-Connect module.
Down below is the optional $35 iPod/USB cable. As a USB cable it's not strictly for iPods and iPhones — it'll play songs from USB memory sticks and other USB-connected music players, too. But U-Connect is able to control an iPod that's connected through this cord using voice commands such as "Play Artist Pink Floyd" or "Play Song Sandman," so it's probably worth it if you are an iPodist. At the very least it charges the iPod's battery.
When it's ready, this module will co back into the dash behind the glove box. There's a rigid bracket back there in the dark depths, with just enough space for this to be tie-wrapped in place in such a way that the glove box door will still close.
But a couple more connections need to be made before we can do that.
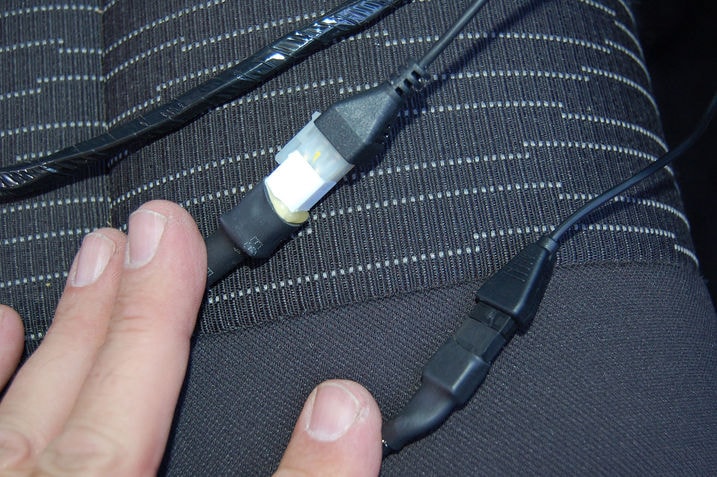
The 6-foot length of the main harness contains two offshoots, one for the Bluetooth/voice commands microphone and another for the U-Connect button. They both have positive snap connections, but I wrapped electrical tap around to make them more secure.
OK, now we can stash the module in the dash. But you'll have to imagine this part because I *cough* forgot to take that picture.
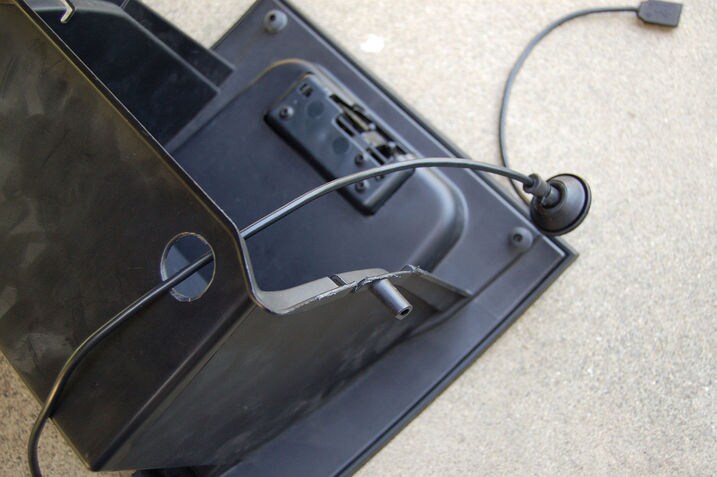
The optional USB cord is designed to live in the glove box when not in use, and it contains a rubber grommet to make the installation look clean. All I need to do is drill a hole, adjust the length I want by the grommet's position then snap it home.

Even though the USB cable is somewhat thick, the glove box door can easily be closed on it when I want to use it, leaving a little pigtail hanging out. Or I could leave it in the glovebox and let the more slender white iPod cord hang out. Lots of options here.
That's pretty much the last step. It's ready to go to the dealer and have the technician reflash the ECU with his Starscan tool to activate the system.
And therein lies the rub. The hour minimum labor rate they'll likely charge you for that probably covers the full installation as well. You may not, in fact, save a dime going the DIY route. On the other hand, doing it yourself does give you full control over where you put the mic and U-Connect button. Maybe you have an idea for a cool hidden location. Or maybe you're like me and you like the DIY approach because it's fun.
In any event, the resulting performance is pretty damn good. Bluetooth pairing and phone dialing the U-Connect button is easy. The system downloads your phonebook automatically so you can voice dial anyone in your existing contact list. The U-Connect lady's voice is a bit robotic, but you can press on through and make voice calls in one long compound command and get past her. You can say "Call Bob Smith Mobile" instead of plodding through "Phone" then "Dial" followed by "Bob Smith" and finally "mobile."
I've found Bluetooth audio to be quite robust, too. You select it using the "aux" button on the RES base radio after the Bluetooth phone/audio connection self-reconnects itself in the first minute after starting the engine. The music or podcast auto-pauses when a call comes in and auto-resumes when it hangs up.
I have not yet figured out how to manually pause music while listening to the iPod through USB other than by switching to another band, such as FM or AM. This unit came with installation instructions, but no operating instructions. Trial and error has worked well for the most part because the commands are fairly intuitive and standard-issue.
Is it worth it? The price is a bit steep and it's possible to do better — pricewise — at someplace like Crutchfield. On the other hand the kit seems to be available for less than MSRP if you shop around the internet.
Even at full price, I like this kit for two reasons: 1) in the end I'm left with a radio and Bluetooth setup that does everything I want but still looks like a base radio that no thief would want — an important consideration with a soft-top Jeep, and; 2) The Bluetooth and voice commands are fully integrated into the whole — it works like a factory system.
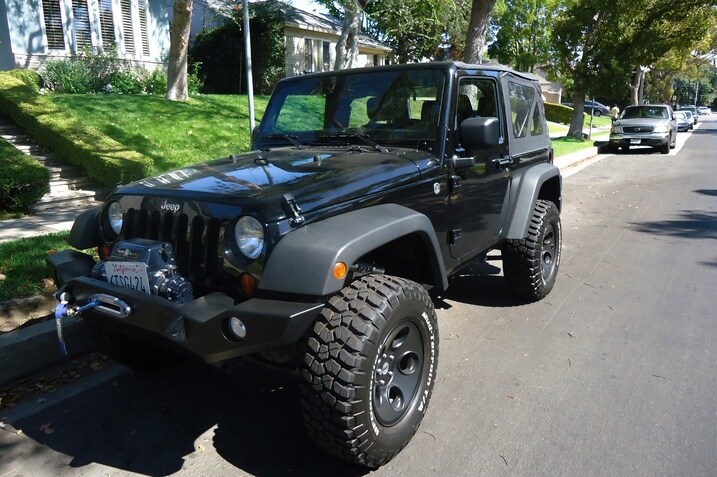
That winch. Those tires. Is there any sight more incongruous than our Jeep Wrangler on a gentle suburban street?
One of the best things about driving this thing around town is the fact that other drivers scatter like flies when you come barreling by. No doubt about it, our Wrangler is intimidating.
What's the most menacing-looking vehicle you've ever driven?

It was last November when I thought it would be cool to install a bikini top on our Jeep Wrangler. So I went out and bought one. It's so long ago now I not even sure I remember how much it cost, but I think it was about $150 with the installation kit.
And since November it sat in its box in a closet. The excuses were numerous; too rainy, too cold, too hot, not good for road trips, not good for the freeway, no way to lock the car, etc.
Well, this past Saturday morning I said the heck with it and installed the sucker. And on Sunday afternoon I realized it was useless and uninstalled it.
Although the top installed easily with a handfull of supplied straps that secure it to the Jeep's roll bar, after a couple of days of driving the abbreviated top just seemed pointless.
First of all it only covered the front seats, so there was still no sun or wind protection for my kids in the back. Worse than that, from the driver's seat it felt like the Jeep's full size top was still in place. I was getting absolutely zero convertible experience.
In other words, I was bored up front and my kids were still complaining about the sun and wind in the back seat. Like I said, pointless.
The bikini top now sits rolled up on my garage floor. Lesson learned.

Our longterm 2012 Jeep Wrangler sent up an oil change alert this morning. There was a chime and the display above (disembodied fingers and all), followed by the display after the jump.
But waitasec, the service interval prescribed by the owner's manual is 8,000 miles, and the Jeep currently only has some 20,500 miles on the clock. By my math, this alert is... 3,500 miles premature. Hmm.

Turns out the Jeep's last oil change was performed by a dealer when the odometer read 14,408 miles. Had they simply re-set the last alert, it would have chimed in again when the odo read 22,408 miles. Seems they reprogrammed the alert to come on at an interval of 6000 miles instead.
Sigh.
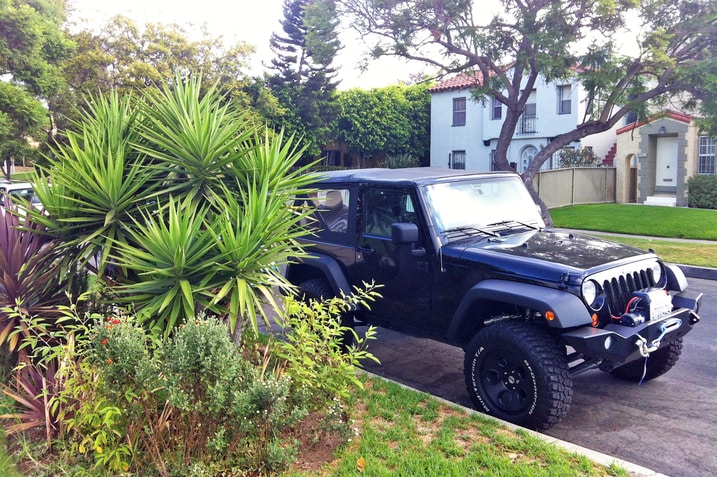
The 2012 Jeep Wrangler parked next to a Sequoia.
Last night I took our modified Jeep home. Something I've been reluctant to do, especially during rush hour. I've never been a fan of its long throws and the fact that I have to push my seat up against the steering wheel so my short legs can work the pedals. But add to that it's now easier than ever to stall.
Why's that?
Because of those huge tires. The gearing is taller now so a driver has to nearly slip the clutch to prevent the car from stalling. I stalled it twice yesterday.
Another downside to those tires? Without the benefit of a step (or a good running jump), short people or those with bad joints struggle to climb in. Not really a great city car, but I'm sure it's just perfect out in the wild.

Went off roading in the Wrangler this morning. Saw this awesome rock stack, which made me want to crawl over rocks. But before I did I had to give the Wrangler a tweak. That tweak involved two 18mm wrenches and a shoelace.
Can you guess what it was?

Yes, disconnecting the front stabilizer bar (for added axle articulation) requires two 18mm wrenches. Tieing the end link to the stabilizer bar requires Monticello's shoelace:

Videos coming tomorrow. And for the next week.

Forget what I said earlier about the dealer tweaking our longterm 2012 Jeep Wrangler's oil change alert interval. As one commenter pointed out, the Jeep's alert is one of those deals that is based on an algorithm that — after monitoring numerous engine sensors over time — makes an educated guess at how beat-up the oil is and sets the alert accordingly. This type of non-adjustable, algorithm-based alert is becoming common, though not yet universal.
Earlier I'd assumed our Jeep's alert was a conventional, old-school odometer-based-only alert as I went straight to the owner's manual's maintenance chart (shown above) and saw no caveats or asterisks. A different section of the manual (after the jump) describes the alert.
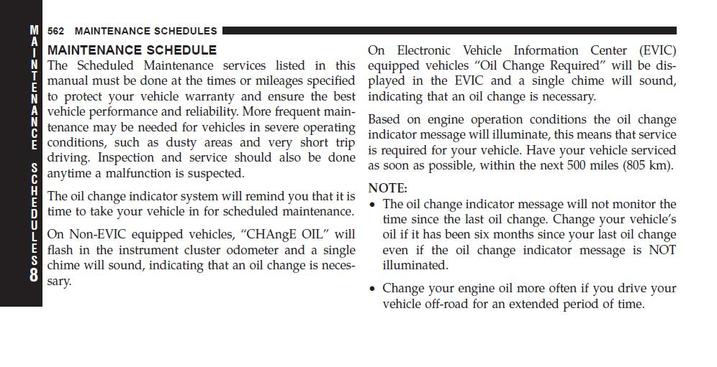

So in our case, it seems there's no dealer monkey business related to the alert after all, and the 8000-mile oil change interval in the lead chart might could benefit from an asterisk pointing to the pages shown immediately above.

Yesterday Mike Monticello and I made many short off-road videos of the Wrangler. I learned from this experience that the feats that feel absolutely stupid inside the Jeep look absolutely timid from the outside. Especially on video.
Also, here's a good shot of the axle articulation available with the stabilizer bar disconnected. And, yes, we need quick disonnects so we don't have to deal with Monti's shoelaces anymore.
So if you want to see some solid video work (and commentary) by Monti combined with some not-so-hard-to-tackle terrain for the Jeep go ahead and hit the jump.
OK, so this is before I learned that the Wrangler will essentially idle up this kind of loose hill. My foot gets lighter in upcoming videos. Even so, I'm no Tim Cameron.
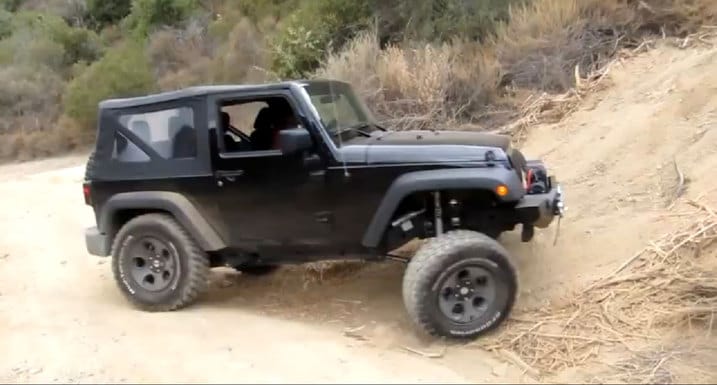
After a few minutes of driving up loose dirt hills last week I realized that it is possible, in fact, to tread lightly. Here's a video of the Jeep climbing a very loose, very steep hill with stunning ease.
It also happens to be a video of me not screwing it up with a — wait for it — heavy foot.
Like I said...easy.

During last week's off-road adventure, we found a big hill to climb. A really big hill. In most of the world it would be a mountain. Click through for a few minutes of in-car footage with Monti on color commentary.
Again, the video just doesn't do the angles and the terrain justice, which is a shame because the stuff this Jeep will climb with ease is truly stunning for us off-roading novices.
Yes, the windshield is cracked. No, we didn't do it on this adventure.

So about half way through last week's off-road adventure it started raining. Normally, this would be a welcome change, but we were about 1,000 feet into a surprising long, surprisingly steep climb that would eventually dead end.
Of course, we weren't certain of this at the time so we soldiered on. In the rain. Two videos following the jump.
Honestly, I was more concerned about getting back down this hill once it became slick than I was about continuing up, which, you'll notice, wasn't a problem for the Wrangler.
I shot this video from the spot the dead end a few thousand feet above where we started.

So we survived the wet, slick descent back to the valley and discovered a wet, rocky playground. This terrain is still on the soft end of the Wrangler's capability, but wet rocks do up the ante some.
Two videos after the jump.
I tried this short frame twister a number of months back with the stabilizer bar connected and it was actually a challenge. Uncoupled, however, it's a bump in the road.
This rocky wash was more difficult that it looks. Lots of places to drag an axle or hang a rocker if you're not careful. And as much as we need to use this truck in the terrain it's built for, I don't want to be the guy responsible for body damage.

Did about 25 miles of light off roading near Big Bear this weekend in the Wrangler. No rock crawling. No super steep inclines. Lots of decomposed granite roads and lots of small embedded rocks. Rough, but not rough enough to crawl.
Following are a few observations:
- The Mopar Stage 3 kit, despite its Fox shocks, is better at crawling than at actually moving. Perhaps you've heard the old expression, "the faster you go, the smoother it gets." Not so in this Wrangler where, by and large, the faster you go, the more Excedrin you need.
- It just never really feels compliant. The spring rates feel too high and after an hour of bouncing over rocks and waterbars, I'd had enough. Crawling, yes. Flying, no.
- Regular driving like this demonstrates the need for lower axle ratios nearly as much as crawling. Getting the Wrangler moving on steep hills gives the clutch an unnecessary workout. I ended up using low range on terrain that didn't demand it just to preserve the clutch. This means you find yourself in fourth gear at 20 mph, which is silly.
- It's tough. I ended up giving the thing a pretty good pounding in this little test and it didn't care. Drives just like it did before, which it should with these mods.
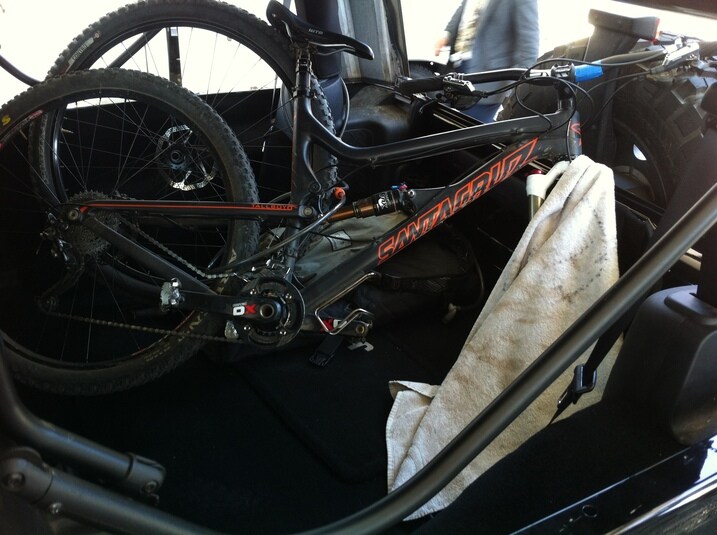
Perhaps you remember Monti's bike fit attempt from last November. He made it happen, but his effort won't win any awards for grace.
Turns out, removing the rear seat makes things a lot easier.

You might have noticed that our Wrangler is still in the fleet even though we've had it for more than year now. Since we own it, we're free to keep it longer if we choose to (unlike the manufacturer-sourced cars that typically have to be returned after 12 months).
While nothing is official, I believe there's interest from Mr. Oldham in keeping it longer so that we can continue to mod it and do a few more off-road excursions. Sounds good to me. The Wrangler continues to be one of my favorite vehicles we have right now.

This was back when it was all going well. I drove our Jeep for two of the last three weeks. As you've likely seen, it went everywhere from our local off-road trails to some mild fire-road hustling out in Big Bear.
I also, hauled this one to pre-school on several occassions. Everything was going just fine until I gave it back last week.
That's when she had a fit. She wants the Jeep back.
So do I.

Photographer Kurt Niebuhr told me a very funny story about choosing a ride to the test track. Only the Jeep Wrangler and our Mazda MX-5 Miata project car were available.
Niebuhr looked at the photo gear he had to carry and realized he needed practical transportation. Naturally, he said, he picked the Miata. Even as he crouched down practically to his knees so he could thread himself past the door bars and into the Miata's race seat, he consoled himself with the thought that while the MX-5 would bounce and shimmy on the freeway just like the Wrangler, it would probably spend more time going straight while doing so.
Personally I thought this was very funny, because for me there's pretty much no difference between the Miata and Wrangler at all.

The Wrangler doesn't drive the same as the Miata, of course. Our Dan Edmunds has turned it into the Jeep equivalent of the desert-racing Honda CR450 he built in high school. Here in L.A., you see desert-spec toys like our Wrangler all the time. You hear this hum of off-road tires, look over into the next lane and this enormous jacked-up pickup truck with fiberglass front fenders powers by you, riding high at the front end with that typical desert-pounding suspension setup. These desert sleds are right out of the same kind of enthusiasm for the dirt that you see in the movie that made dirt bikes a cultural phenomenon back in the 1970s, On Any Sunday .
And that's the link between the Wrangler and the Miata. Like the Mazda, this Jeep is all about what you do on Sunday, whether it's road racing or rock crawling. The Wrangler is a sports car, which is to say that it is simply a street-legal high-performance car. You put up with the compromises in daily life so you'll have something really fun on the weekend.
Don't get me wrong, because the Wrangler is just barely tolerable in daily life. You need a climbing rope and pitons to climb up into the driver seat, and when you're ready to climb out again, you wish you were wearing that wacky flying suit from the Kumho tire television commercial. But then, it's just as much trouble climbing across the MX-5's racing-type door bars.
When it comes down to it, anyone who loves to drive will put up with a little impracticality in his ride just so there's a little something extra when you really want it, whether it's horsepower, tire grip, braking capacity or suspension composure. We all make compromises in the everyday practicality of our rides whenever we do something as simple as check off the box on the new-car order blank that says "sport package."
So don't think the Wrangler is any different from our Mazda MX-5 project car. It's just a sports car, that's all.
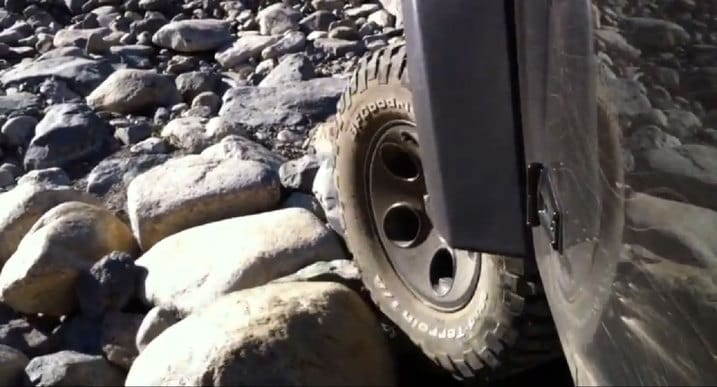
Here's a little point-of-view action from the Wrangler shot with a cool little iPhone case I'll tell you all about after the jump.
Went back to the usual spot, but forgot the tools to disconnect the front stabilizer bar. The above video is the same small climb you can see in the first video in this post. Here, with the bar connected, it's a problem. Enough so, in fact, that it required a second attempt. We did all of today's session with the bar connected and it made obvious the importance of axle articulation and limited-slip diffs — in that order. Next time I'll remember the tools.
This is our first try at shooting anything with the Igloo Case — a protective sheath for an iPhone 4, 4s or 5. Coupled with a suction cup mount it makes some pretty engaging video. The Igloo Case was cooked up by car guys and it works well in this kind of application. Recording can be triggered by a Bluetooth headset so you don't have to open the case.

More videos to come.

Here's the best thing about off roading: Having something old and tired is better in many ways than having something new and shiny. My friend Tani's 1994 Toyota Pickup is old and tired.
And awesome.
He joined us on yesterday's adventure and, on some terrain, embarrassed the Wrangler.
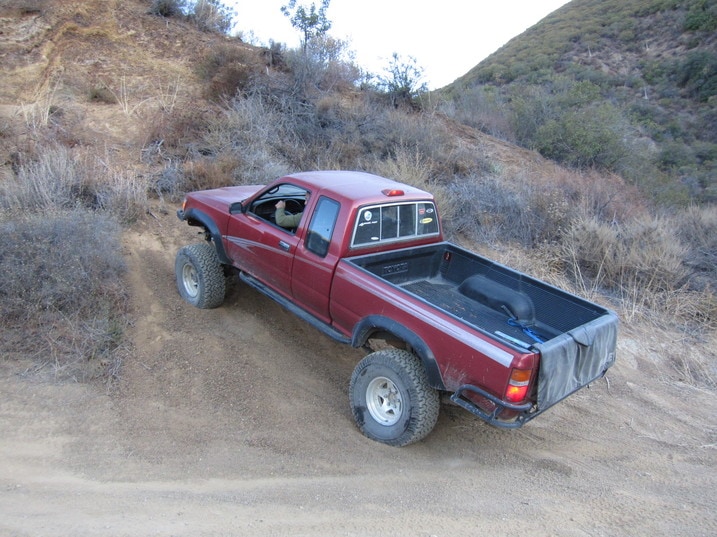
With a solid-axle front suspension conversion, a dual transfer case and a rear locker, the Toyota's off-road abilities are not to be taken lightly. It idled through rock beds and up hills that made the Wrangler — with its front stabilizer bar still connected — struggle.
Also, I'm pretty sure Tani wasn't worrying about his paint.

There's no getting around it: The Wrangler's rear seat is a beast. It's heavy and awkward and covered with metal hooks. And, best of all, like an old hide-a-bed, it unfolds when you least expect it unceremoniously crushing your hands or toes.
Still, I'm glad it's removable.
Following is my step-by-step installation/removal process.

First, as you already noticed, I don't carry it anywhere. I use a small cart to roll it in and out of the garage. It's too heavy. I haven't weighed it, but I'd guess there's a solid 75 pounds of large, awkward finger-annihilating Jeep seat here. Use a dolly. Save your back.
Then I pad the bumper for the transition from dolly to Jeep. Doing it myself is a bit of Gong Show, but I can manage with some huffing and puffing. It's a wrestling match to arrive here:

It's not obvious the first time one installs the seat that the two front hooks must align with the front two floor latches like this:
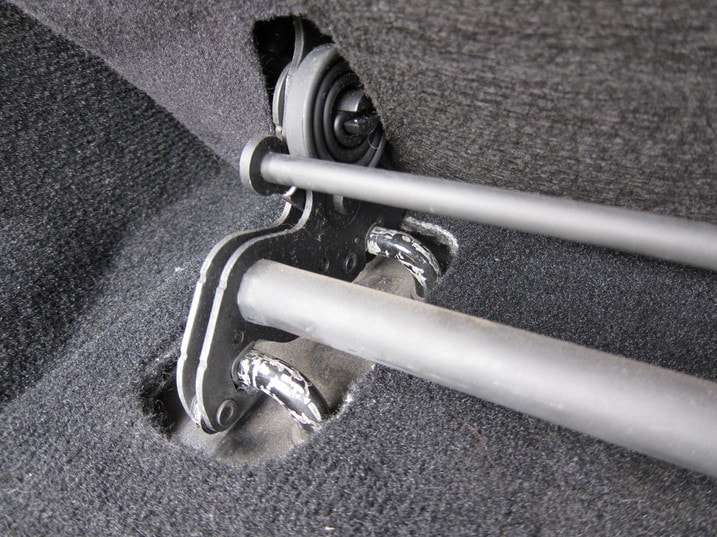
From here, one only needs to unfold the seatback into its upright postion as the seat bottom folds down to contact the rear floor latches. Failing to unfold the seatback will result in the rear hooks refusing to latch and the seat will return to the upright position without latching.
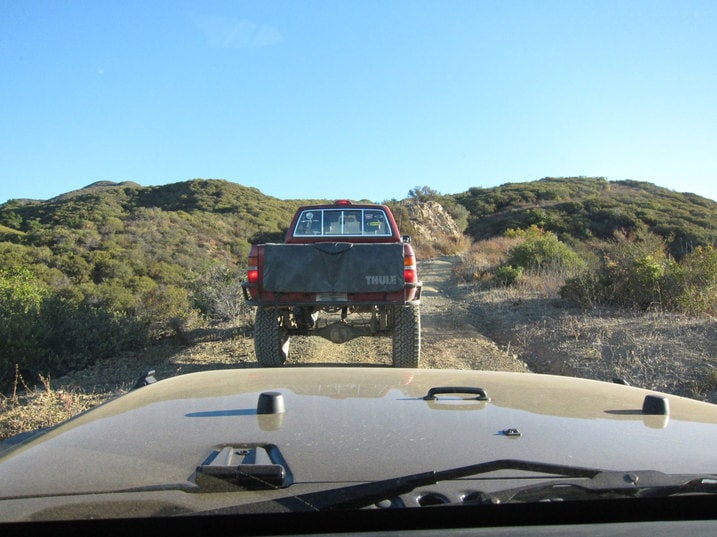
Following the jump is some additional video I shot earlier this week on the trail.
Good times, this.
Without being able to see the whole picture, it sure looks like I spent a lot of time needlessly hugging the left side of the trail. But this is a narrow road descending a very steep hill with a big drop to the right. Keeping left mattered.
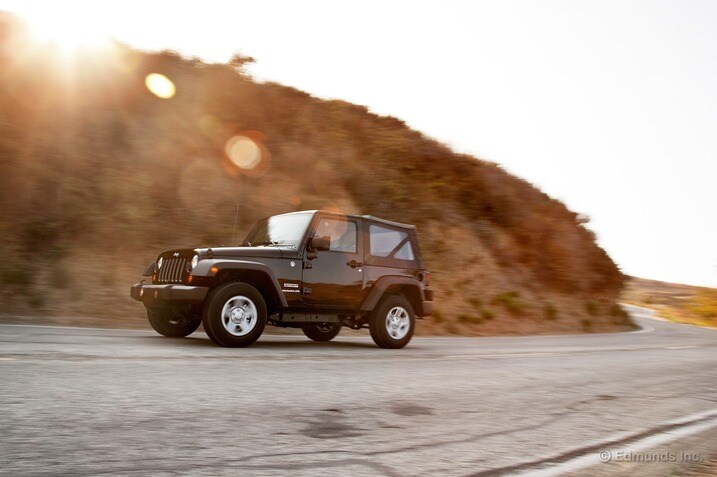
Let's not confuse things, I really do like our Jeep in its current state of not-too-extreme tune and I'm head-over-heels for the wheel/tire package.
Unfortunately, I don't want to own it.
When we first got our Jeep it was a revelation. It was pure, simple, uncomplicated and a thrill to drive. It didn't steer particularly well, but it was way, way faster than it needed to be and the traction control wasn't as grabby as it is now. You could get rubber in second gear.
It looked kind of stupid with the 16-by-7 inch wheels with P225/75R16 tires, but it wasn't supposed to. The tires were meaty enough to survive obstacles, quiet enough to be tolerable on the highway and cheap enough to reasonably exist on a $23,000 Jeep.
Our tweaked Jeep is extremely capable. So is a stock Wrangler. The way our Jeep currently sits is pretty rad (and about 250 pounds — excluding new bumper and winch — heavier), but I'd have been perfectly happy keeping this one stock.
Okay, maybe I'd add the blacked out wheels.

Since Edmunds had Monday off, I took the opportunity to head up to Sequoia National Park for the day in our Wrangler. Enabling and encouraging you to go out and do something fun — it's what our Jeep is best at, and what truly endears this vehicle to me.
It was also fortuitous that I made the trip in the Wrangler. A recent storm had dropped a few inches of snow, limiting park access to vehicles with 4WD and snow tires or vehicles with chains. I didn't have any problems taking on the snow and slush.

I didn't think the Jeep could be any noisier, but I was wrong. The weather stripping on the top of our Wrangler's passenger door has come loose. I discovered this only after driving the Jeep on the freeway and hearing a rather loud wind leak.
Further inspection revealed the loose seal. Somehow it got pulled off the door frame and then sandwiched askew when I closed the door at some point. I was able to easily pull the seal back onto the frame to its original position, but a more permament solution is likely needed.

Seeing a Jeep being towed by an RV is a pretty common sight. Since we have our Wrangler, I was curious about what the owner's manual said to do for flat towing. So I looked it up.
The steps listed in the manual are fairly detailed, but the summarized version is that the Wrangler's transfer case needs to be placed in neutral and the transmission needs to be in gear (say, Park for an automatic or first with a manual). This allows the axles to rotate freely while keeping the transmission and transfer case safe. The manual also states not to tow with just one set of wheels lifted (front or rear) and only to tow with the Wrangler facing forward.
Now all we need is a Class A RV to test this out. This seems like a perfectly logical addition to the long-term fleet.
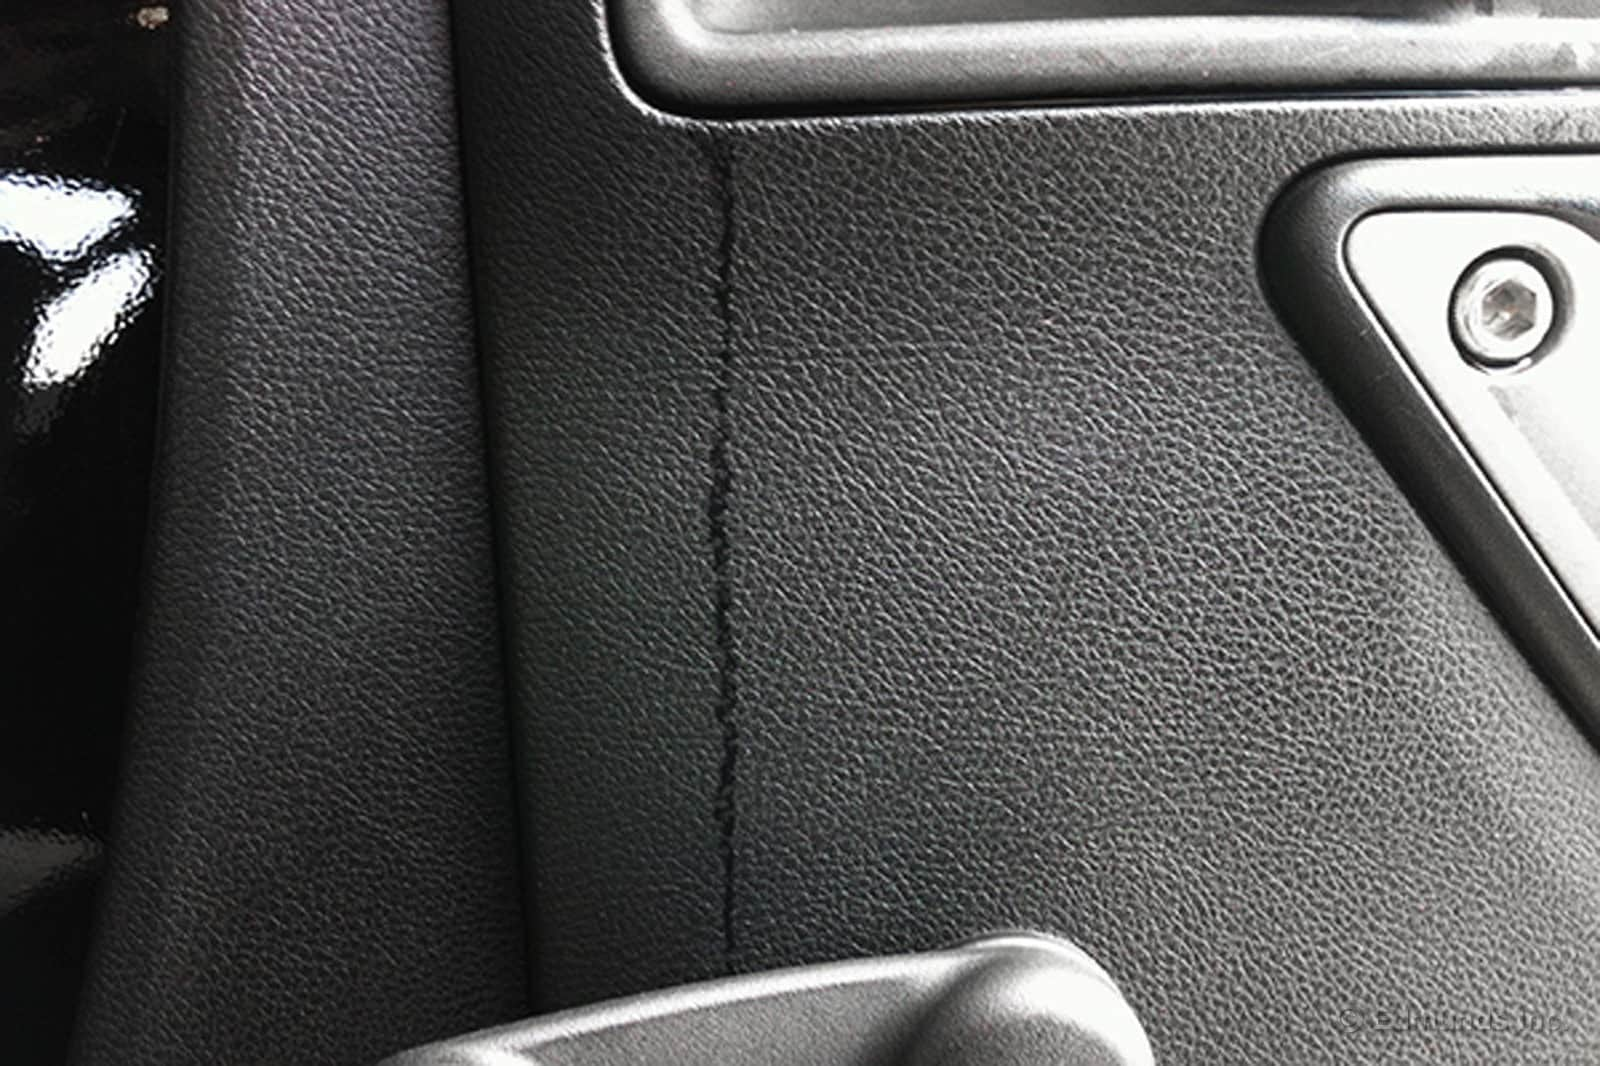
My original plan was to take our Jeep deep into the Mojave Saturday morning with my dogs and go hunting, but two things changed my mind.
First was Mother Nature. The areas I was thinking of going were getting snow. And a lot of it. I'm a Southern California boy, really. I've never had to deal with snow like most of you. And I haven't had to deal with it way out in the hinterlands either. I didn't want to get stuck without some kind of support. I don't have a lot of confidence in those tires to do the snow/sludge traction thing.
Secondly was my neighbor. No seriously. As I was packing up my gear late Friday night, I watched him back out of his driveway across the street and right into my wife's car that was parked in front of our house. He then calmly drove away. Mutha Trucker. He and I were going to talk. I waited up late but he didn't come home. Hunting trip was off because he and I were going to talk in the morning.
I didn't get to use the Jeep as I had planned. It spent most of the time in my driveway getting rained on. Thankfully the neighbor came to our door first thing in the morning and gave us an apology and his insurance information. In the end, a good guy. Still a touched miffed he didn't do something right then.
What wasn't good was that when I got into our Jeep Sunday morning, I noticed several weird leaks. One even coming from the door handle! I have to hope that the abundance of plastic will mean than the Jeep won't rust out in a few years. That'd be a shame.
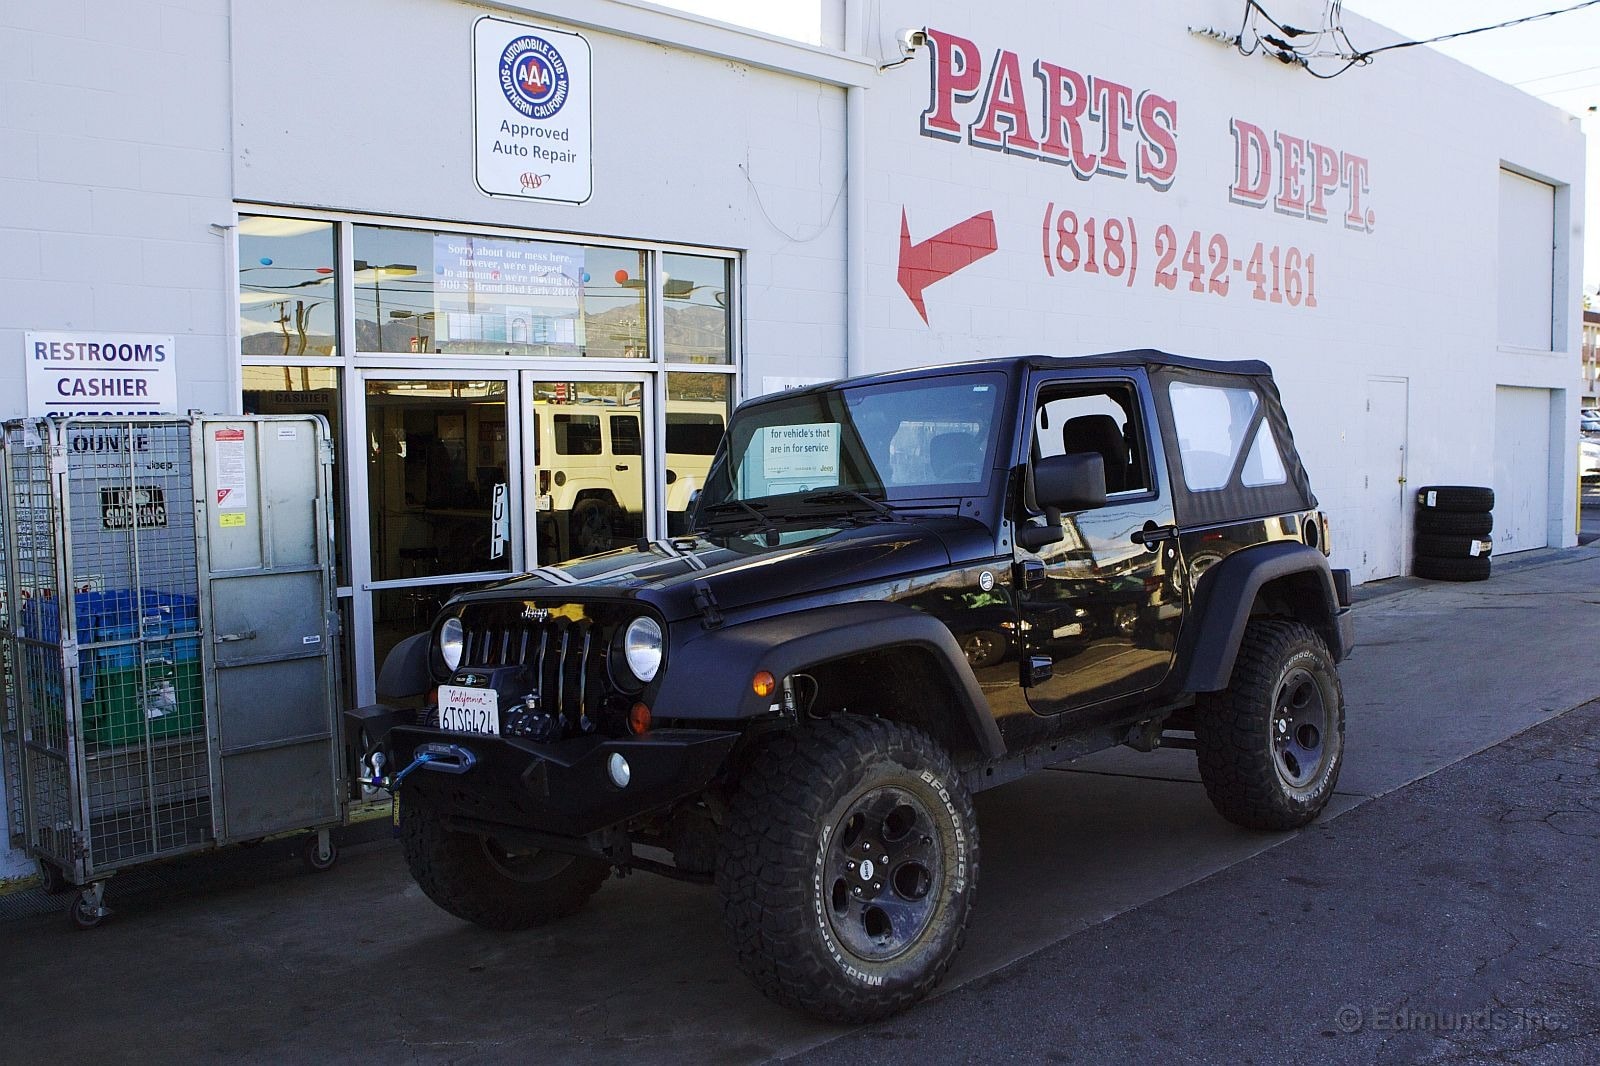
Wow, things can sure happen fast. One moment everything's fine. It's the Sunday before Christmas and our 2012 Jeep Wrangler is running great. Late in the afternoon the check engine light comes on, but there are no symptoms other than the light itself. We're not too stressed by this because we're almost back in our driveway at home.
Turns out the closest dealer, Glendale Jeep, is closed on Christmas Eve day in addition to Christmas, so this is going to have to wait until Wednesday the 26th when they open again at 7:00 a.m. No problem. With family in town and plenty of stuff going on it's easy to leave the Jeep parked until then.
That was how it began for John Adolph. Nothing seemed too alarming, but with a 1,600-mile New Year's day road trip looming on Thursday — including a side trip for some off-road action in Death Valley — he was eager to have this handled. Besides, it was time for an oil change anyway.
John arrived bright and early Wednesday morning and told the service writer about the oil change, the check engine light and his upcoming road trip the next day. Within walking distance from home, he agreed to leave it with them, expecting to pick it up later that day.
At 10:30 a.m. he gets a call. "Yeah, you're going to need a new left cylinder head," said the service writer.
"What?" replied John, more than a little taken aback. "How much is this going to cost me?"
"Nothing. It's covered under warranty," came the reply. There was more, the gist of which was this wasn't a complete surprise to the dealer. Apparently, the need to swap in a new left-hand cylinder head isn't exactly unheard of with this new Pentastar V6.
So much so that the dealer went on to say this, "We can have you fixed up tomorrow afternoon. Do you want us to go ahead?"
For this kind of turnaround they must have had a new cylinder head very close at hand, although at this point it must be said that this Jeep brings up the name Edmunds or Edmunds.com when they put the VIN into the system. We bought it outright, but it isn't registered anonymously. Still, even with that knowledge, a one-day turnaround seems unlikely without parts standing by in a nearby depot. It probably didn't make much difference.
Whatever the circumstances, John picked up the Jeep with its new cylinder head the next day at 2:00 p.m. and was on his way. He put 1,600 miles on it over the weekend and it never once flinched. In the process, the Death Valley dirt roads applied so much fresh dust over the engine compartment that it's difficult to see signs that anything was done.
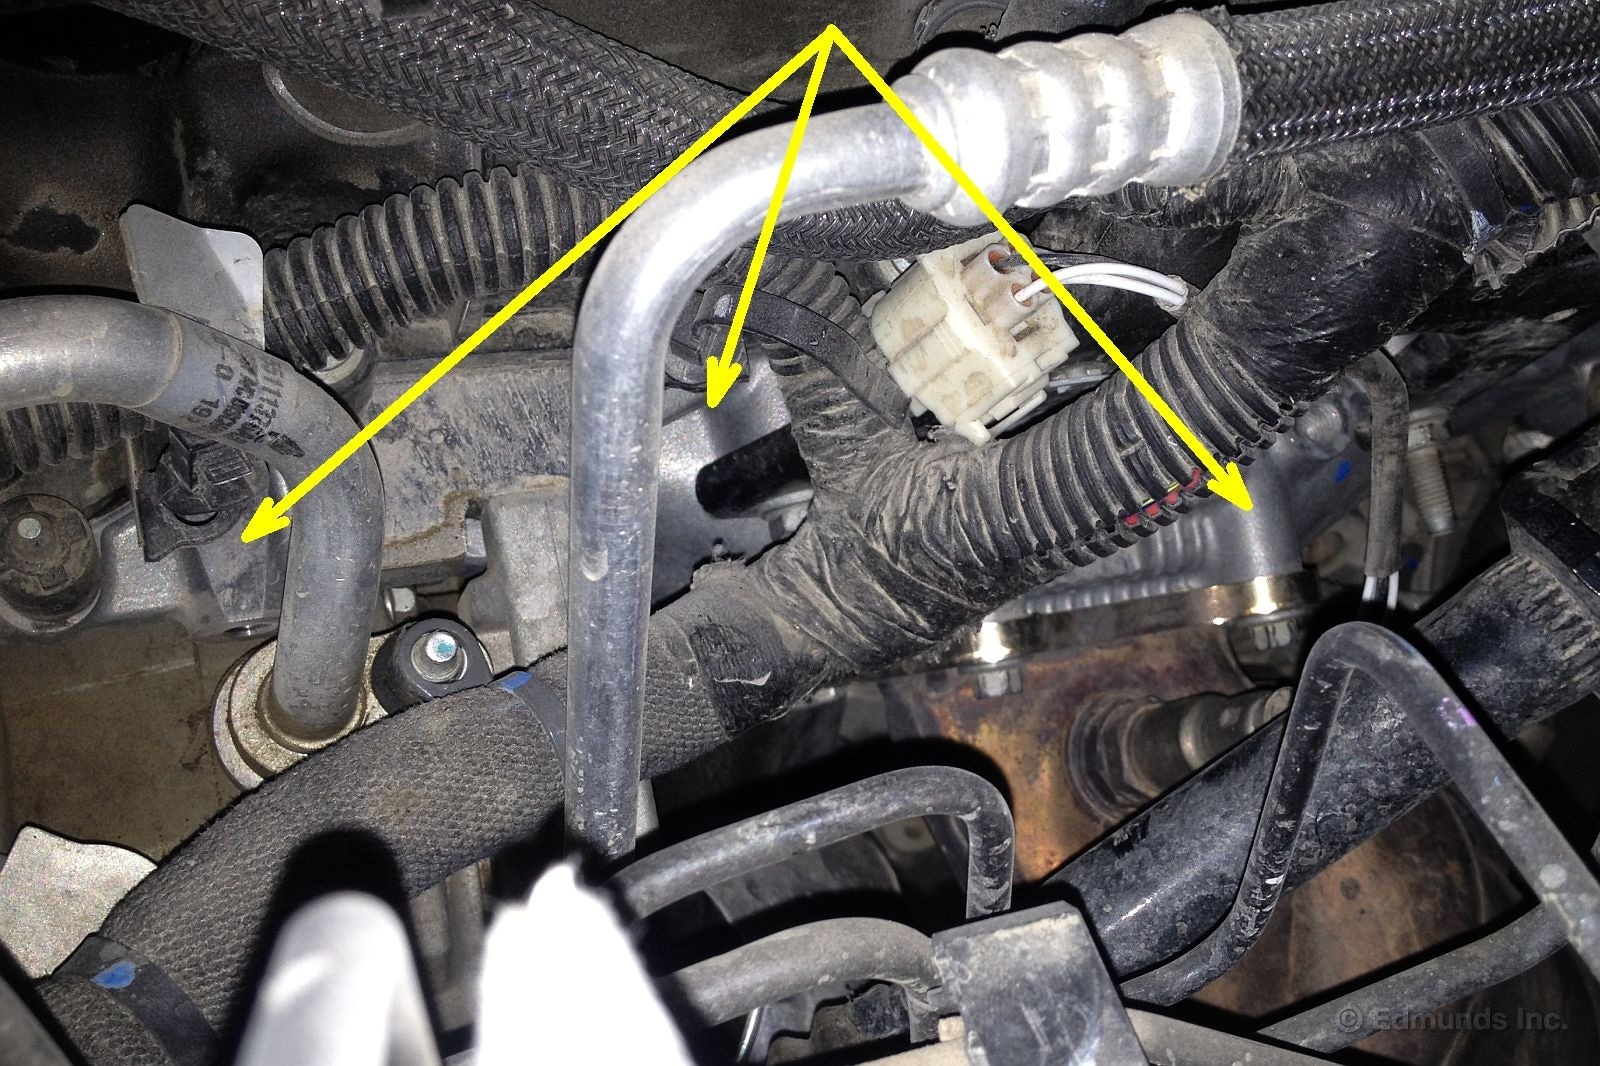
The work ticket is clear, but it raises as many questions as answers and it doesn't explain what actually went wrong. I have a call in to Jeep to see what I can find out.
But I do know the code was P0302, which represents a misfire in cylinder #2, which is on the left-hand bank of cylinders. From there they installed a new coil, spark plug and injector, but the error code persisted.
At this point I get confused, because after this failed they did a compression and leakdown test. Knowing this is not a wholly unfamiliar issue, I'd have thought they'd do the leakdown test first before throwing any parts at it. What was the point? But I digress.
The leakdown test didn't go the way they'd hoped. The cylinder pumped up to 125 psi and exhibited 85% leakdown. I'm not privy to the actual specs for this motor, but apparently this was enough to trigger the decision to install a new cylinder head.
From the way the service writer talked about it I get the impression that the problem as it pertains to a larger set of vehicles is confined to the left-hand bank, although I don't yet know for certain. The fact that they are opting to replace the entire head tells me it may be a problem with the head itself, not a problem with a valve, seal or spring that could be repaired, but that's a guess at this point, too. And I have no idea if this is tightly confined to a small group of vehicles built with one lot of parts or something larger.
I do know that we have been sticking with Jeep's recommendation for 87-octane fuel, but we always buy that gas from top-tier name brands: Shell, Chevron, Mobil, Unocal 76, Texaco. We don't use ARCO because of their quirky payment system and their sometimes-low octane, and we don't use off brands.
Meanwhile, as far as our 2012 Jeep Wrangler is concerned, we're fine. It's running great and we love this engine just as much as we did before this went down. Maybe that's because we didn't get stranded, because we experienced no gradual decrease in performance and because we were able to react to the check engine light relatively quickly. The light came on, we went in, the dealer didn't like the reading they were getting and we got a new head with no undue hassle or delay. They had our Wrangler for a grand total of 31 hours — a day and a half to us. That they replaced something as major as a cylinder head almost seems like a dream. It doesn't seem real.
Official comment from Jeep has been requested, but we have not yet heard back. We have no idea how rare this, what causes it and if there are any measures that can be taken to avoid it. Stay tuned for further updates.
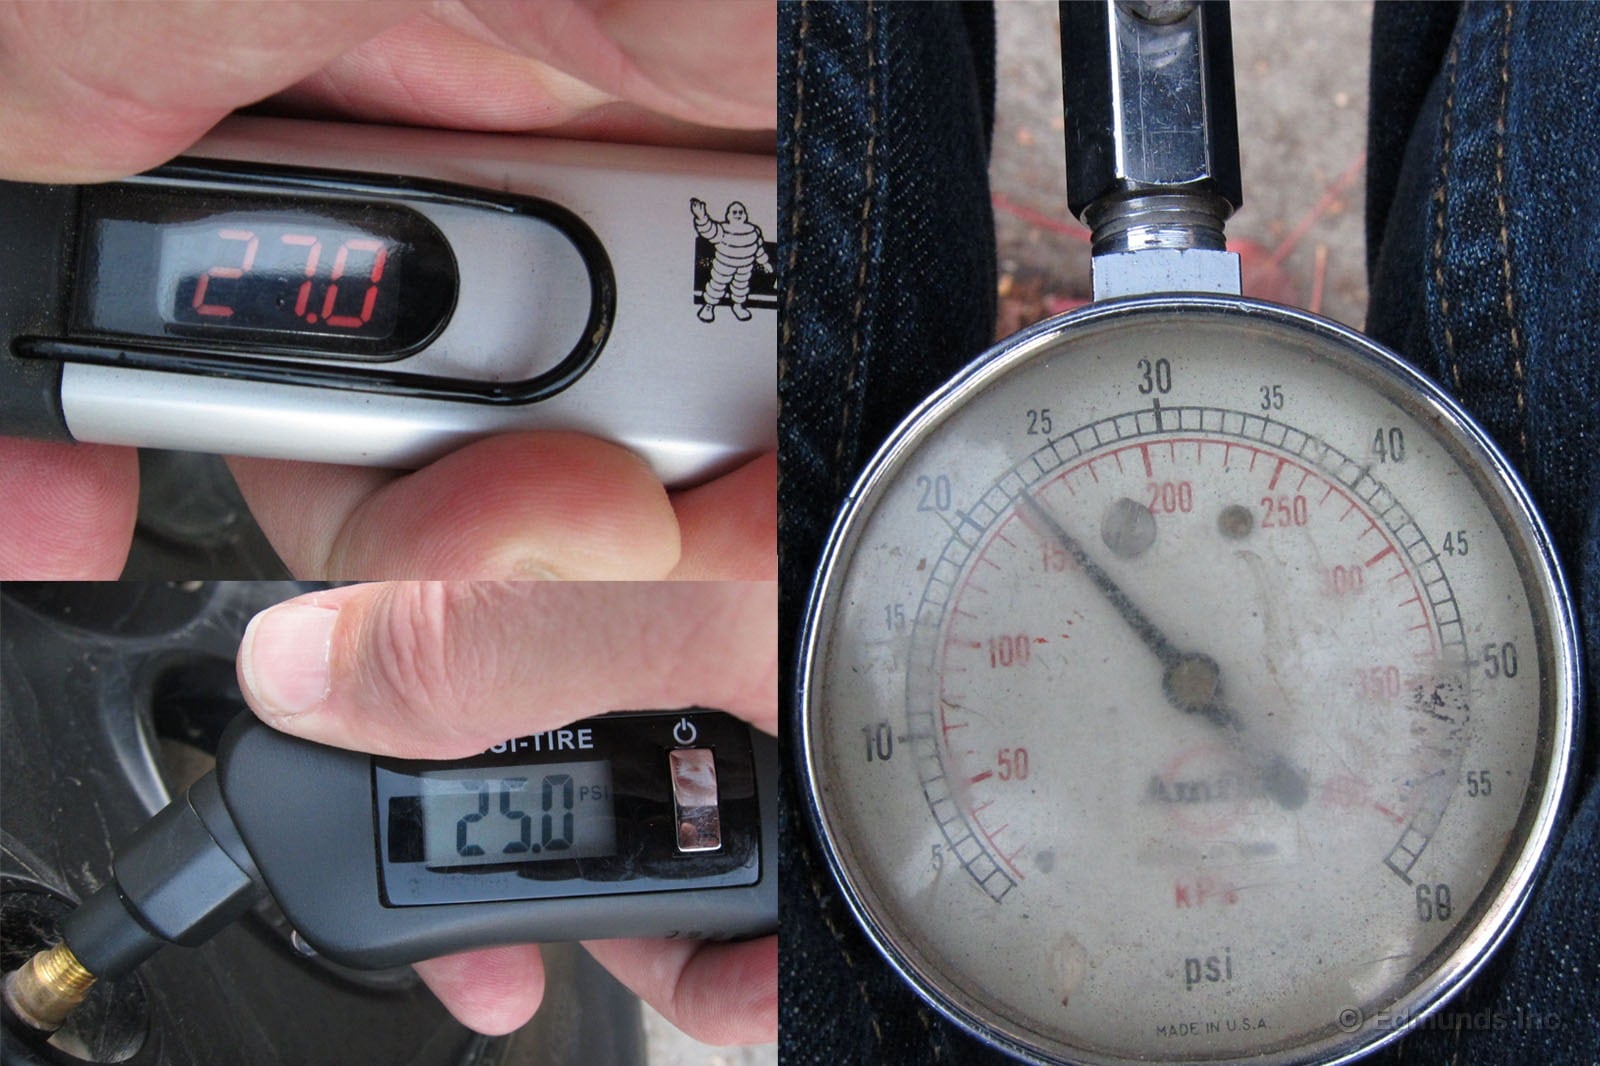
It was cold, and the tire pressures had recently been dropped on purpose for some light off-roading. It was therefore understandable that the TPMS light had winked on, but I still needed to check and make sure one of them wasn't leaking.
The Wrangler's TPMS system is of the dumb variety, in that it doesn't display the actual pressures on the dash like some others. So I grabbed a tire pressure gauge out of my toolbox.
None of them were lower than any of the others, so I wasn't facing any sort of leak. For fun I decided to grab a couple of other gauges I had lying around.
As you can see, three out of three tire pressure gauges don't agree. Can you guess which one was correct?
The most accurate answer is "I still don't know." None of these have been calibrated using a master gauge. The accuracy of the civilian tire pressure gauges we typically buy is based largely on trust, and as you can see there's little to put one's faith in here.
According to Price is Right rules, the well-worn dial gauge and its reading of 22.5 psi is the closest without going over.
If none are calibrated, how do I know that my beat-up analog gauge is correct?
Well, because a couple months back I reset the trigger point of the Wrangler's TPMS system myself using something called an AEV Procal. This very cool device is meant — among other things — for off-roaders who have fit oversized tires to their Jeeps. Our huge BFGs have much more load capacity than the skinny originals, so we feel safe running them at 28 psi. We certainly feel less discomfort at that pressure.
TPMS systems are typically set 20-25 percent lower than the recommended running pressure so they don't issue too many false alarms, so with that in mind I reset the system to trigger at 23 psi with the AEV Procal.
Since the TPMS light only just winked on before I did this, the analog gauge's reading of 22.5 psi is right on the money and the two fancy-pants digital gauges are out to varying degrees of lunch.
Which makes me wonder: How can you possibly trust any tire pressure gauge you might buy? One of these has a 4.5 psi error. Buy a good one, I suppose. An analog one with a bleed button meant for racers.
Still, this all seems unnecessary when you consider that each of our Jeep's tire assemblies has an accurate tire pressure gauge built right it. It's a pity Jeep didn't see fit to display those pressures right on the dash so we don't have to struggle with something so simple.
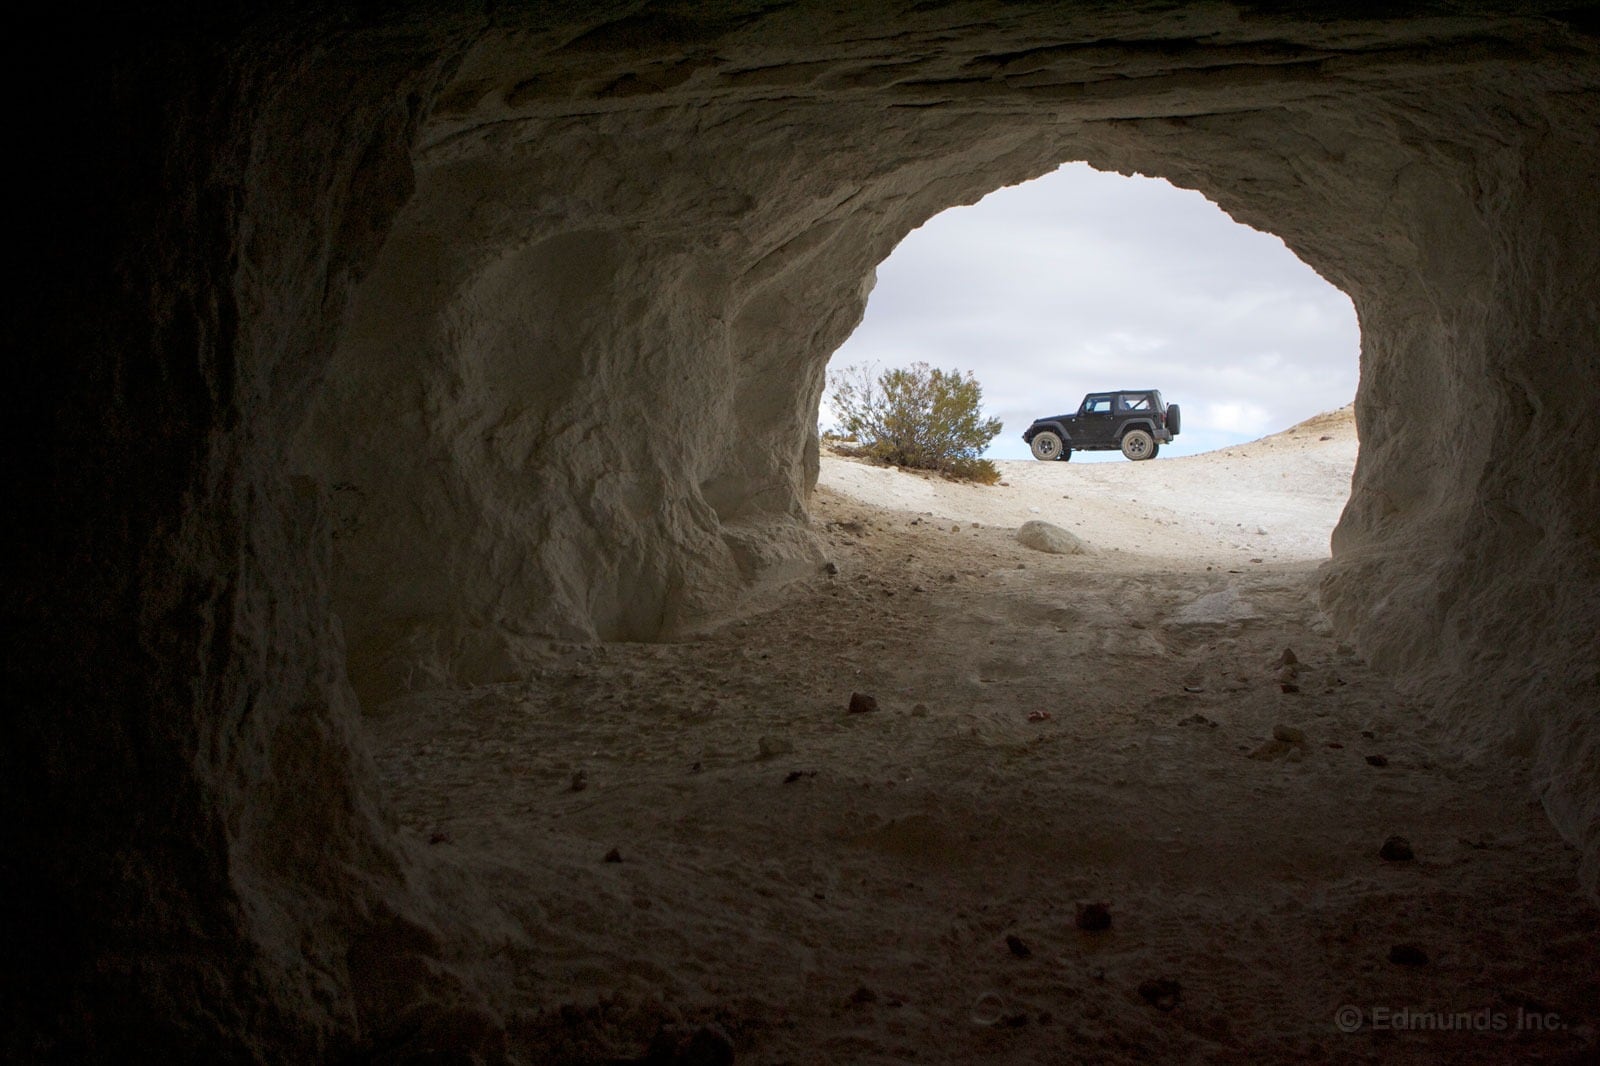
The Sunday trip was set and we were off. Last Chance was the destination and we made good time getting there. This particular area is south of one my other favorites, Jawbone, where I spent countless weekends trying to ride MX bikes that were way too tall for me as a kid.
Last Chance Canyon is a beautiful remote canyon within Red Rock Canyon State Park. Not exactly the most hardcore wheeling, but it's spectacular and there's a lot more than just rocks and sand. The name Last Chance is generally associated with explorers and prospectors who finally found water as time was running out via dehydration.
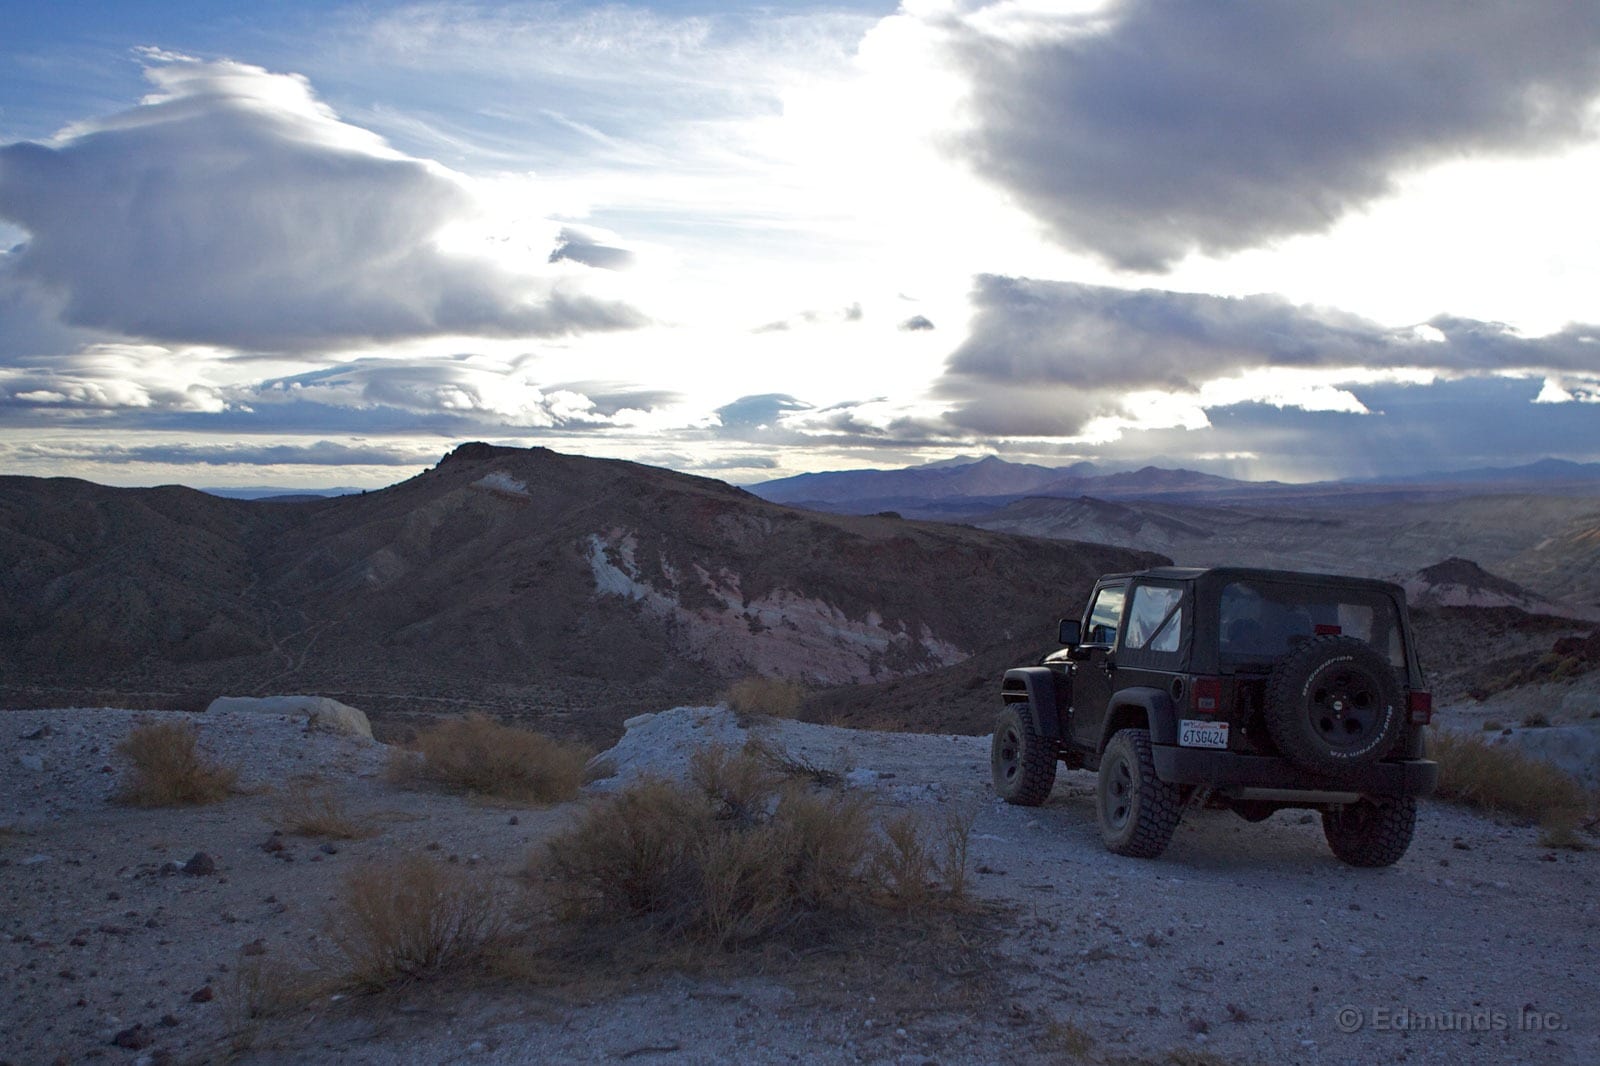
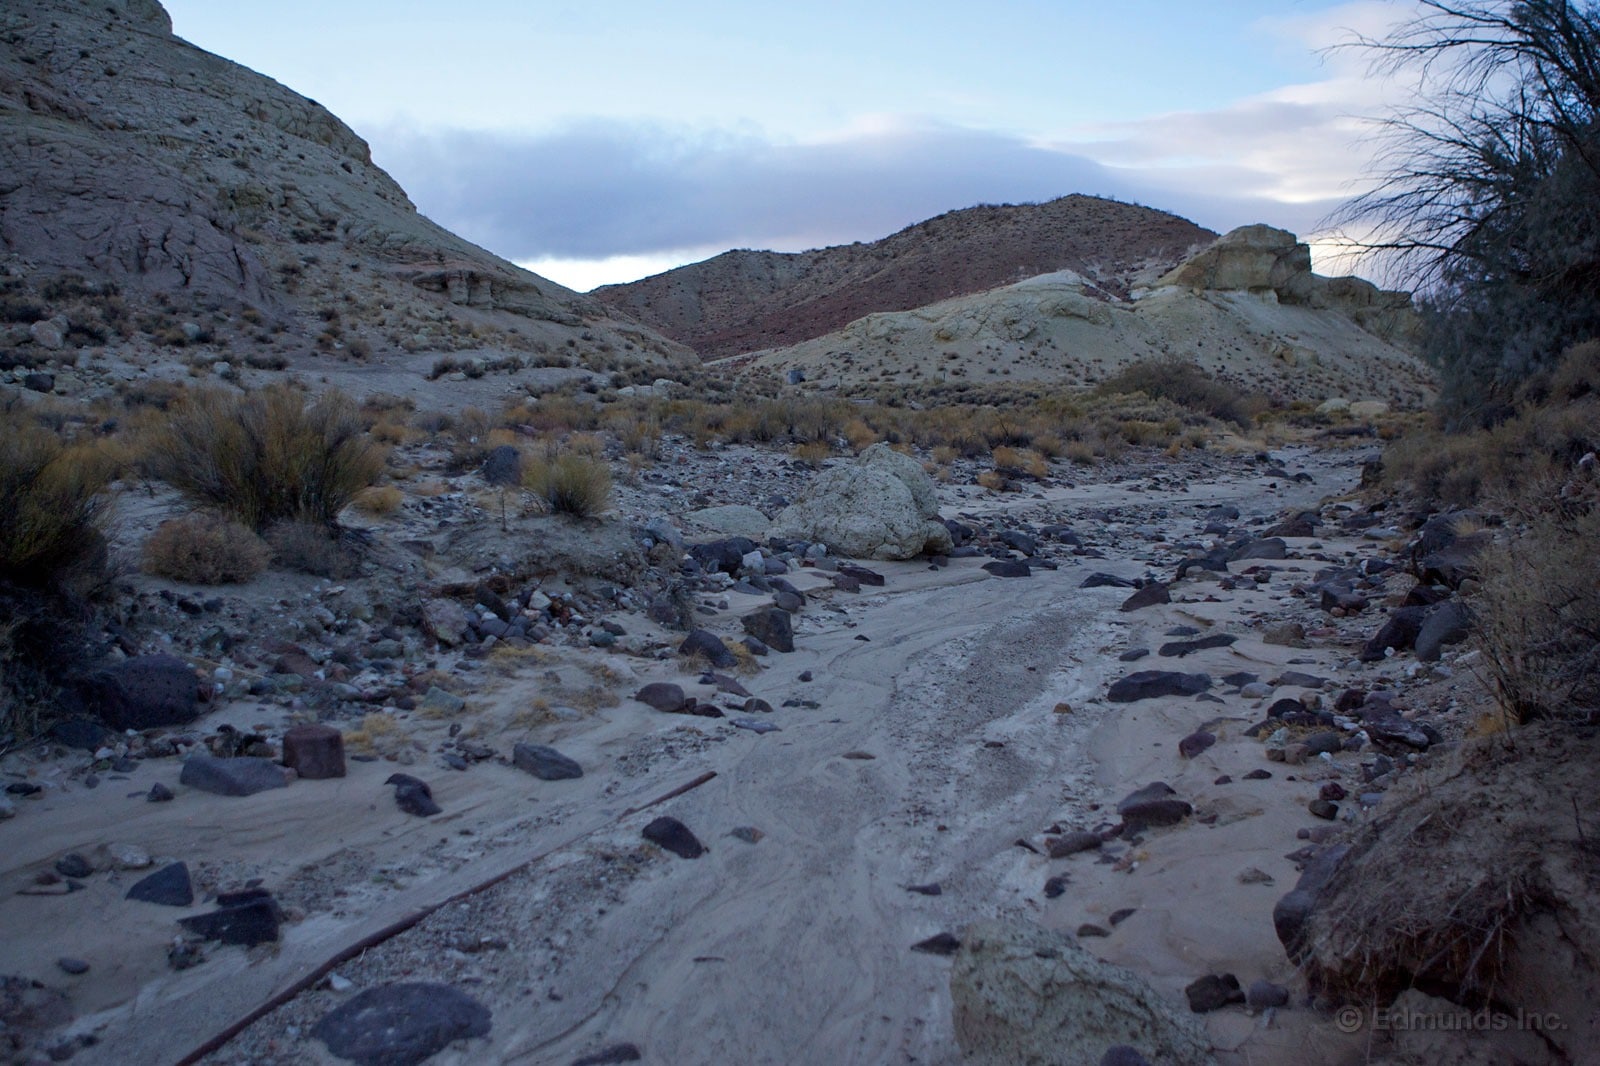
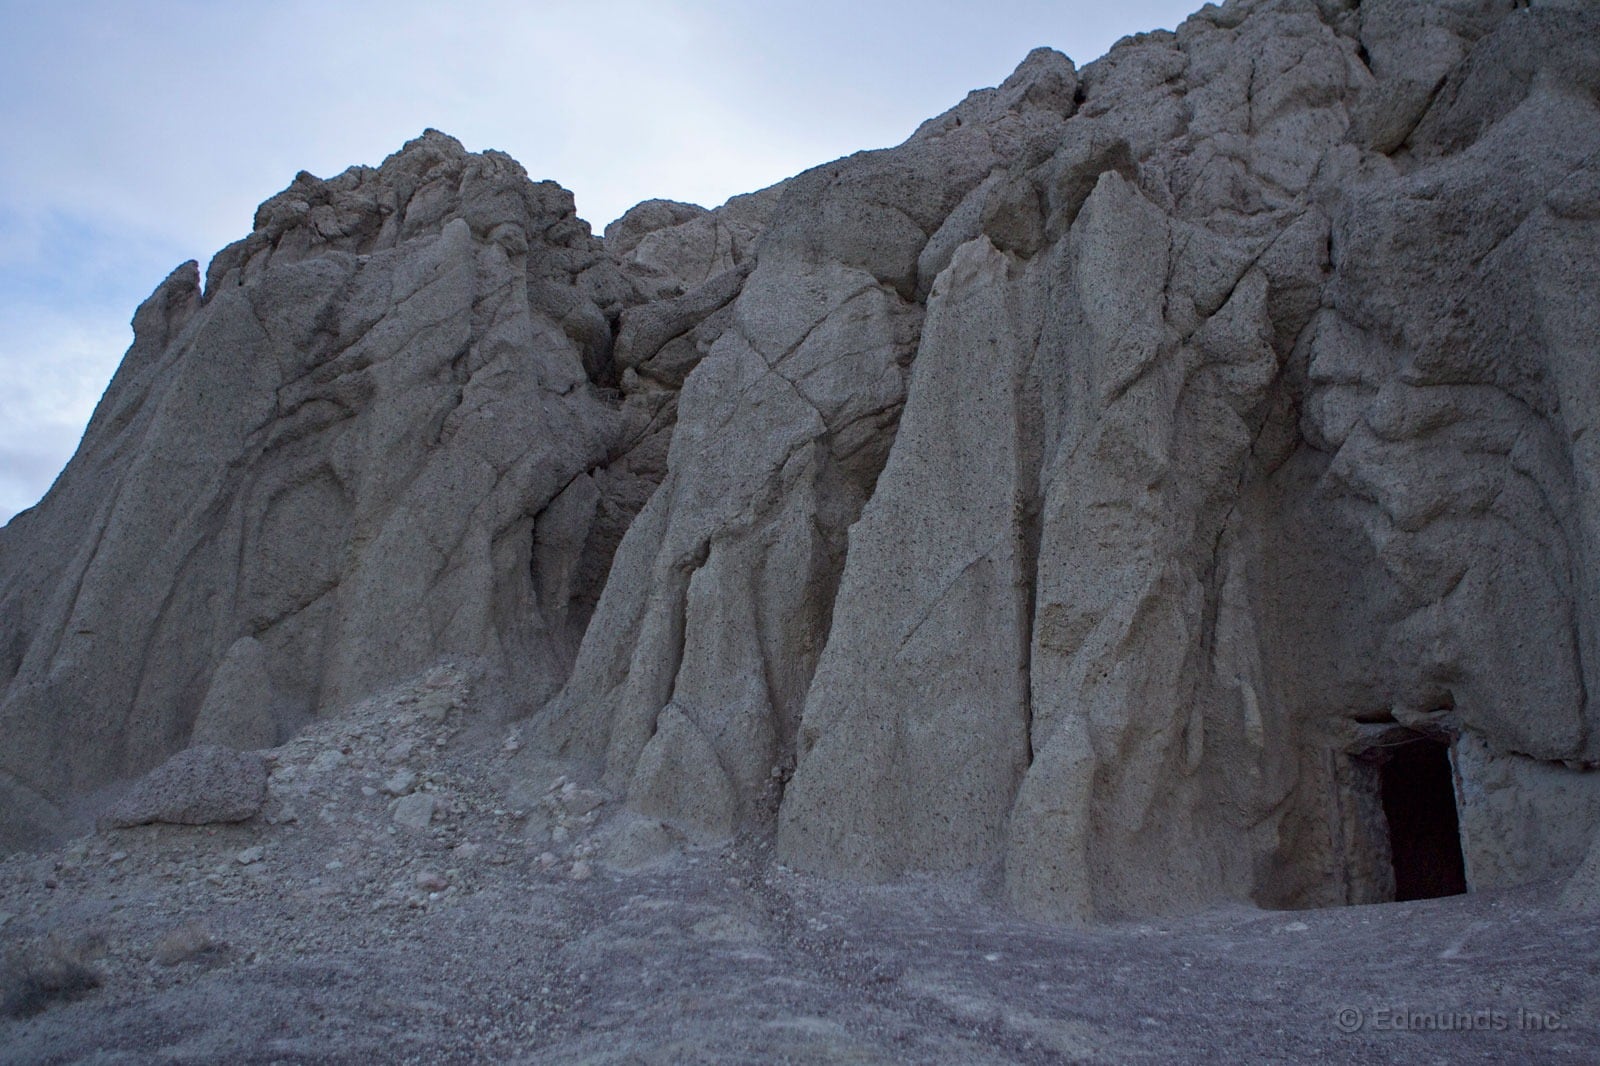
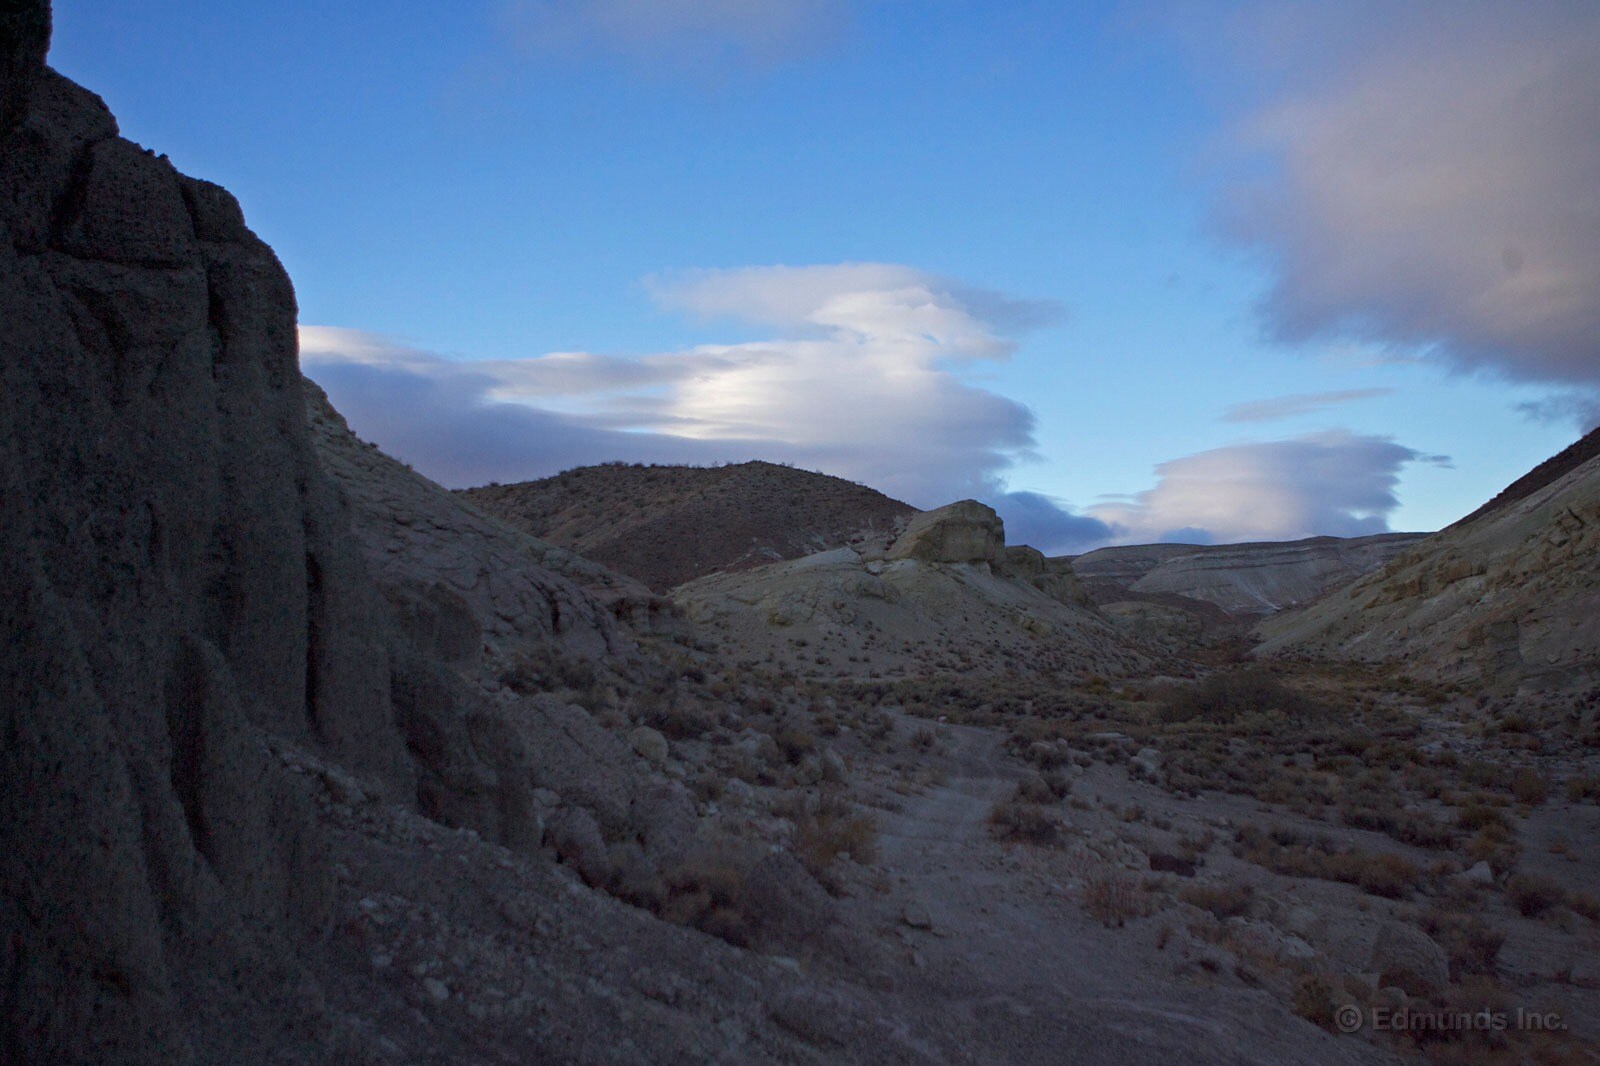
The 10-mile trail led mostly along a wash with deep sand interspersed with rocky sections. That made careful wheel placement and a bit of spotting necessary to prevent any body and/or undercarriage bonks. Now, the Jeep didn't have any trouble, but the combination of the short wheelbase and the spring set up made it a VERY jarring ride. Even with the tires aired down to 25 psi, every single rock said hello and anytime a bump stop was "reached" it was so violent I would jump out and check for damage.
The concrete foundations and scattered tramways are all that remained of the Cudahy Camp and the Old Dutch Cleanser Mines, which produced the pumice-based cleanser from 1923 to 1947. The chalky white pumice deposits were the result of many layers of volcanic ash that settled over time.
The trail left the wash and headed up a short but steep low traction climb. The Pentastar equipped Jeep made it up no problem. Once through the main wash the trail opened up to show off pink and rose-colored walls and rock formations, and led us to the southern tip of the El Paso Wilderness. From there it was a quick trek via some sandy valley floor single track back out to California Hwy 14. Now that's where this thing shines. Higher speeds and no rocks made our trip back to the asphalt world much more enjoyable.
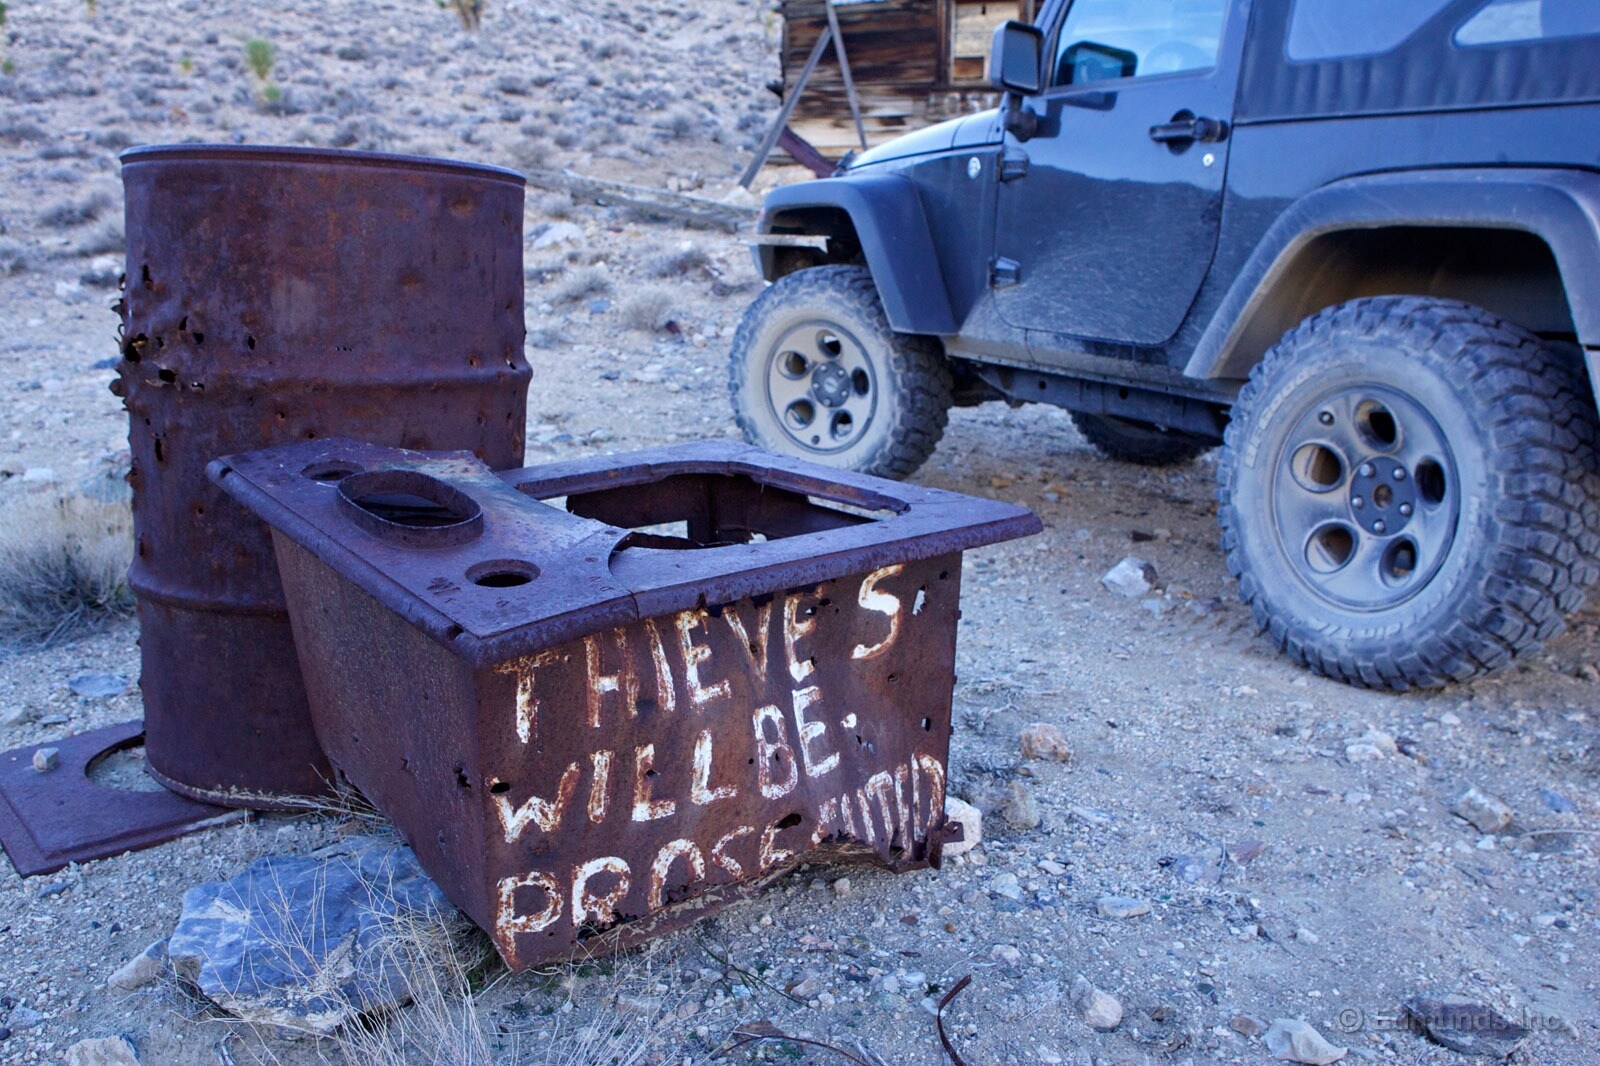
Los Angeles, Sacramento, Reno, Virginia City, Bishop, Panamint Springs, Death Valley and back home.
The 2012 Jeep Wrangler wouldn't be considered much of a road trip vehicle, but with two dogs and two adults it fit the bill. The back seat was removed to help with canine and cargo space. With a smartphone/iPod hooked up to the aux we were off.
The highlight for me was Hwy 395 along the southern sierras and the Saline and Panamint Valleys. This is the good stuff. The Jeep seems happier in these surroundings.
After meeting up with some friends camping in Death Valley, we ran down to the Racetrack of Moving Rocks. One thing we did notice was rental Jeeps. Tons of them. Makes sense to me since a bit of confidence can go a long way in unfamiliar surroundings, and also Jeeps are symbolically American. Like Harleys and Route 66, people come from all over the world to experience this place in an American way.
When leaving the Racetrack we took Hidden Valley Road as a shortcut back to camp at Panamint Springs. One stop before the sun went down was Lost Burro Mine. Rusted equipment, abandoned shafts, and the camp structures are still standing. Nothing hardcore about this trail, but we did hit a foot and a half of snow and a ton of ice. The desert landscape mixes with red sand and junipers at the higher elevations of the pass and at the top both aforementioned valleys can be seen.
So after 1,300 miles here's my gripe: the soft top. I don't mind the noise. I don't mind the leaks. Visibility? Oh well. My main concern is security and access. Having to unload all the gear nightly was a real pain. The zippers are sticky and hard to handle in sub freezing temps.
Overall. mpg was 13.56, and that's pretty good considering the extra weight of people, luggage, and recovery gear (including heavy duty snow chains).
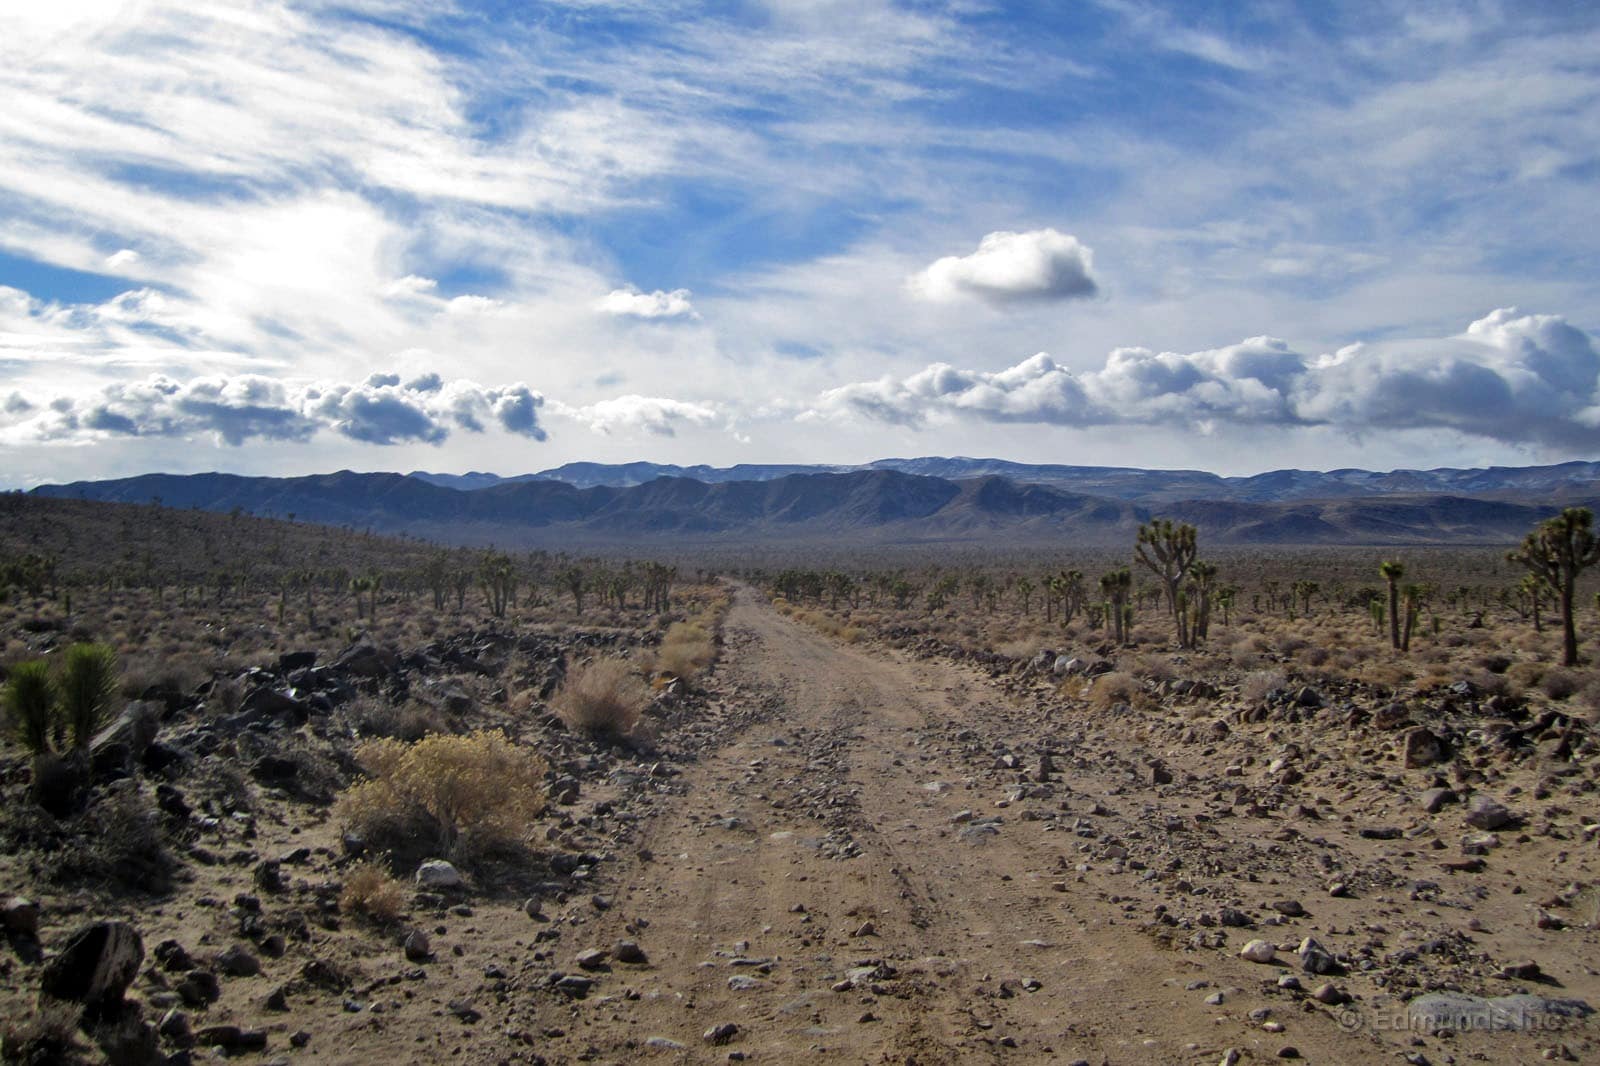
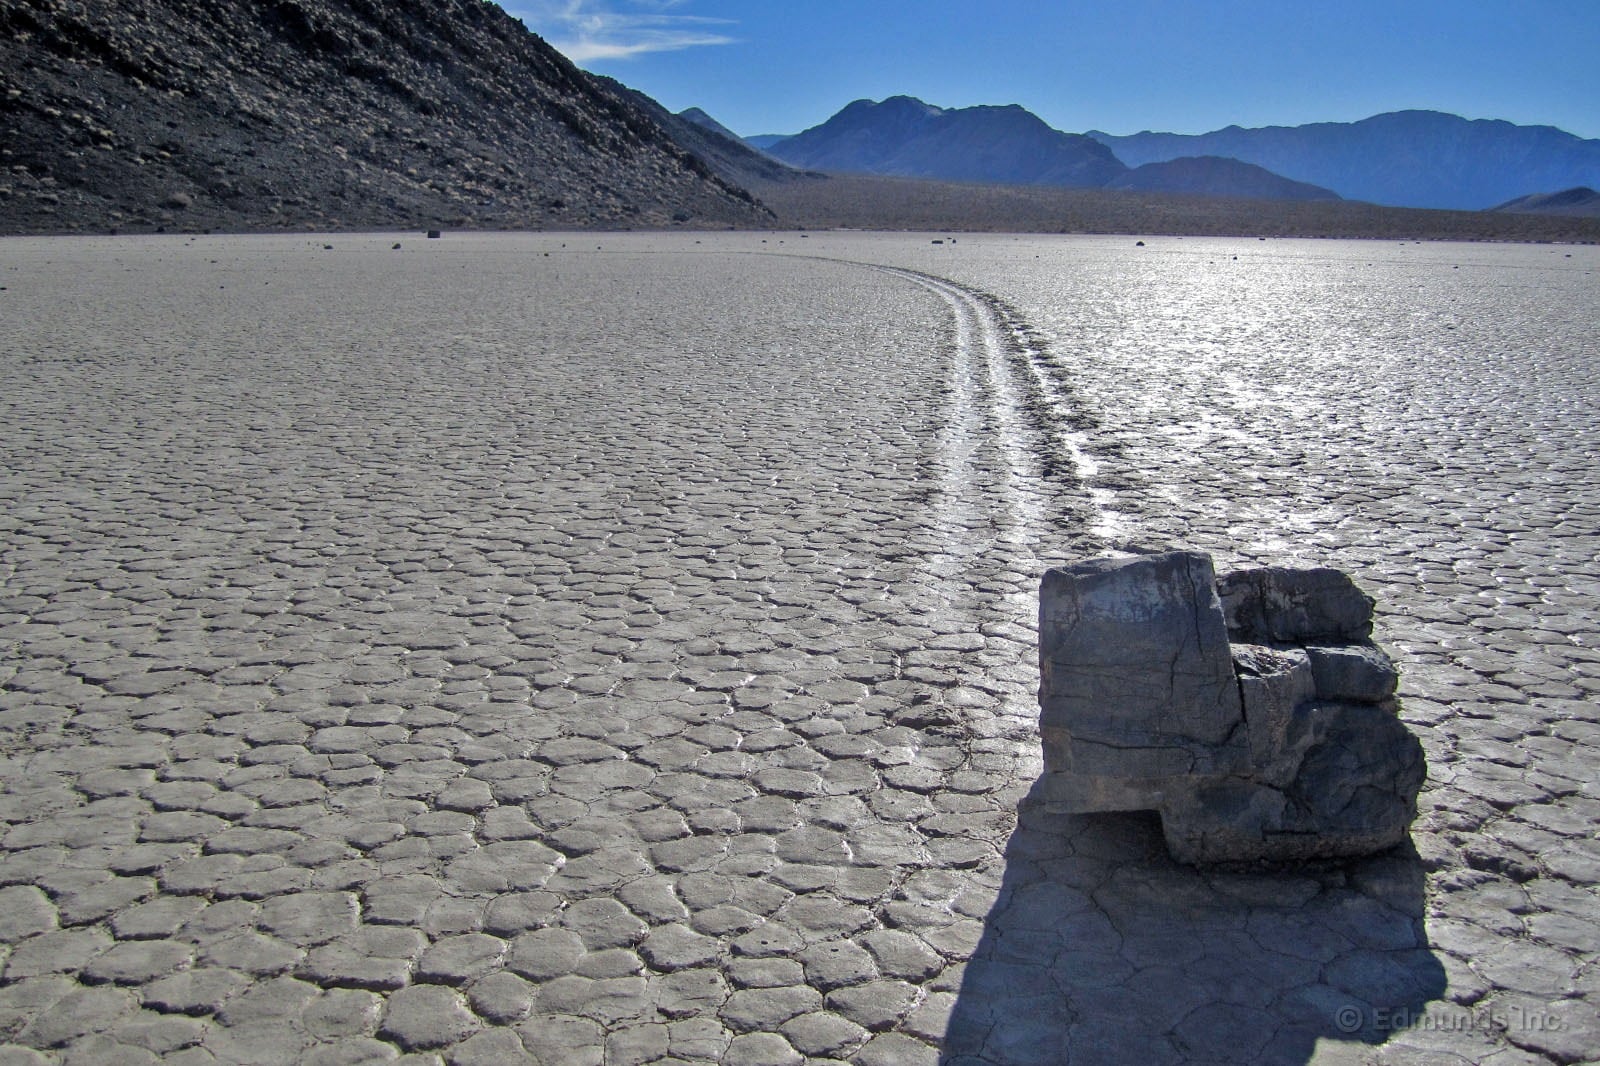
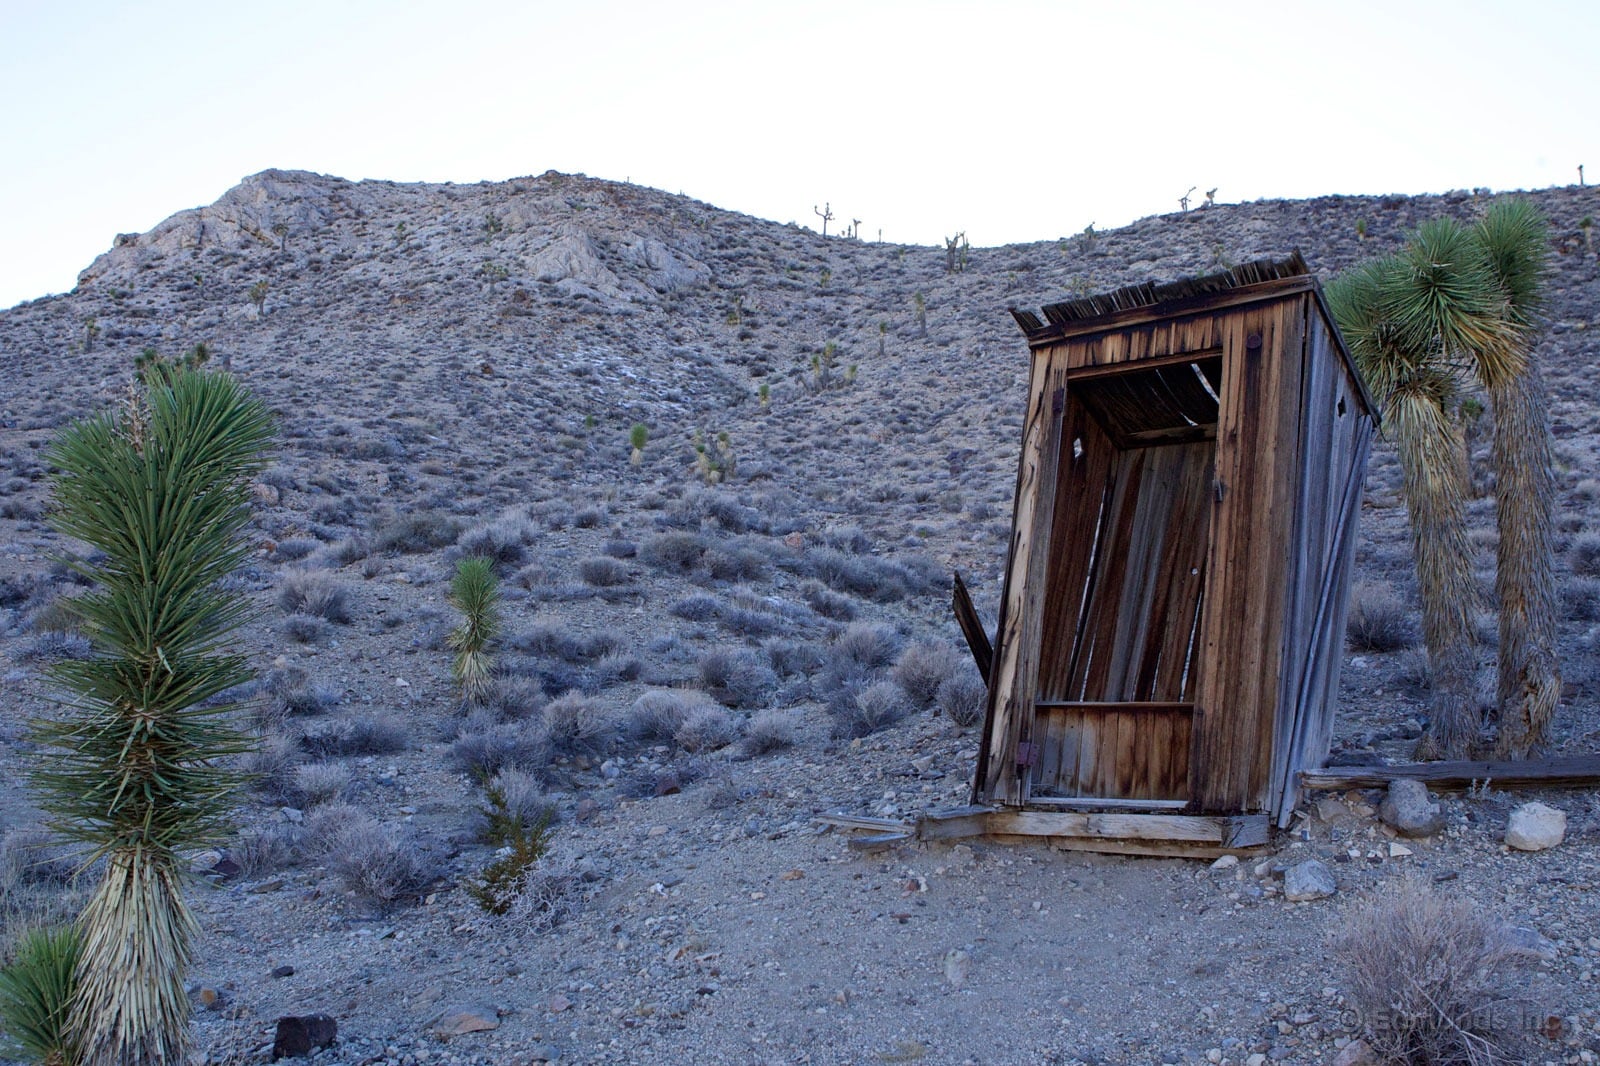
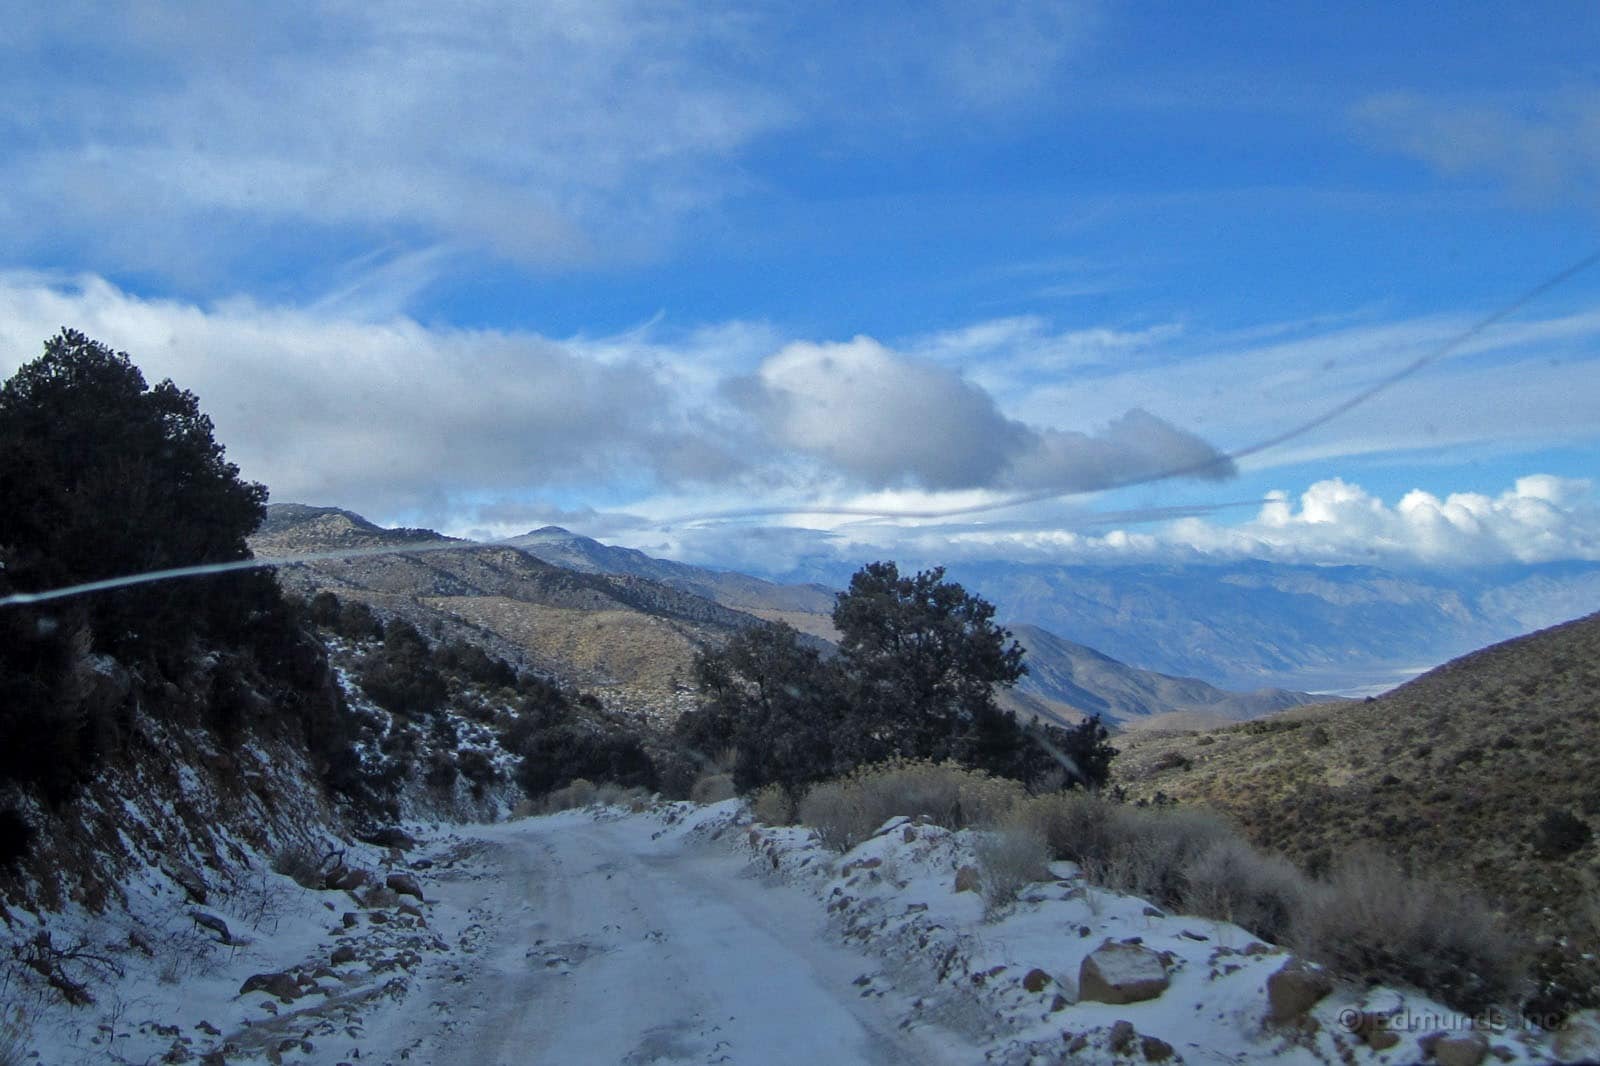

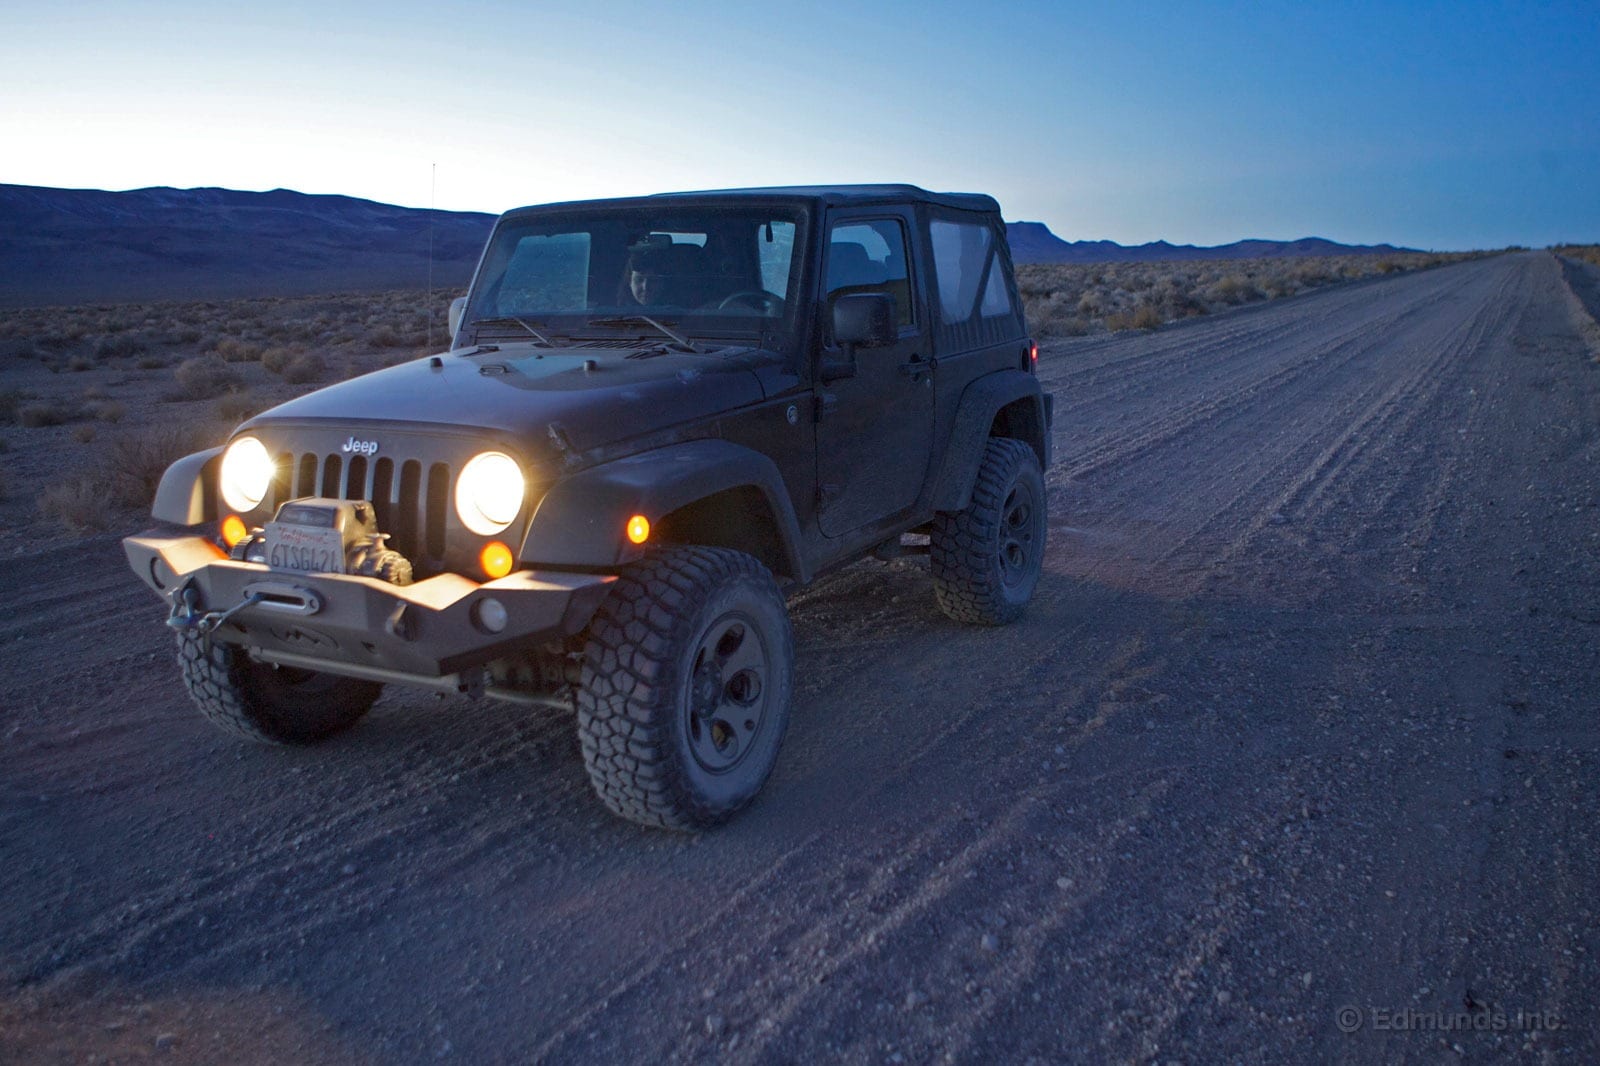
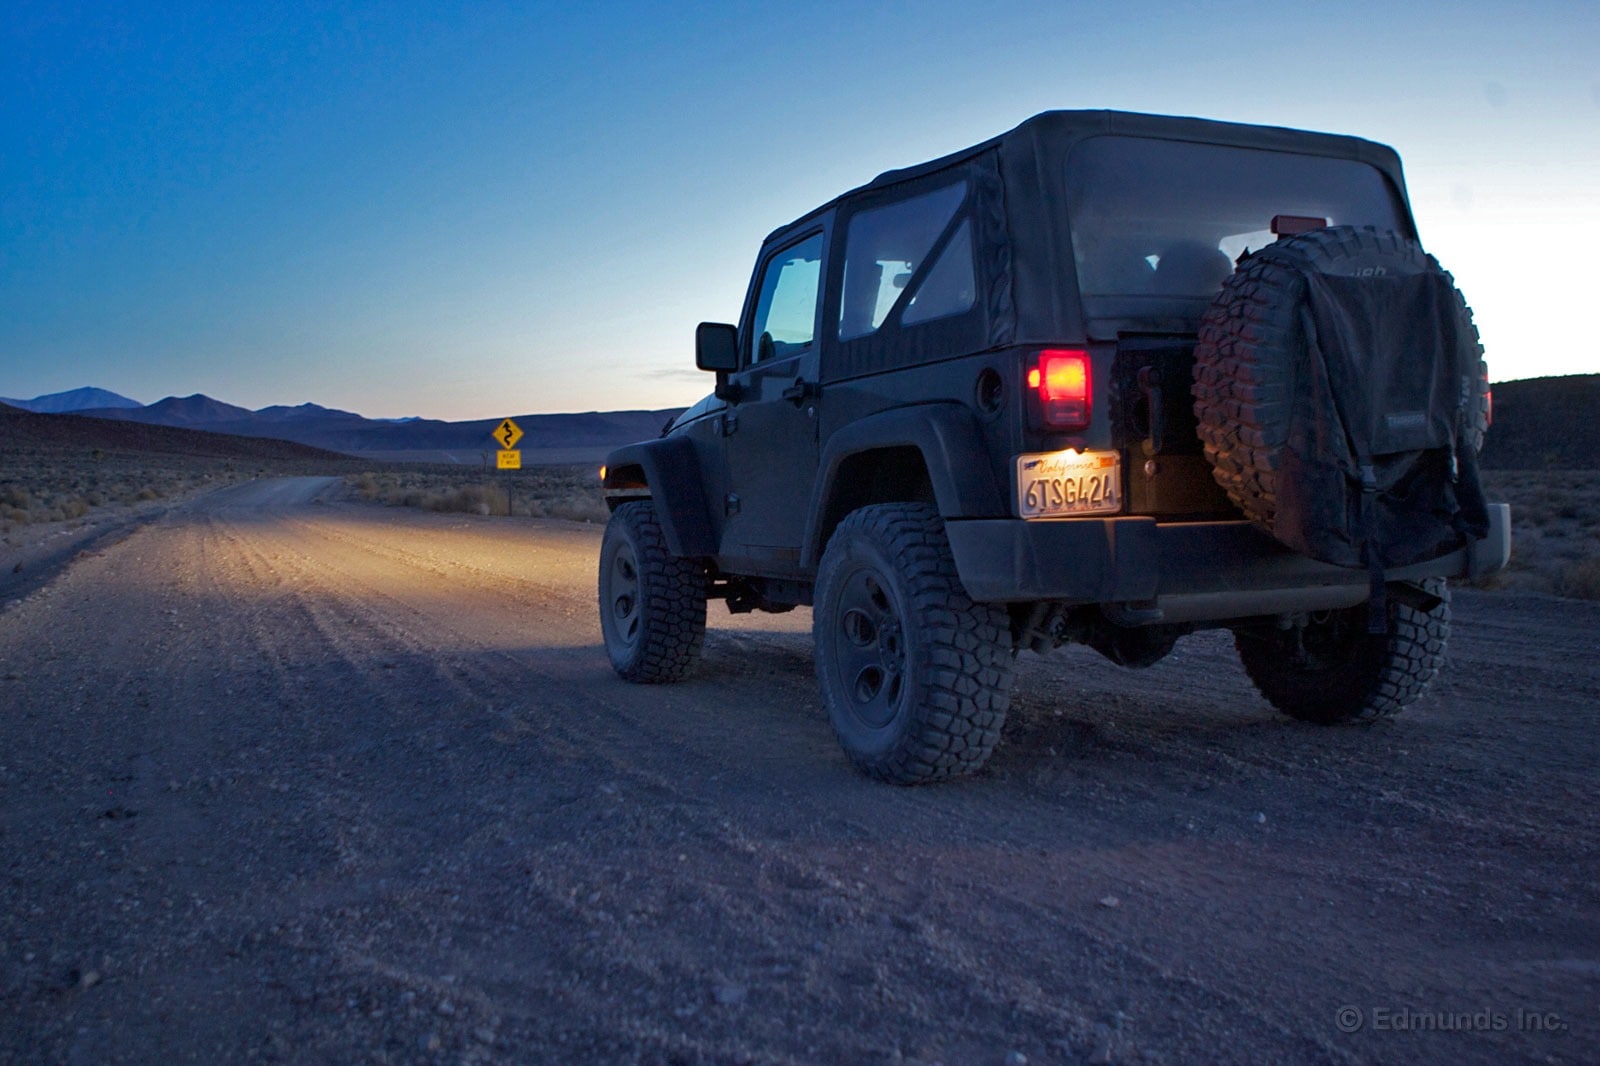
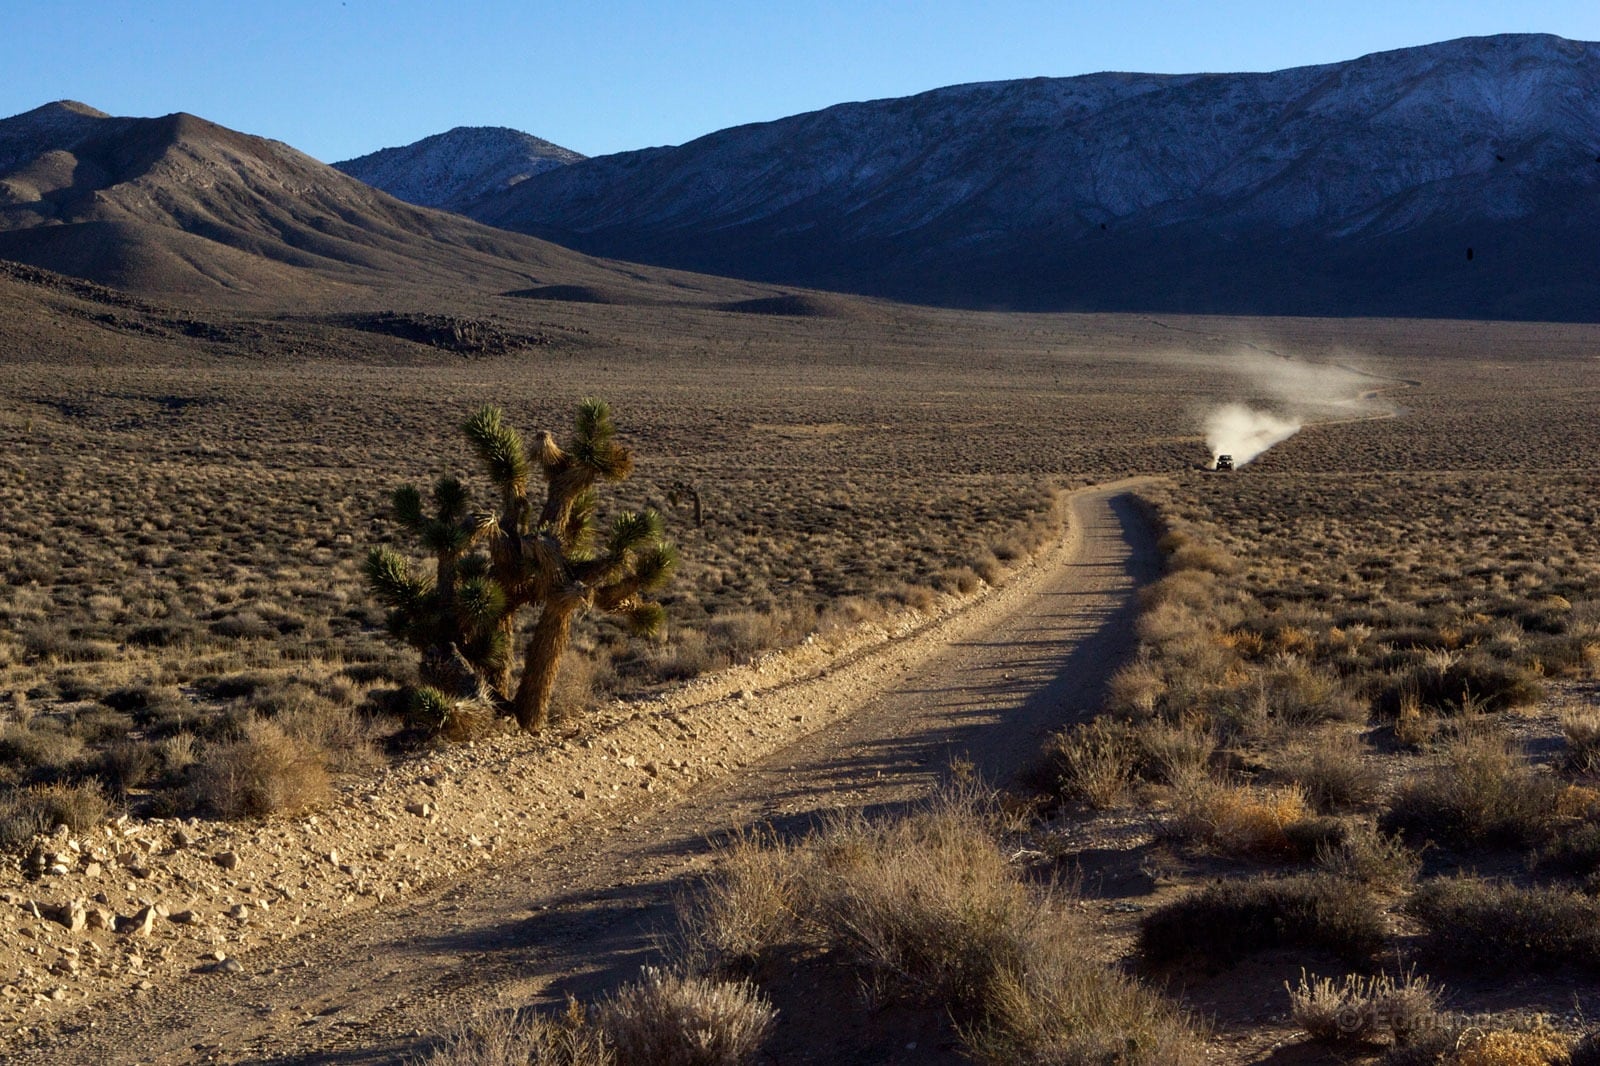
Hundreds of miles of washboard roads can take its toll. In the recent trip crisscrossing the Panamint and Saline Valleys (and eventually ending up in Death Valley) the 2012 Jeep Wrangler handled it easily, but with two minor hiccups.
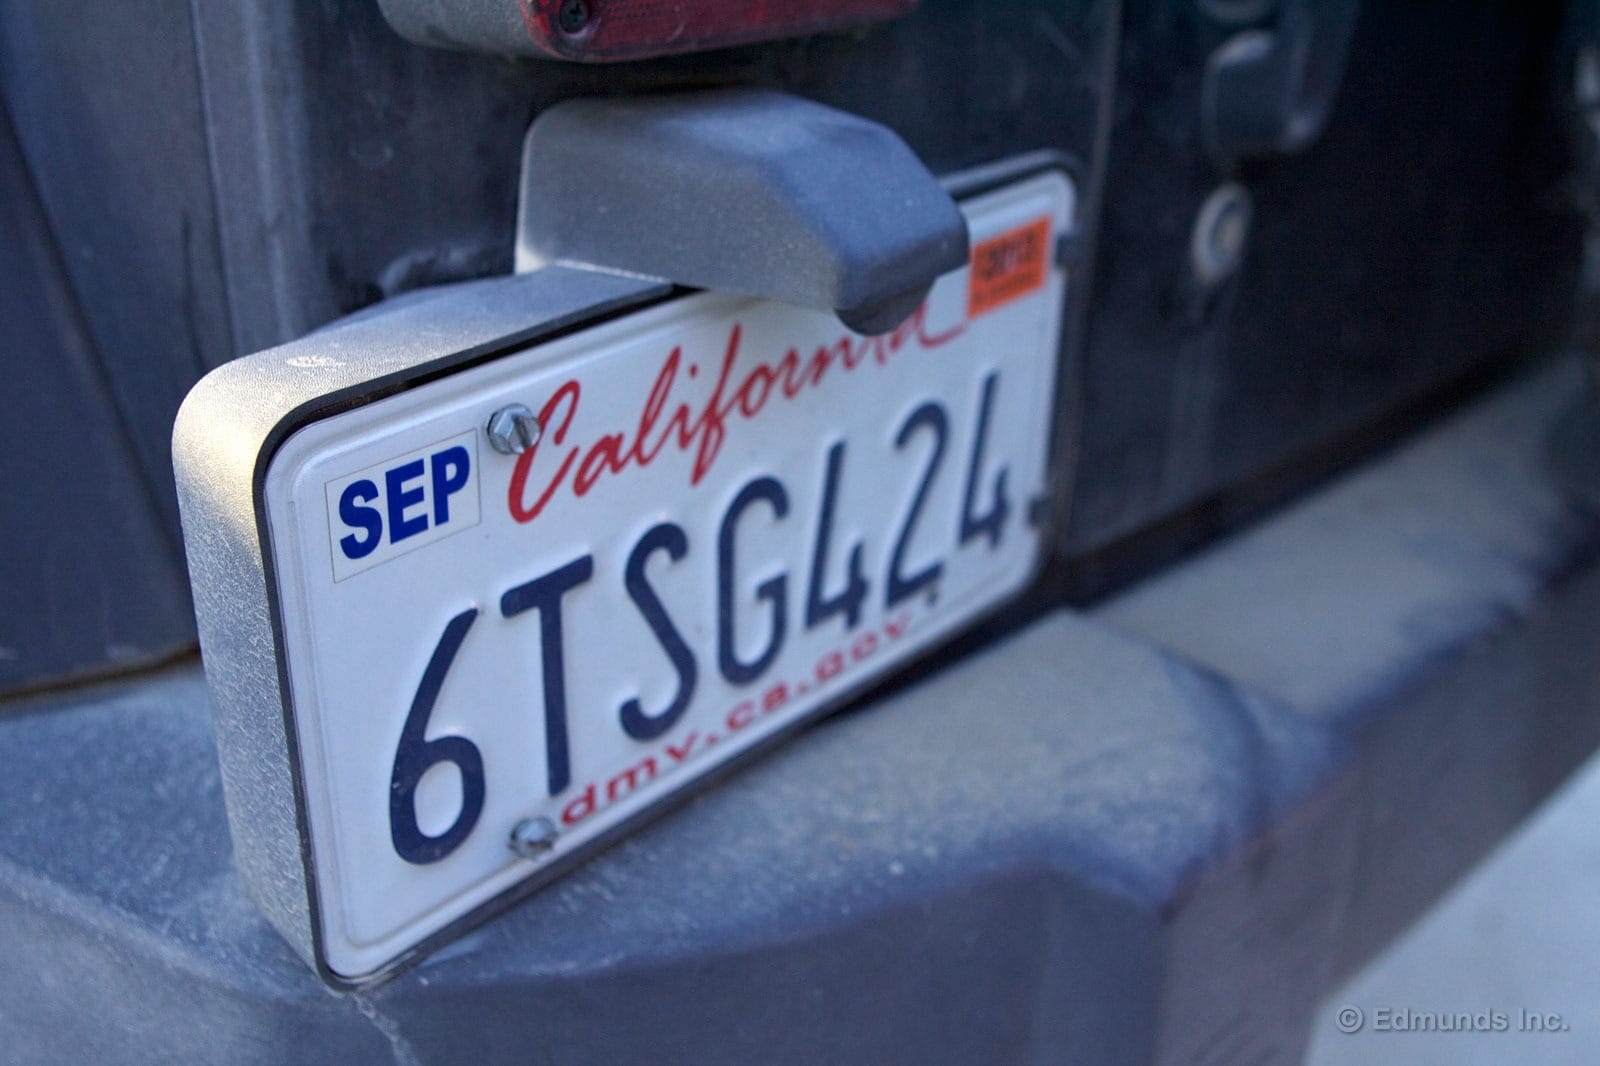
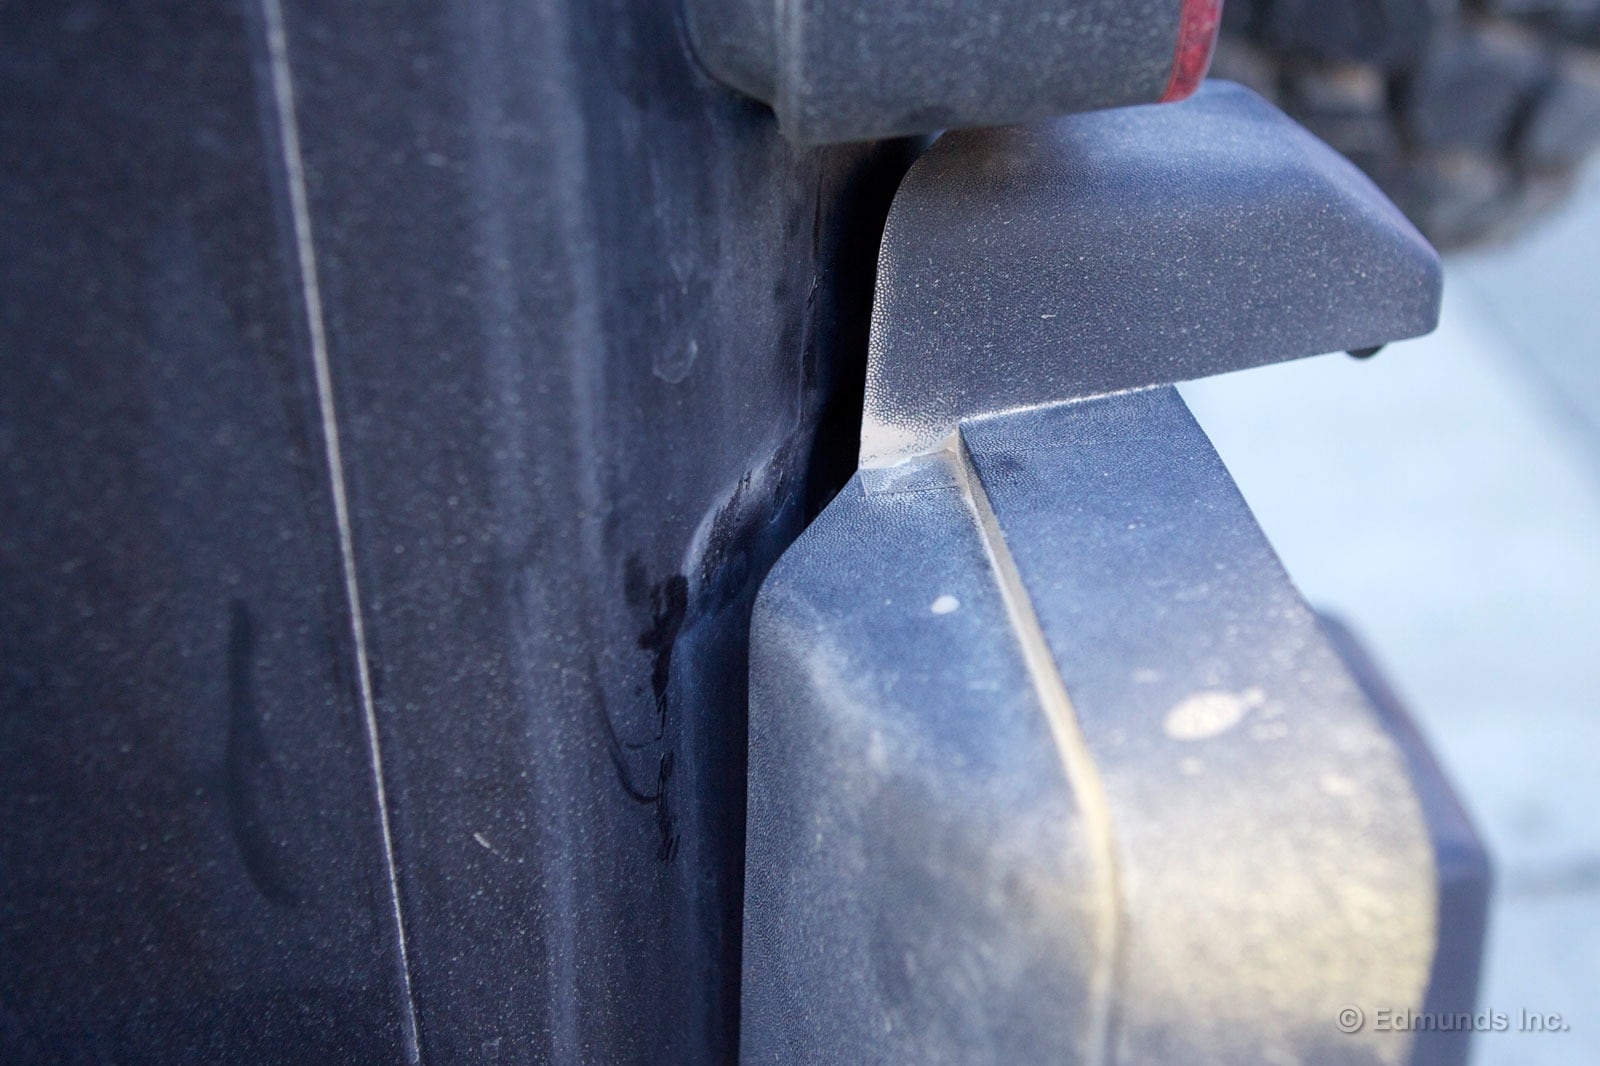
First, about an hour after leaving Lost Burro Mine, I noticed a rhythmic thump. Turns out the plastic clips holding the rear license plate frame/bracket had broken, and the metal screws had backed out. The license plate wiring loom was the only thing keeping it from being discarded along a dusty trail. Luckily, the screws were held inside the housing behind the plate, and I was able to retighten them easily.
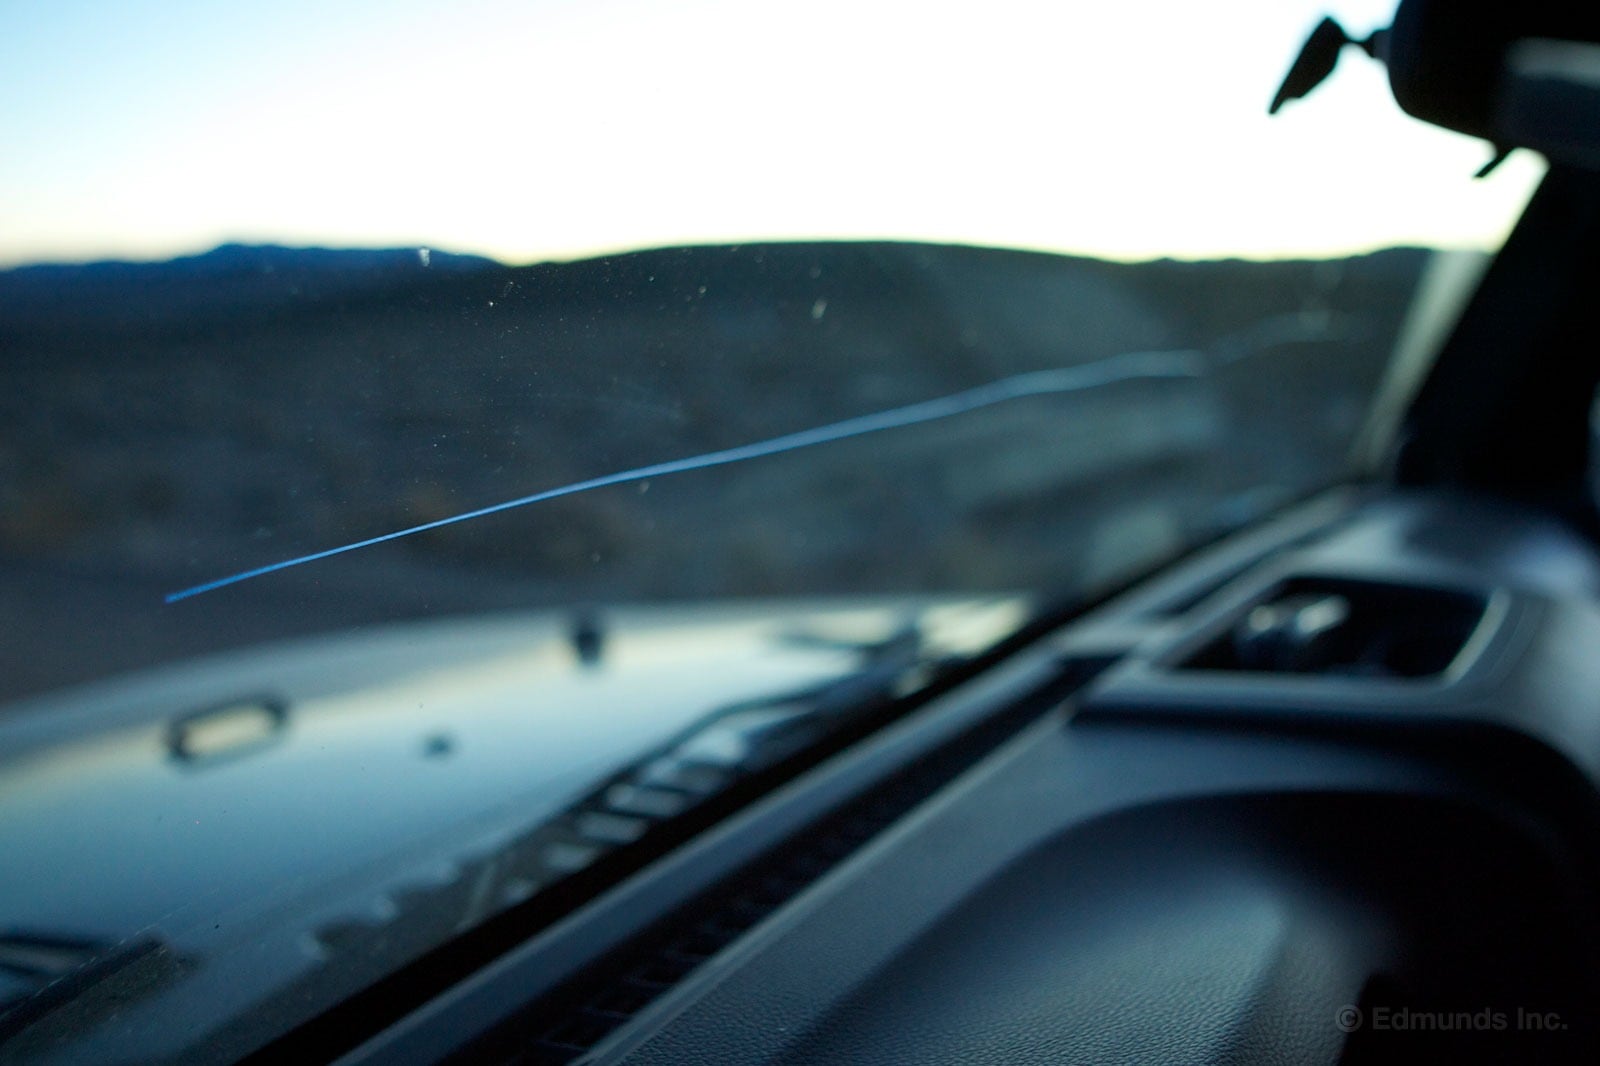
Secondly, it seems that broken glass doesn't like hours of shaking. The windshield crack had grown about two feet, almost reaching A-pillar to A-pillar.
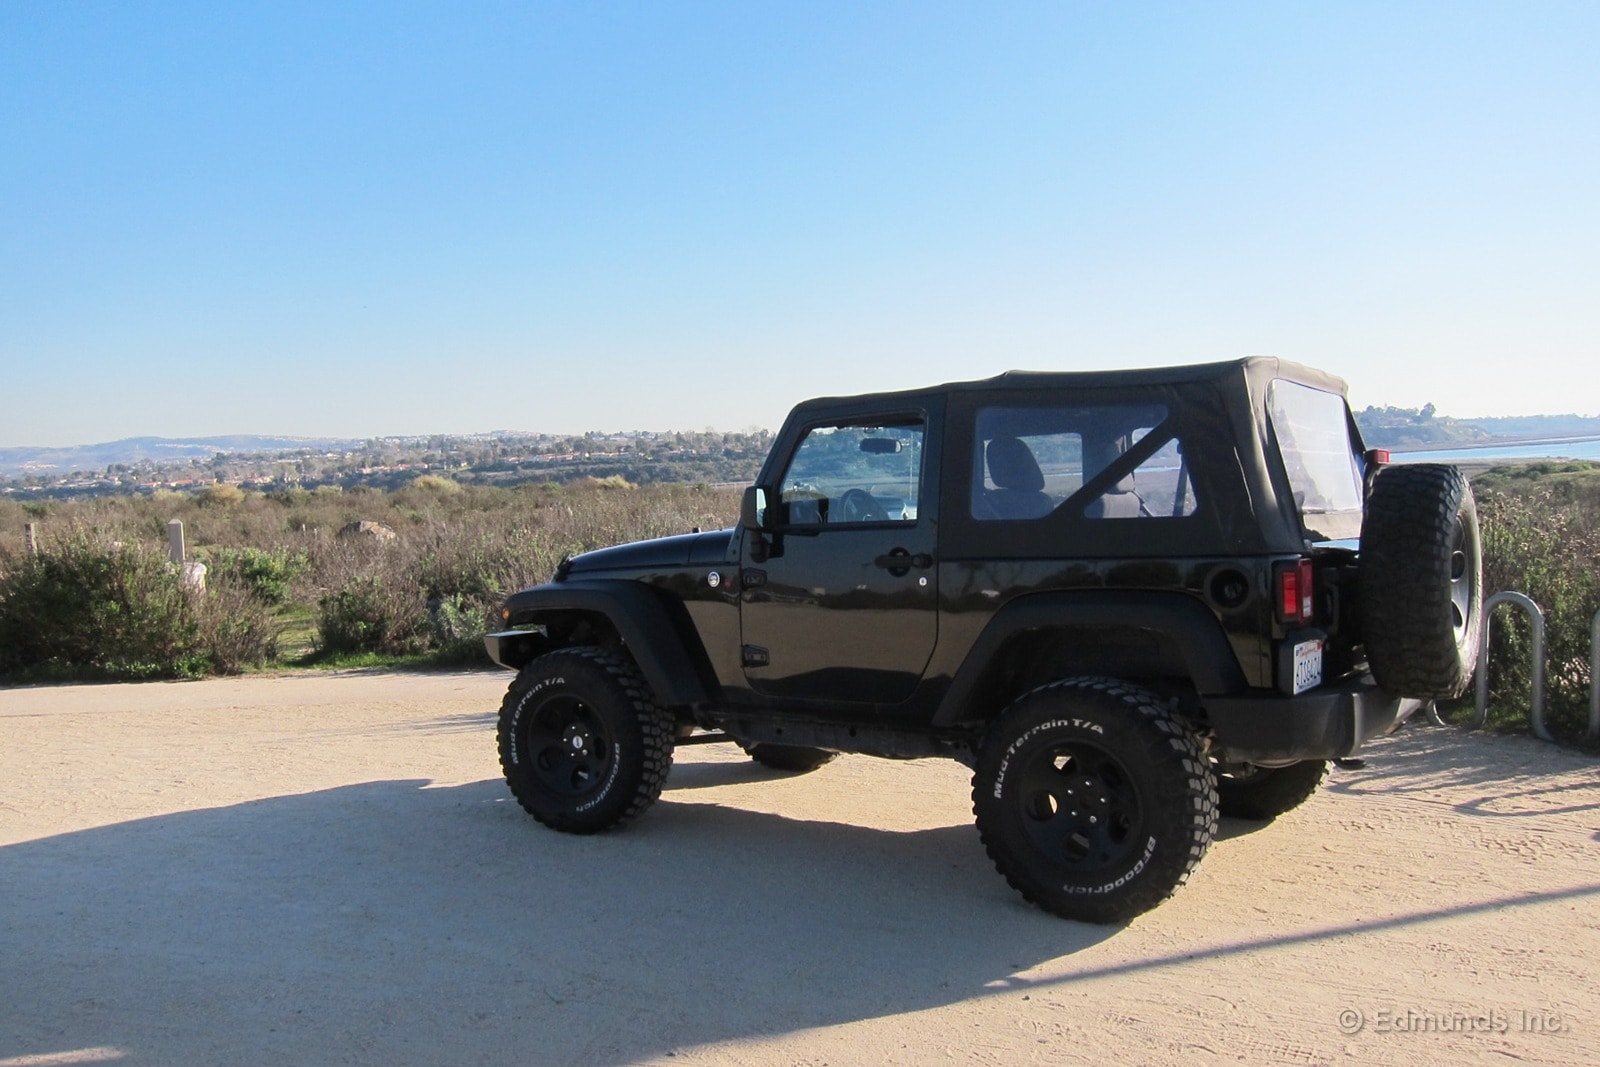
I've got this neighbor, really nice guy, works in IT. He must stress, because I often see him outside having some nicotine when I drive in for the evening. We always get to talking about whatever car I'm in. "I've always wanted a Jeep," he said the other night when I drove up in the Wrangler. "Maybe not as aggressive as this, but a Jeep. A Wrangler, specifically."
He doesn't have any need for the winch, nor our beastly tires. But he likes the look and more so, the purpose of a Jeep. I told him ours was horrible to drive on the freeway, floaty with steering that feels continentally wide. Jacquot says he feels the clutch slipping too. I didn't notice that, but my mechanical senses are nowhere near as keen.
But, bad as the Wrangler might be for commuting, I like how it kinda keeps you on edge buffeting down the highway. It's not a relaxing drive, but it's good to drive something that keeps you fully engaged now and then. In the Wrangler's case, it just reinforces the notion that this car is built from the factory, and now especially under the guiding hand of Dan E, is made for the wild. It just wants to be out there, and rewards you for being out there.
My way of coping is just getting up on the Pentastar hard, then easing off into the right lanes and parking it there for the duration of the drive home. People see a blacked-out Wrangler perched up high and they treat it like a VW Bus. You don't need to stress. They'll find a way around you.
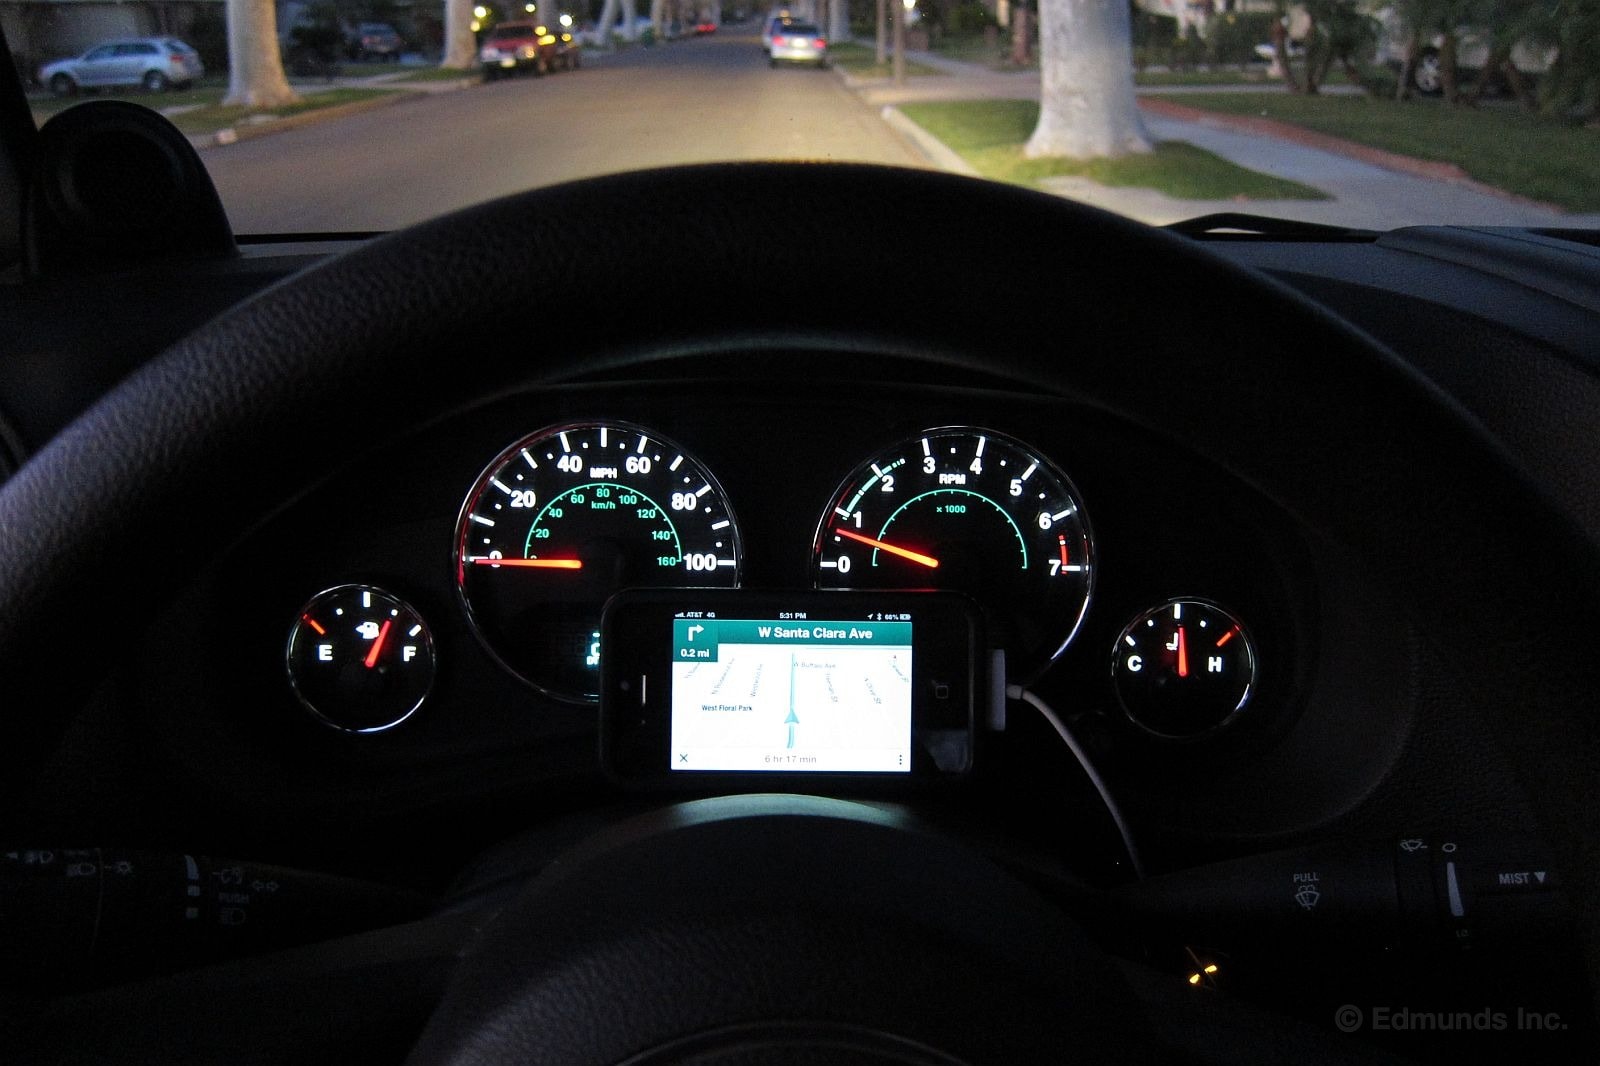
One of the things our 2012 Jeep Wrangler Sport doesn't have is a factory navigation system. Heck, it didn't even come with Bluetooth, a matter we quickly rectified by installing a factory-developed U-Connect Mopar accessory.
But that didn't address navigation. Fortunately, the recent dust-up between Apple and Google has resulted in a very cheap and effective solution, an alternative to the factory nav system and the aftermarket Tom Toms of the world that make the purchase of either one unnecessary.
Apple got cocky and ditched the native Google Maps app that had always come pre-installed on their phones. The in-house Apple iOS map replacement was (and still is) a disaster, and within a matter of weeks Google came out with a fresh Google maps app that anyone could download from the iTunes store.
For free.
Thing is, Google Maps, the App is light years better than the old native Google Maps button that came on the iPhone before the infighting started. The new one reroutes, it issues turn-by-turn instructions with or without voice (through the car's speakers), it offers the choice of perspective view, the graphics are better, you can see traffic red zones along a planned route (the blue route line no longer obscures them), it displays and recalculates ETA as you go along and much more. It's better in almost every possible way, in fact.
And it's free.
This new Google Maps iOS app is especially effective in our 2012 Jeep Wrangler because an iPhone will perch comfortably atop the flat-topped steering column without obscuring the gauges. A non-skid rubber phone case helps greatly to keep it there, of course.
There are two drawbacks, however.
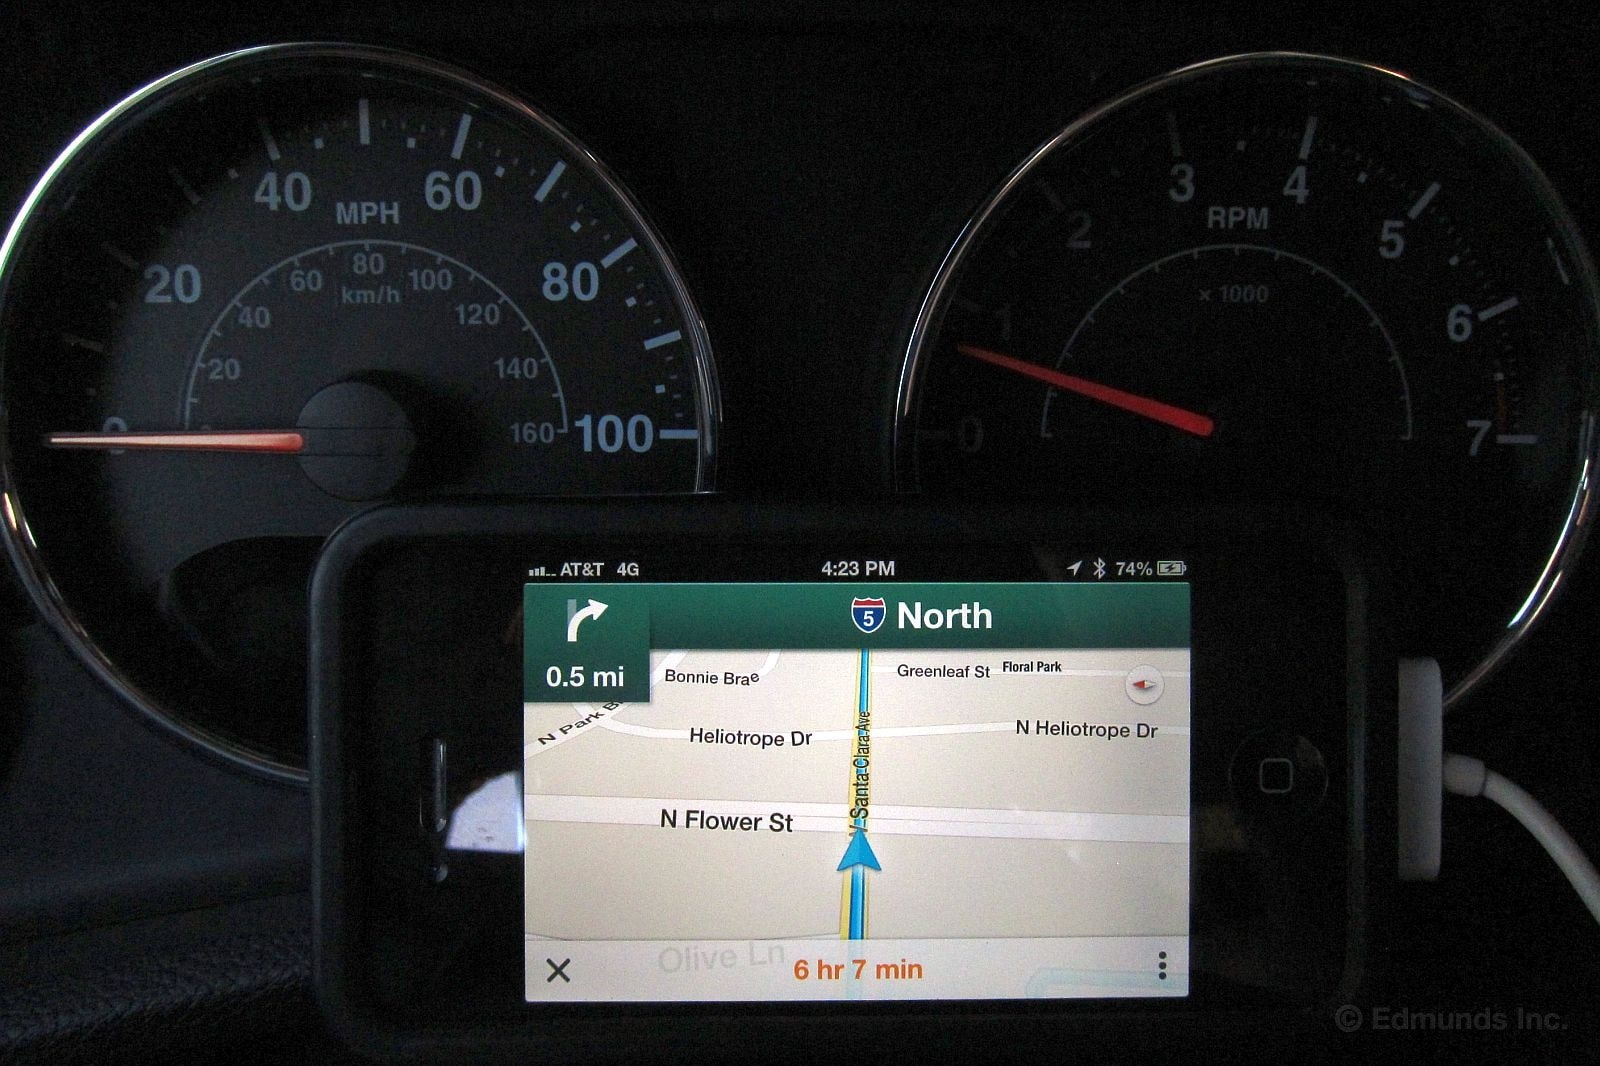
One, all of the search data comes in over the air, from the cloud, as they say. Nothing is in permanent memory in the car. So you must have a decent 3G or 4G connection to search and establish the route. Google's search database is immense, and it's quite clever at figuring out what you really want even if you don't have a full address, but you have to have a data connection to get at it. Once you begin guidance you can drive out of 3G territory and it'll still know where you are.
Second, the new Google Maps app is a battery hog. The phone has to be plugged in to the cigarette lighter or the USB socket to keep up. In our 2012 Honda CR-V, even this wasn't quite enough on an 8-hour trip. The battery level still dropped slowly (I was listening to music on the iPhone, too) until I realized that I could pause navigation until I got closer to where I needed it. After all, I was on highway 101 for 6 straight hours. I didn't need navigation to tell me where to go for that.
But hey, it's free. If you have an iPhone or an Android smartphone, that is.
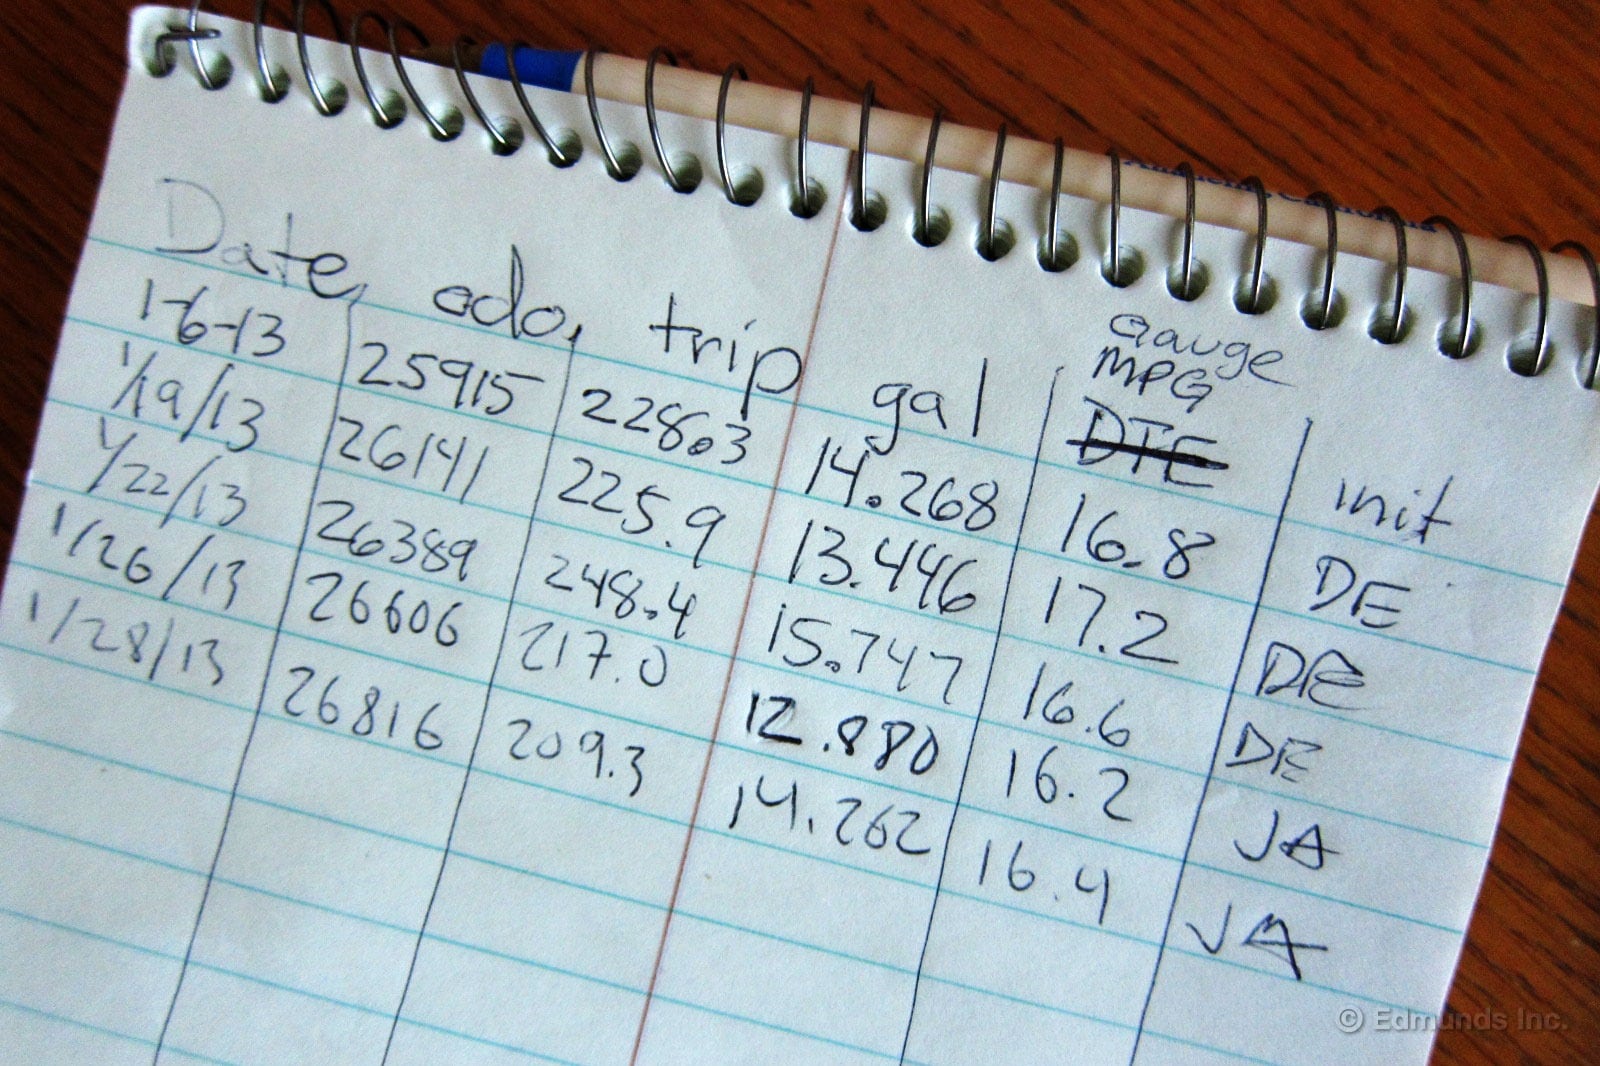
During the month of January we drove our 2012 Jeep Wrangler 1,524 miles, many of which were off road. During those four weeks the Wrangler averaged 15.9 miles per gallon of 87 octane fuel.
That's slightly below the 16.2 mpg we've averaged over the Jeep's 26,816 miles in our fleet but dead on the 15.9 mpg we've been averaging since installing the oversized BFGoodrich rubber. The EPA rates the Wrangler at 18 mpg combined but doesn't consider the oversized tires we've got on our Wrangler.
Worst Fill MPG: 11.4 (low range, off road)
Best Fill MPG: 21.0 (before big tires)
Average Lifetime MPG: 16.2 (overall), 15.9 (since big tires)
EPA MPG Rating (City/Highway Combined): 18
Best Range: 315 miles (before big tires), 293.4 (since big tires)
Current Odometer: 26,816 miles
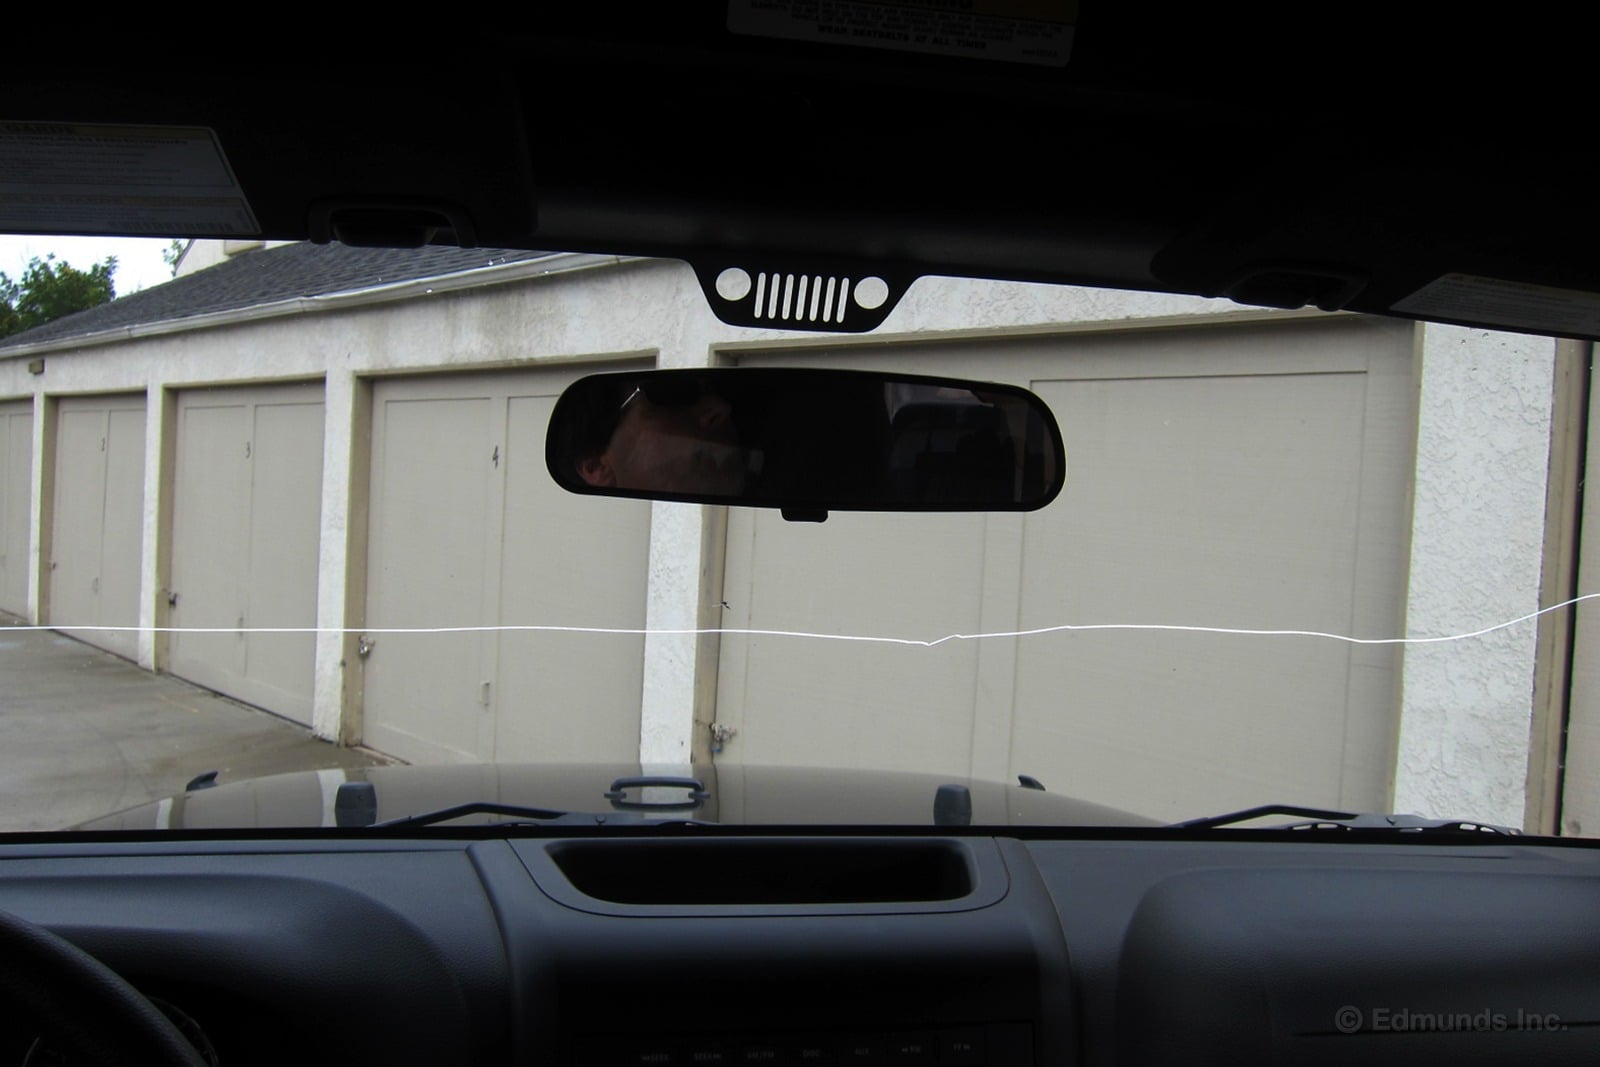
The same way a kid isn't a ball player until he's taken a fastball to the ribs, a Wrangler isn't a Jeep until it's cracked its windshield. Our Wrangler has proven itself a Jeep multiple times during its stay with us. This growing crack (nearly spanning the length of the glass) only solidifies it.
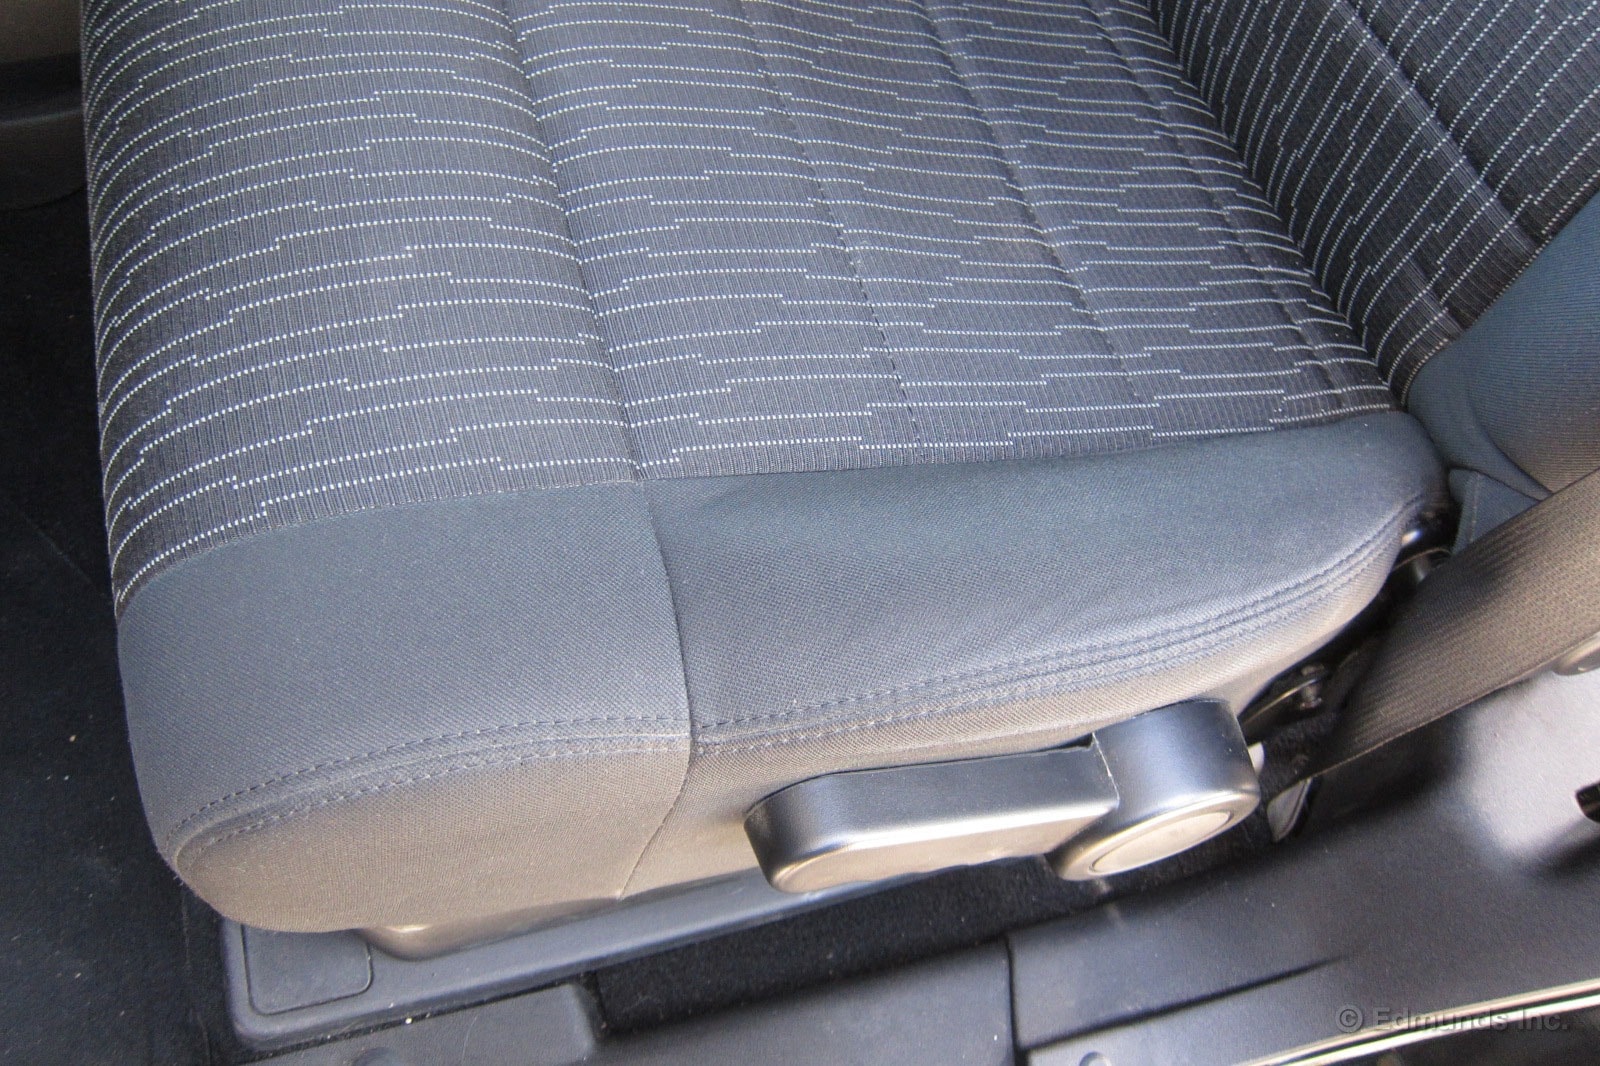
Despite the fact that our Wrangler now smells like it hosted a campfire for several nights, its interior continues to wear well. After its weekly bath yesterday, I got to looking around and noticed that, aside from a few nicks here and there, the only real sign of wear on its interior is this small deformation on the driver's seat. It's relatively insignificant considering the indifference with which we've driven it to nearly 28,000 miles.
Otherwise, its steering wheel, shifter and other daily touchpoints continue to look new.
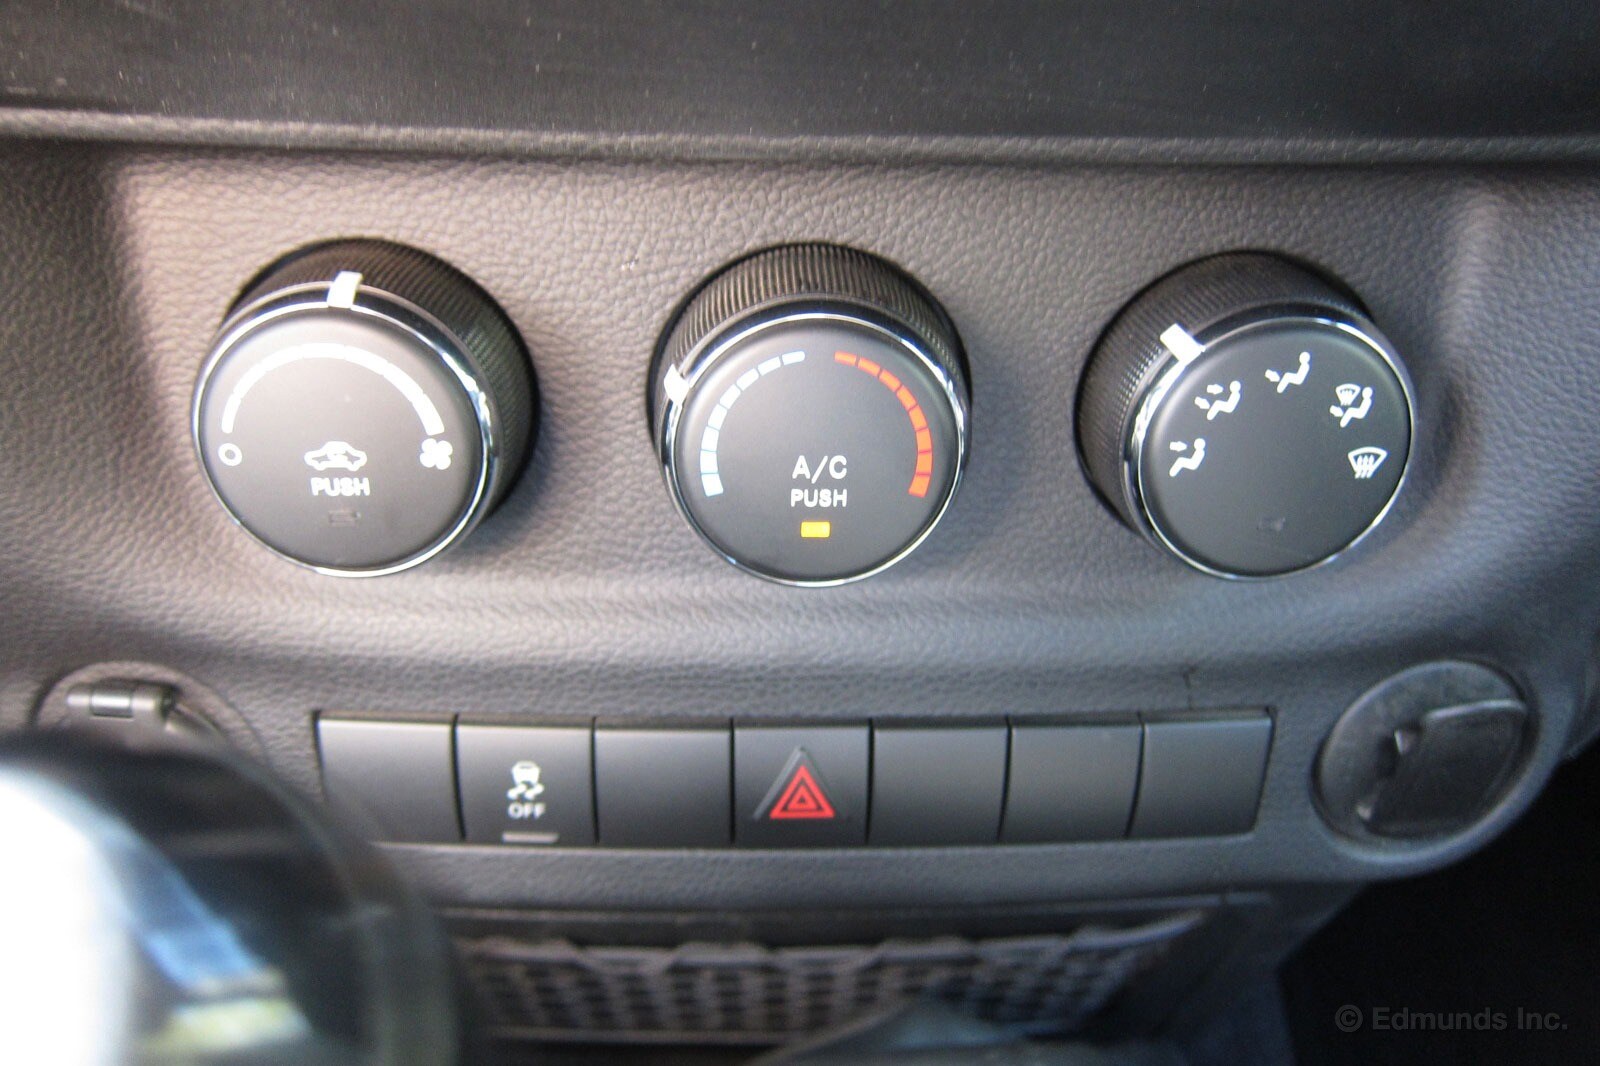
Ask yourself, do you want a Wrangler with climate control? I don't. This is partially why I find myself liking the Wrangler's simple, three-knob, two-button ventilation controls. Simple, direct and functional like everything else about the Wrangler.
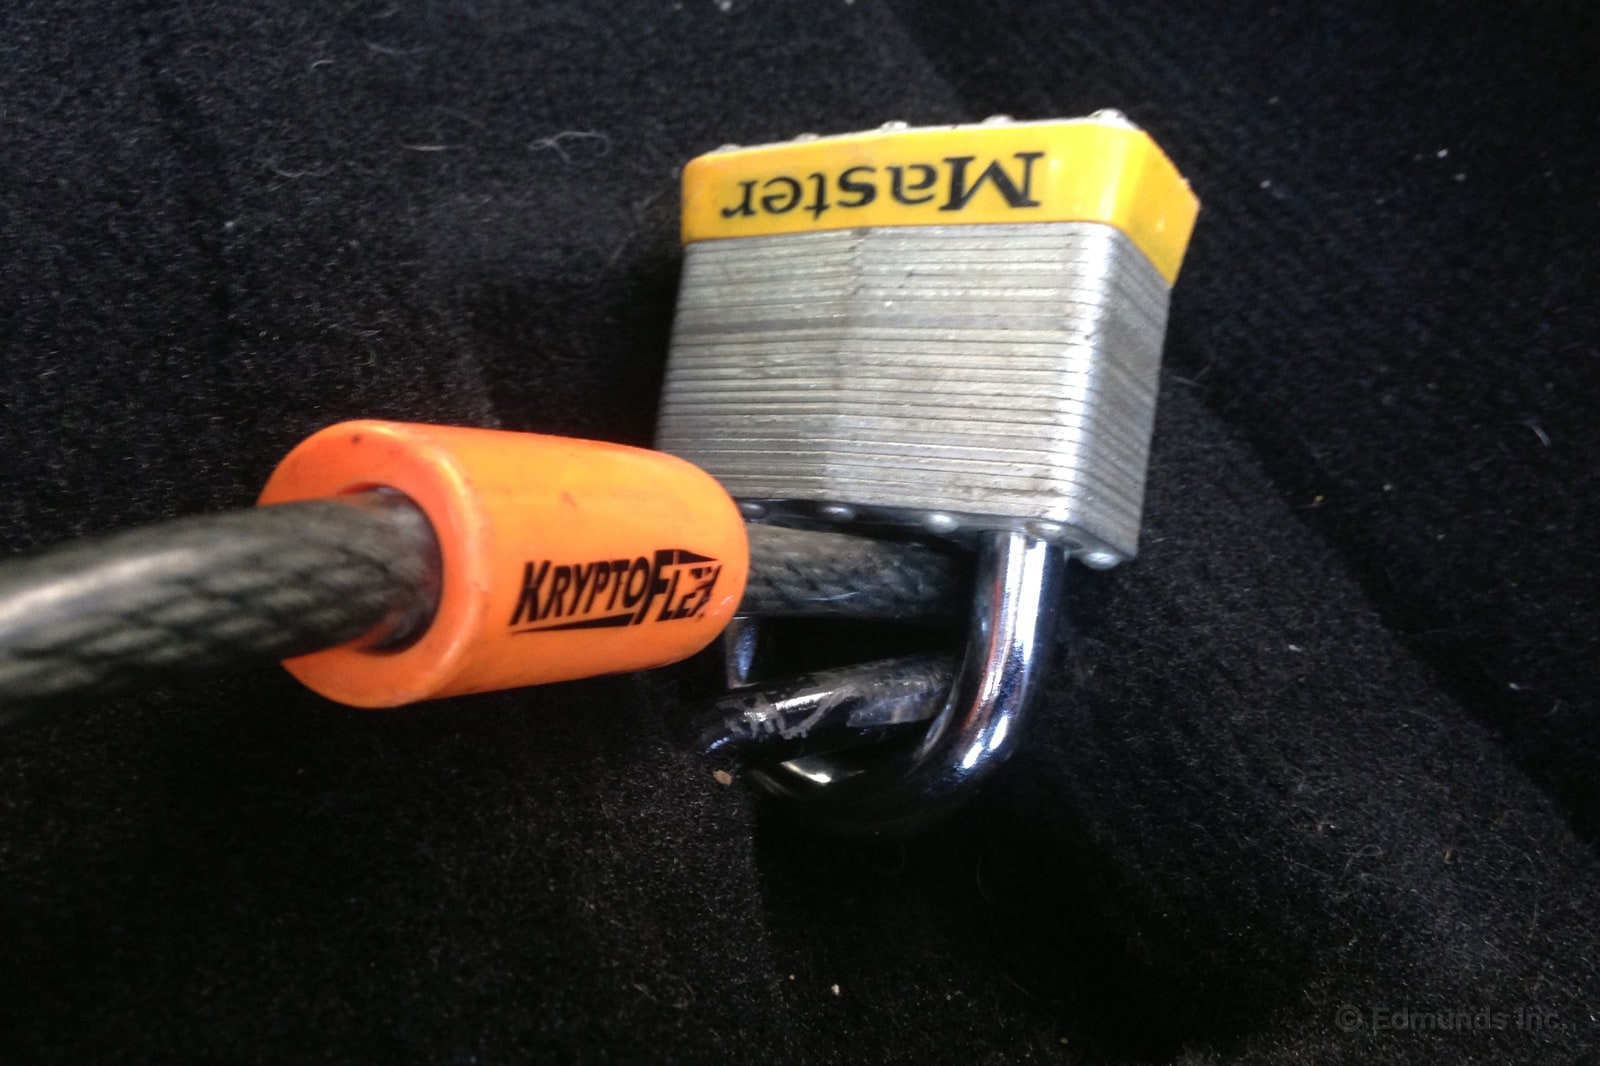
Here's one of the overlooked benefits of removing the Wrangler's rear seat: Cargo security. The rear seat's u-shaped strikers — all six of them — offer perfect locking points for whatever costly cargo (in this case a mountain bike) you might otherwise leave unsecured inside the soft top.
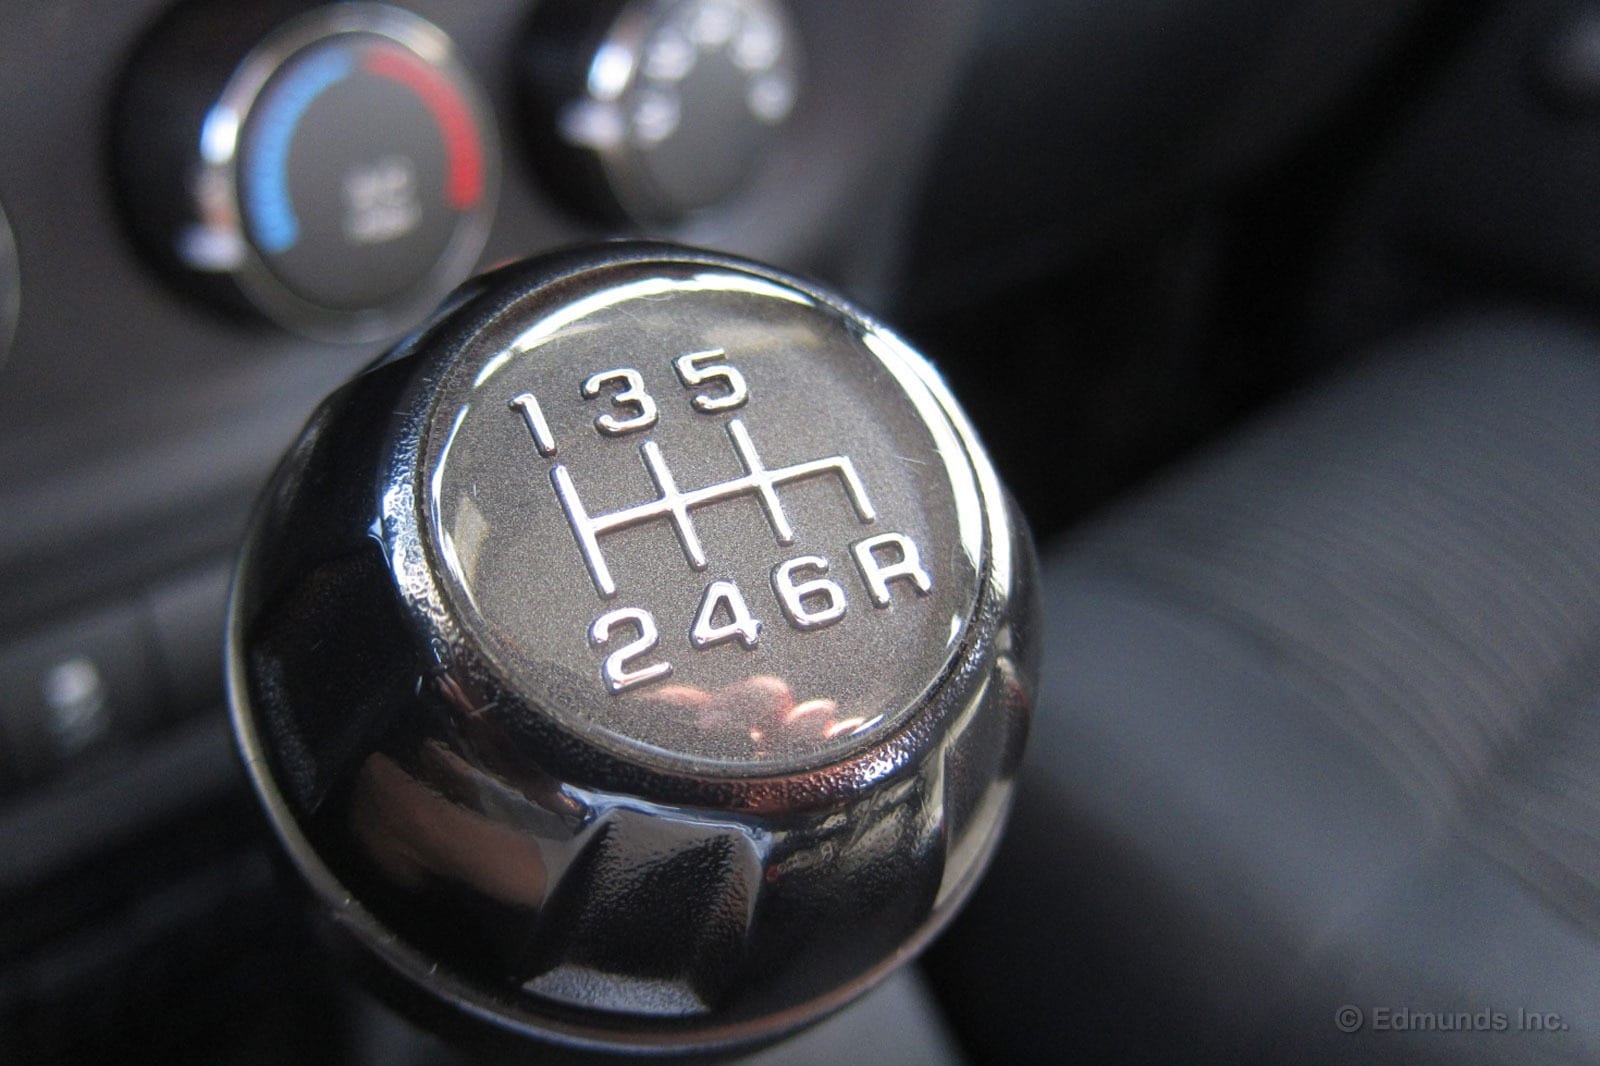
Given our Wrangler's huge tires there's no need to ever use sixth gear. At 70 mph in sixth the Pentastar V6 is turning over only about 1,850 revolutions per minute. And that's just not enough to pull even the slightest hill. Even a medium crosswind will trigger the need for a downshift. Fifth gear is only turning about 2,350 rpm at the same speed and that's a usable engine speed.
Lower axle ratios, of course, are the answer. These would get us a better crawl ratio, too. Lower gearing would save our clutch both on and off road. But it's in everyday driving that the benefits of proper gearing would pay the biggest dividends.
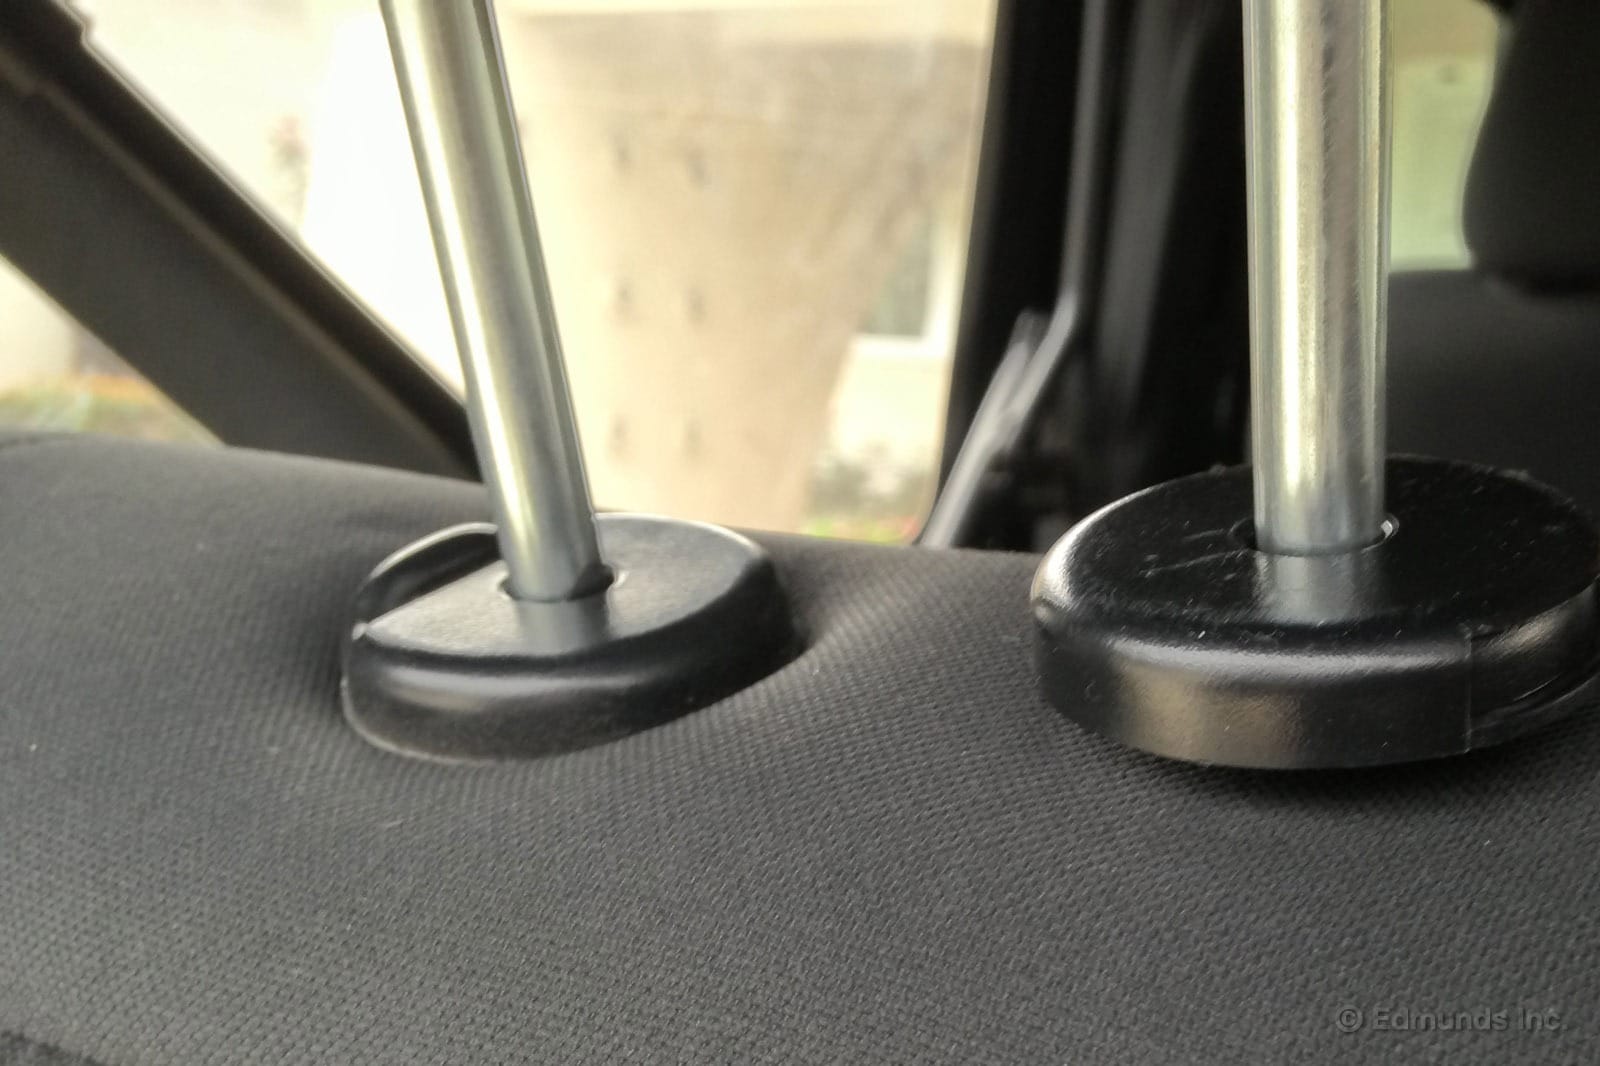
Some time ago one of the headrest mounts on our Wrangler's rear seat broke. The fixture which locates the driver side headrest in the seat pulled free. The headrest can still be removed and inserted, but the mount is no longer fixed to the seat. Fortunately, the other side is still attached and it locates the headrest solidly.
This should be addressed on our next dealer visit.
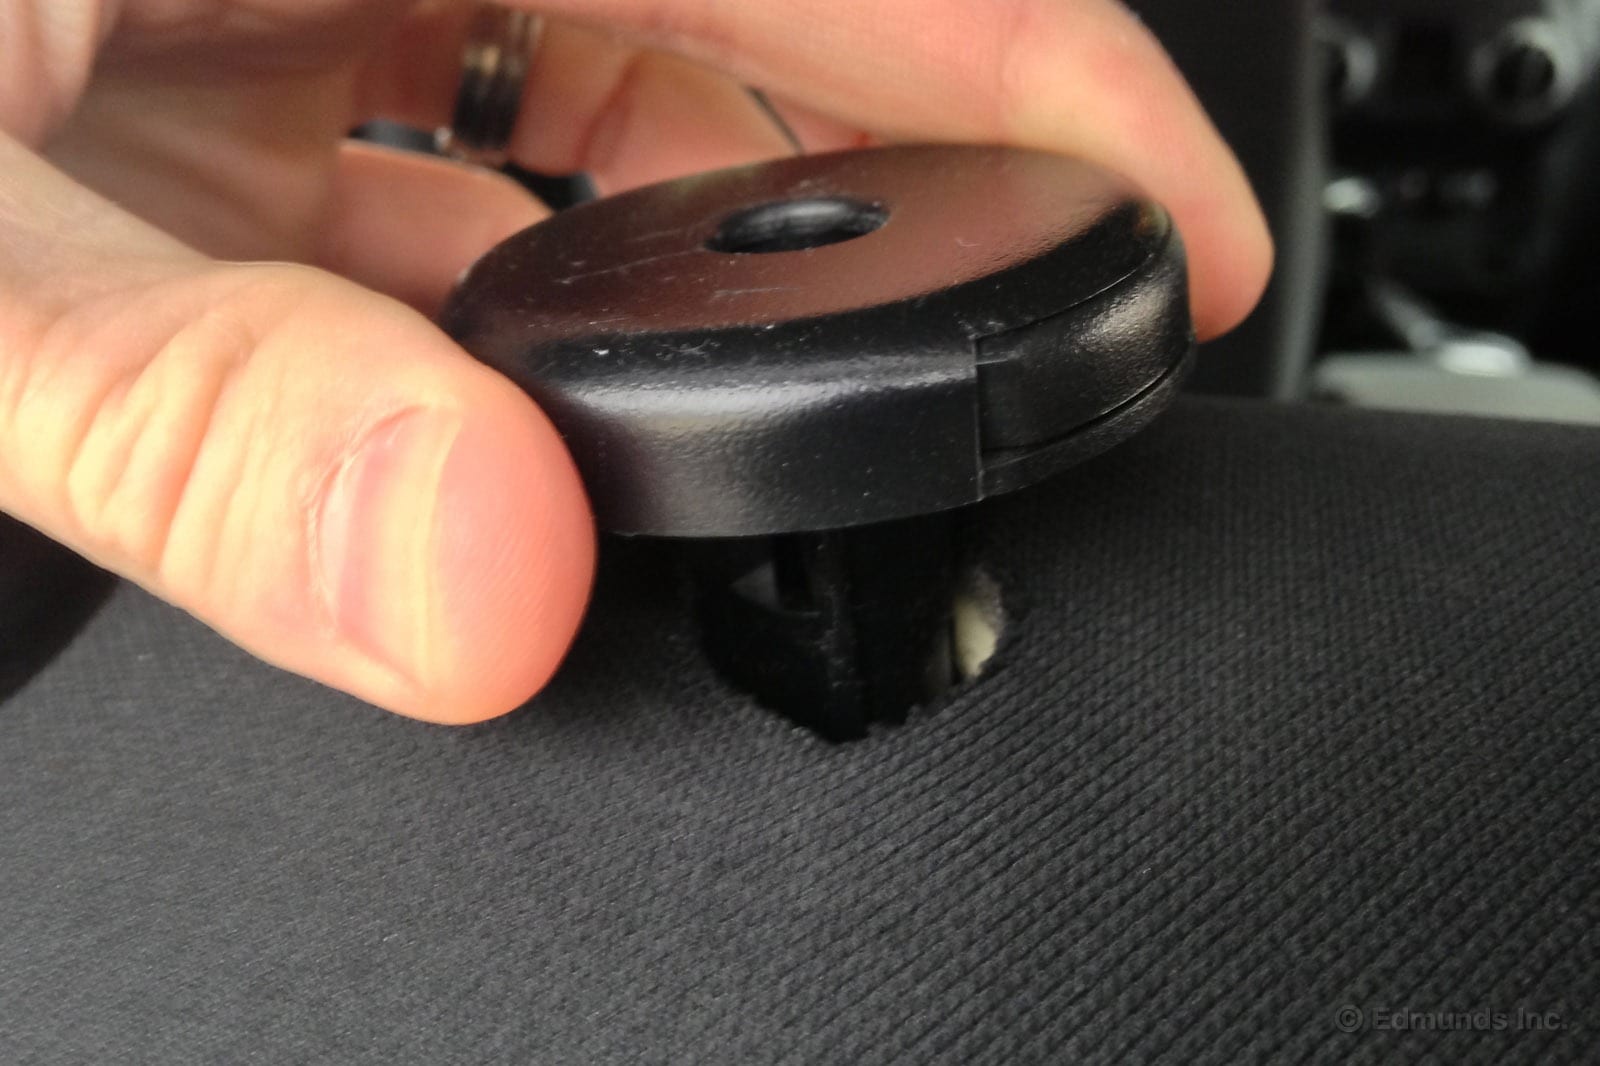
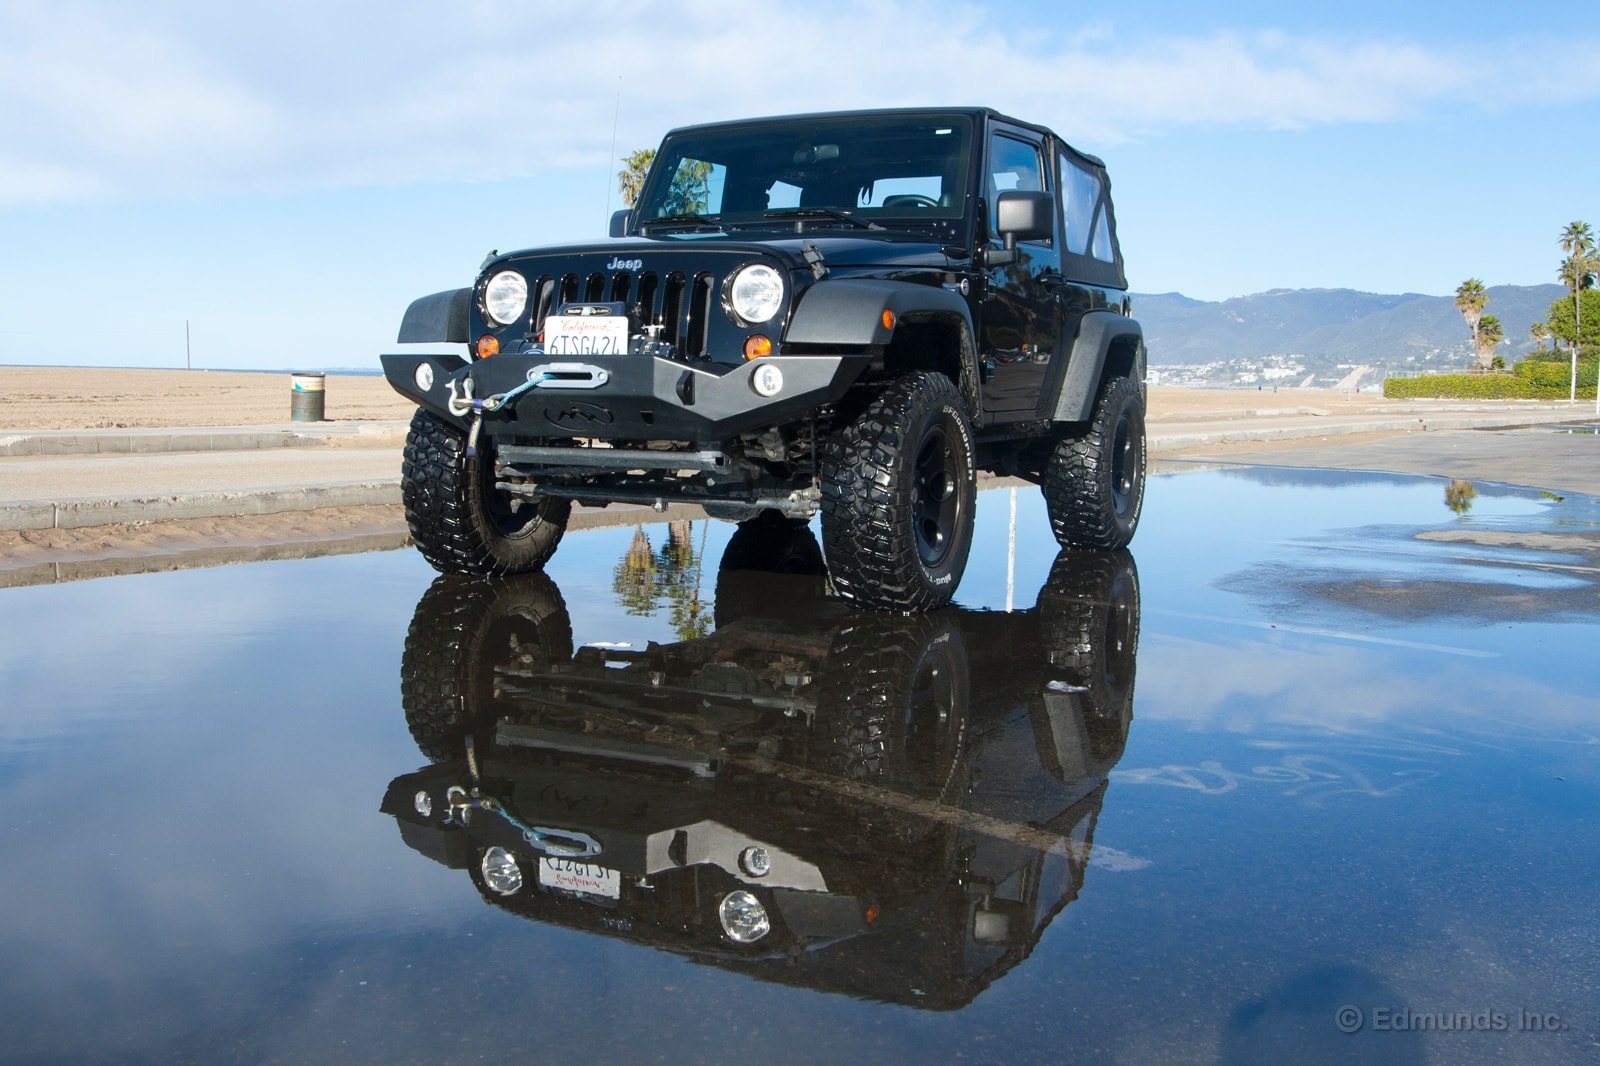
When I look at our Jeep Wrangler, I don't feel like it's massive. Next to our Jeep Cherokee it seems relatively normal. Parked in my structure at home it doesn't seem gargantuan. When the Wrangler is stationary, it seems large but not too big to park, commute in, or navigate on normal roads.
The size dynamics of the Wrangler change dramatically the moment you drive it. It's high up, difficult to see out of in traffic and has aftermarket tires that are wider than the body. Is this all an illusion or am I running over curbs, fire hydrants and small woodland creatures everywhere I go?
When I drive the Jeep Wrangler, I have to stick my head out and make sure it's not going to hit garage ceilings. I have to make tricky five-point turns to assure that I'm not going to nail my neighbor's Civic. Most importantly, I have to be very aware of my lane position.
During rush hour this can get tricky. While sitting at a red light I noticed that the left hood latch (red arrow) on our Wrangler was lined up directly with the left lane line. I popped my head out the driver side door and checked my tires. They had about 6 inches of space on the left before exiting the lane.
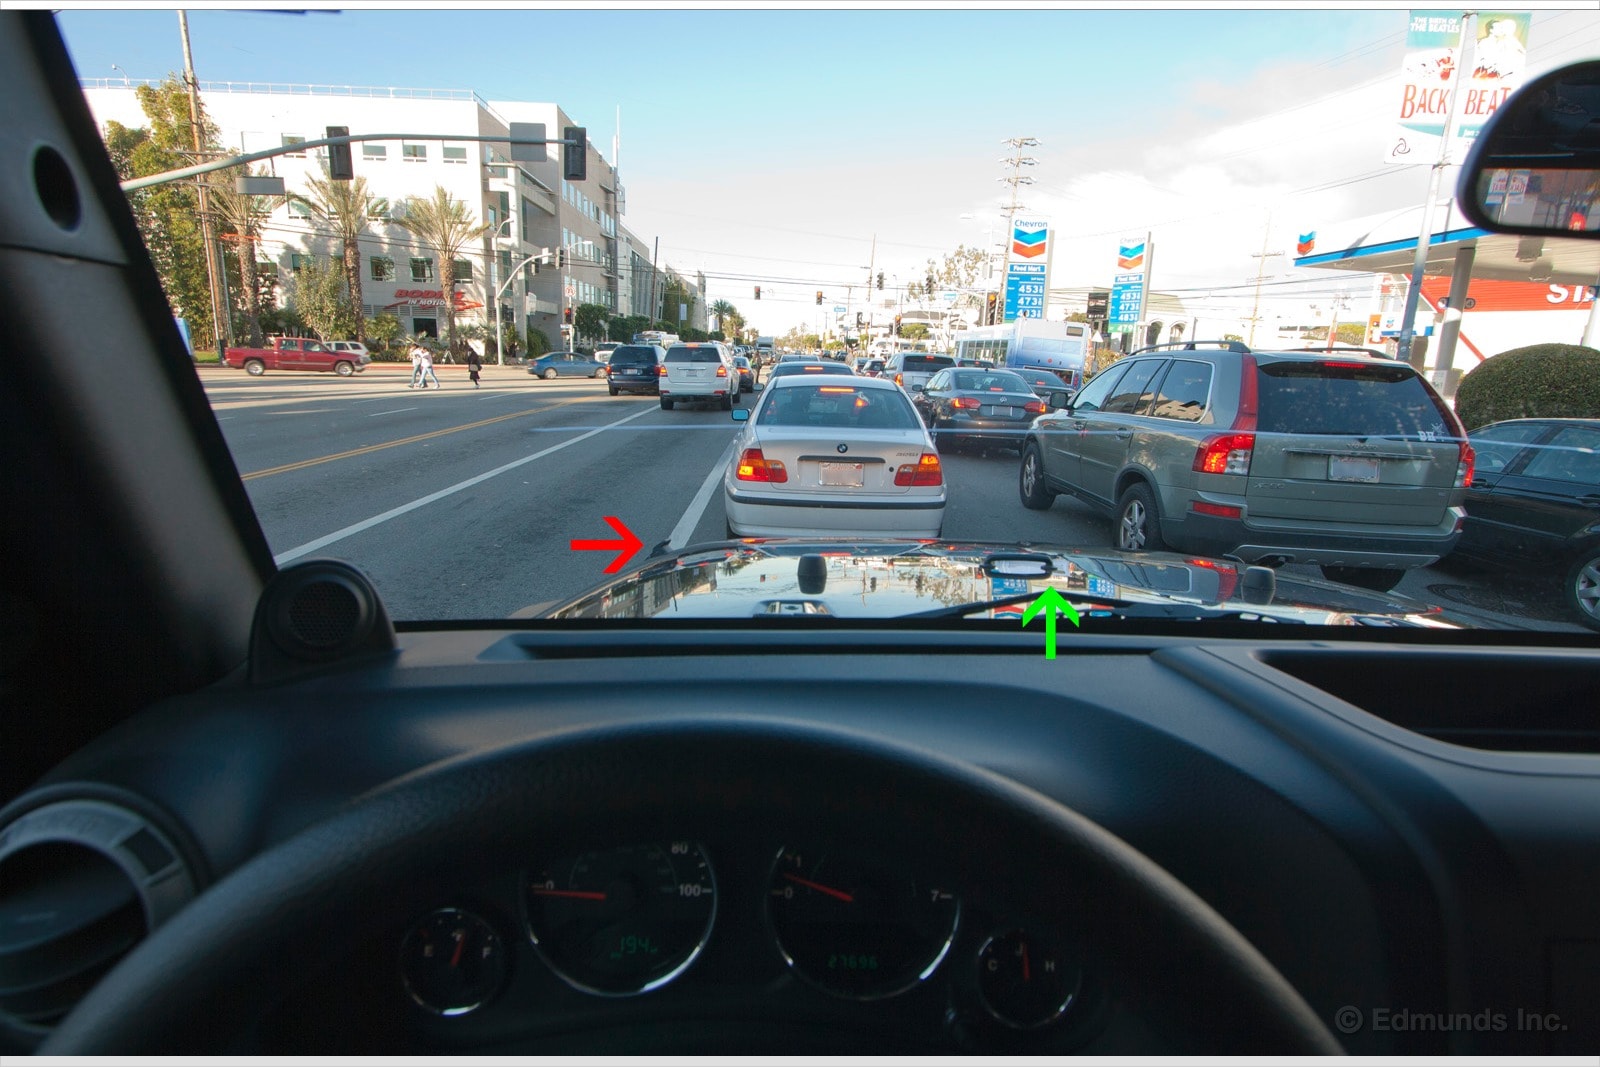
The handle in the center of our hood lined up with about the same proportions to the right hand lane lines when I kept my head centered on the same driving position. For reference I decided to measure from outside sidewall to outside sidewall on the tires.
The Jeep Wrangler measured exactly the same as our SRT8 at just over 75 inches. For comparison I measured our stock Subaru BRZ and it came in at 68 inches wide on stock tires. None of this changed the width of our Wrangler, but it made me a little more confident on the road that I wouldn't be crushing the toes of bystanders as I made my way to work.
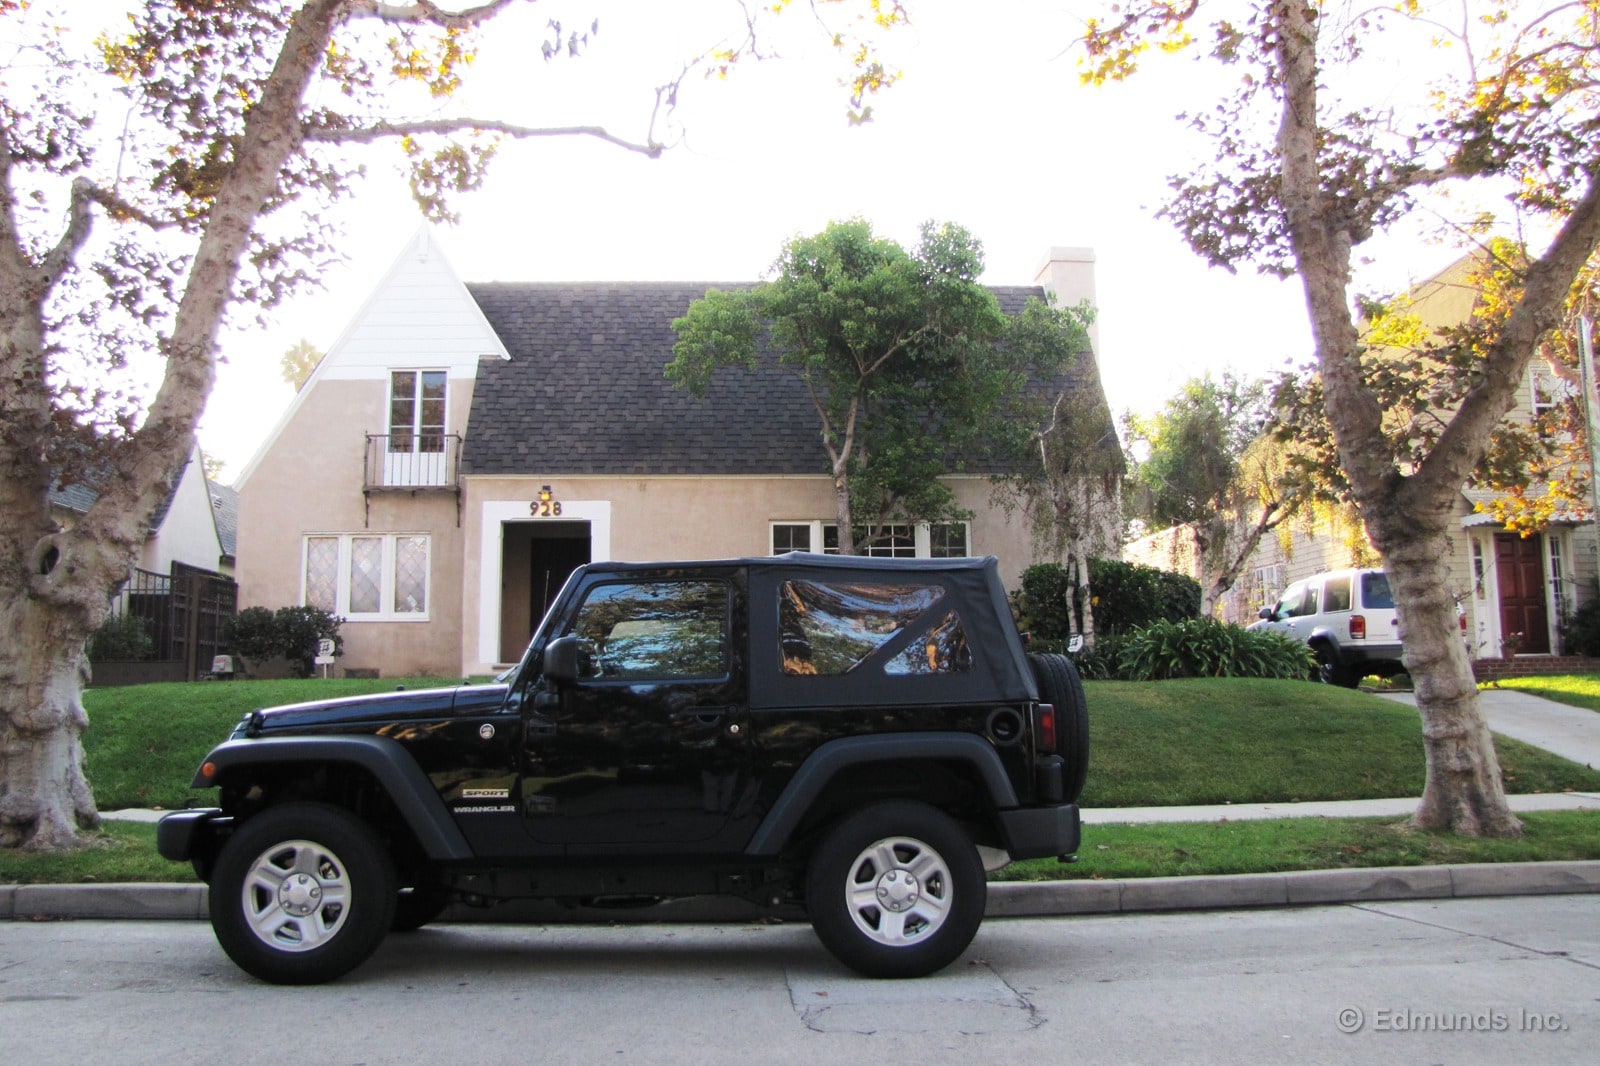
My wife got a call from her mother yesterday. Apparently she and my father-in-law bought a new car.
My wife was a little perplexed. She knew they were thinking about getting one, but per tradition, they hadn't talked to me yet about what they should be looking for. I haven't steered them wrong yet.
She knew immediately why they didn't when she found out what it was: a loaded 2013 Jeep Wrangler Sahara 2-Door.
They just knew I'd shake my head and try to steer them in a different direction with a laundry list of reasons why it's not a good idea. Reasons like, I don't know, a verbatim recitation of the Cons section from the Edmunds model review.
"Cons: Noisy cabin; choppy ride; long braking distances; poor side crash ratings."
I'd also throw in the fact that it's not fuel efficient and handles abysmally. They got the hard top, so the myriad soft-top complaints can be replaced with "still noisy; the paint on the removable hard-top pieces chip easily."
Apparently, my mother-in-law has just always wanted a Jeep. Apparently, my father-in-law knows a guy who likes to go "four-wheeling" and when they move back to California this year, he can go too. (My wife thought this was unlikely).
Inevitably, though, they fell victim to Jeep Infatuation. Unless you really are going to frequently get it dirty, I can think of few rational reasons to buy one — for my parents-in-law or anyone else, really. If you compare it to a modern crossover SUV for use as a daily driver, it's basically a joke.
Yet, the Wrangler remains one of the best-selling SUVs in the country because of its looks, its aura, its history and its inherent coolness. Believe me, I totally get buying cars for such reasons. Without such reasons, we'd all drive Honda Civics. I don't want a Mercedes-Benz CLS63 for rational reasons.
So good for them, I truly hope they enjoy their new Jeep. However, should they start noticing those Cons, I will simply raise a Spock-like eyebrow and offer, "Hmm, fascinating."
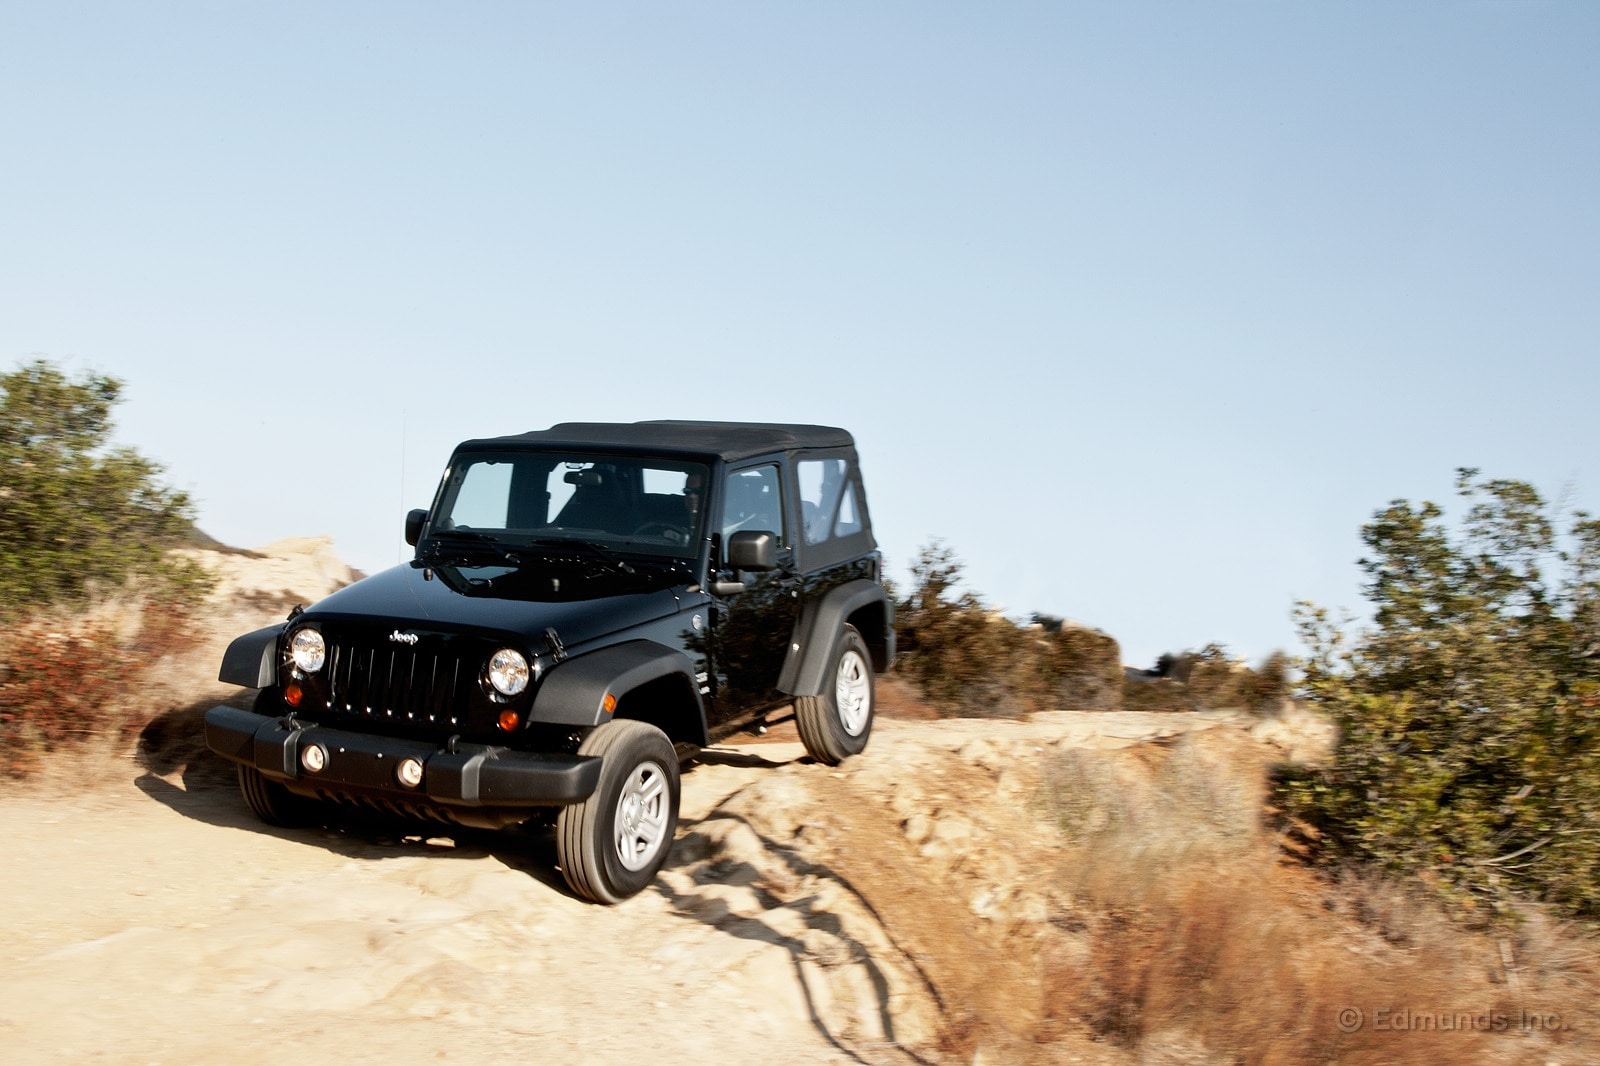
One of the more specialized vehicles in our long-term fleet, the 2012 Jeep Wrangler doesn't always get out as much as the more comfortable commuters.
Even with an additional 1,000 miles added to its odo in February, the Wrangler's monthly fuel economy averages remain unchanged.
Worst Fill MPG: 11.4 (low range, off road)
Best Fill MPG: 21.0 (before big tires)
Average Lifetime MPG: 16.2 (overall), 15.9 (since big tires)
EPA MPG Rating (City/Highway Combined): 18
Best Range: 315 miles (before big tires), 293 (since big tires)
Current Odometer: 27,987 miles
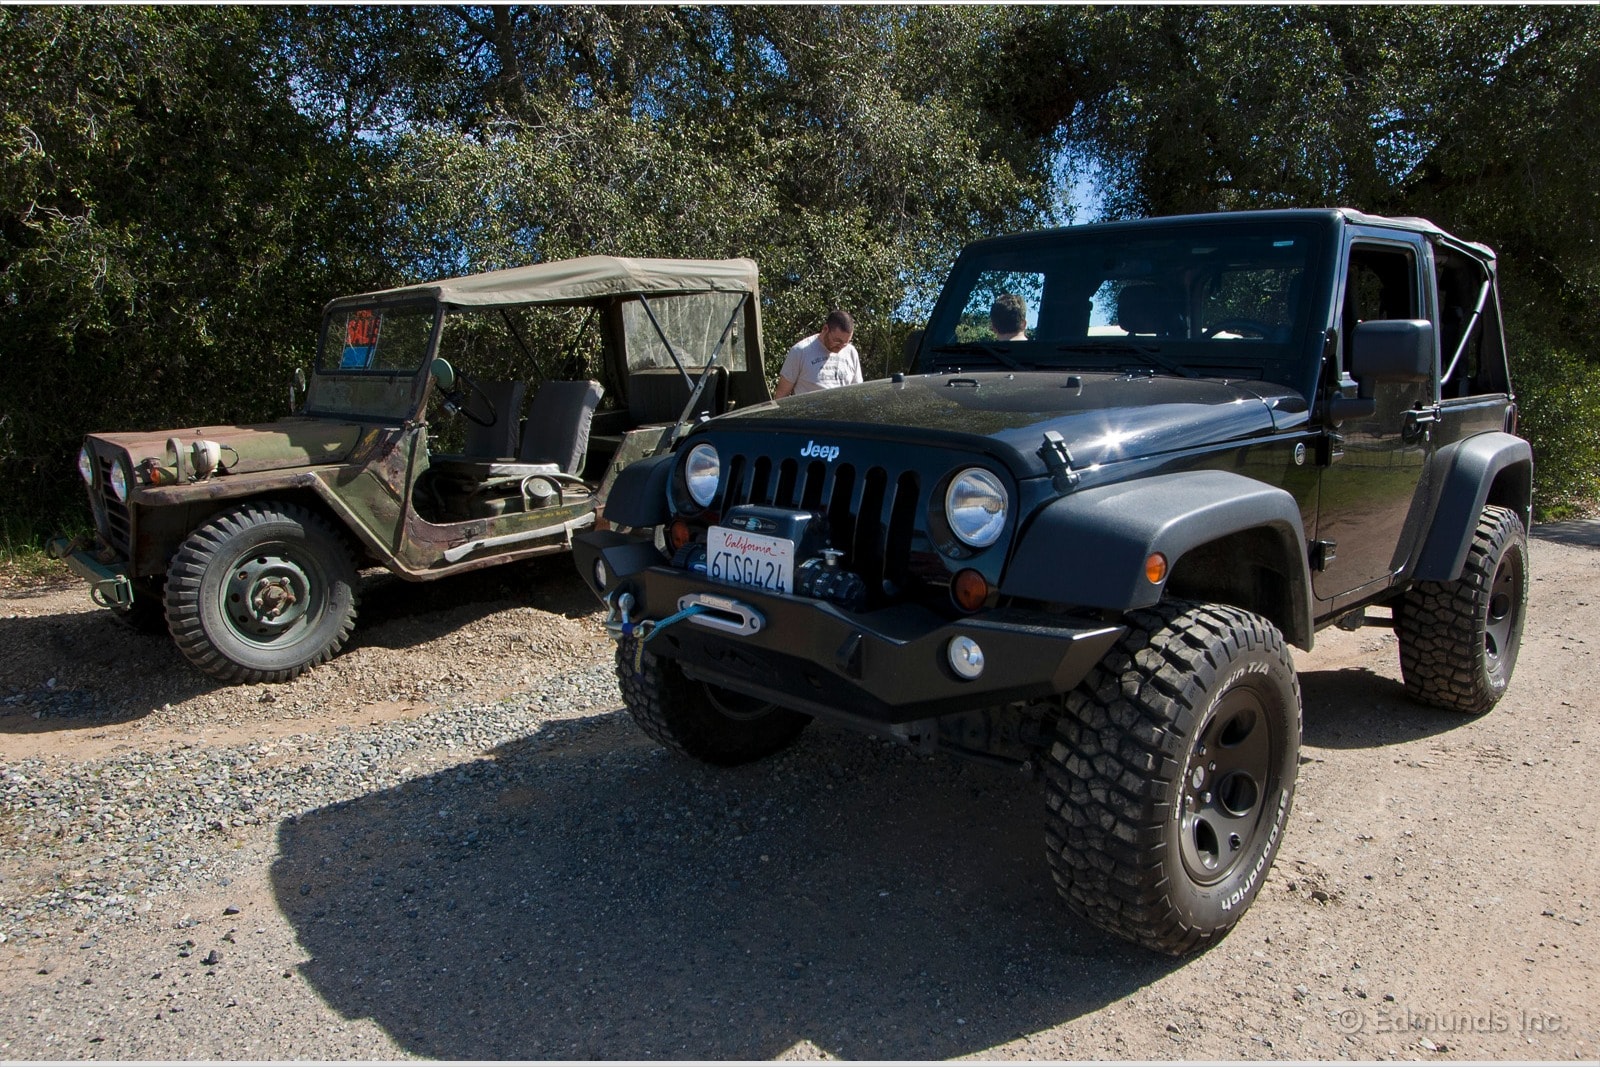
When I drive our 2012 Jeep Wrangler around town (and especially on trails) it gets a lot of attention. Jeep owners seem to be a particularly passionate group. Drivers in other Wranglers are constantly waving, giving the thumbs up, or taking a closer look at our modifications. Driving the Wrangler also makes me much more aware of other Jeeps and various off-road vehicles around me.
En route to a recent off-road trip I spotted a classic Jeep (or so I thought) and pulled over for further inspection.
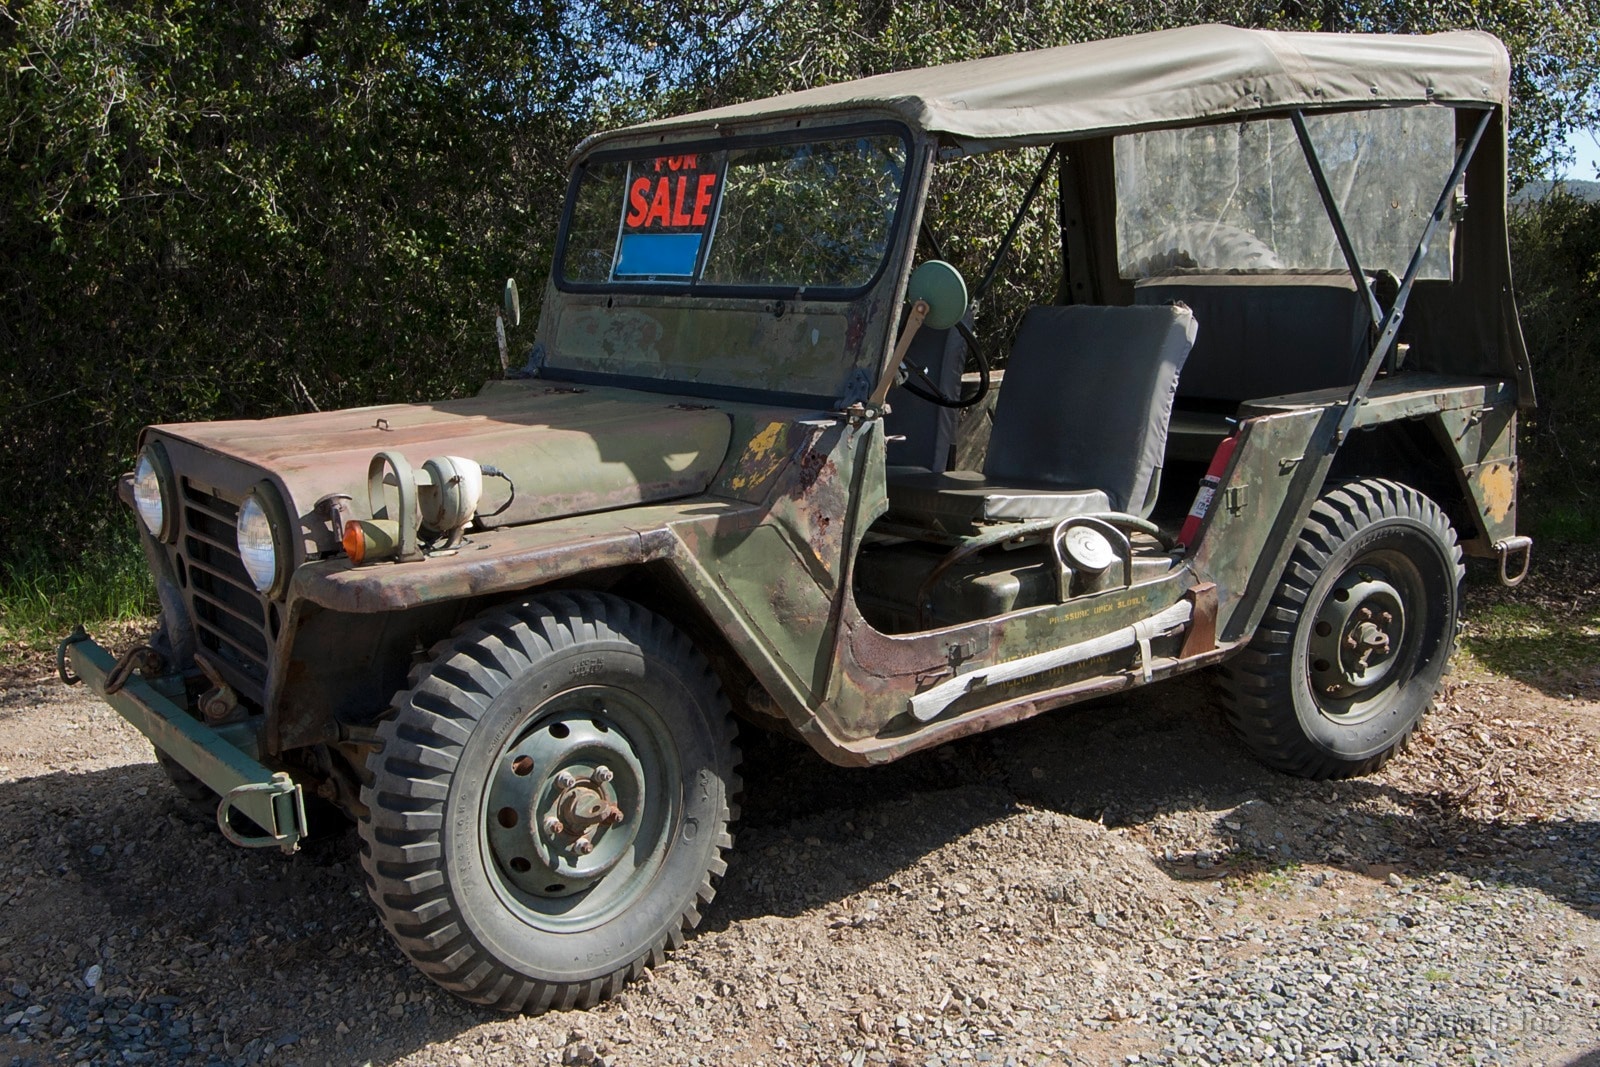
This 1965 M151A1 Jeep was actually built by Ford. As we stopped to take a few pictures the owner came out to greet us and was nice enough to give us some of the history behind this particular era of military vehicle. Apparently this era of Jeep had some serious rollover problems so when they were done with military service, many were cut in half. This one survived its U.S.M.C. service in one piece. It still had the original axe and shovel, and started up on the first try.
You can see some of the same styling cues in our Wrangler today. The grill, the headlights and even the supports that hold up the soft top in the rear seem to be close relatives. There's a strong case to be made that some heritage remains here.

Prior to starting to work for Edmunds, the only time I had spent off-road included a few dirt bikes rides (no jumps), some time on a quad, and a trip to Lake Havasu in college where my buddies and I had ingloriously ran a Jeep Wrangler out of gas. So when an opportunity came up to take our 2012 Jeep Wrangler and leave the pavement behind with a local group of Land Cruiser owners, I jumped at the chance.
Don Swertfeger, a friend and fellow Edmunds employee, convinced me to join a group of all-Toyota off-road enthusiasts for a day on the dirt. After some morning coffee and gassing up the trucks, we headed east from Los Angeles to Cleveland National Park where the trail was located. We reached the trailhead and to our dismay it was closed.
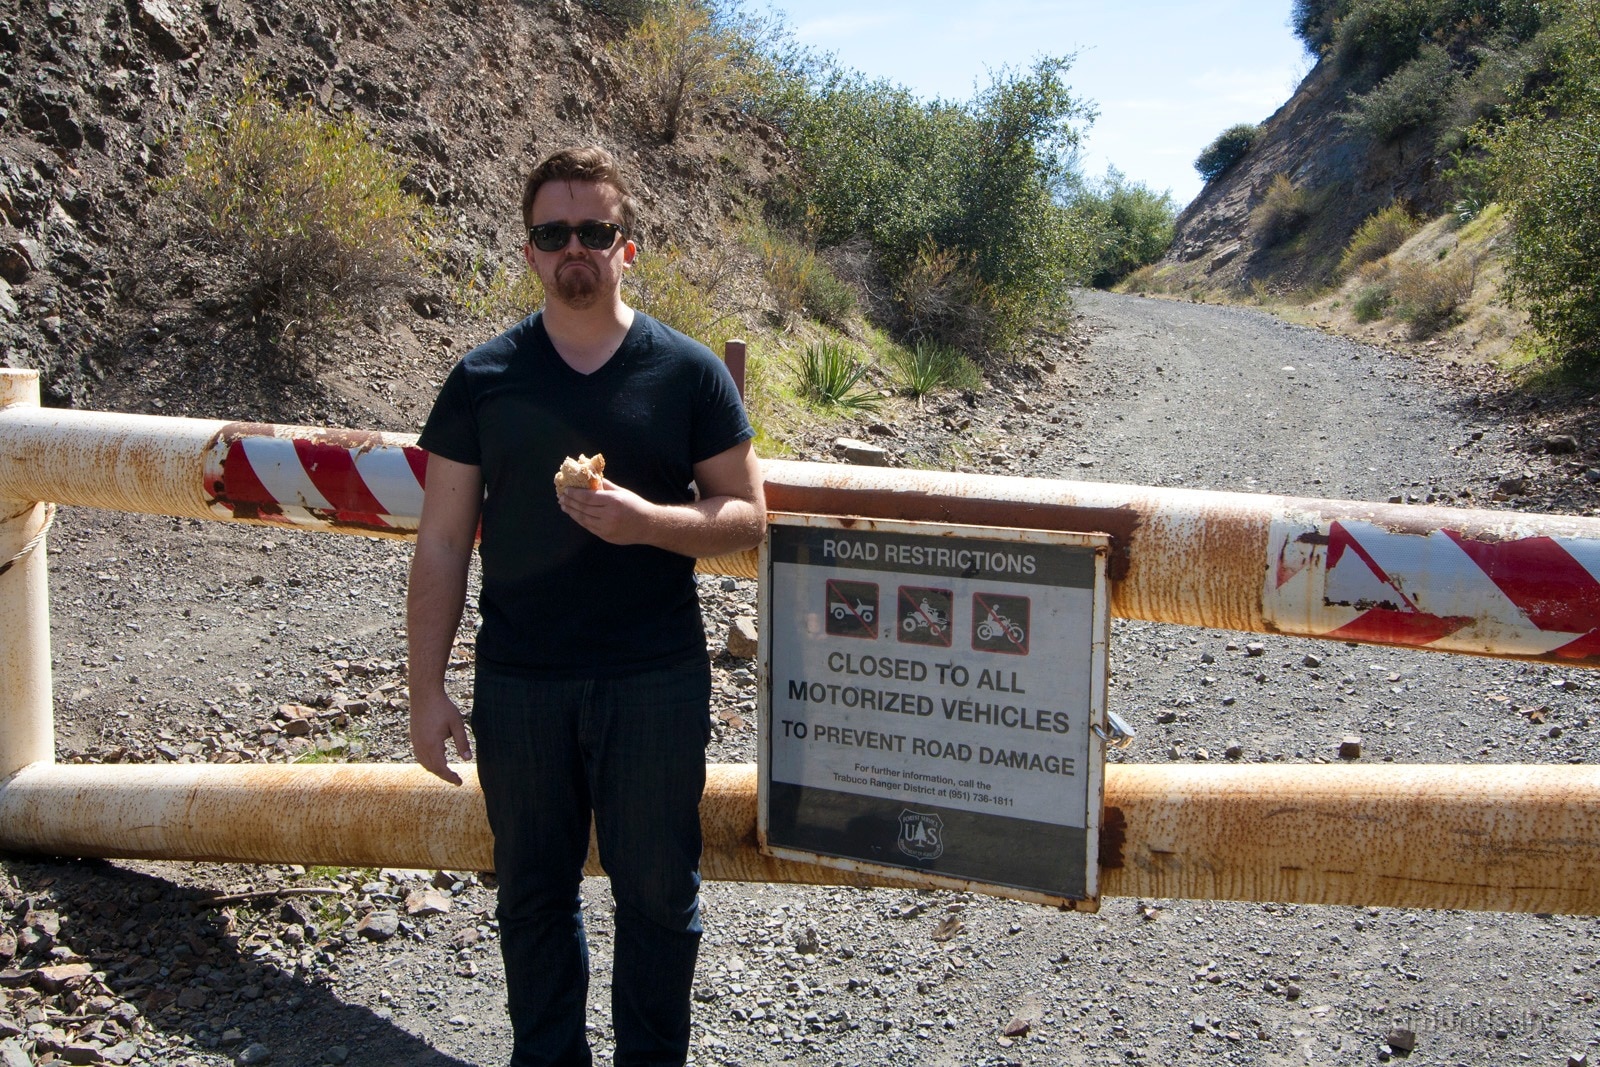
Don enjoys turkey and cheese, but not as much as he enjoys climbing hills. We broke out the trail mix and discussed our options.
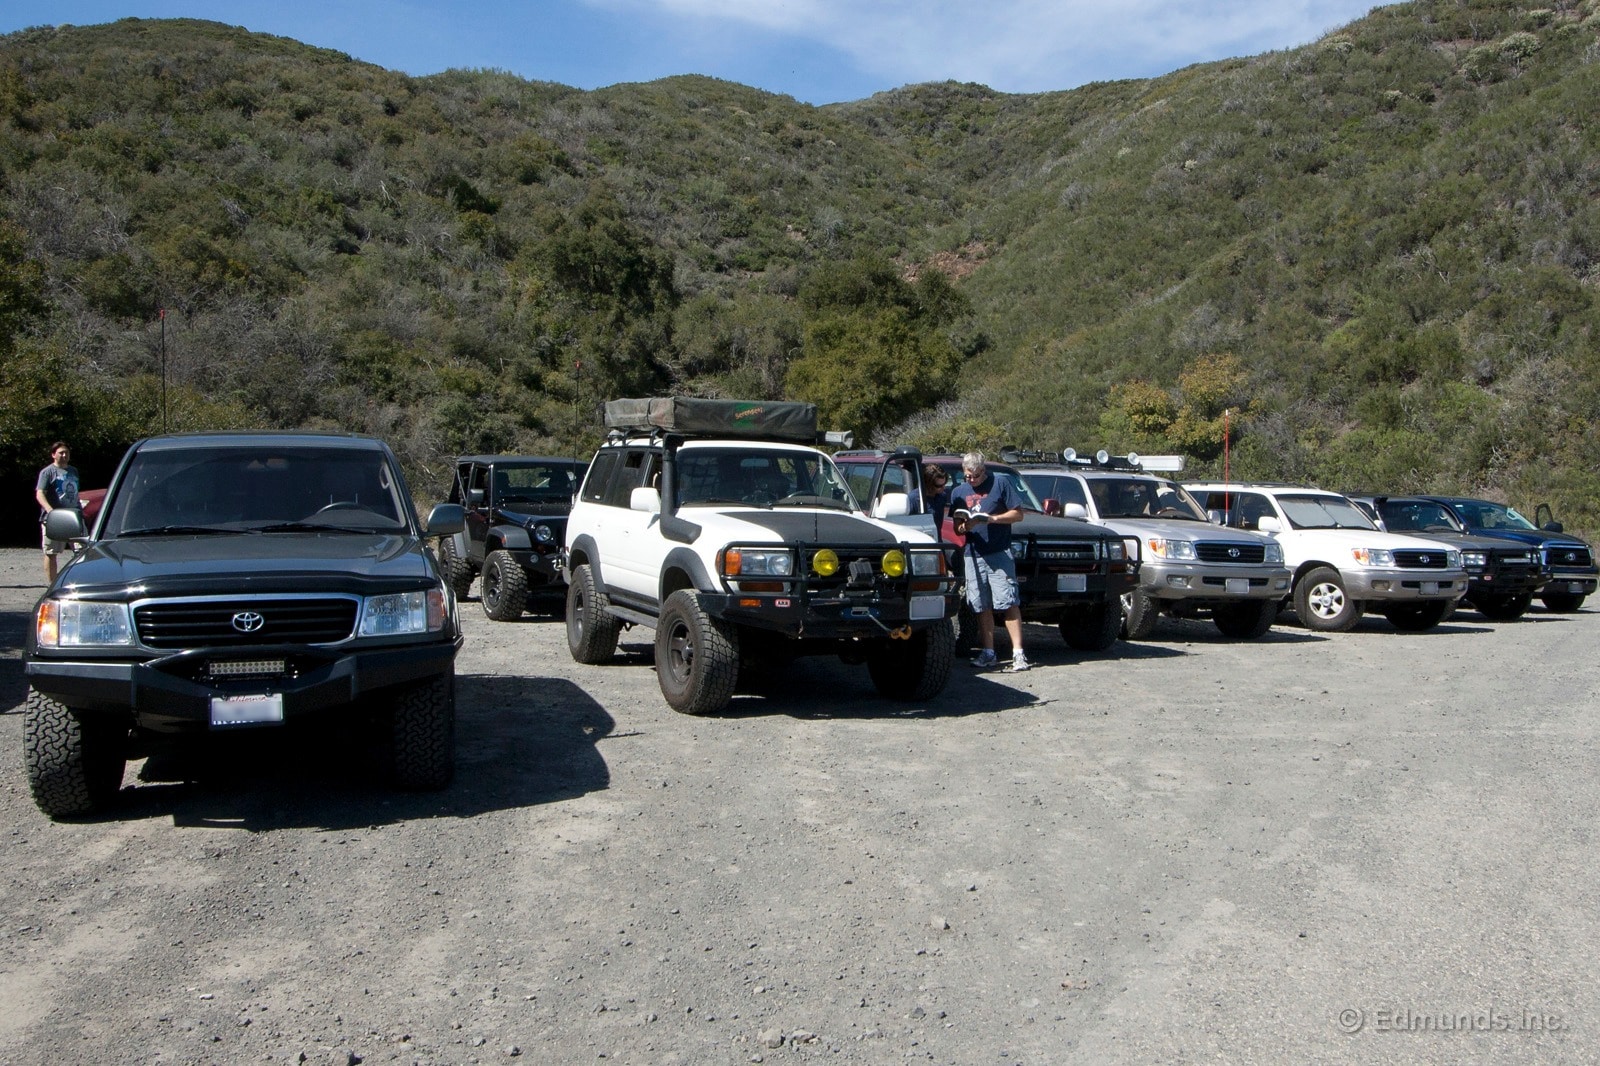
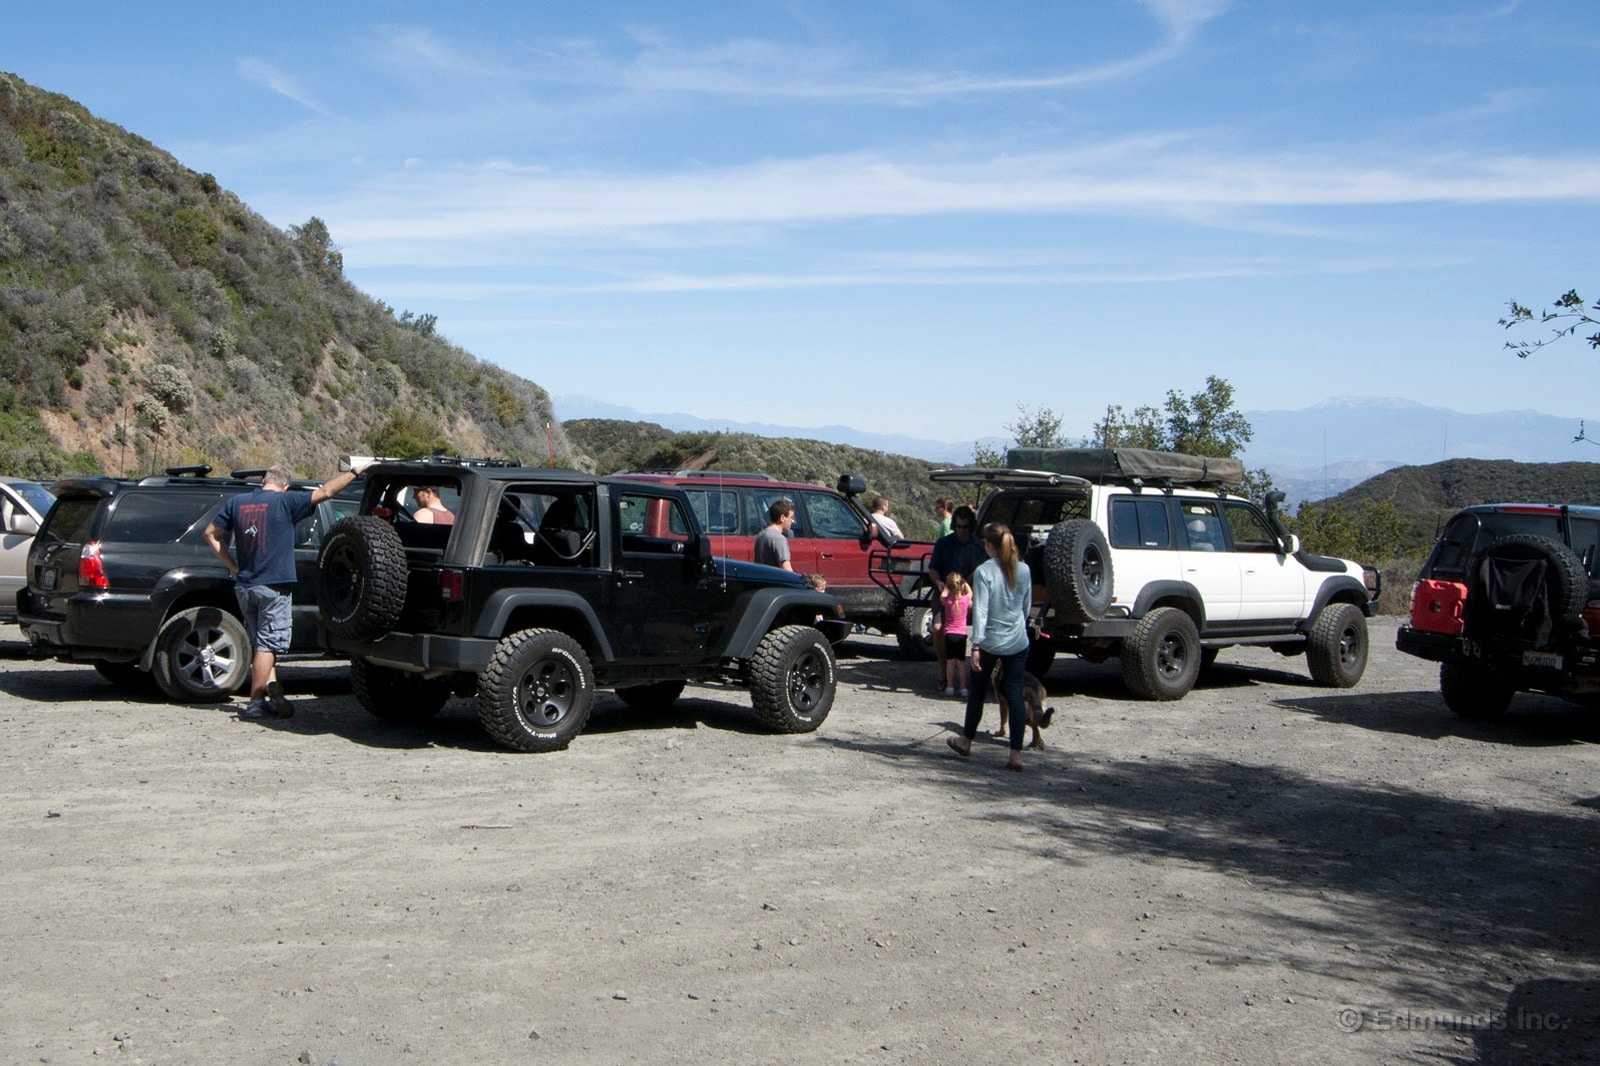
After we conferred with the maps and acknowledged that no one really knew other local roads worth mentioning, we simply carried on. We happened upon a second road that was thankfully open, and put the trucks in four-wheel drive. For a novice like me, this became quickly exhilarating.
Being with a group of capable drivers gave me confidence and encouragement and it made finding the right lines up the trail easy. Many times I found myself giving the Jeep Wrangler nothing but steering inputs, keeping my feet completely off the clutch, brake and throttle altogether.
This trail was like child's play our Jeep, but for me the experience was like playing with the Tonka Truck I had as a child. Its simplicity brought me great joy with minimal effort.
Don and I both laughed constantly as we bounced up and down in the stiff seats, like elated children with a new toy.
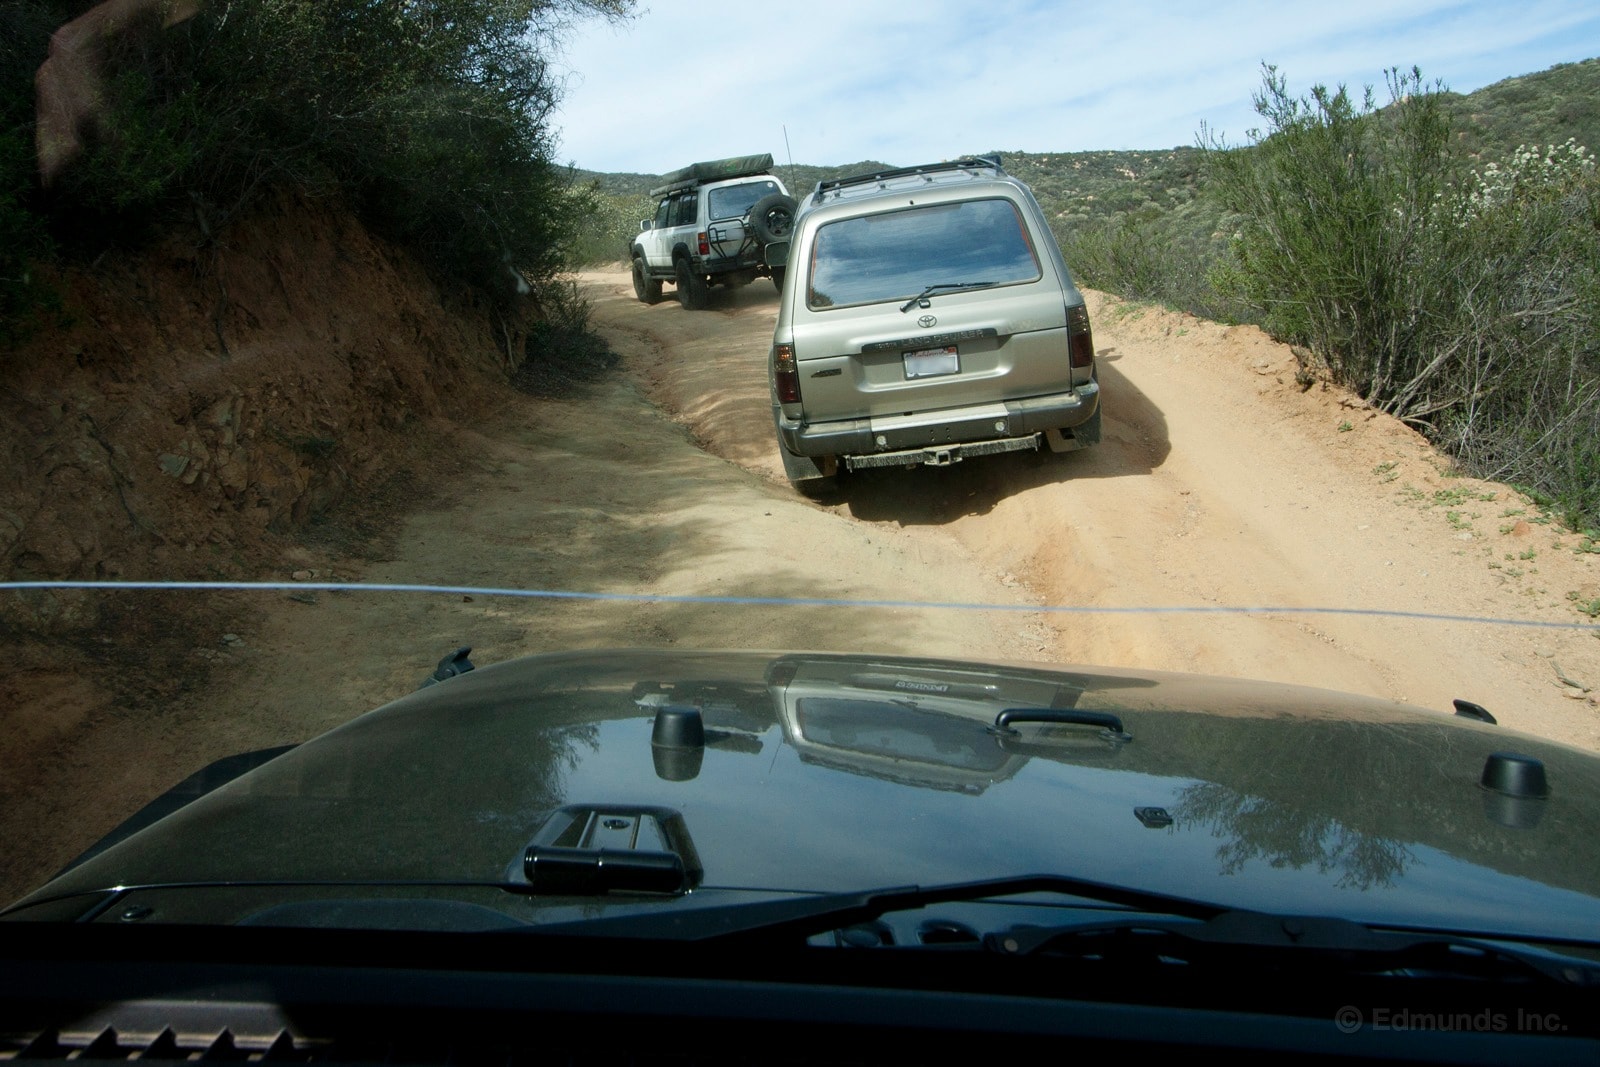
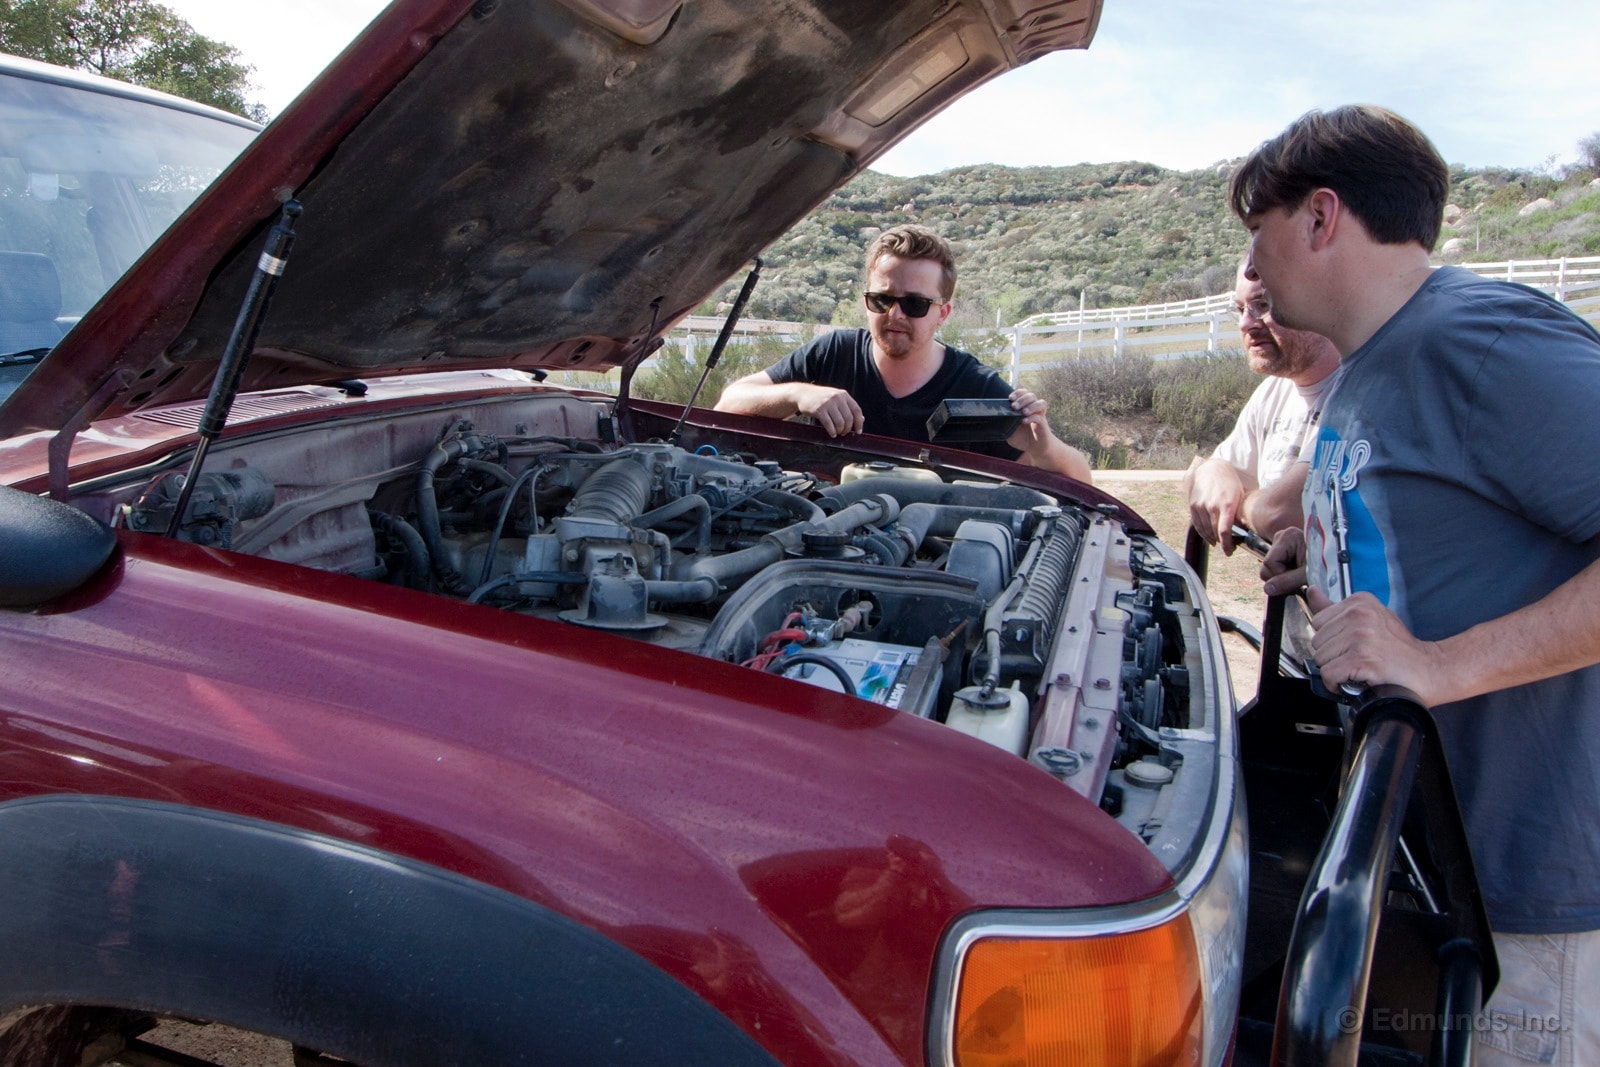
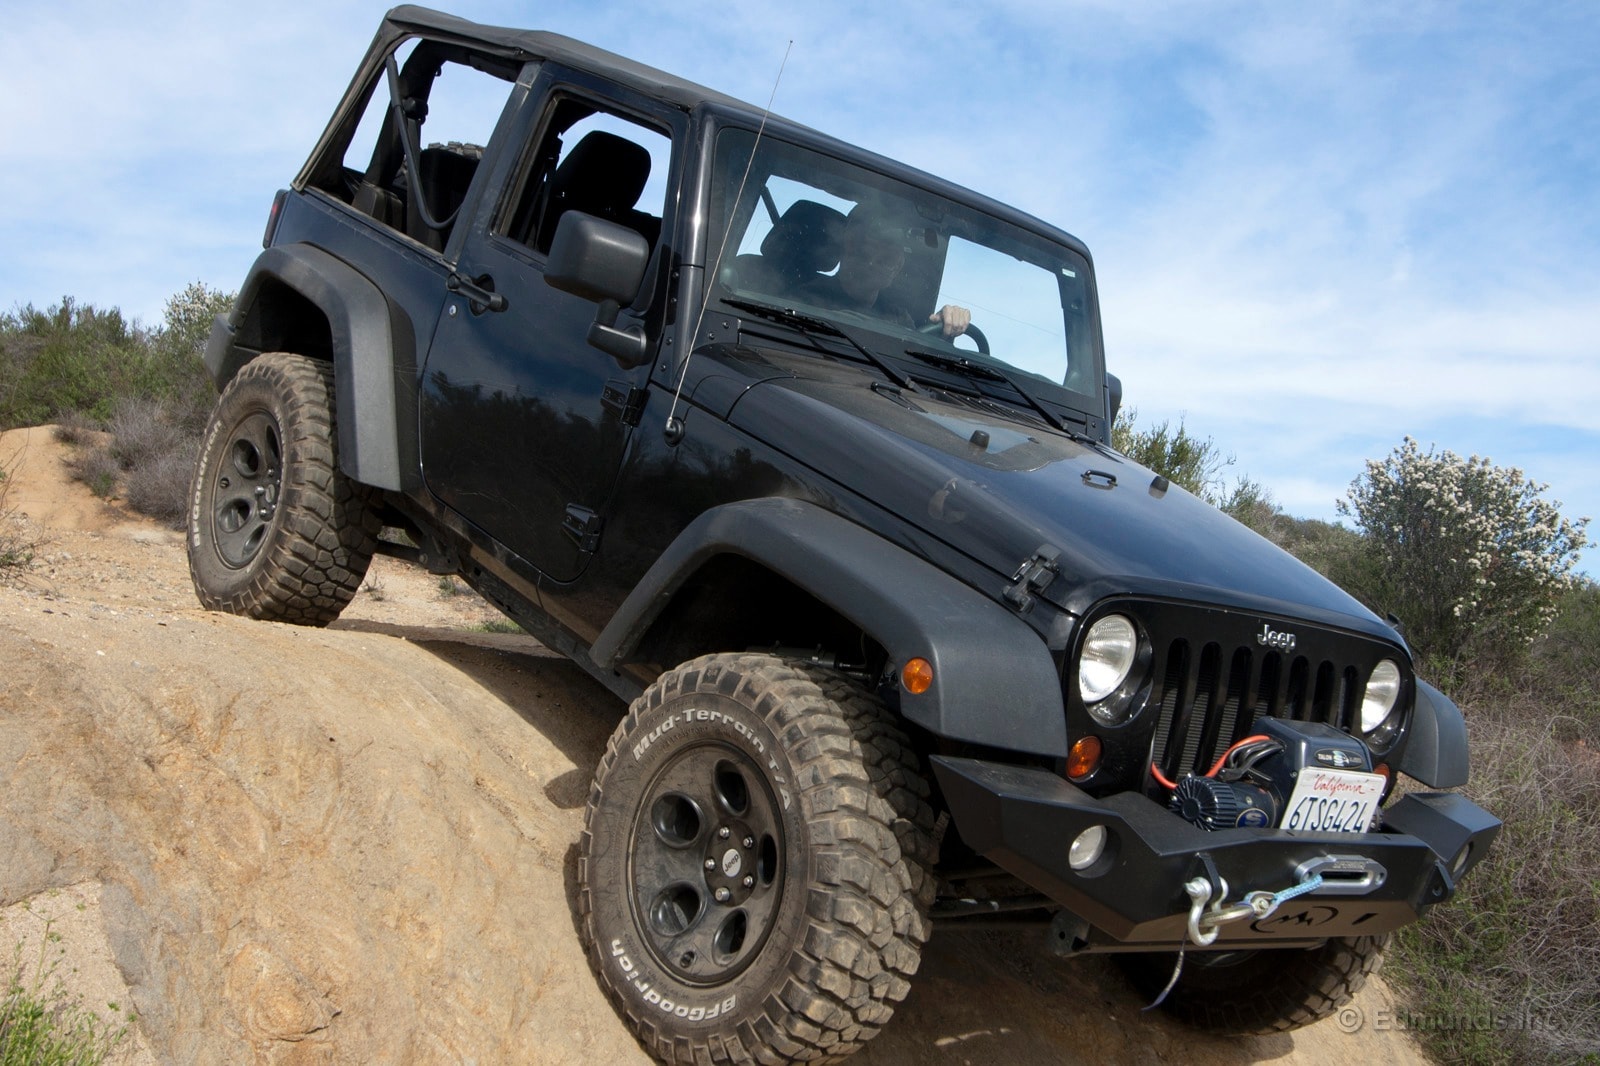
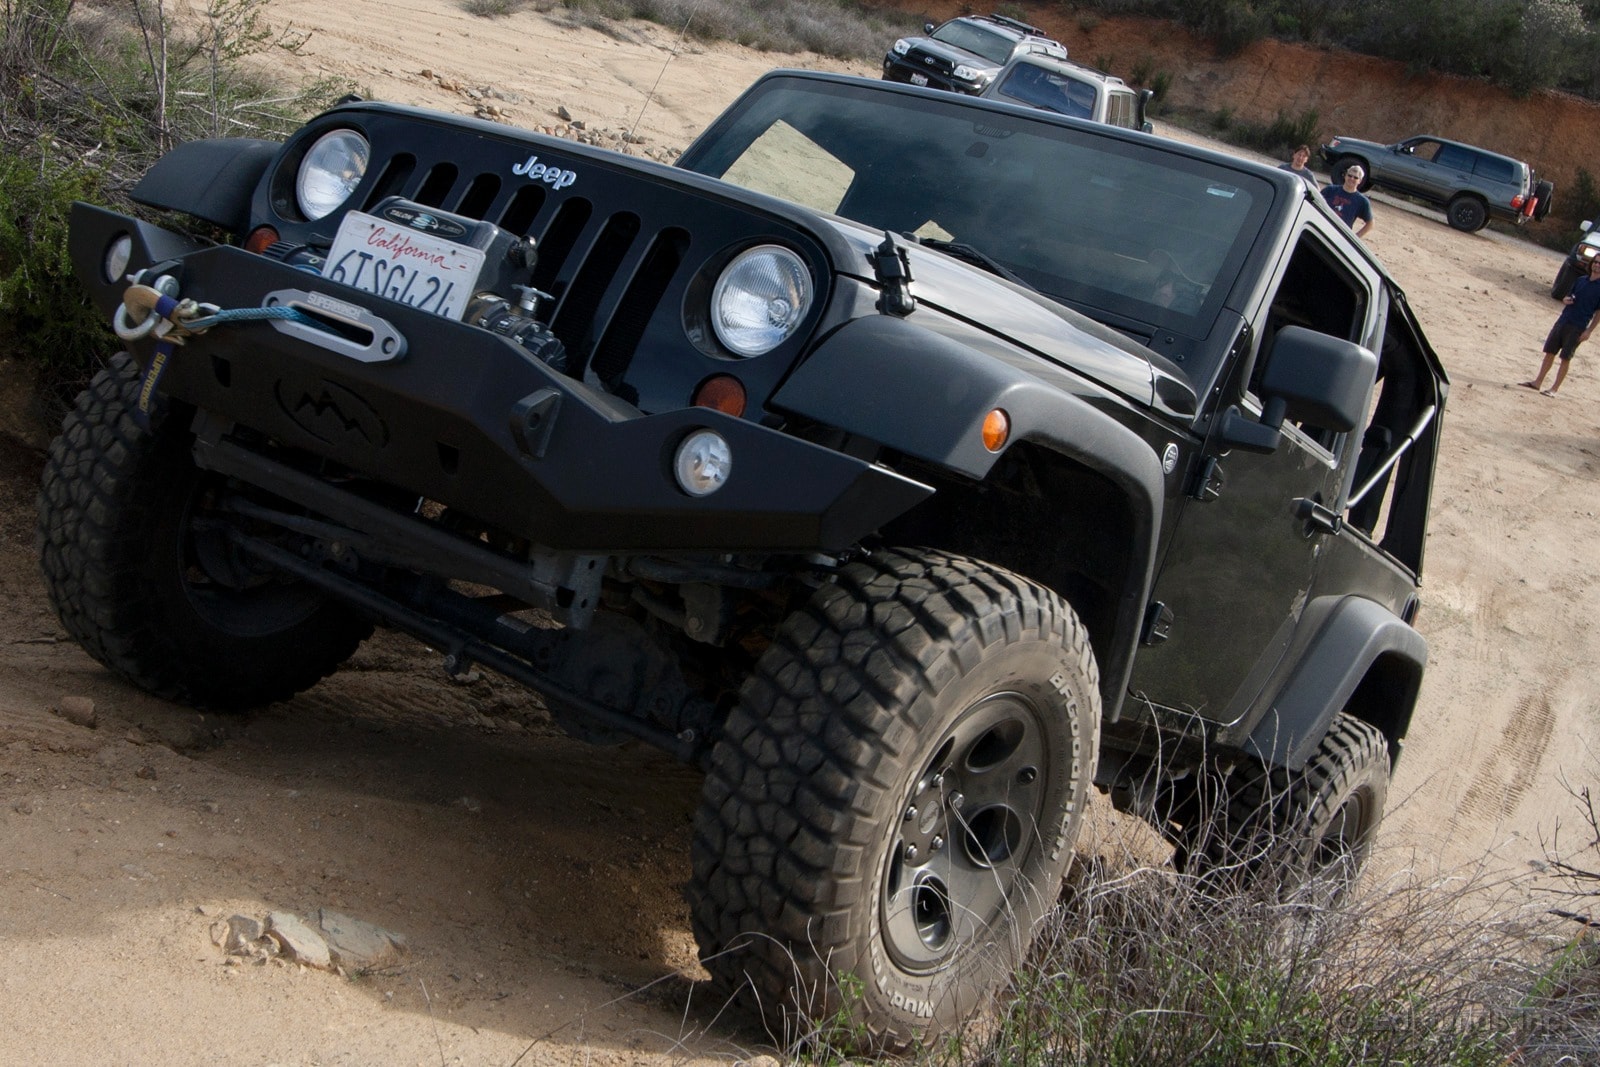
Despite a small starting issue with one of the trucks (which turned out to be an easily fixable relay), the trip went great. As someone who typically spends the weekends on the beach or cruising the canyons, this is a motoring hobby I could definitely get used to.
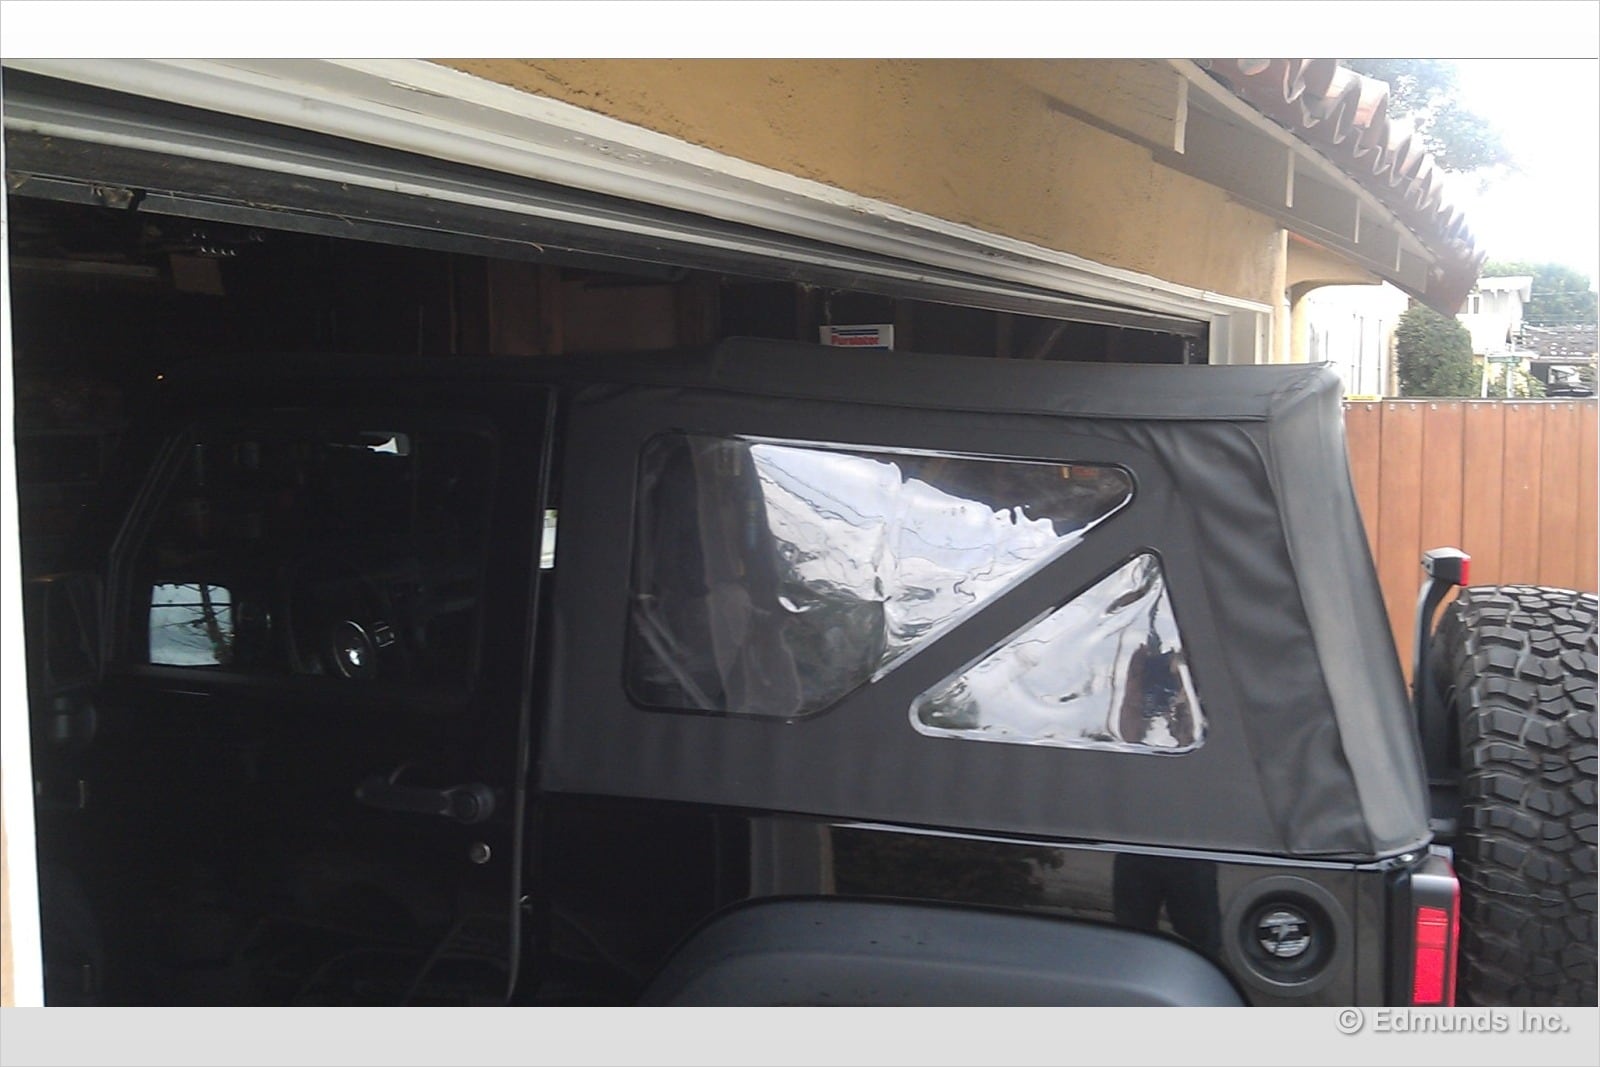
Lift kits on Wranglers look cool and of course increase the Jeep's already impressive off-road capabilities. But if you like to keep your vehicles garaged, or have to because there's no driveway and you live where street parking is tough, you may want to do a little homework before you jack up your Jeep. As you may know, we installed the Mopar Pre-Runner suspension kit on our Wrangler which includes a three-inch lift.
Knowing it was going to be close, I carefully approached my open garage and stopped to check the clearance when the Wrangler's windshield was close to the opening. After that I pulled partly in and snapped the photo to show the clearance. Just a few inches worth, but thankfully enough.

Some trucks and SUVs, such as a Ram 1500 have A-pillar-mounted grab handles. These make it a lot easier for shorter drivers and passengers to hoist themselves up and into a high-riding 4WD. The Wrangler provides a grab handle for the passenger, but it's mounted horizontally down on the dash which isn't as handy as being angled and higher up on the A pillar.
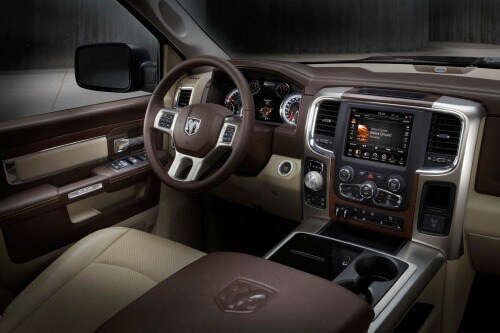
Shorter drivers hopping into a Wrangler, especially one fitted with a lift kit like ours, typically have to grab the steering wheel. This makes for somewhat clumsy ingress and egress, whereas one of those A-pillar jobs would make it much easier.
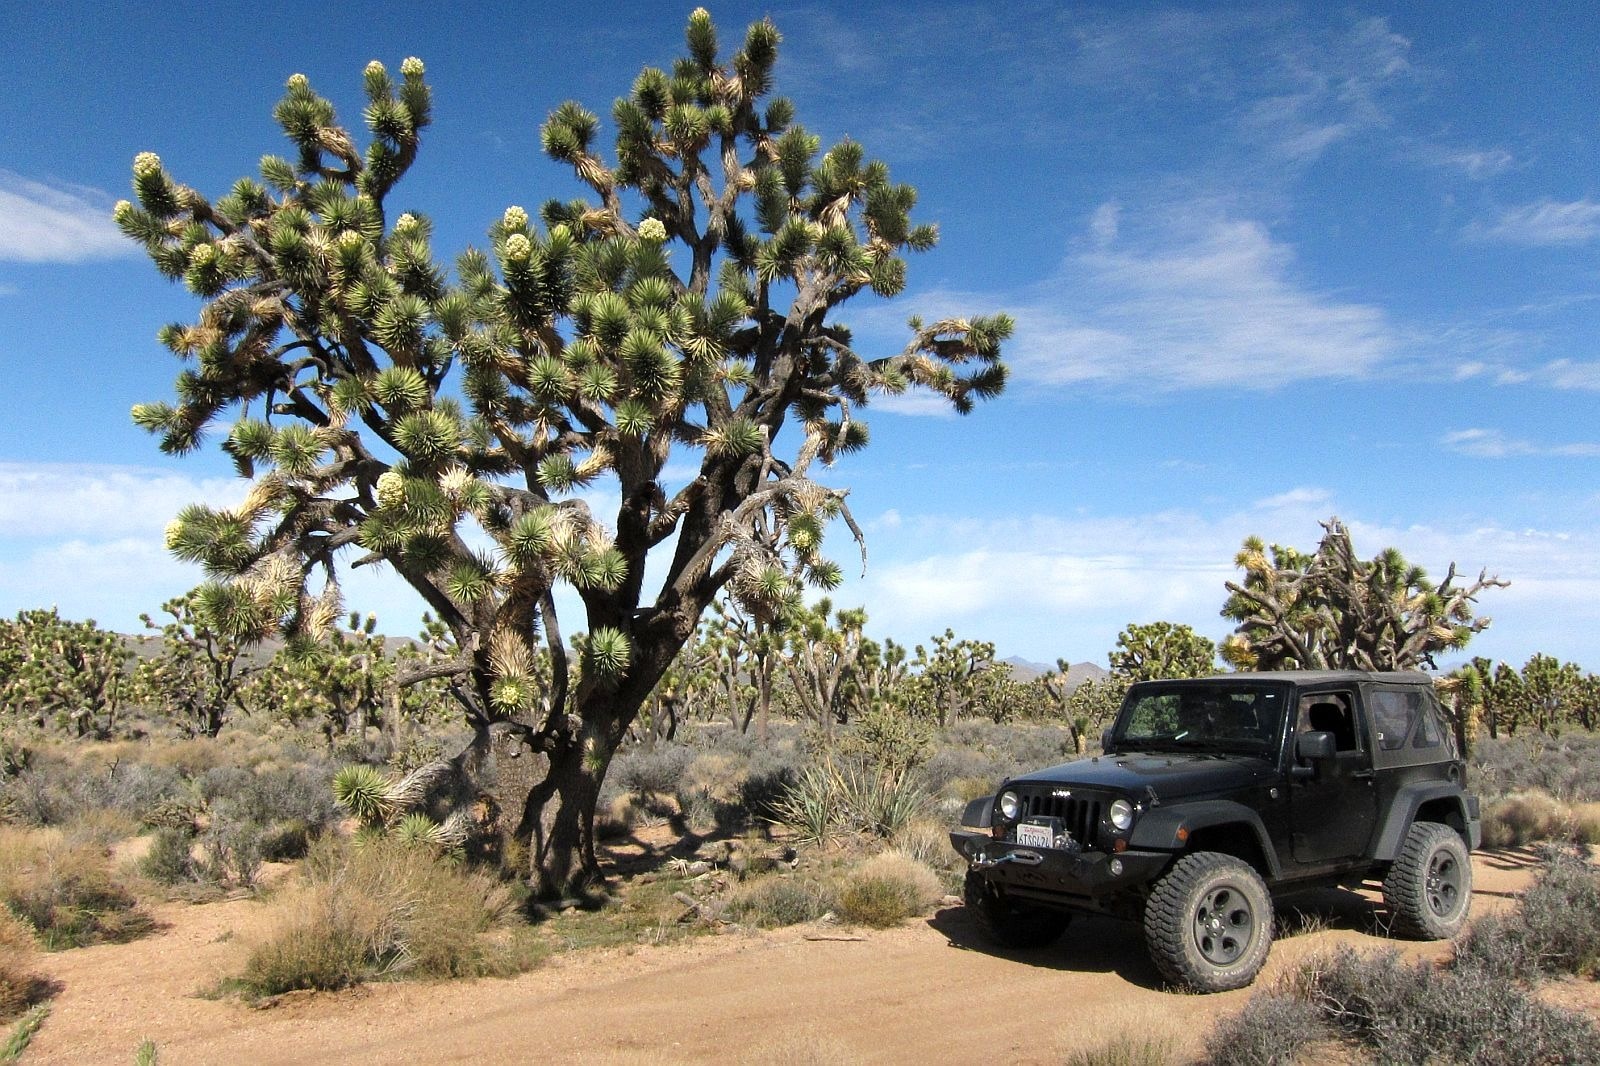
There's a lot of unspoiled desert out there, and last weekend a small group of us headed north from Quartzsite, Arizona in three vehicles to explore a decent-sized swath of it. We left the pavement just northeast of Q-site at a wide spot in the road called Bouse, and from there we bumped our way north as far as Meadville and Grand Canyon West.
This was expedition-style off-roading. Nothing too technical, but clearance and 4-wheel drive were necessary. A soft-road crossover, especially an AWD one without a lockable center differential, would have stood a good chance of getting stuck in any number of sandy washes and rocky streambeds. I used low range a few times.
Anyone who ventures out this way can't be averse to superficial paint and clearcoat scratches because trailside growths of mesquite, creosote bush and palo verde are common along the often-narrow trails that meander across the Arizona backcountry. You could say the Desert Stripe package comes standard at no extra charge.

Tiny Bouse, Az is the place to top off and air down. You may have heard of the Parker 400 off-road race. This place is near the southernmost point of the course.
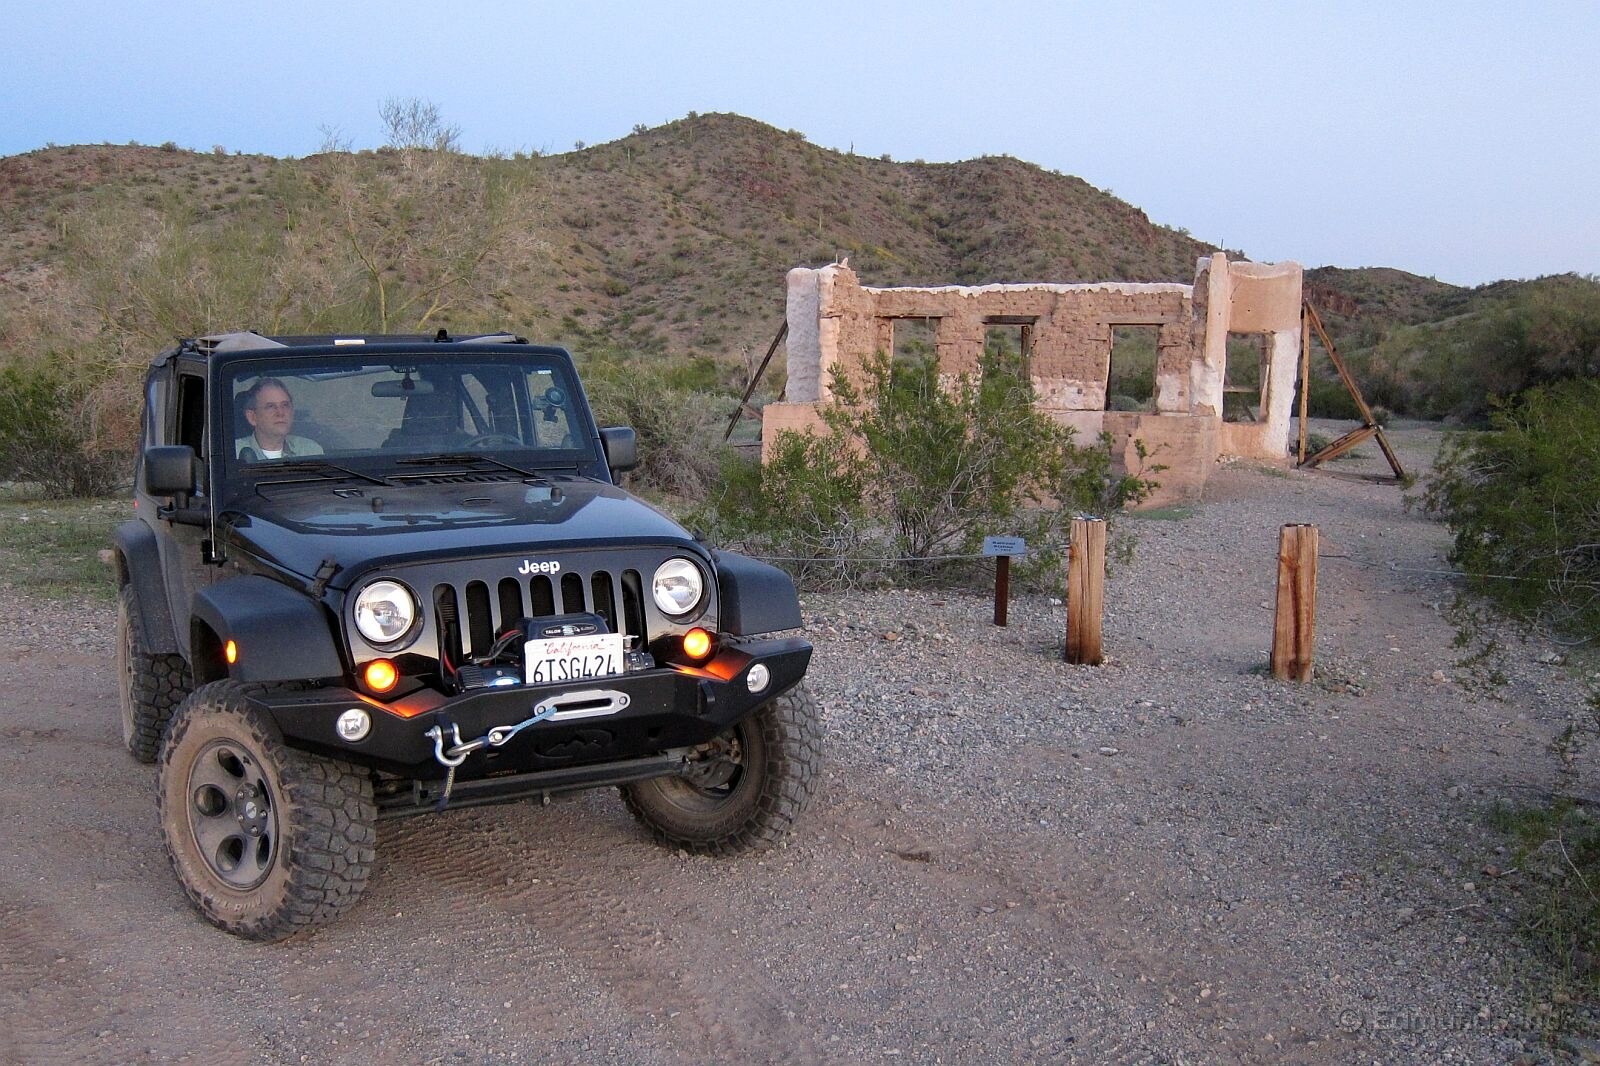
The Swansea mine and ghost town is barely more than an hour up the road if you take a graded road. We took narrower primitive tracks, so it took us twice as long.
Once there, some of the old mine buildings have been stabilized and partially restored. This crumbling adobe structure was the railroad depot about 100 years ago.

We set up camp nearby at a semi-improved campsite. There are about a half-dozen fire rings and sun shelters, but they are spaced several hundred yards apart. None of the others was occupied. Except for coyotes, we had the entire valley to ourselves.
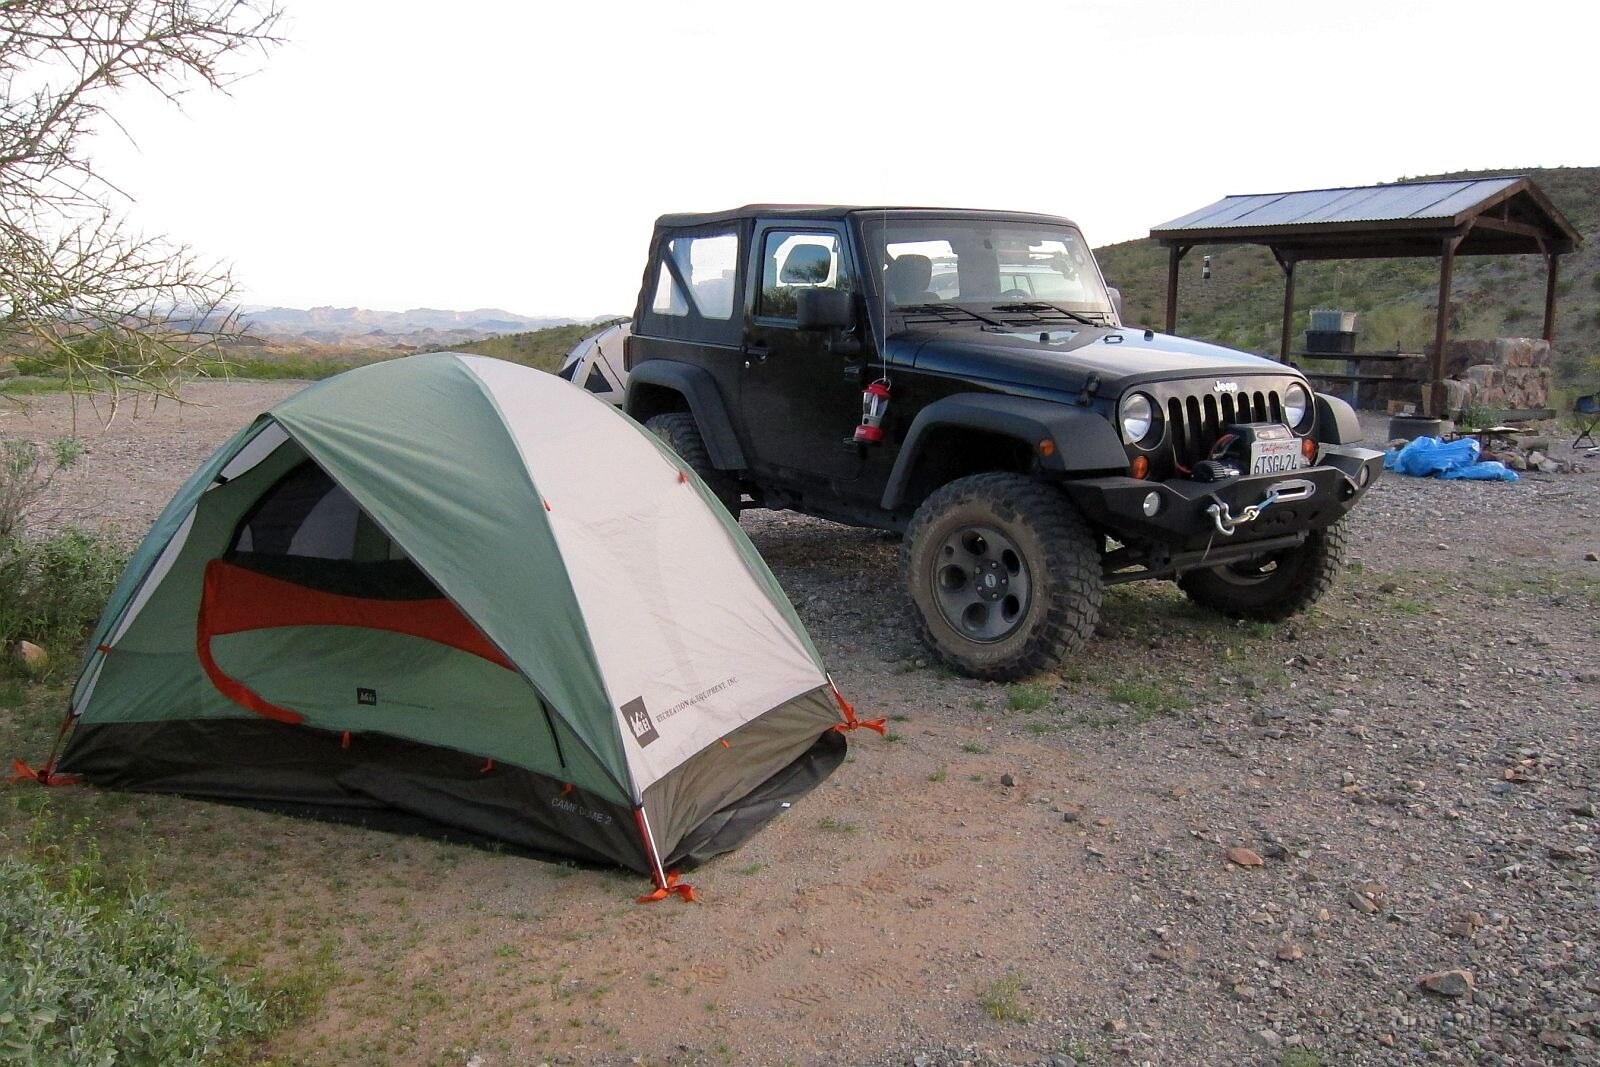
The Jeep's antenna mast makes a handy hang-point for my battery-powered lantern.
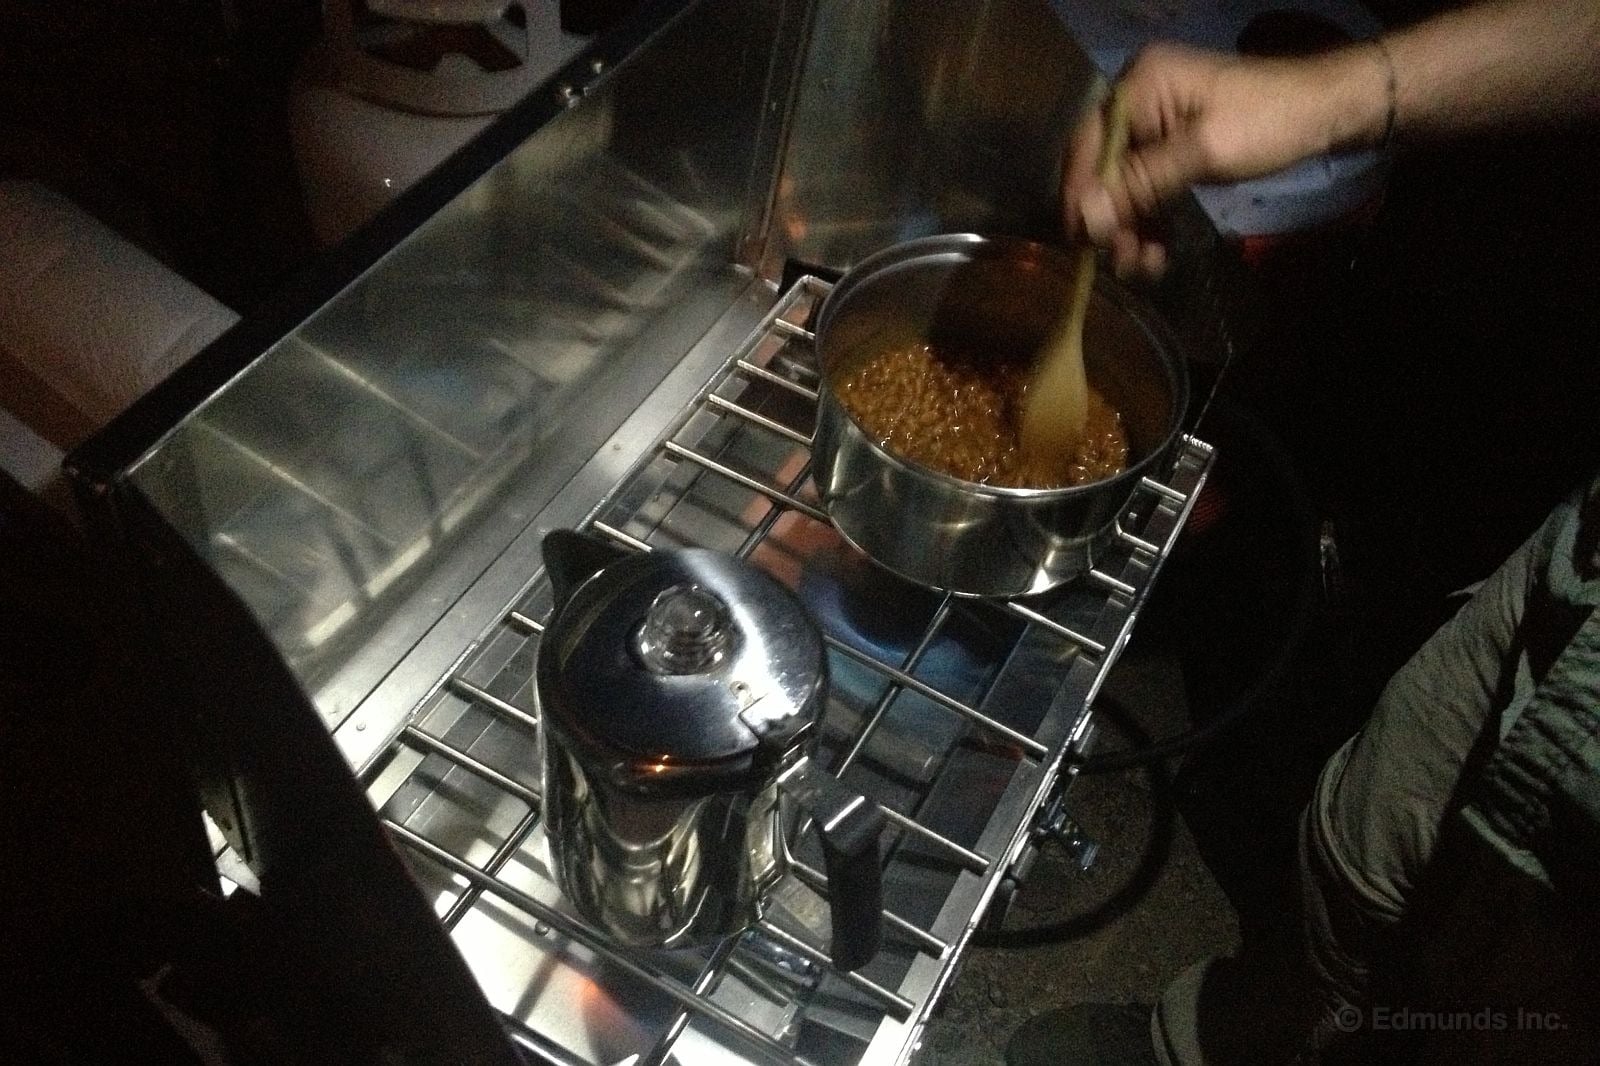
Burgers, beans and beer.
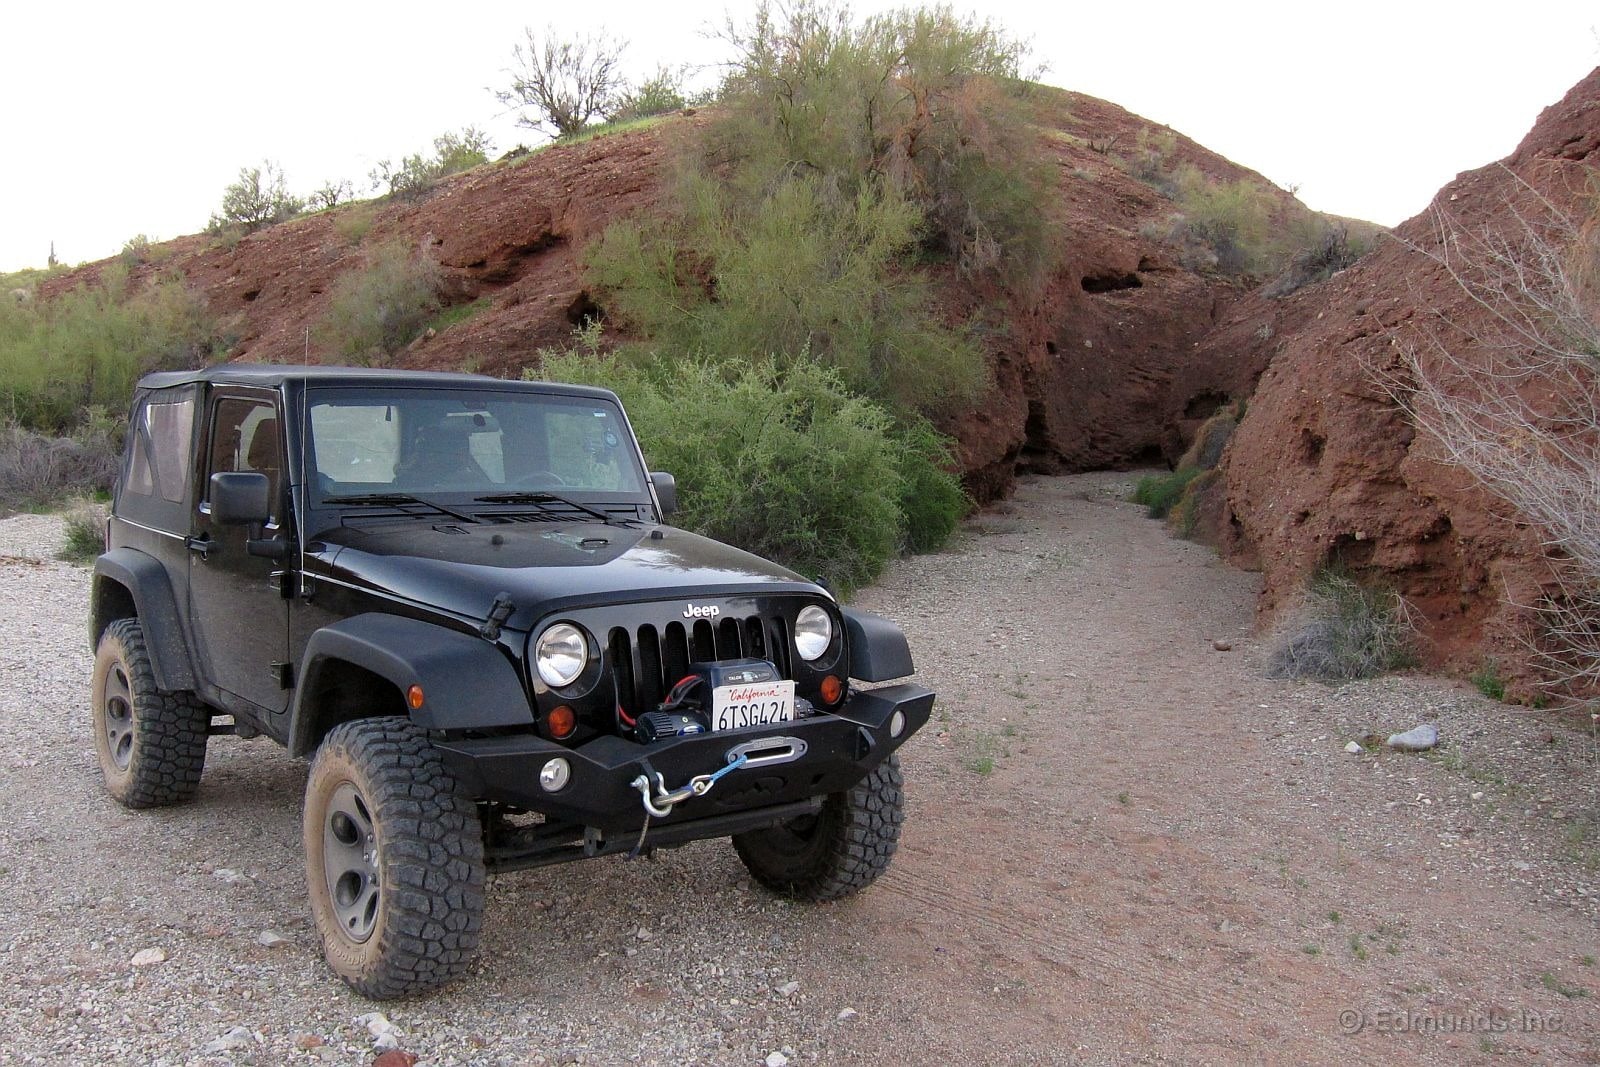
Next morning we headed for the Bill Williams River to find a way across. On the way we ran into this rather unassuming opening that leads to a really cool slot canyon. We hopped out and took a look.
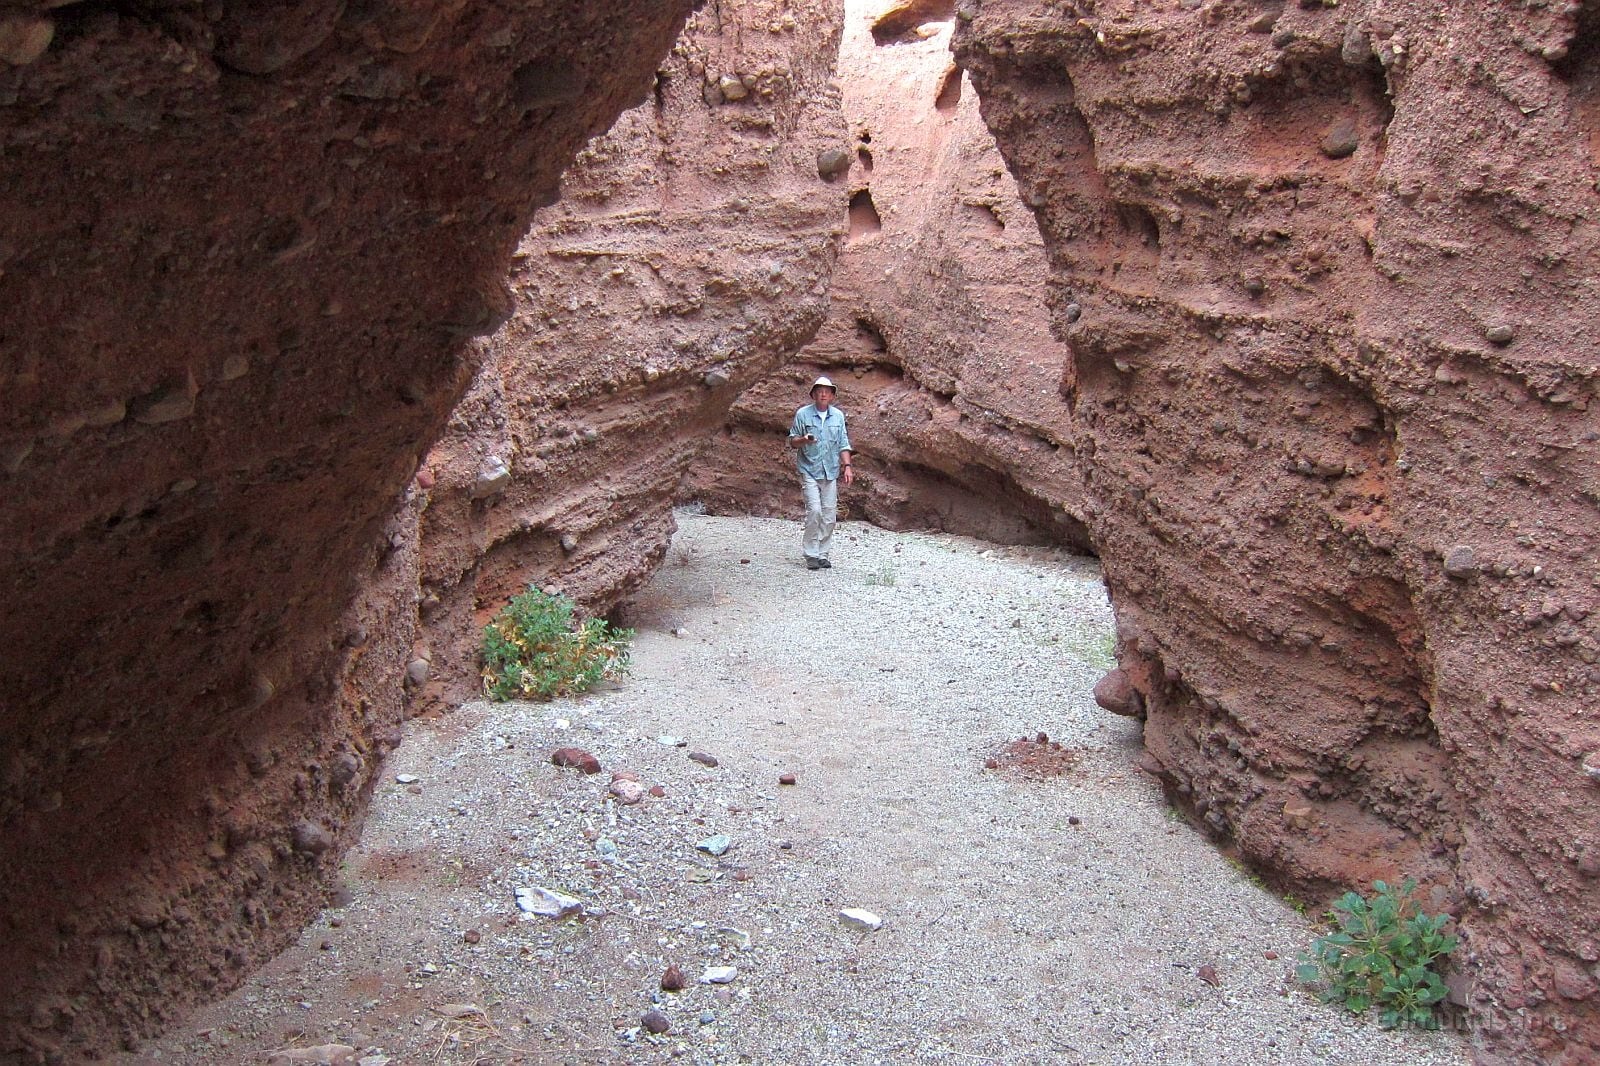
We went in about 800 feet, and this was the wider of two branches. The narrower one quickly necked down to about 2 to 3 feet wide and 30 or 40 feet tall, with the slit far above our heads barely 18 inches across in places.
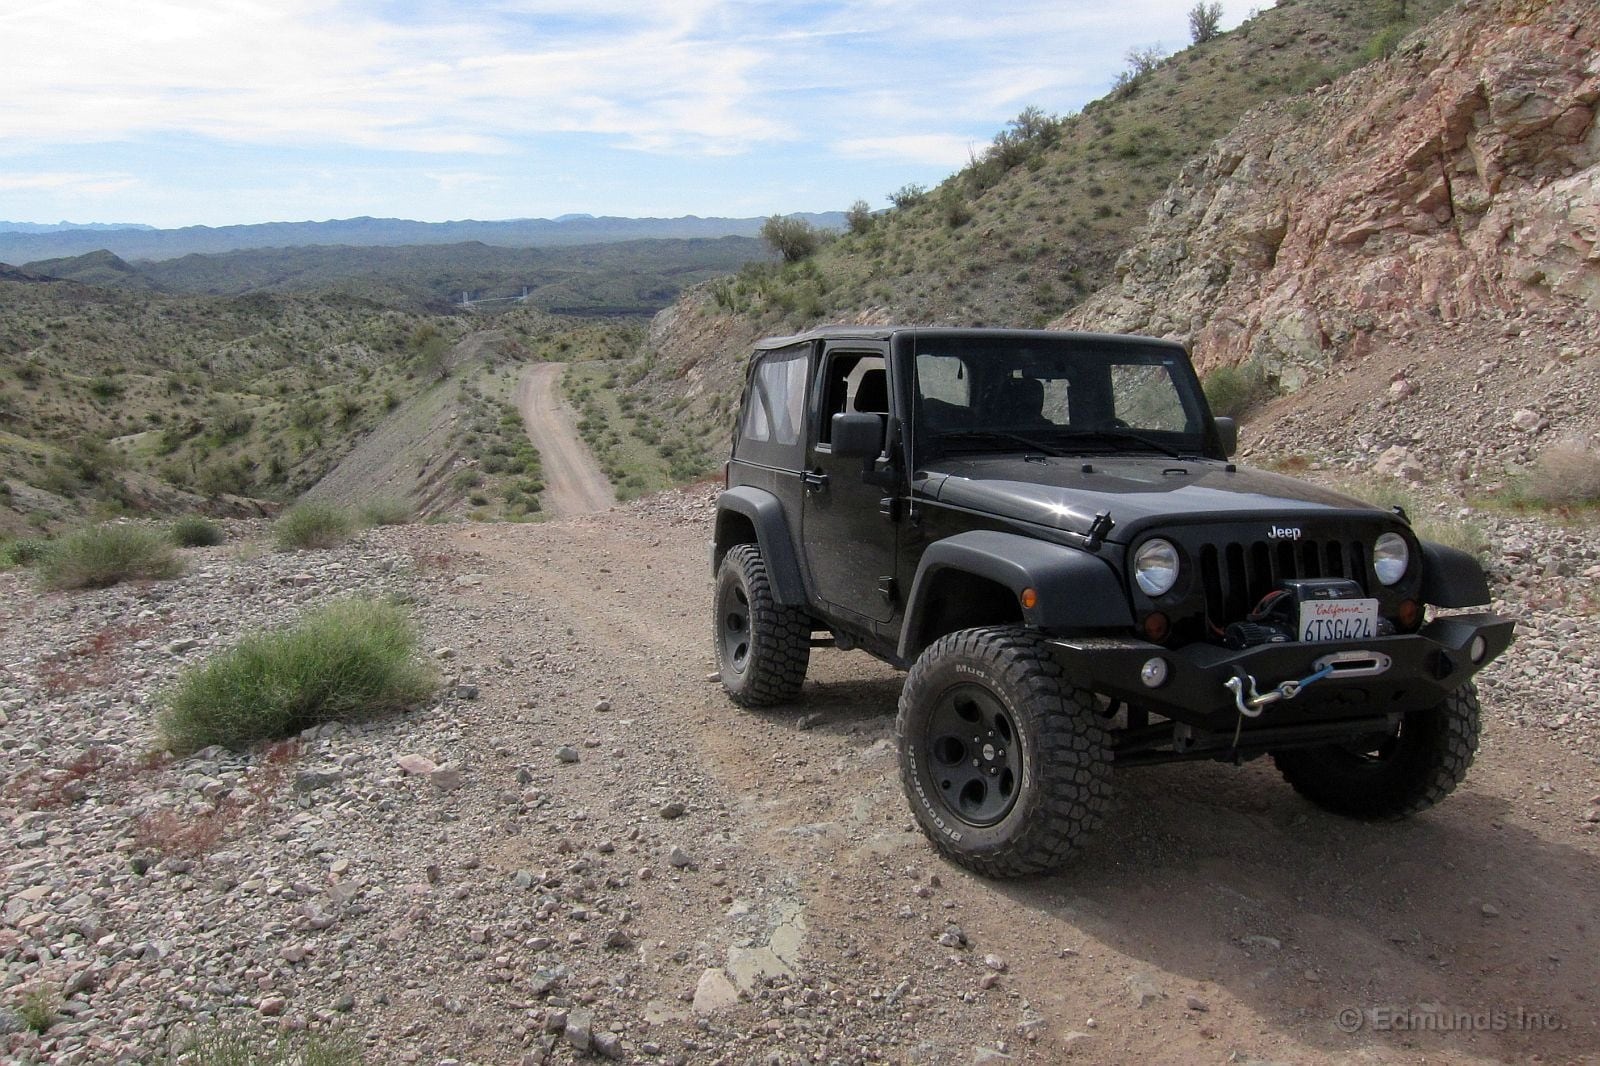
After crossing the Bill Williams River, a series of puddles this time of year, the trail followed a gas pipeline for a few miles.
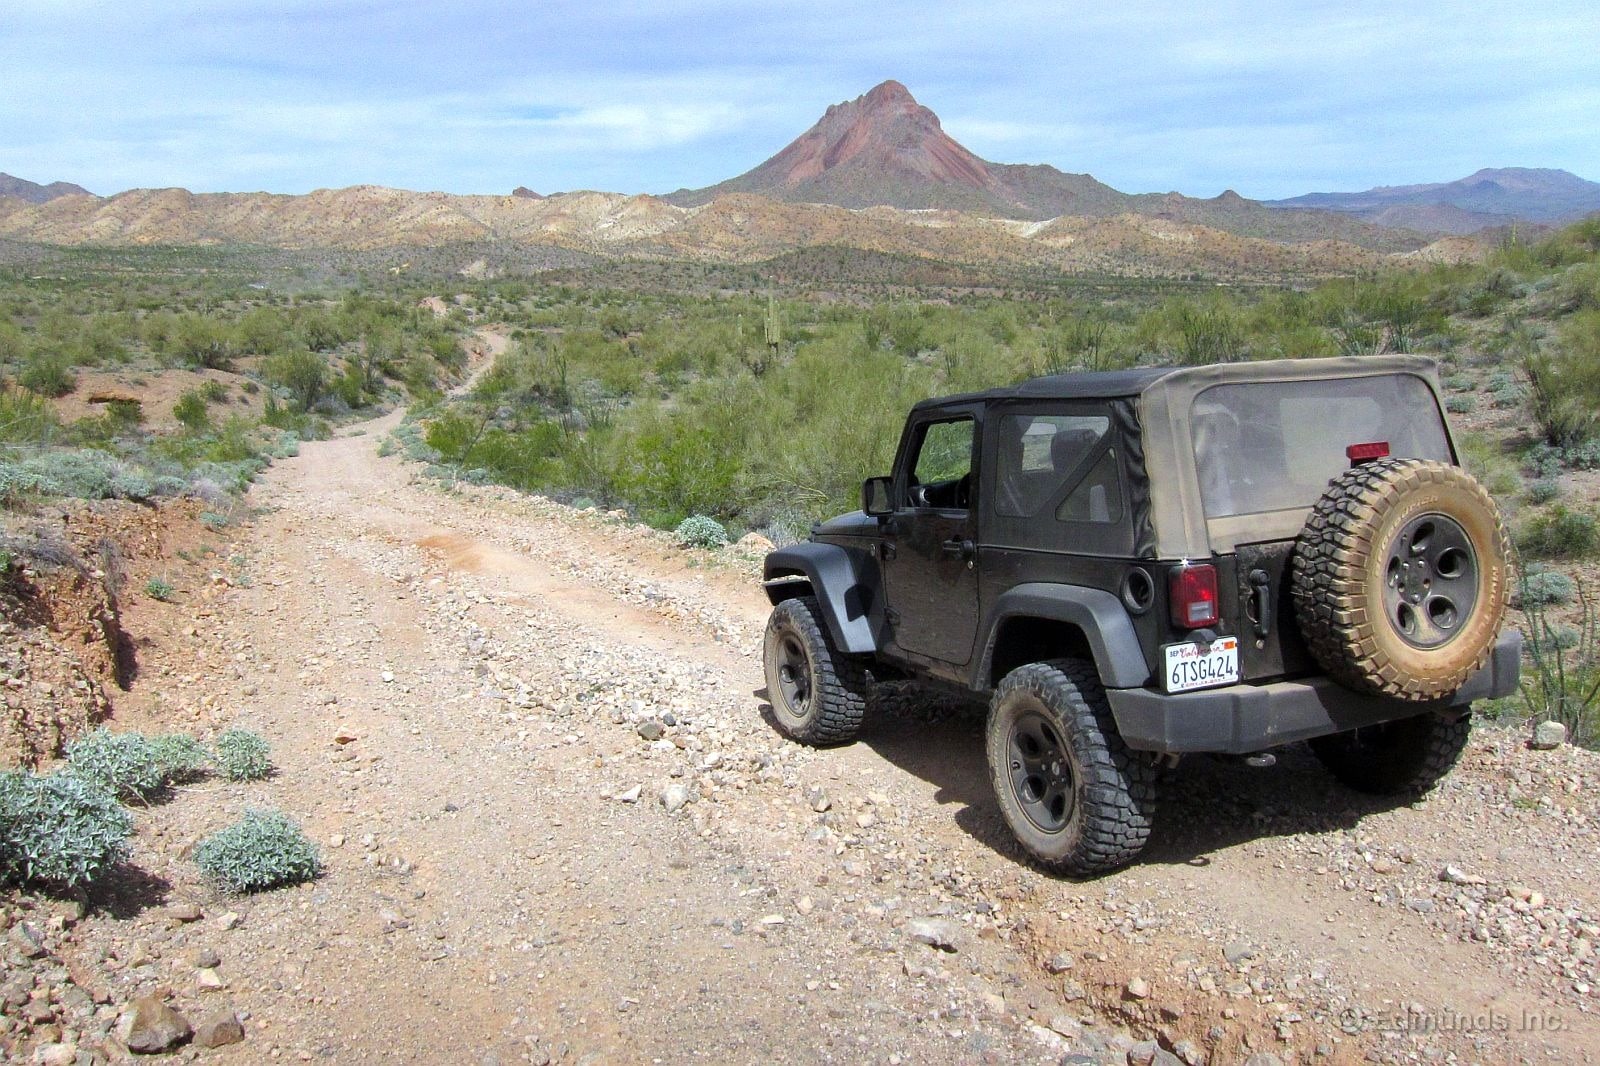
The track bounced along toward Alamo Lake, where other access roads for the bass fisherman are graded. We turned off onto unmaintained tracks to make our way north to Kingman, Az.
North of Kingman we stayed on asphalt until we reached Meadville, our next overnight stop. Next morning we turned onto dirt once more and passed through a very healthy Joshua Tree forest.
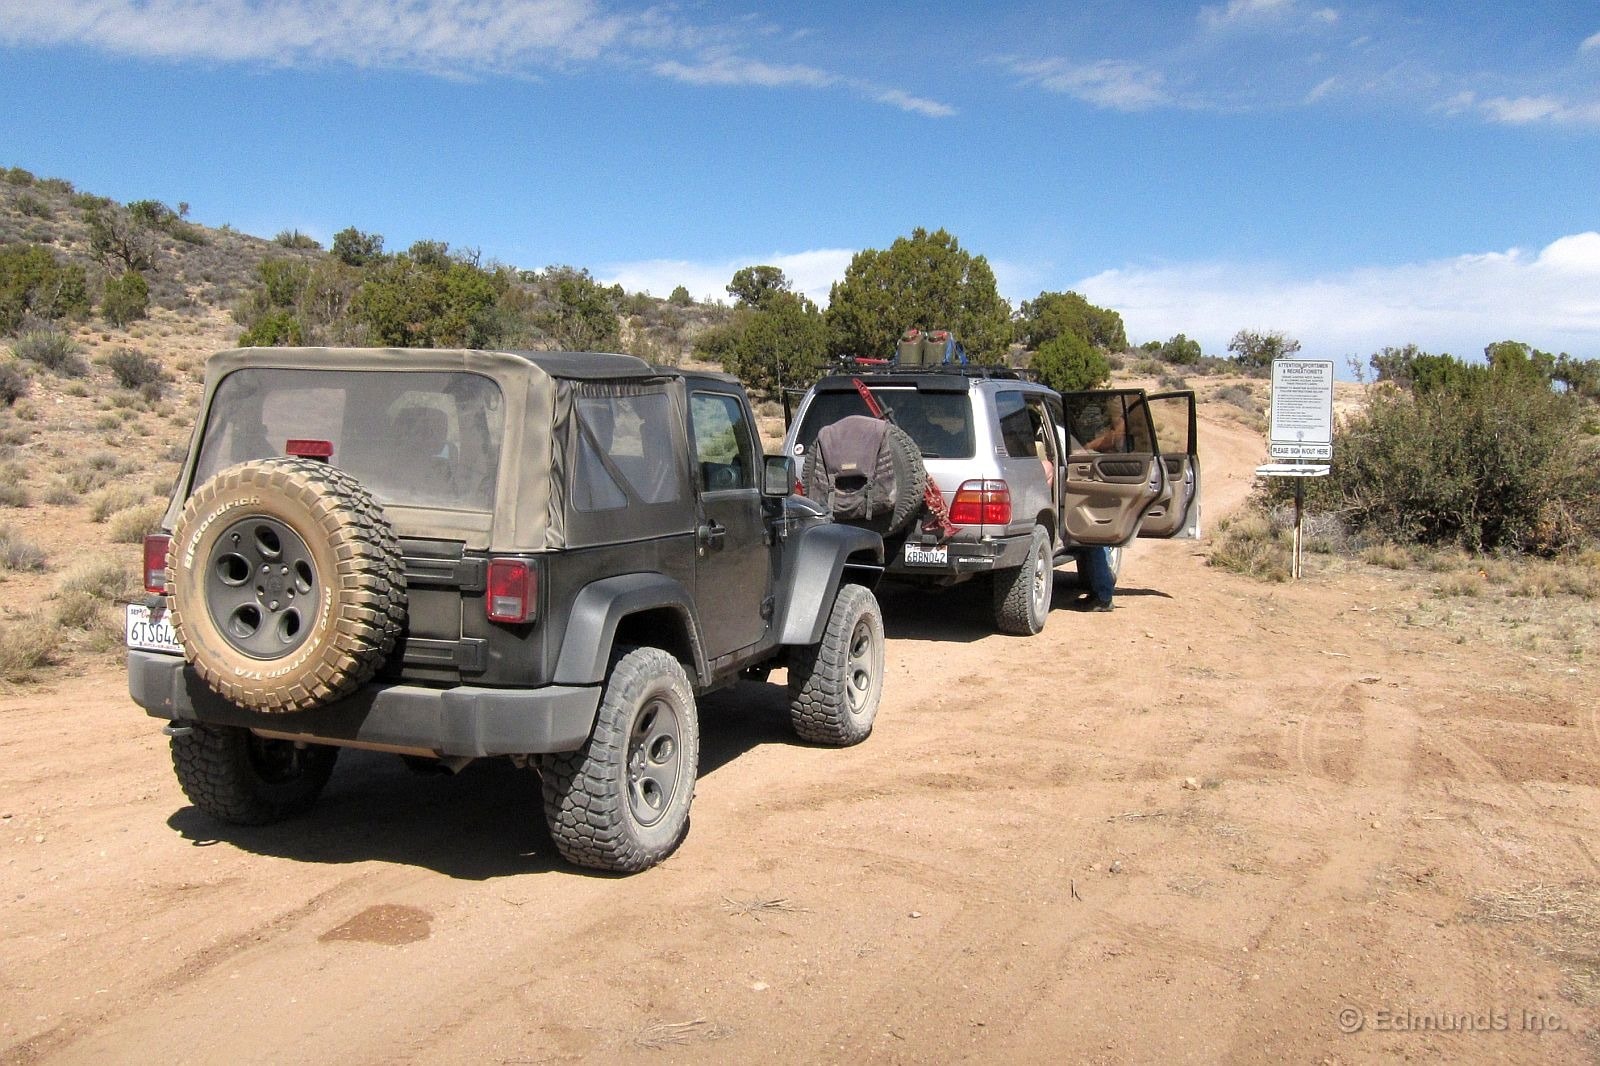
The west end of the Grand Canyon sees few tourists because you can't easily access a rim view. And to get to the park lands you have to cross private ranch land in a 4x4 first.
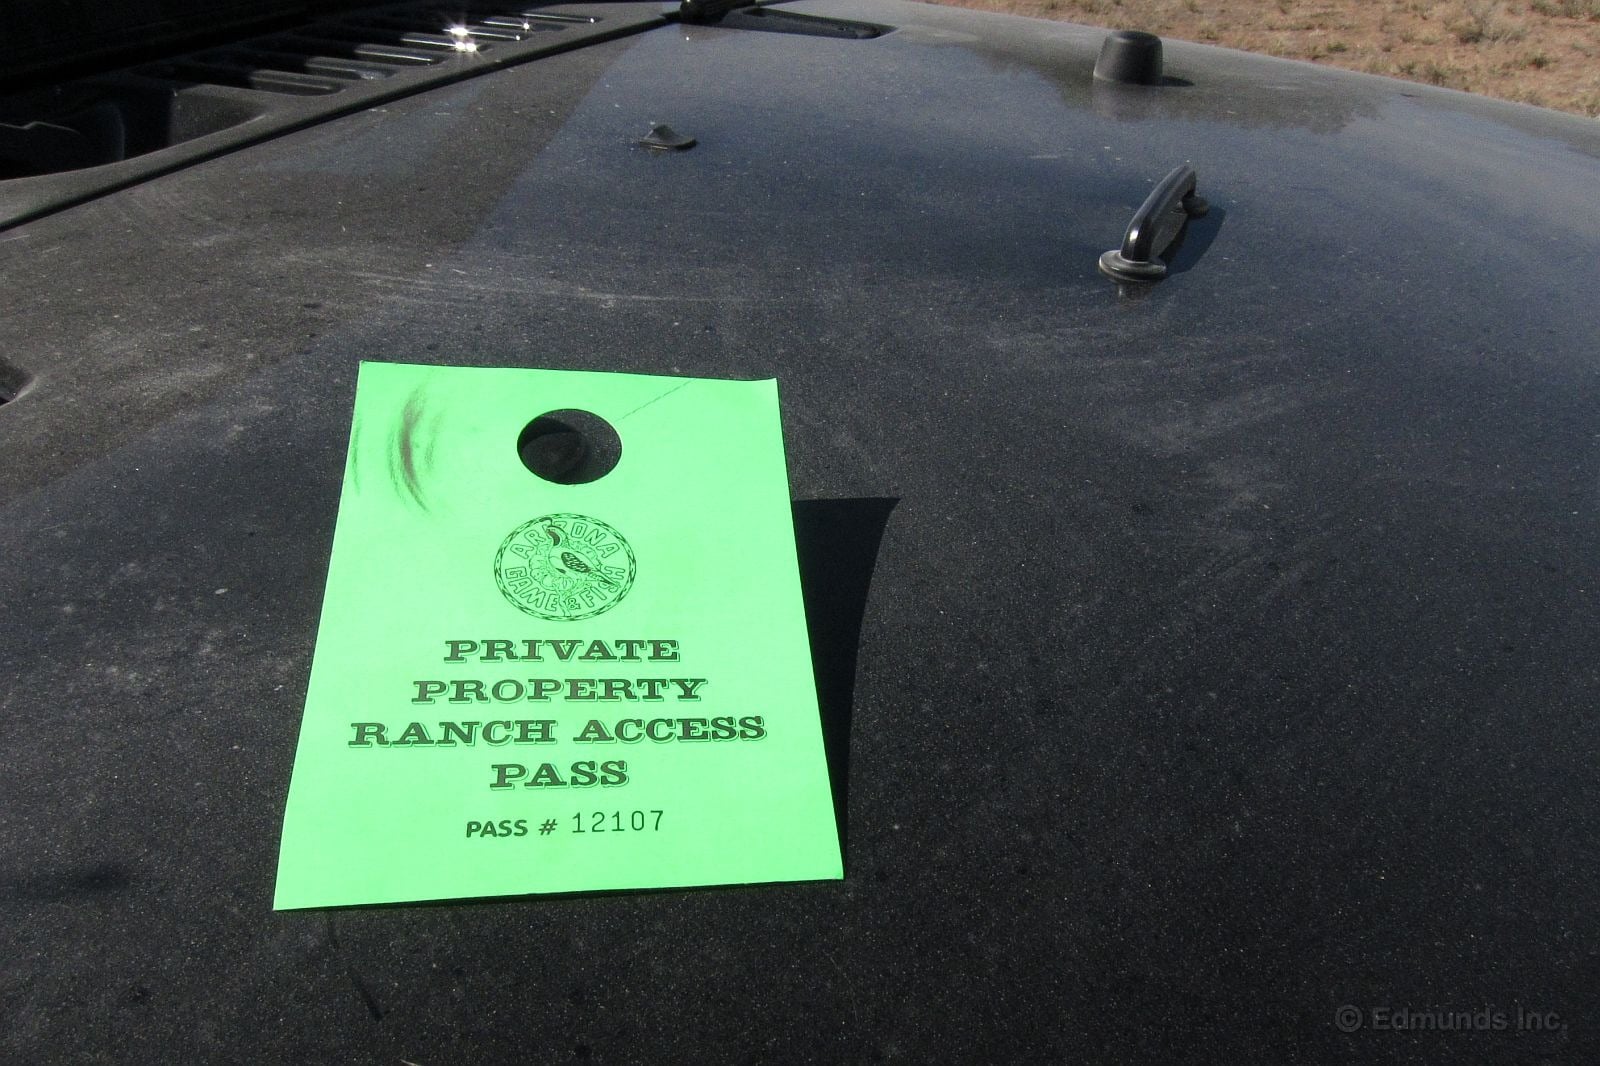
Fortunately, the Arizona Department of Fish and Game has worked out an access arrangement for "sportsmen and recreationists." There's a sign-in box and free access passes at the fence line. All they ask is that you pack out your trash, stay on the trail and refrain from pestering the cattle.
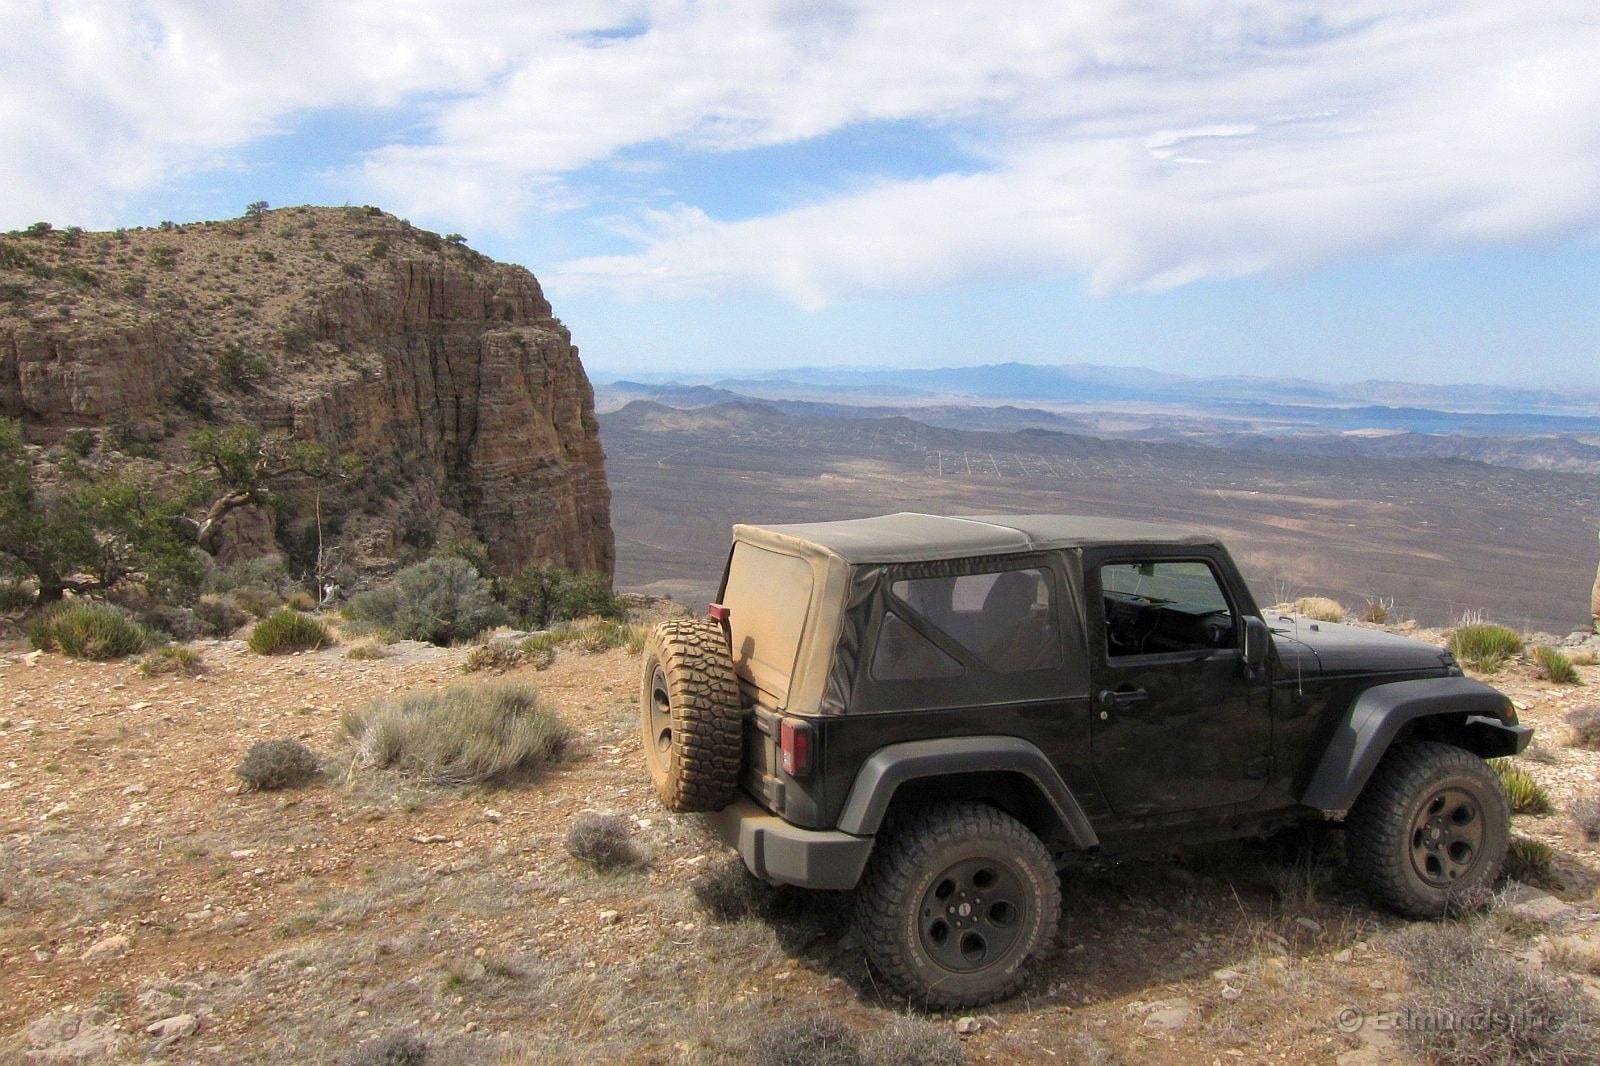
This isn't the Grand Canyon Rim, but we are close. That's Lake Mead in the far distance.
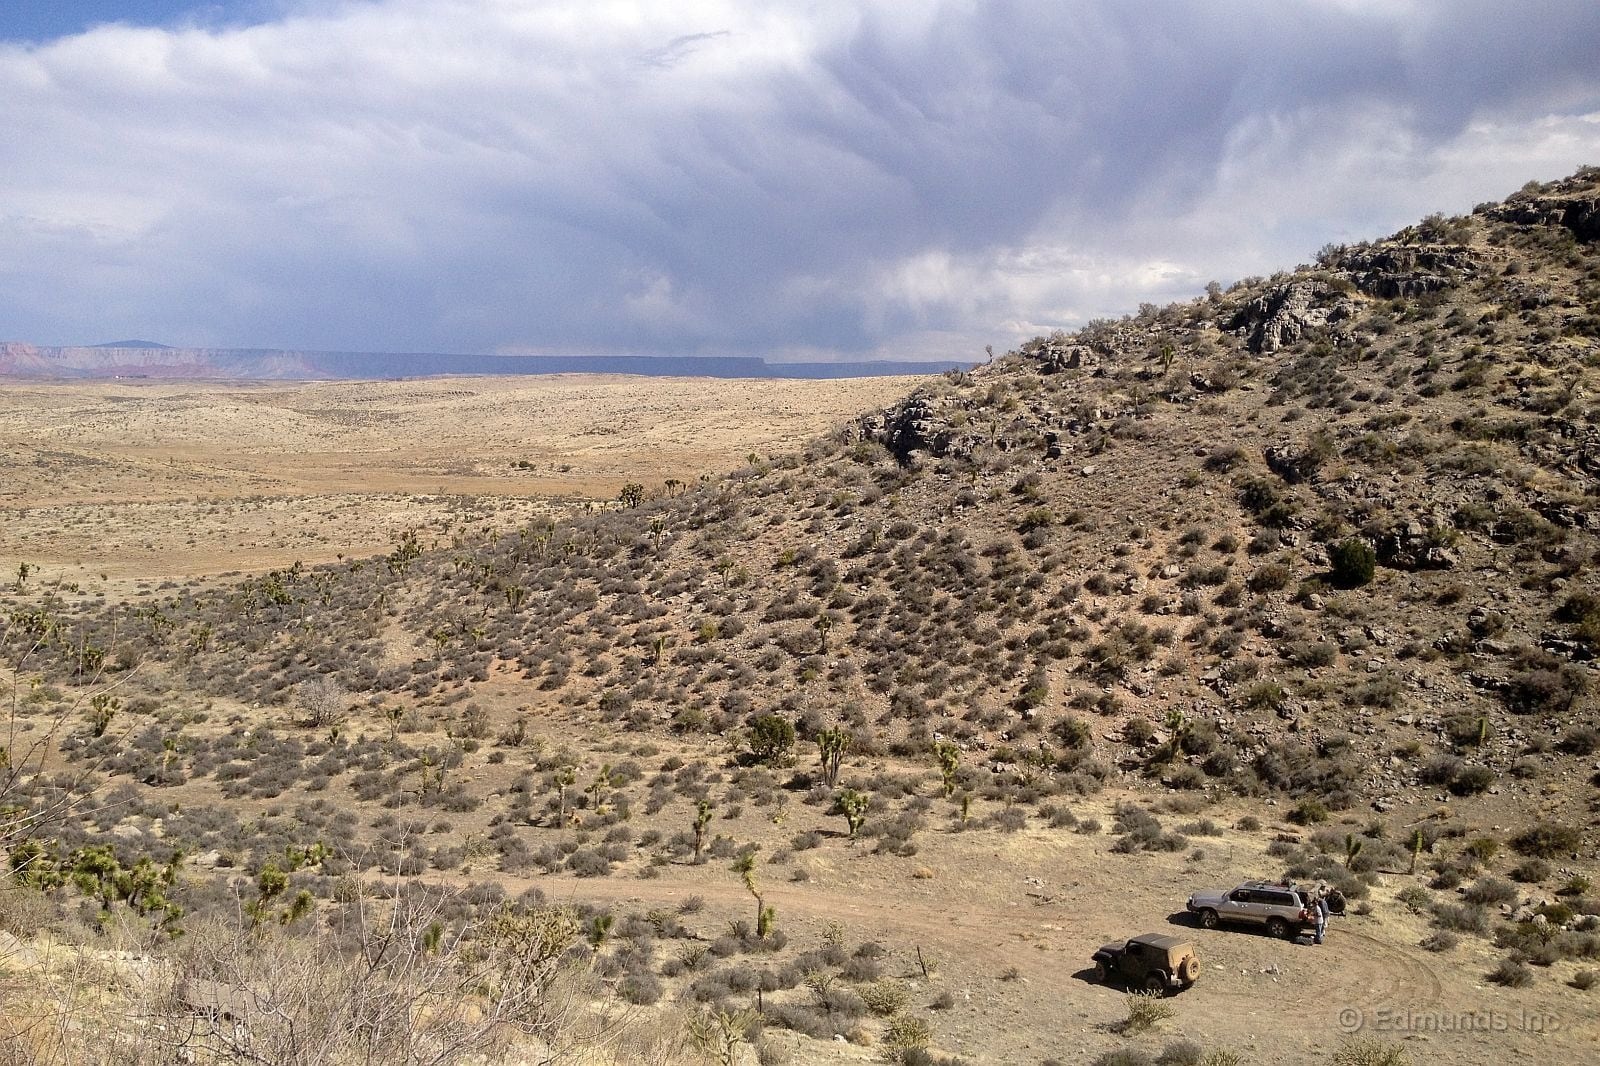
The far side of the Grand Canyon, the North Rim, is the dark line of cliffs in the distance. We're about two miles away from a point where we could see the Colorado River. For now, this is lunch.
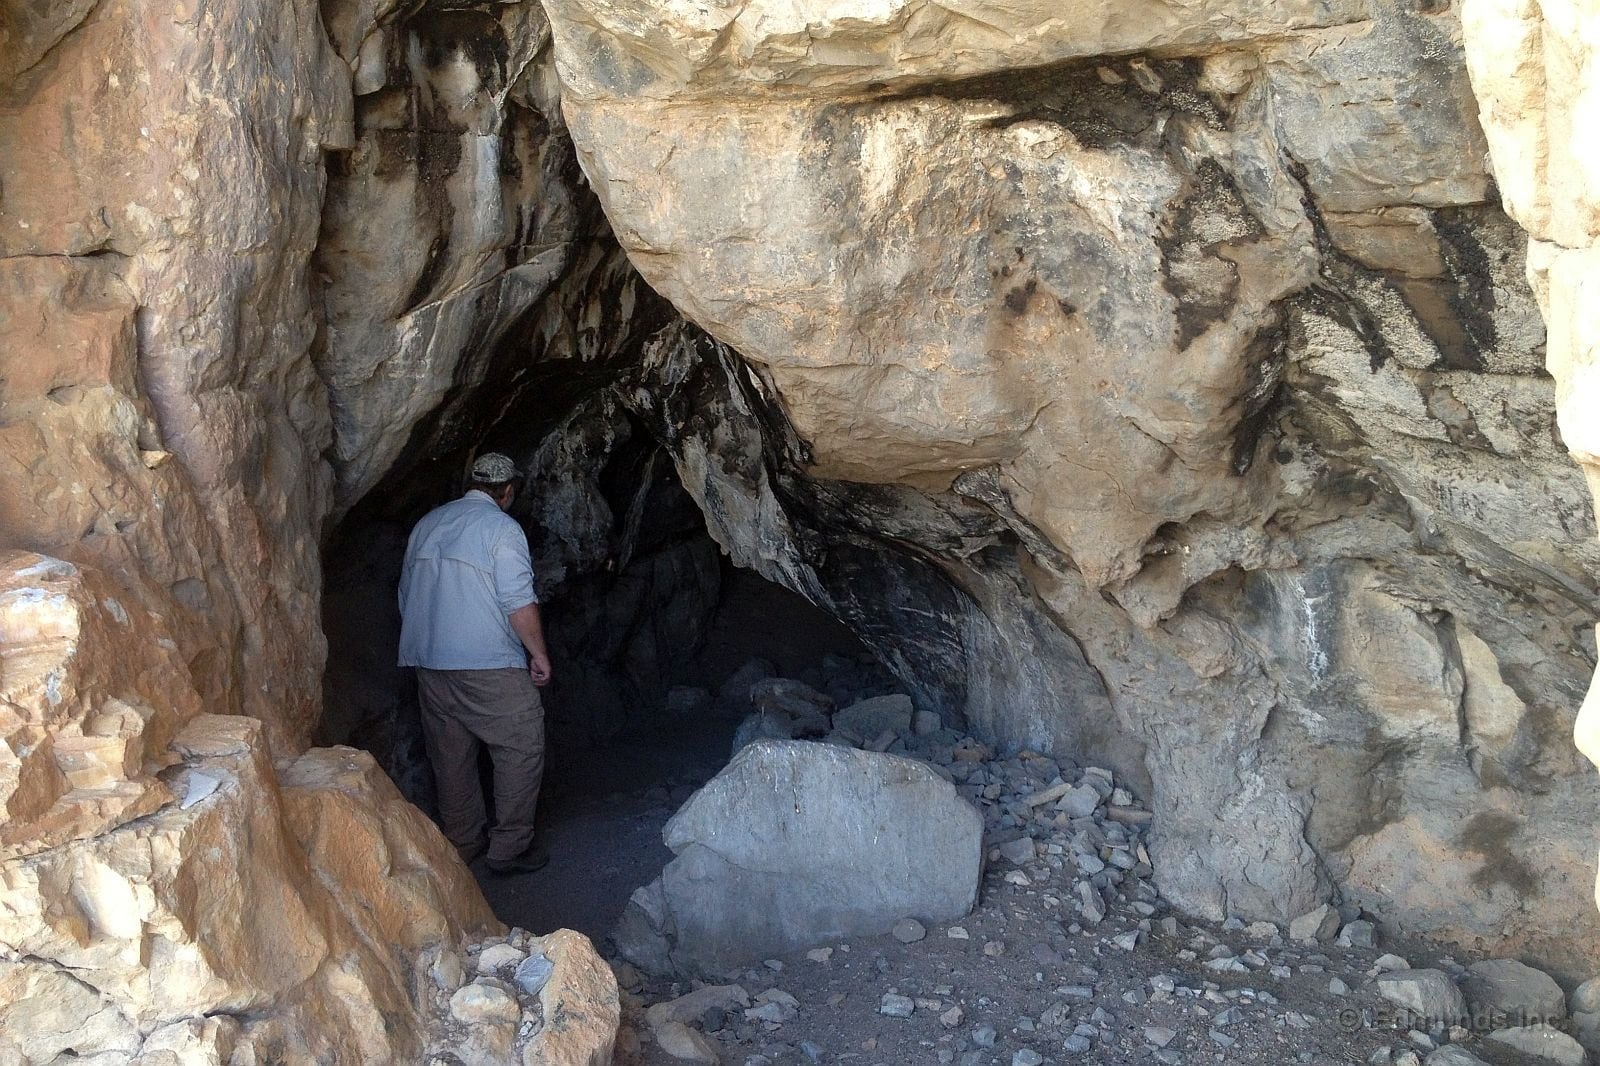
To get the last picture I stood on the "front porch" of a small cave. This was the view behind me. It goes in 60 or 80 feet, with evidence of ancient walls halfway back. There are hand-worked rock shards at my feet, remnants of the arrowhead-making process. Also, there are big-cat prints and droppings, but thankfully no fresh ones.
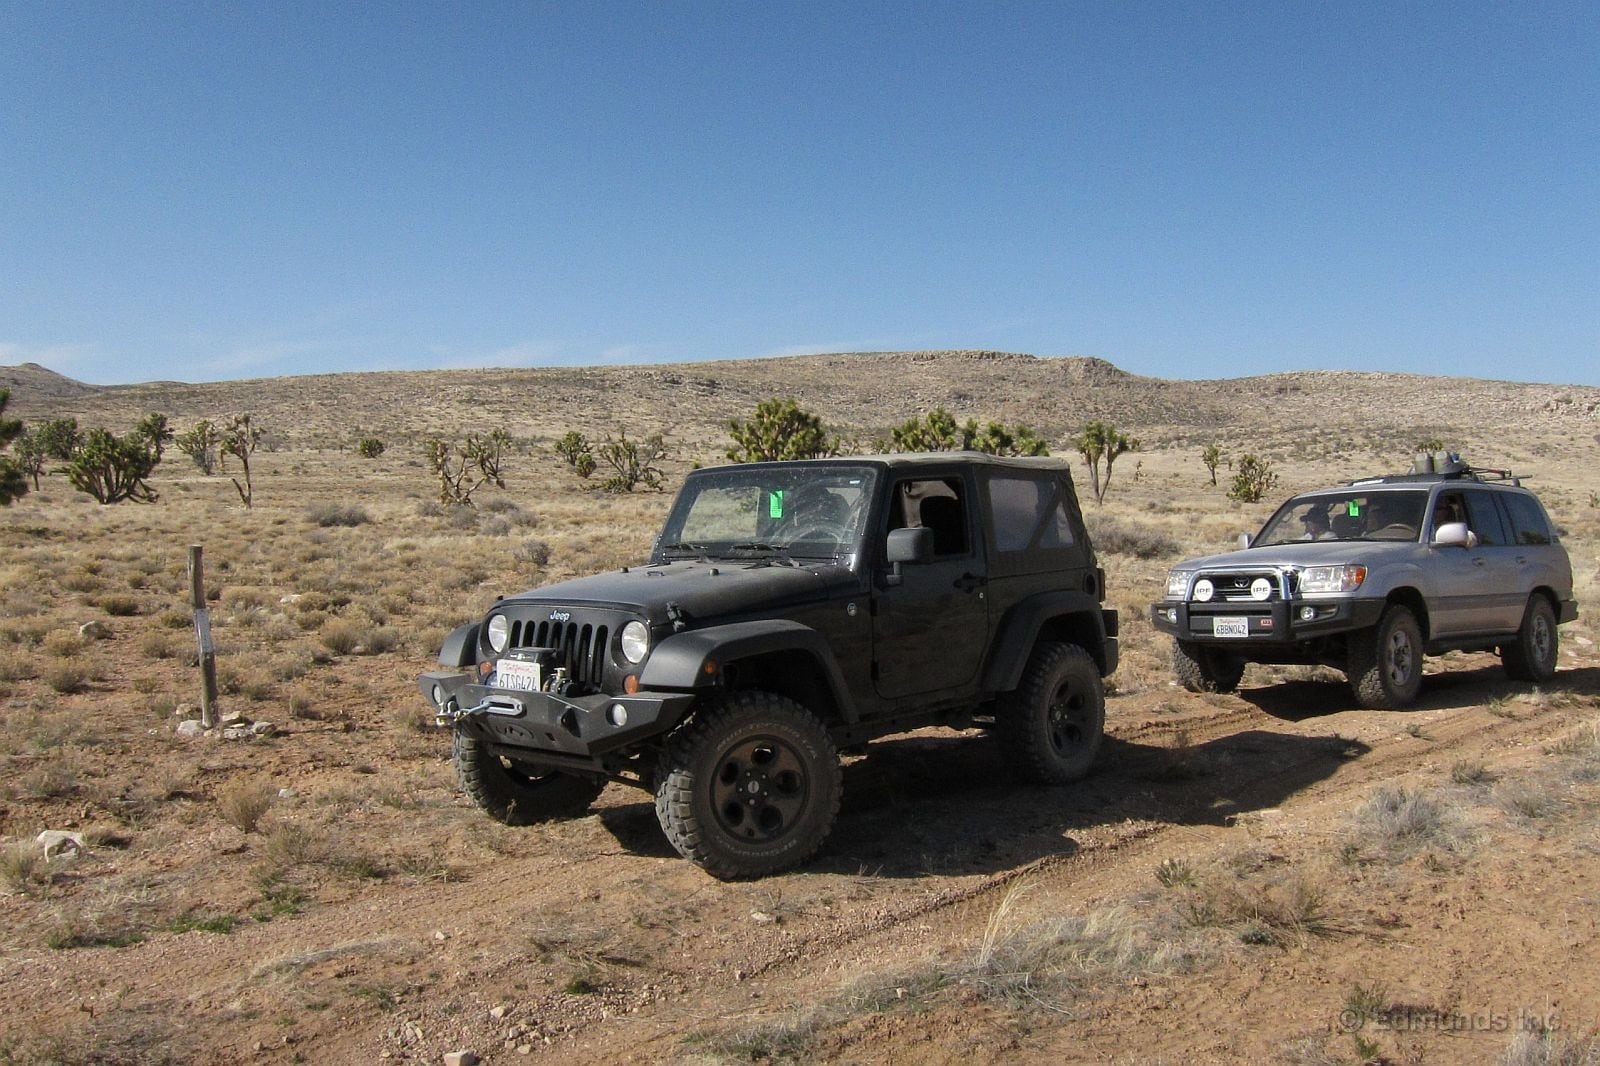
A wooden pole and rusty sign indicates we've crossed onto Grand Canyon National Park. I have my annual pass if anyone asks. We see nothing but two Pronghorn Antelope, a coyote and a couple dozen cows.
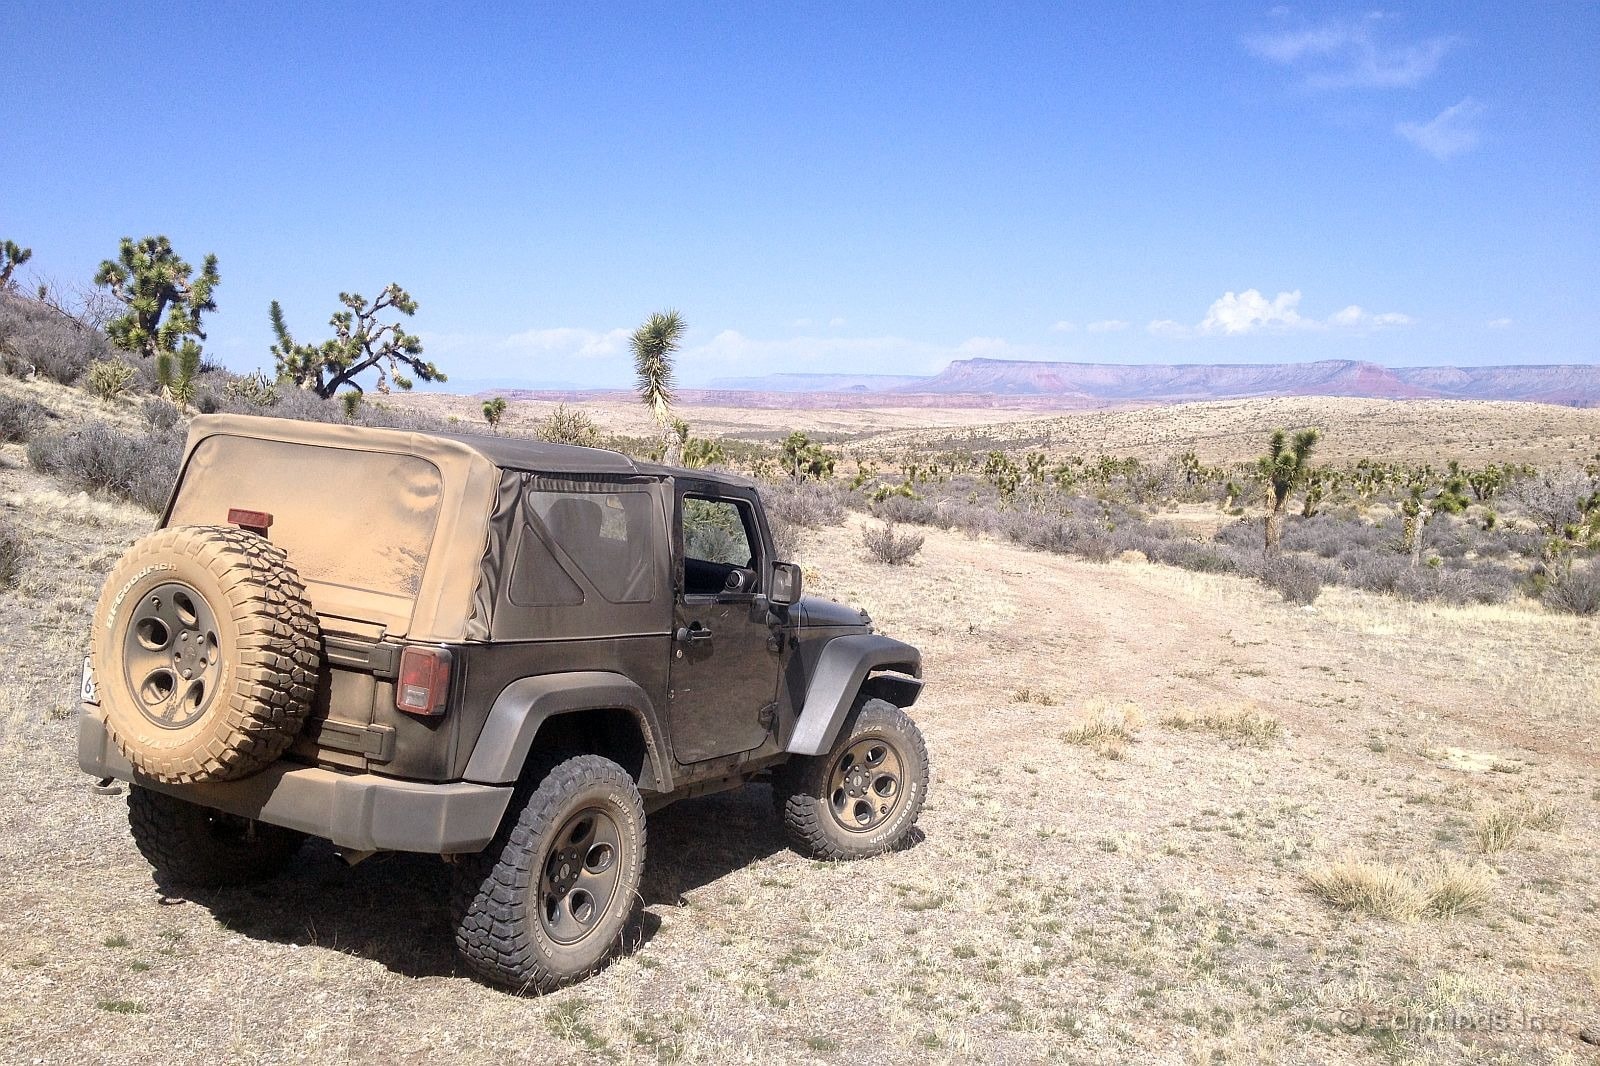
In the end the road peters out before we get to the Grand Canyon gorge. We can see the other side, but the West End of the Grand Canyon is broader than the famous parts farther east. We need to proceed on foot to get to a dramatic overlook, but we haven't got the time and there's no trail from road's end.
We'd need another night in the bush but don't have one. Monday is staring us in the face. It's time to retrace our steps to Kingman and take the freeway home and return to the world of alarm clocks and commuting.
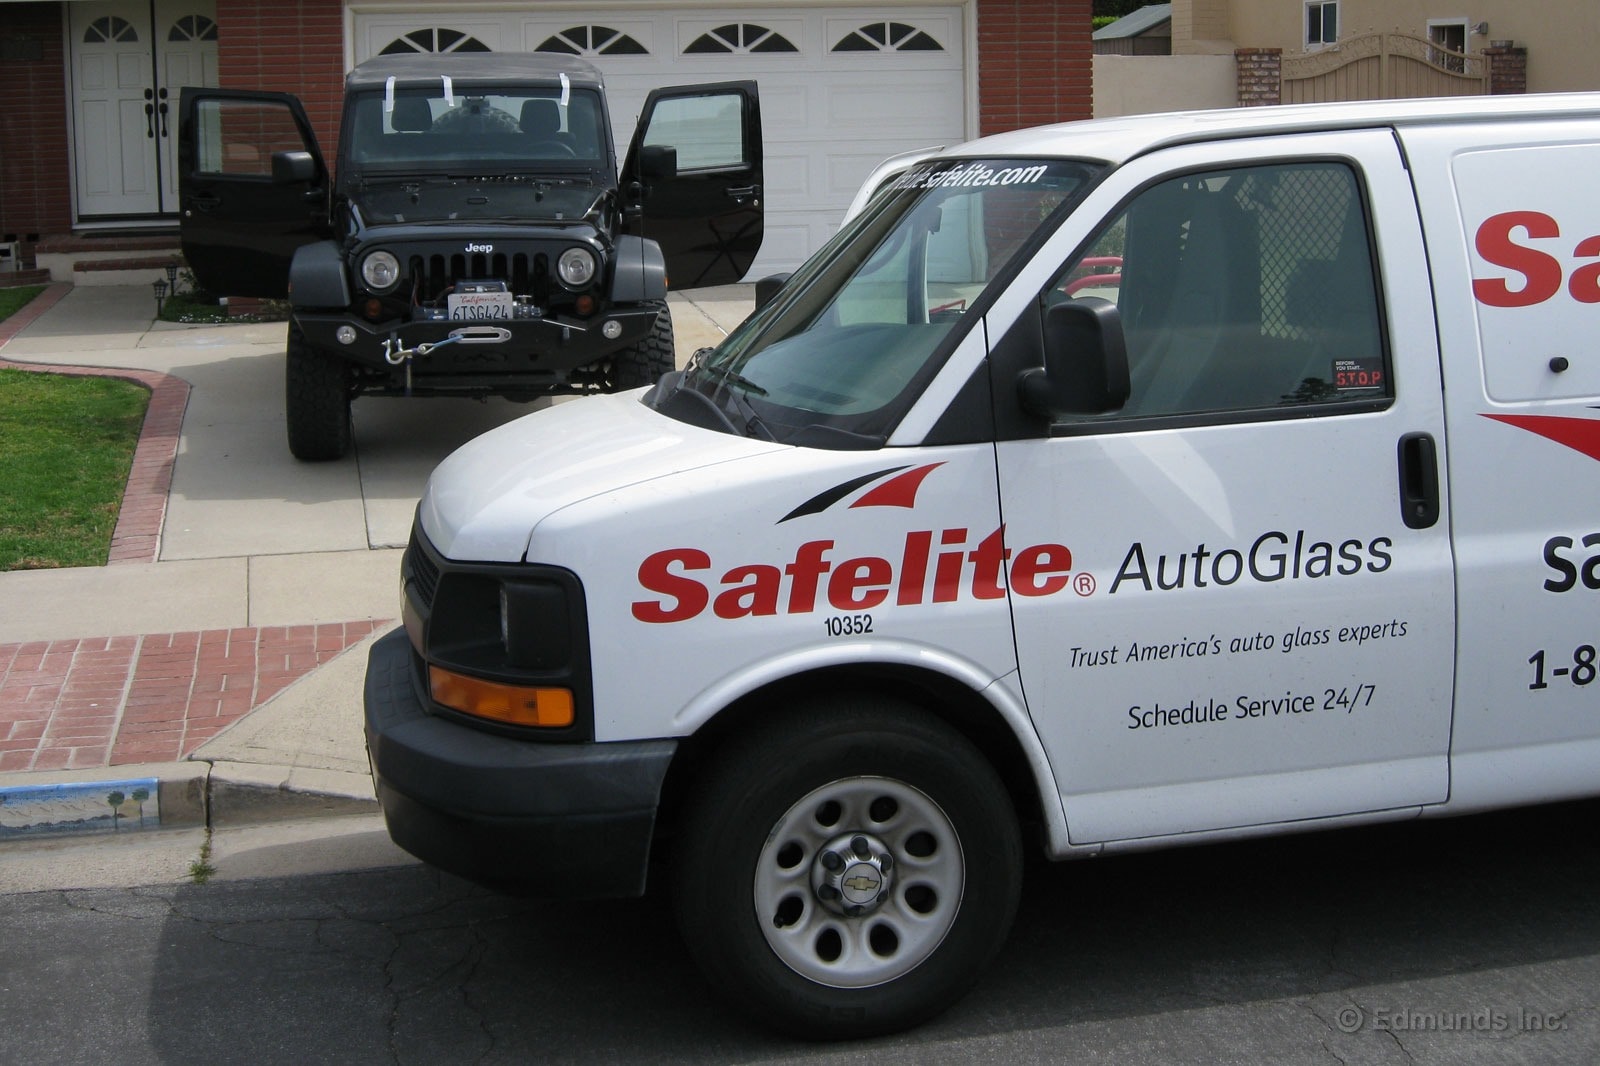
The front windshield on our 2012 Jeep Wrangler cracked long ago. Today we got around to replacing it. We recently had the windshield of our long-term SLS repaired at a local Safelite AutoGlass store. It was a good experience. And we left wondering how their mobile service compared. This was our opportunity to find out.

We researched windshields and found these guys offered a competitive price. Then we sat down at the computer. Everything was done online. We input our car information from a series of pull-downs. When it came time to choose the glass, the site gave us a choice of the factory glass or a cheaper, logo-free variant. Click. Our appointment was scheduled for the following morning between 8am and 1pm.
Just before 9am our phone rang. "This is Brian with Safelite. I'll be there to install your windshield today. I expect to be there close to 1 p.m." He arrived about an hour before his estimate, which worked better for us. The install took an hour or so. Brian was polite and professional. After the glass was in he cleaned all of the windows and vacuumed the car. It was cleaner when he left than when he showed up, which was a nice touch.
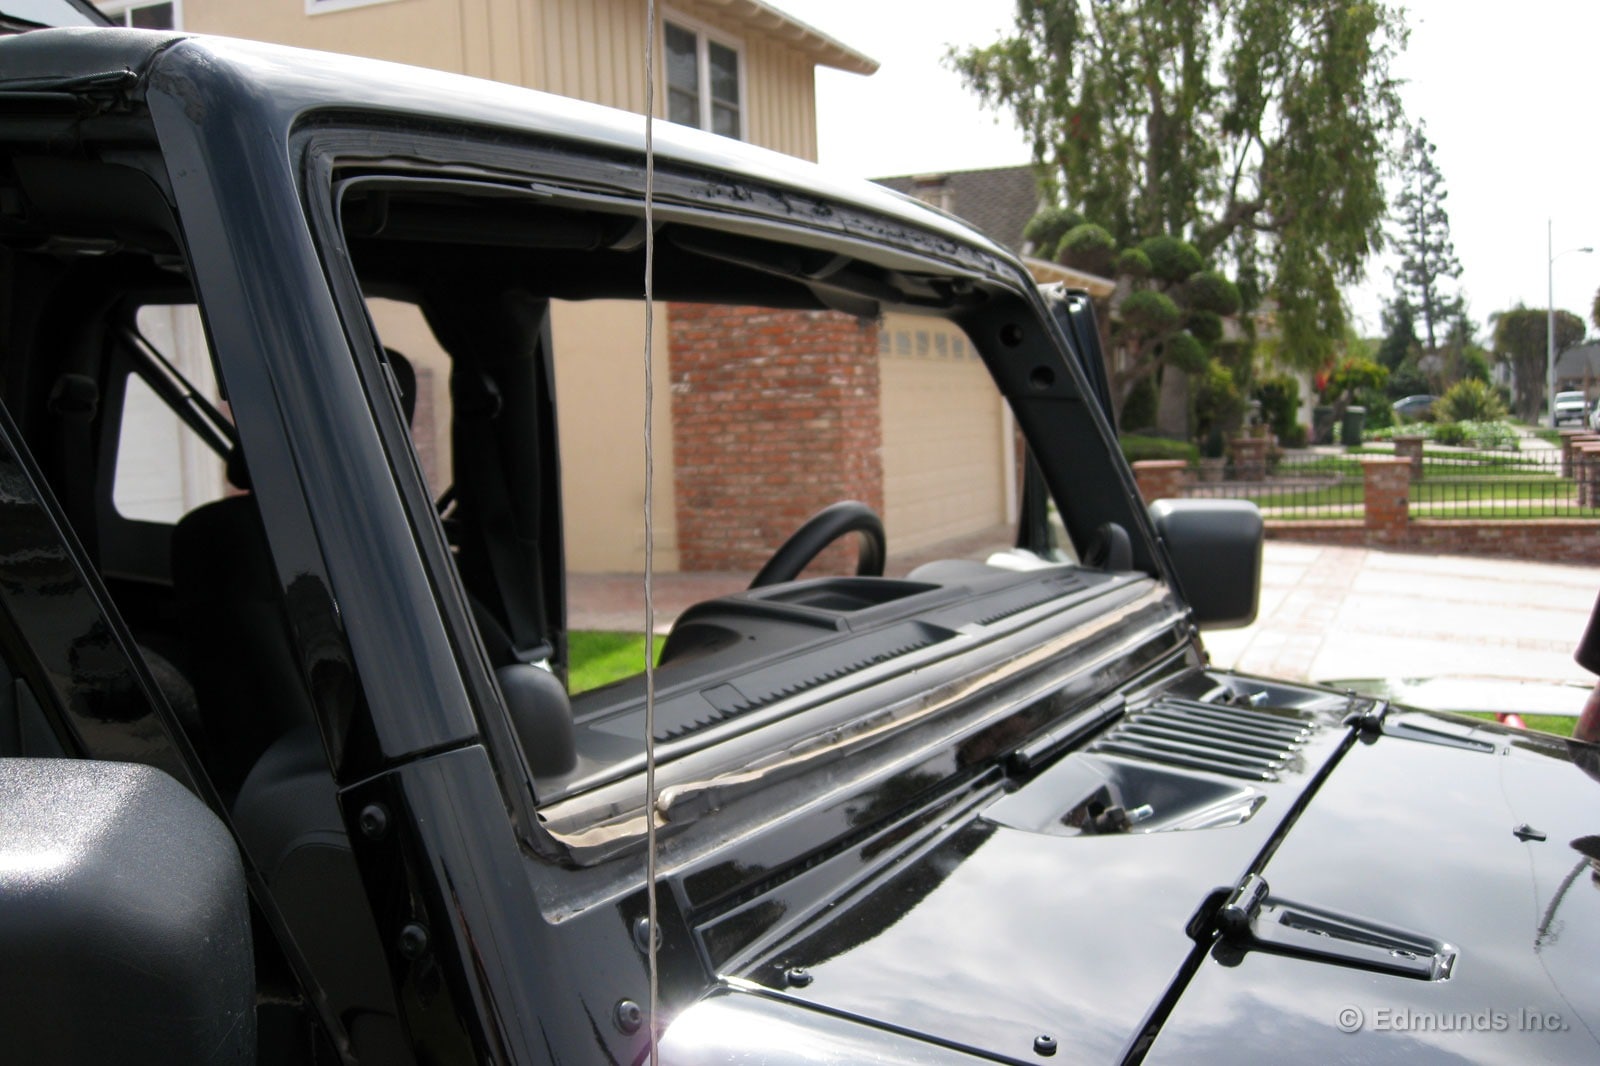
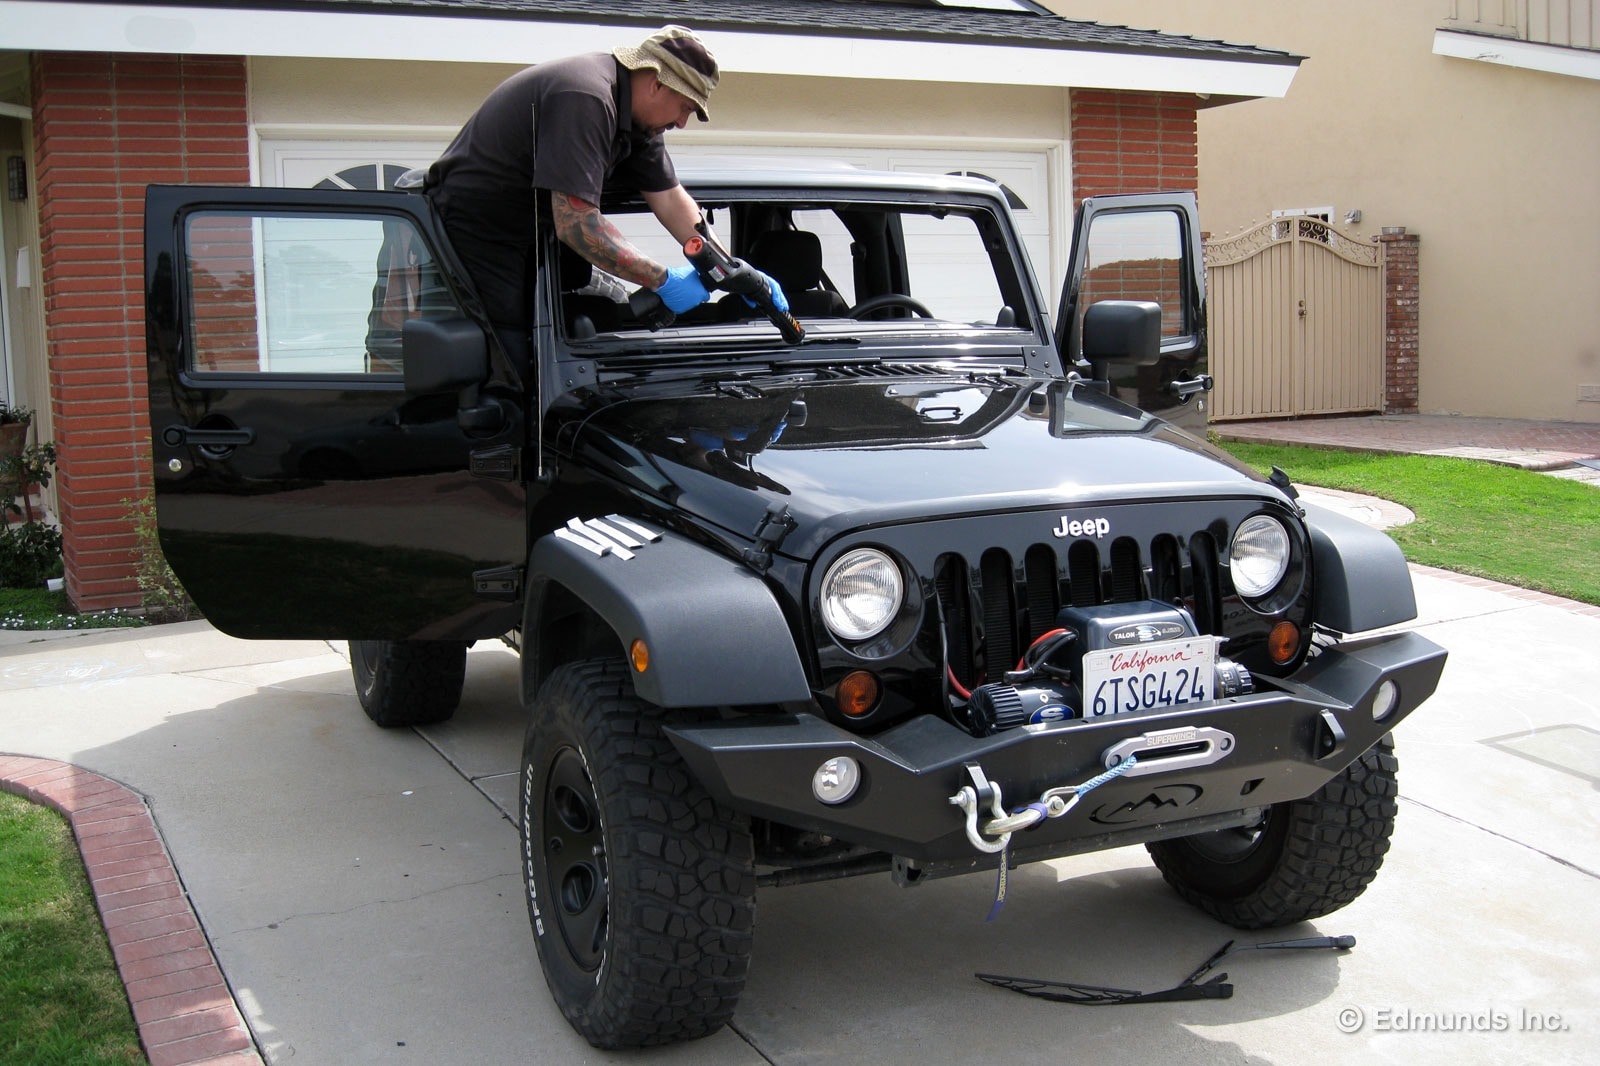
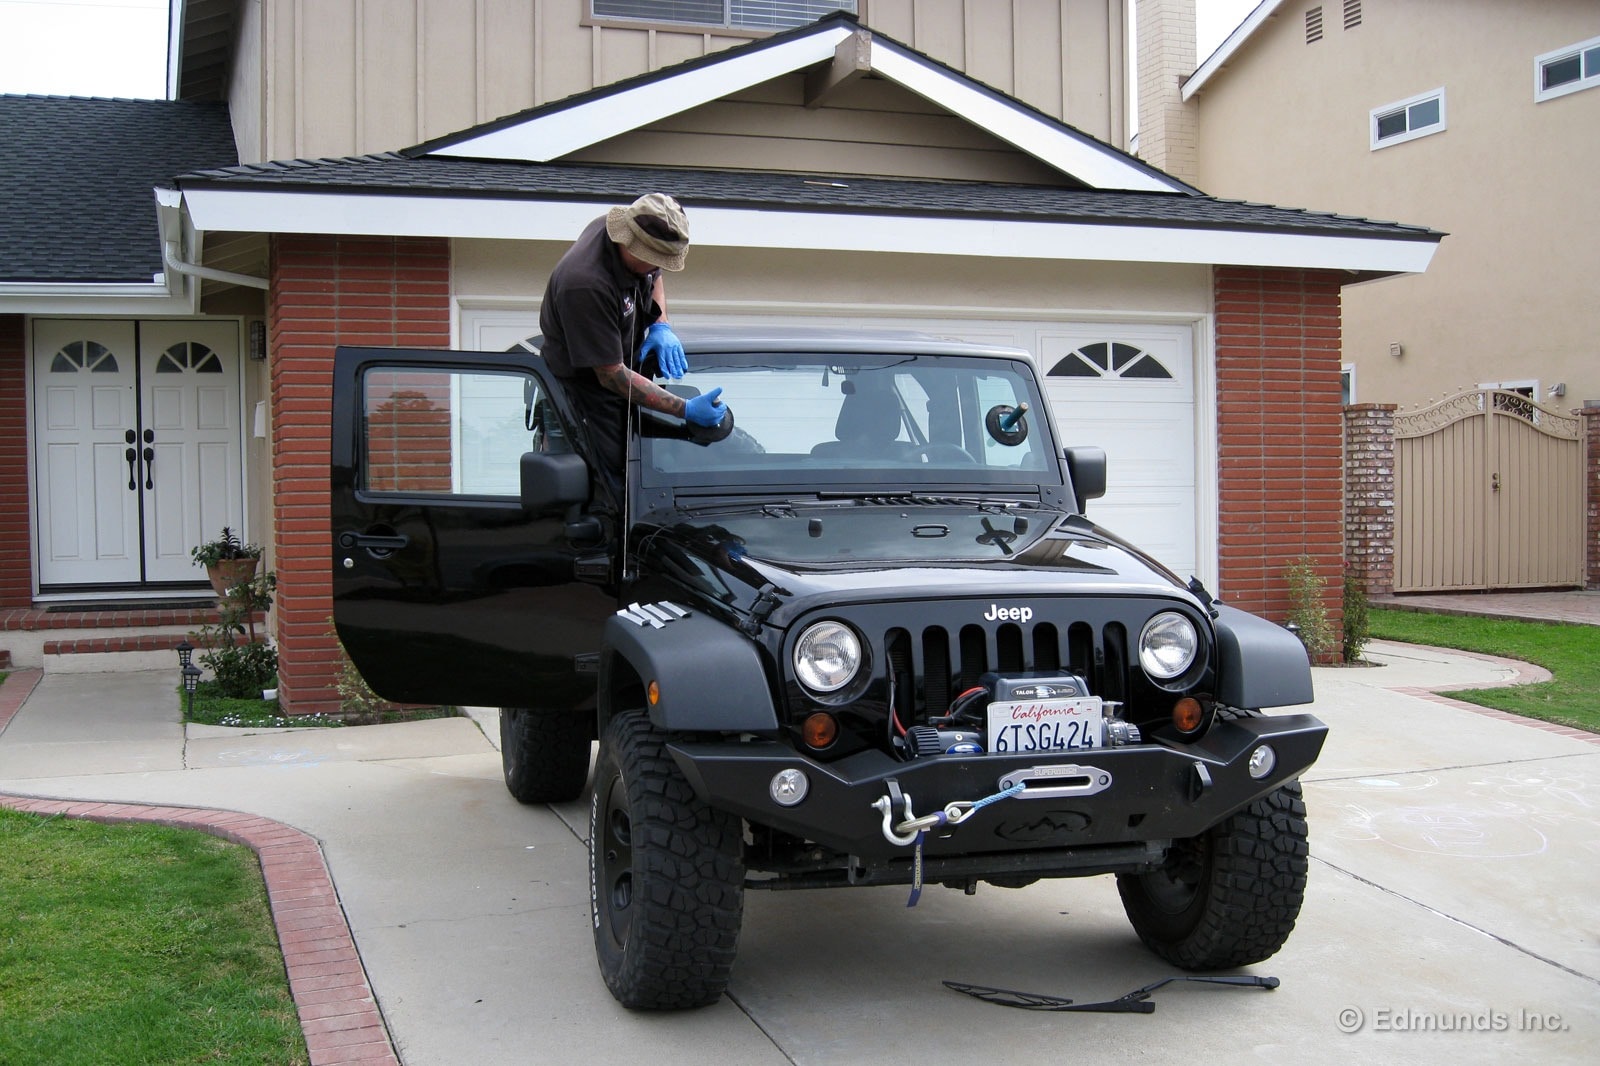
We've tried Safelite for windshield repair and replacement. Both experiences ended with our complete satisfaction. We can't speak to all locations, but the Westminster office that we used sure seems to have its act together. The total cost was $458.85. Of that amount, $336 was for materials, $60 for labor, $25 for mobile delivery and the rest was tax.
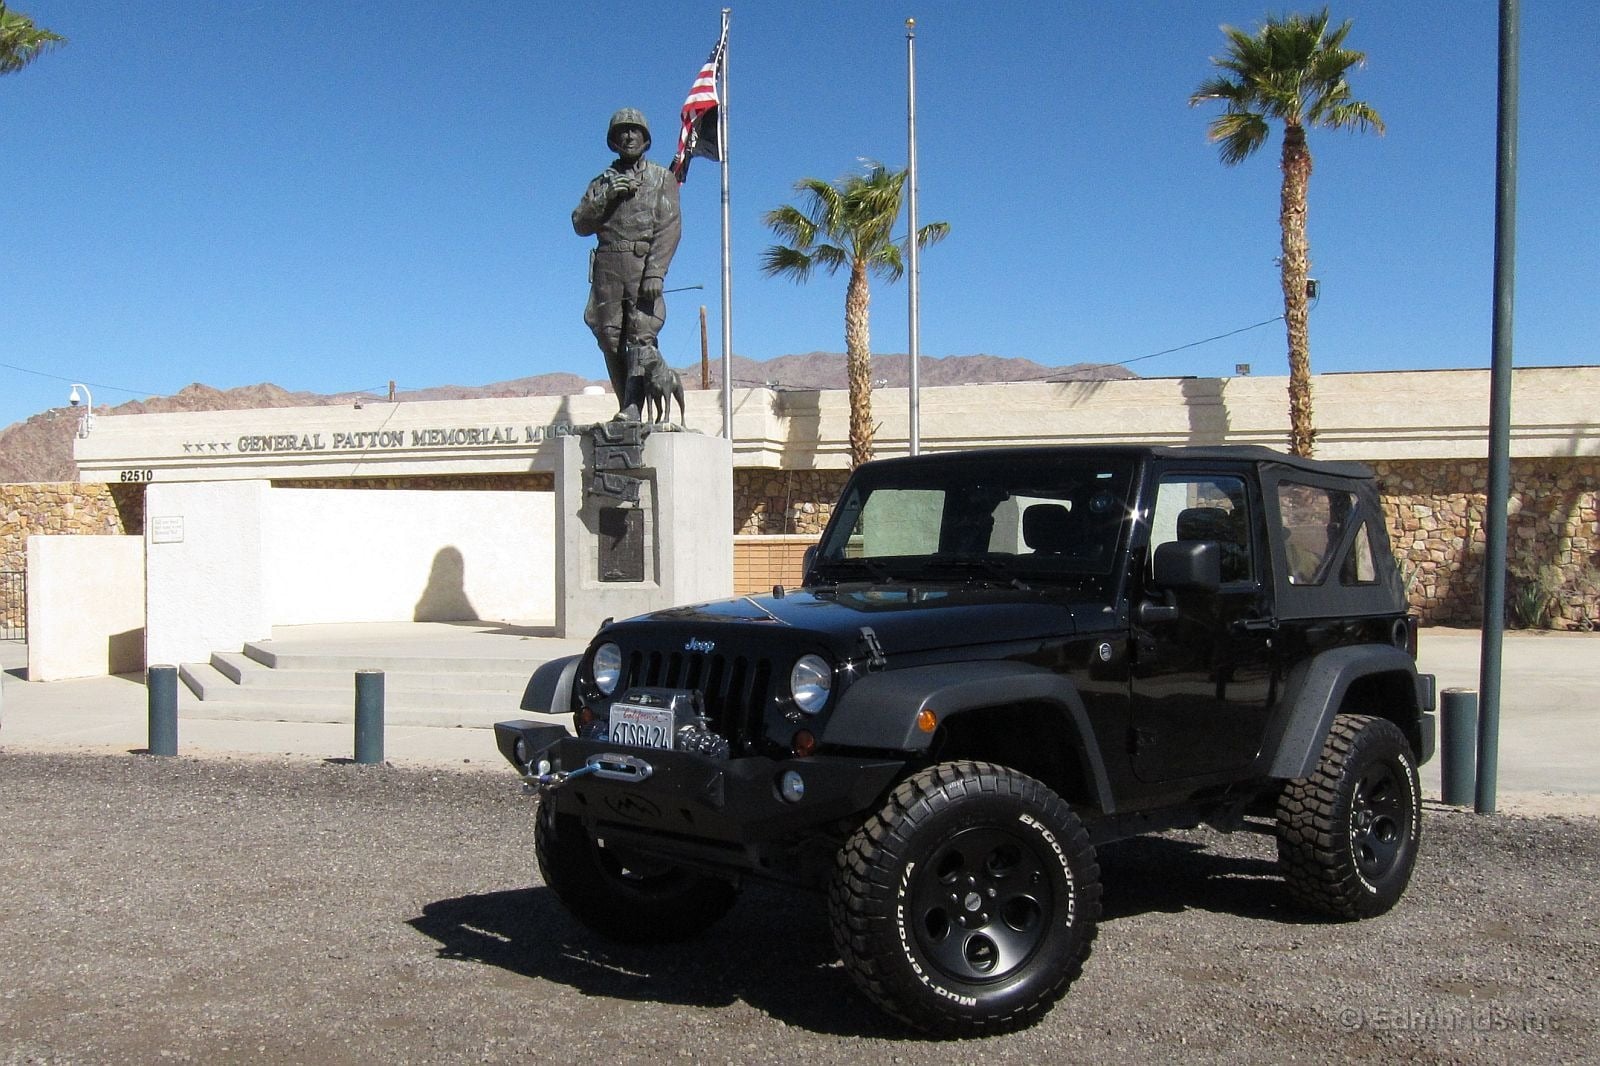
It was 9:00 am when I rolled into the parking lot to meet my friends to start our recent Arizona off-road camping trip. Our 2012 Jeep Wrangler was clean. Too clean.
The person that drove it before me took it to the car wash. It was spotless, and for that I am grateful. But the thing that had my buddies pointing and snickering was the liquid black tire shine goo the car wash had lathered onto my BFG rubber.
"That's not going to last," was the kindest thing they said.
They were right, of course. My wet licorice BFGs did look more than a little ridiculous in the face of 300 miles of dirt and rocks. It's a lot like putting on makeup before heading into a coal mine.
Or so I'm told.
A Jeep can and should be a little bit dirty. Dusty, at the very least. Extra points for mud, but not too much.
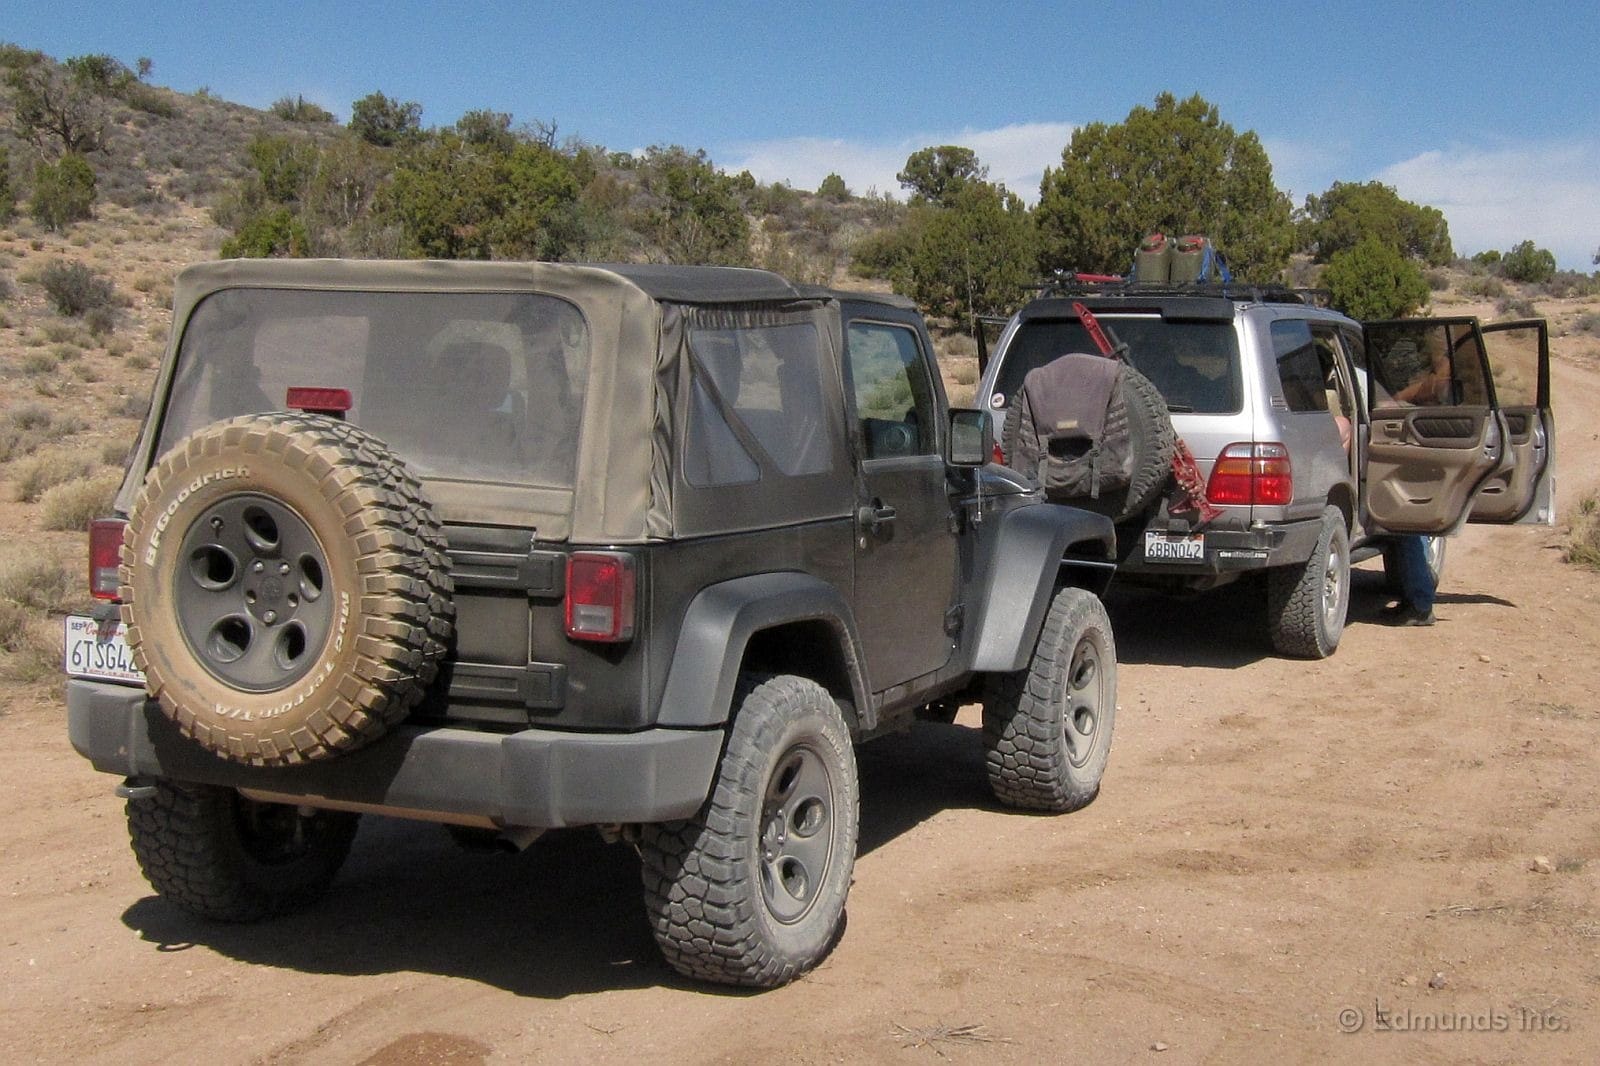
As for the tire goo, it captures silt like flypaper attracts bugs. My spare BFG was soon red/orange like the surrounding landscape. But only to the first rib of tread, mind you, exactly as far as the car wash guy's tire shine rag goes as he wipes the stuff on.
Meanwhile, Richard's untreated rear-mounted spare retained its appropriate flat black non-luster.
Late in the trip the Jeep's four rolling sidewalls were black too, of course, because they'd been rubbing on rocks and brush the whole way. Even tire shine junk doesn't stand a chance against that kind of friction. But the unmolested spare, well, it just got oranger and oranger.
When I wash this thing I'm going to ask them to lay off the tire shine this time. I hate that stuff even when something other than a Jeep is the victim.

Our 2012 Jeep Wrangler is the base Sport model, which means it doesn't have the motorized front stabilizer bar disconnect system found on the more expensive Rubicon.
Up until now I'd have to crawl underneath with a pair of 18mm wrenches and some tie wraps, spending about 5 minutes disconnecting the bar myself before I headed off into nasty territory.
But several companies sell an alternative system that replaces the bolts and tie-wraps with an easily removed pin. Teraflex makes a particularly good one, and they sell it for about $130.
Here's how the installation went. It took about 20 minutes, including photo breaks. Double everything you're about to see because the entire process is repeated on the other side of the car.
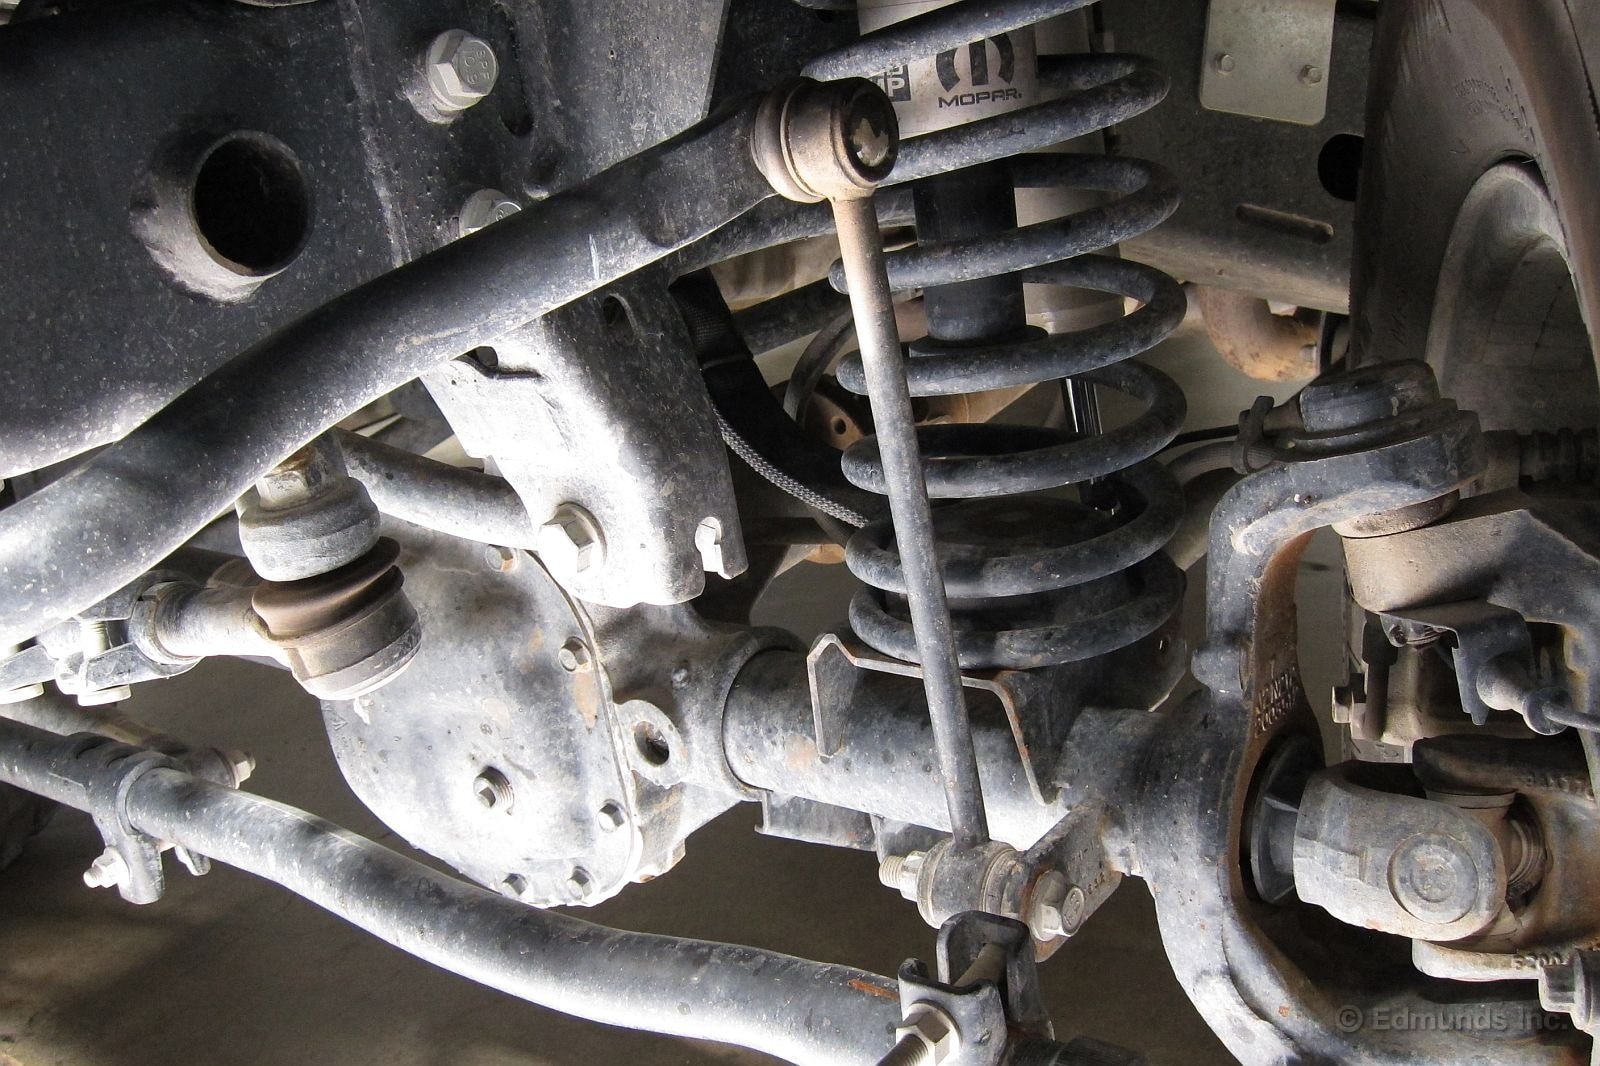
The old stabilizer bar links are bolted on top and bottom. They need to go. The kit includes new ones. The reason why will become clear in a moment.

Here's the familiar 18mm bolt we used to remove and replace before we got this kit. We'll remove it once more for old time's sake, then scrap it.
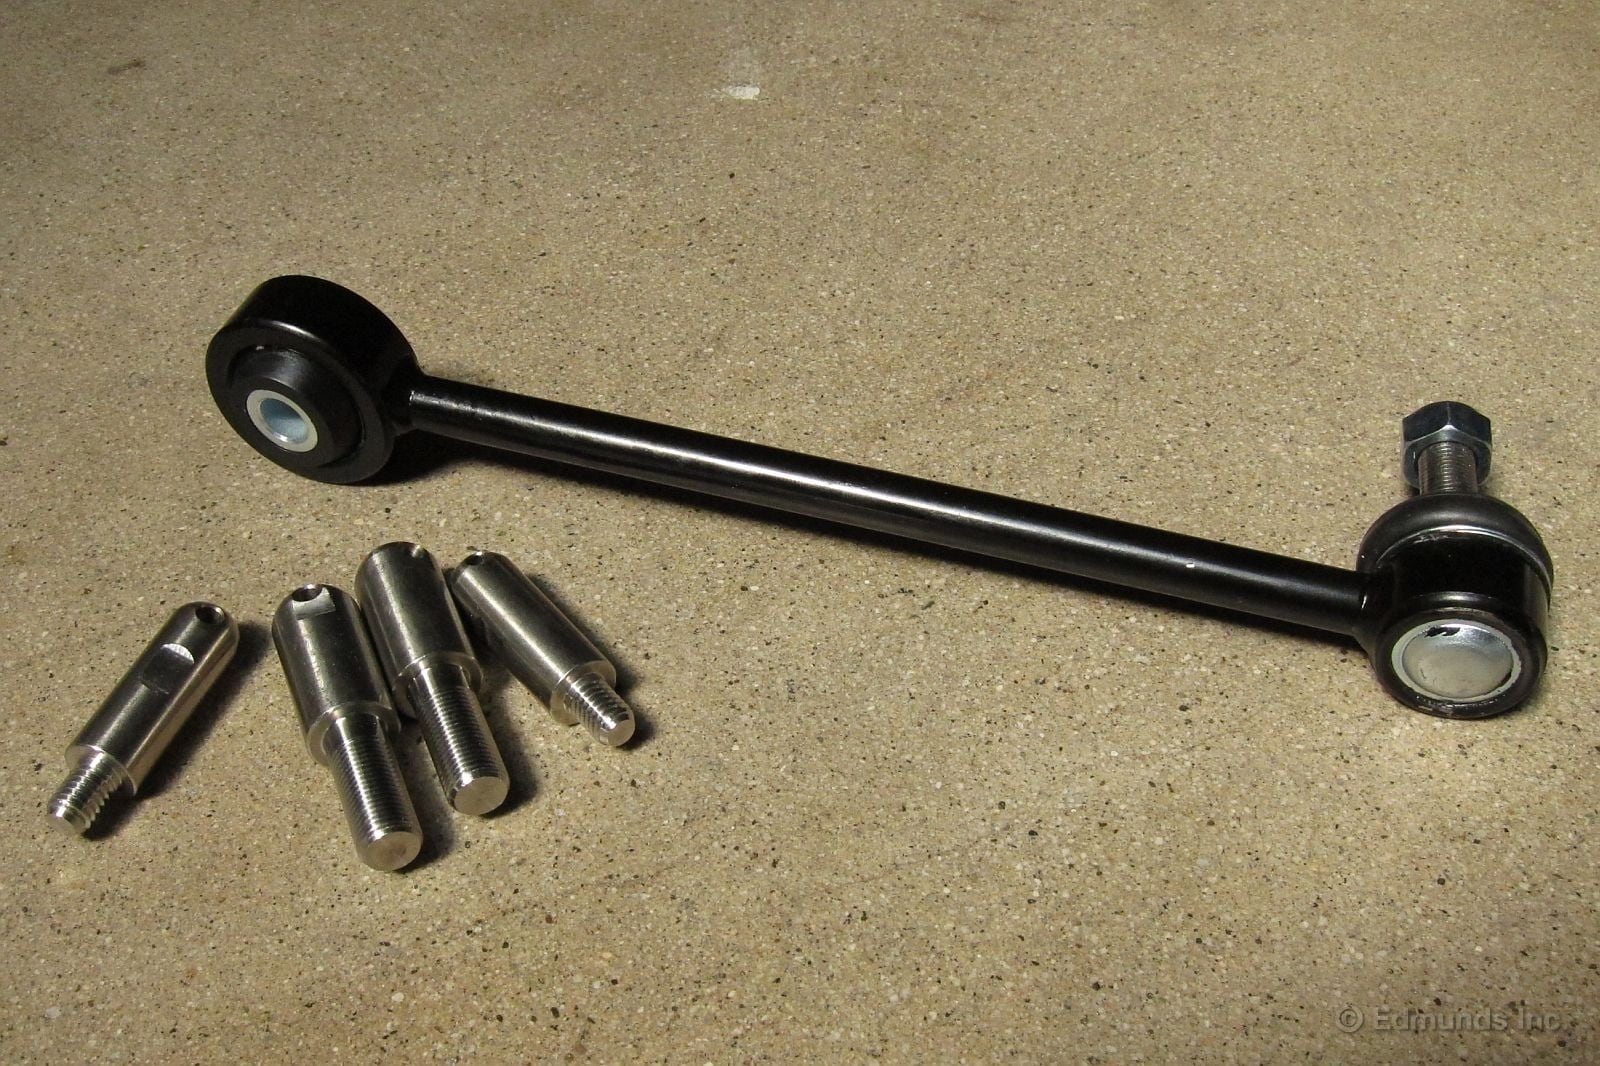
The Teraflex kit comes with two links, four pins, a pair of brackets and some other nut-and-bolt hardware that didn't make it into this shot. Note that the pins com in two diameters. Note also that both pins are too large to fit into the metal sleeve in the link. What's that all about?
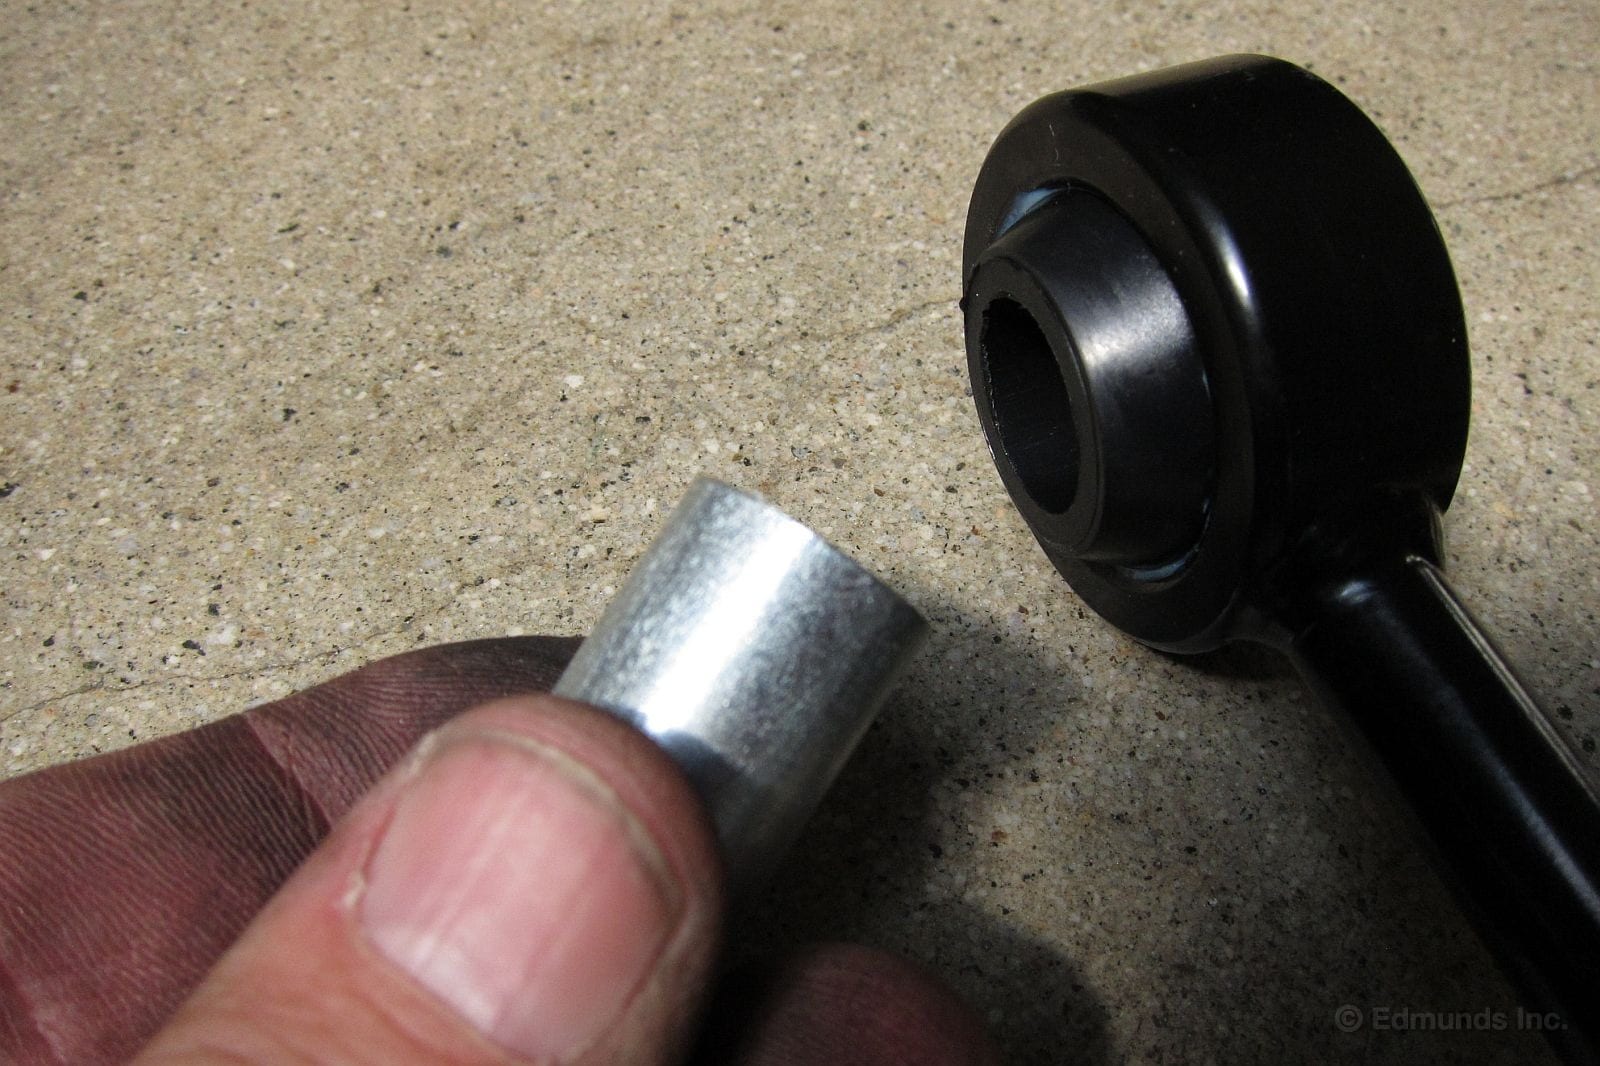
The sleeve is only there to protect the rubber bushing and contain its grease in storage. It's a throwaway piece that has to come out. But it's not so easy as this picture makes it look.
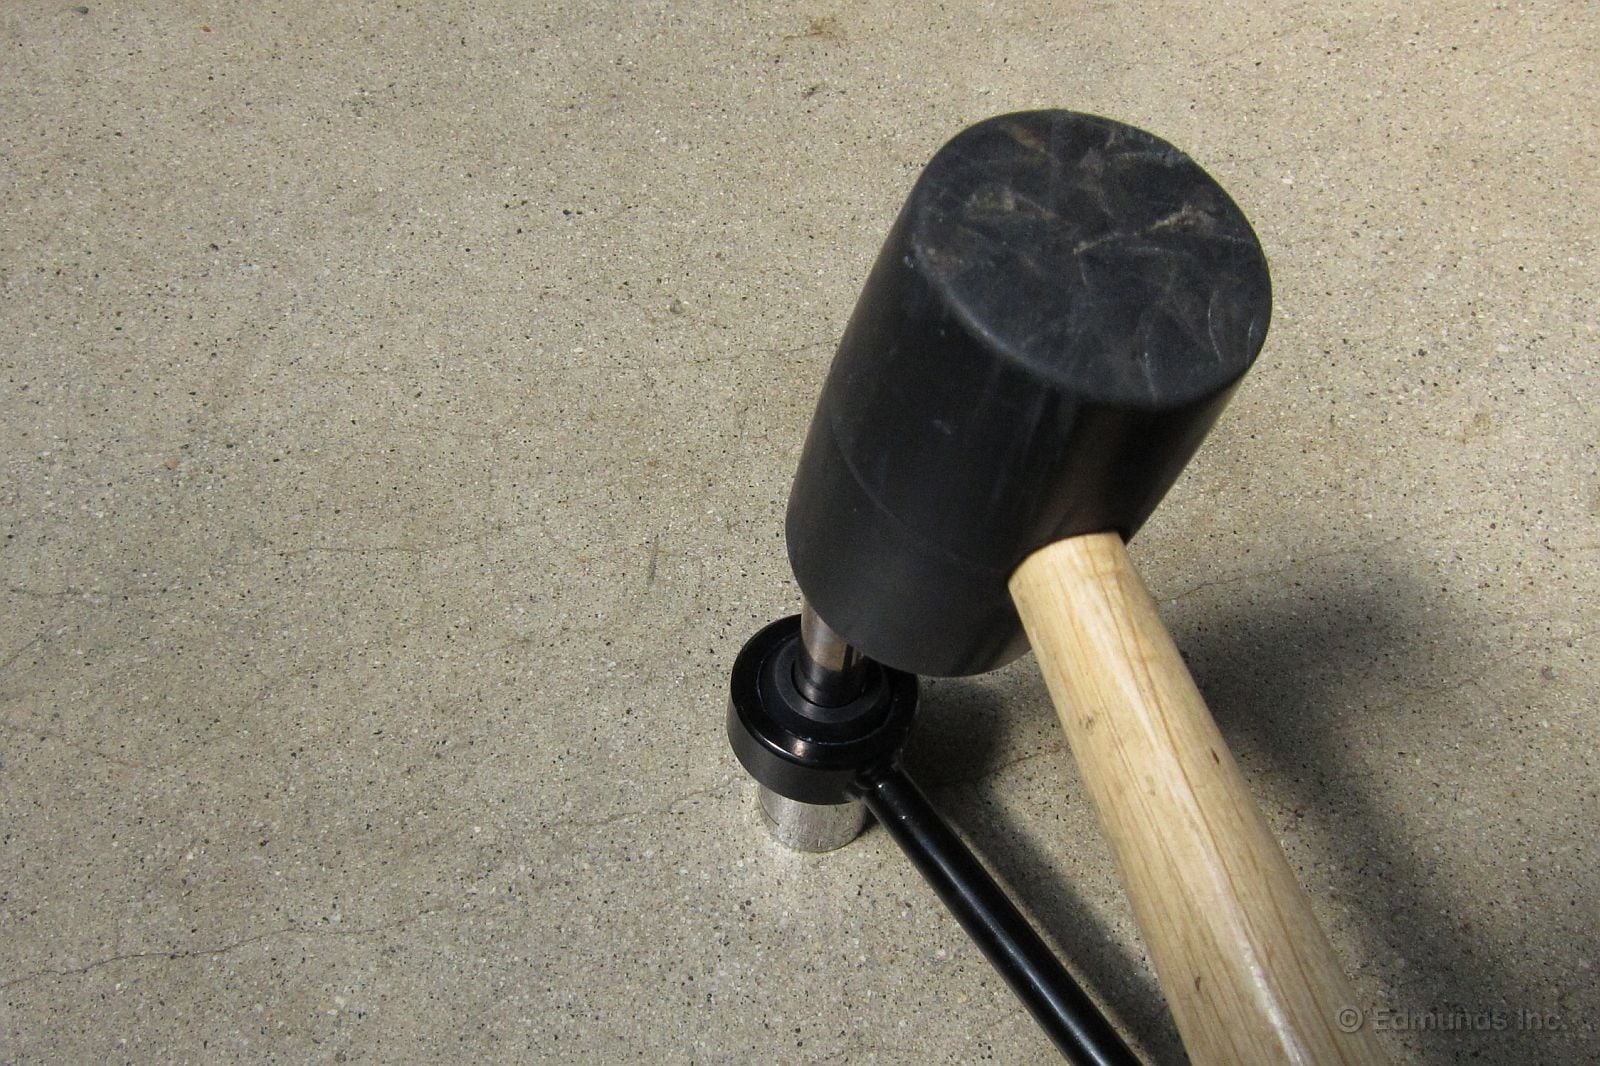
I had to tap it out with a mallet, using a fat socket below to cup the bushing and a skinny deep socket up top to drive out the sleeve.
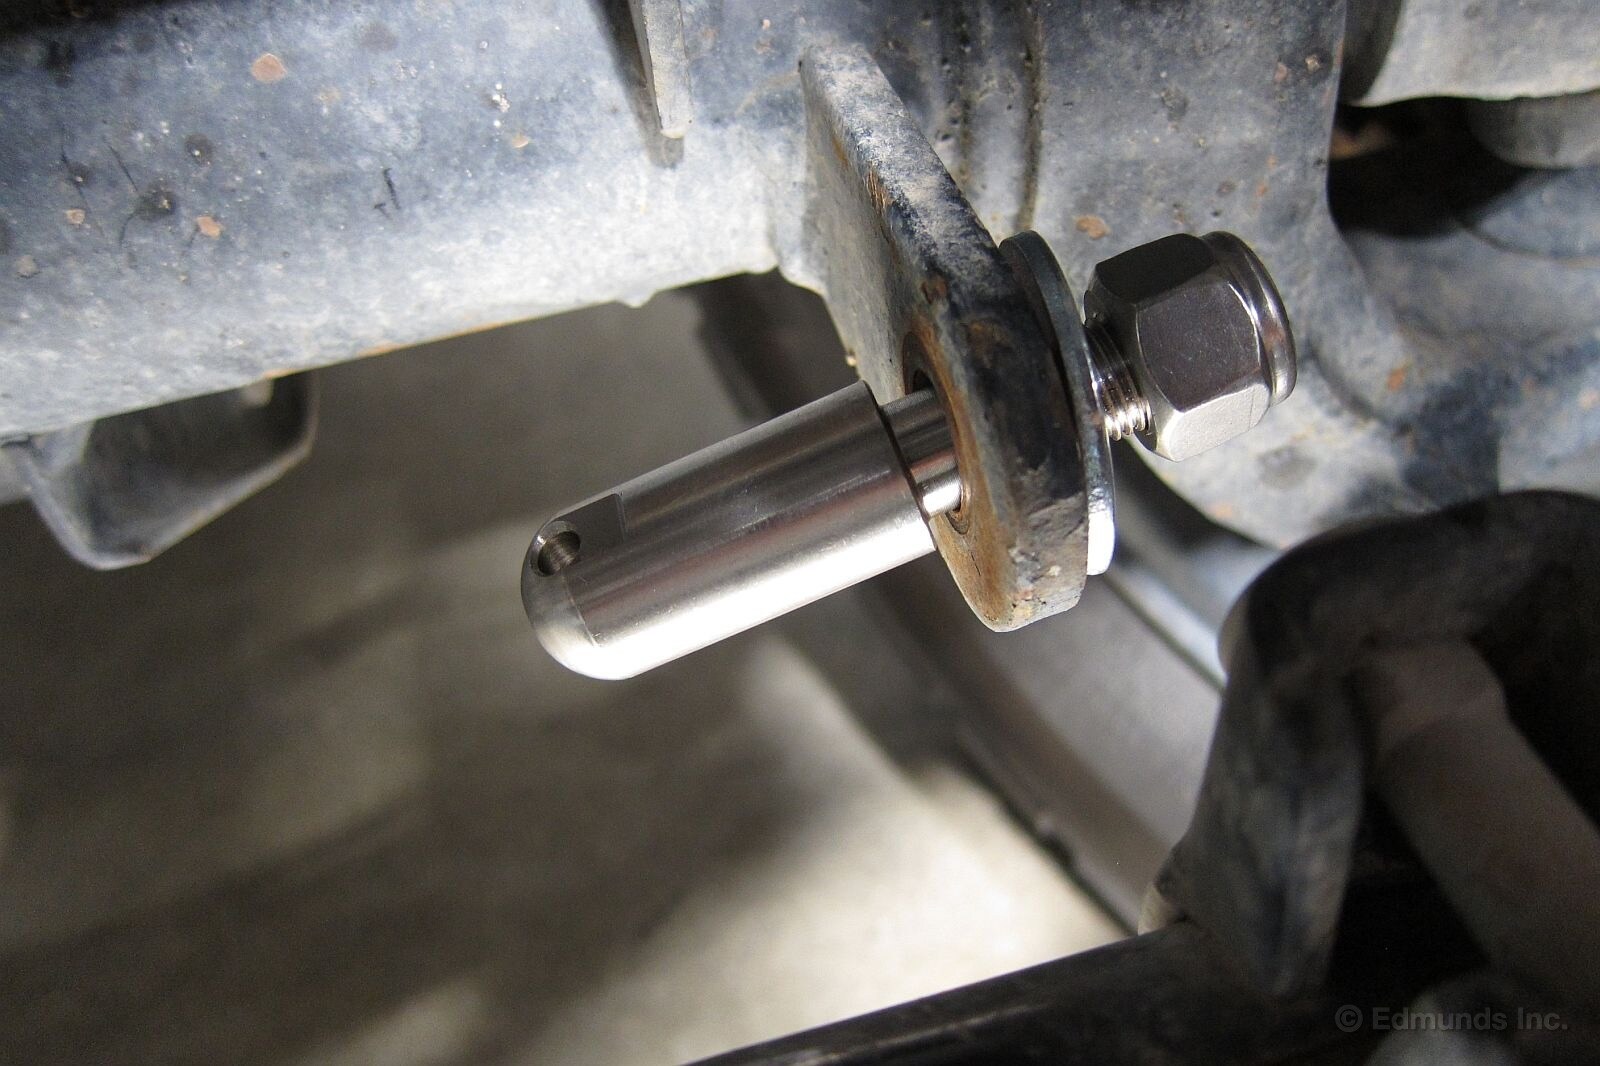
The fatter of the two pins goes on the lower mounting flange on the axle. Its larger diameter is a tight fit inside the bushing we just prepared because the two will be connected 95 percent of the time. I tightened it after this shot, of course. I've only got two hands.

These grease fittings thread into the bottom of the link eye. There's some grease in there already, but these fittings will allow us to add more once we're done.

Now we can install the upper end of the link. A new nut is provided. You can use a socket because an Allen wrench is needed to keep the stud from rotating as the nut is tightened.
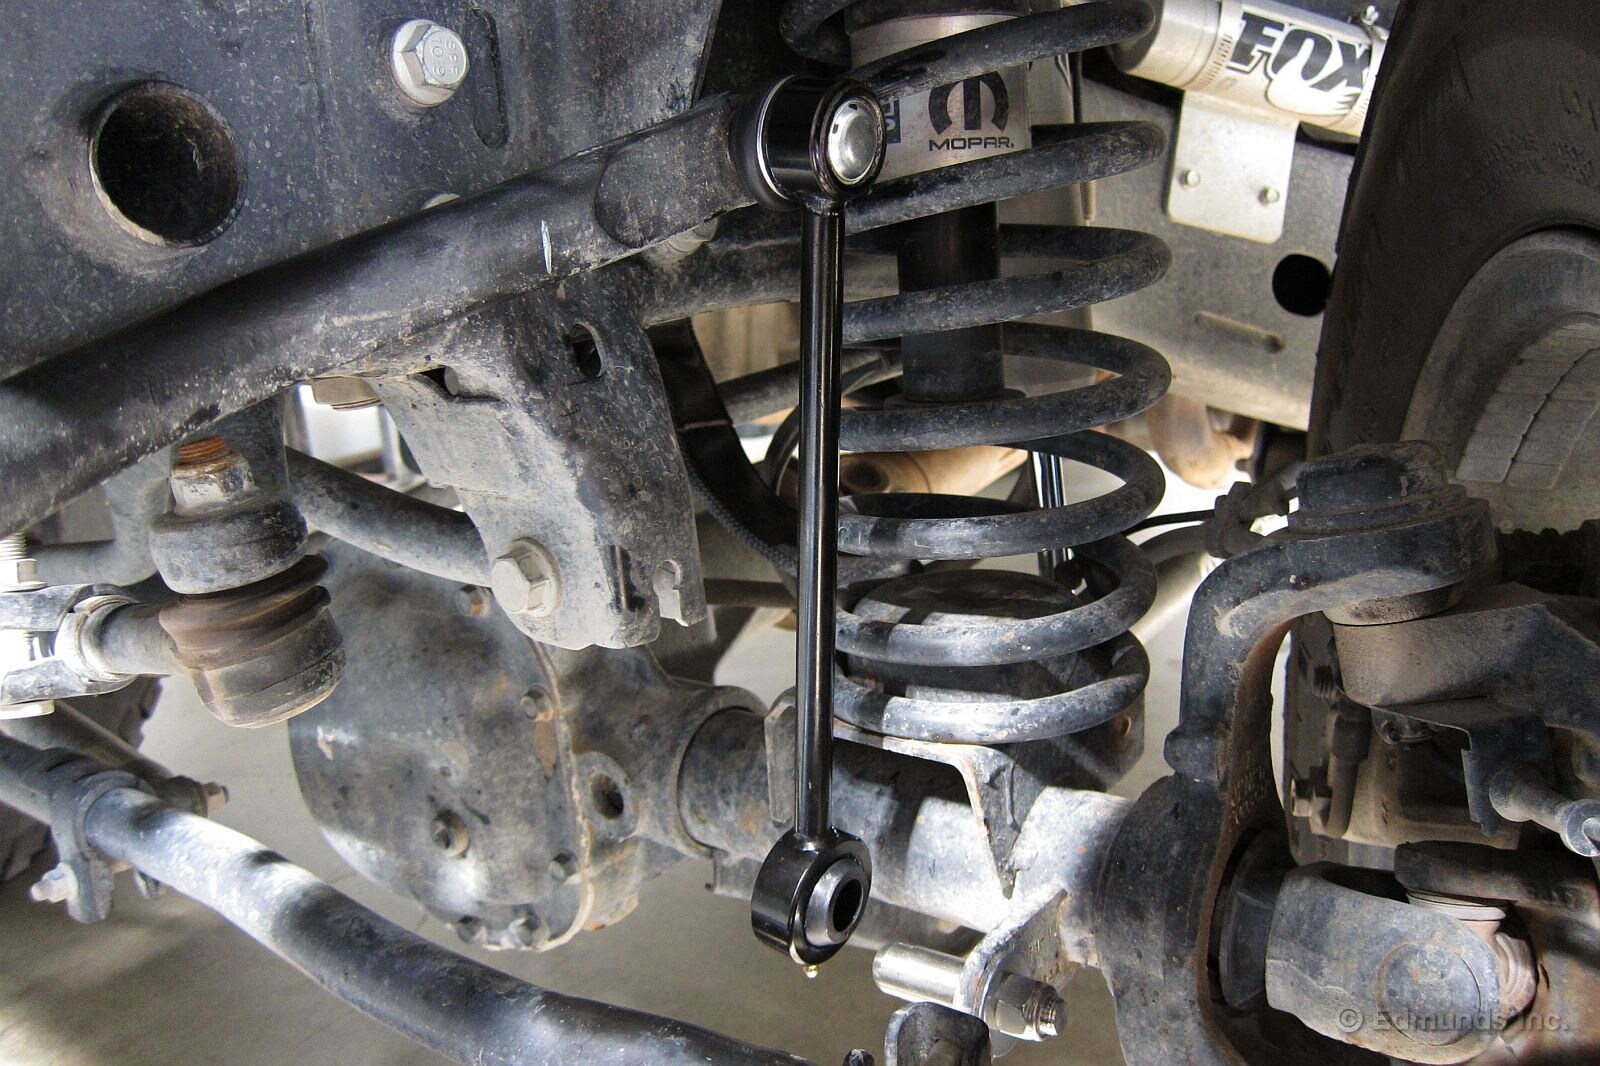
Now you see how this is going to work. A washer and pin will hold them together, but we're not there yet.
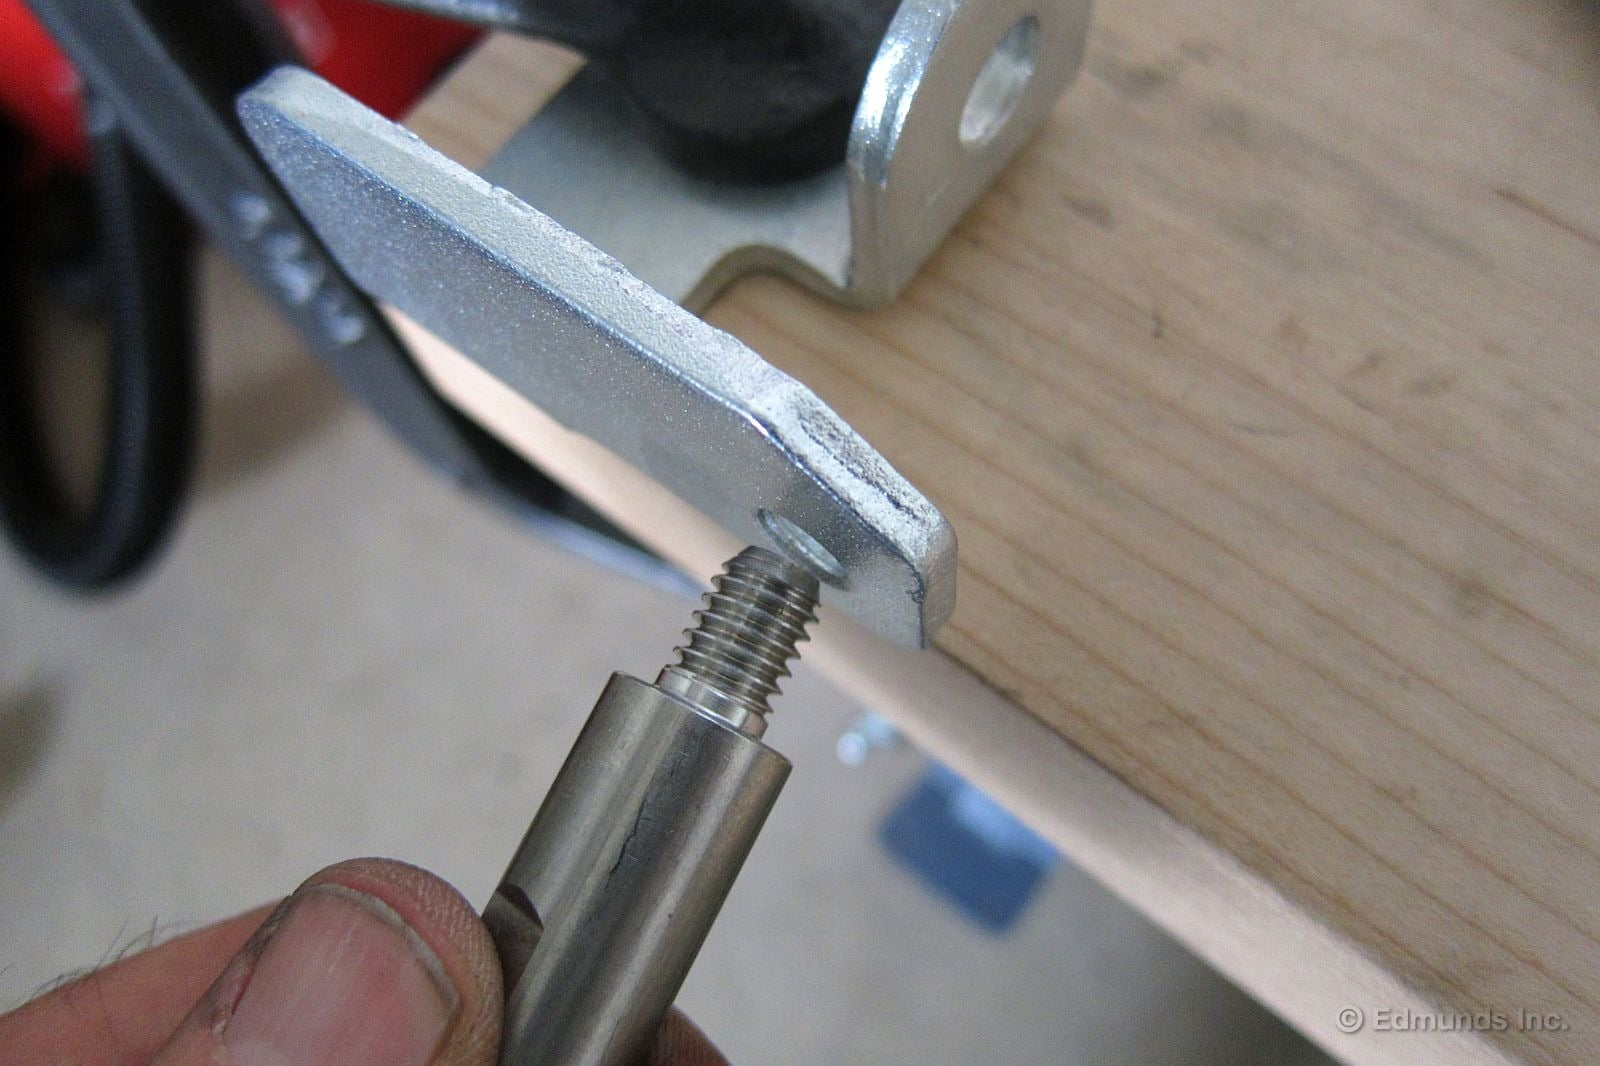
The skinnier pins thread into brackets. I clamped them to a bench so I could get them tight.
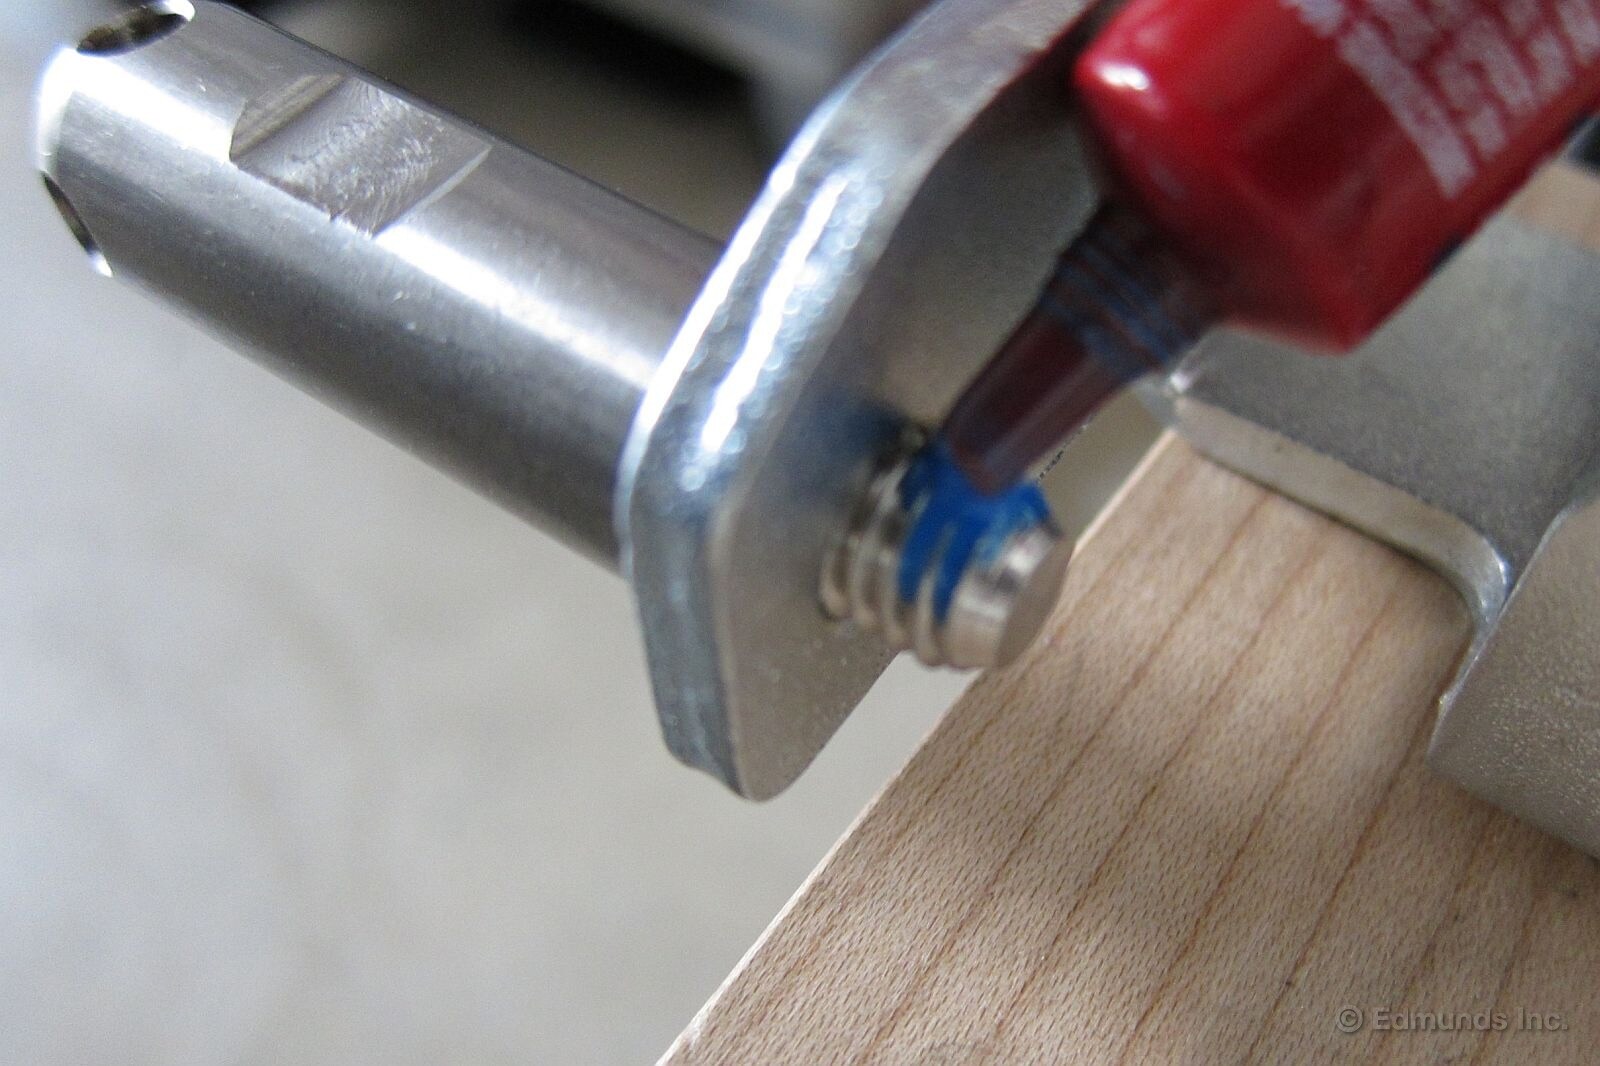
I also applied thread locking compound before I added the supplied secondary jam nuts.
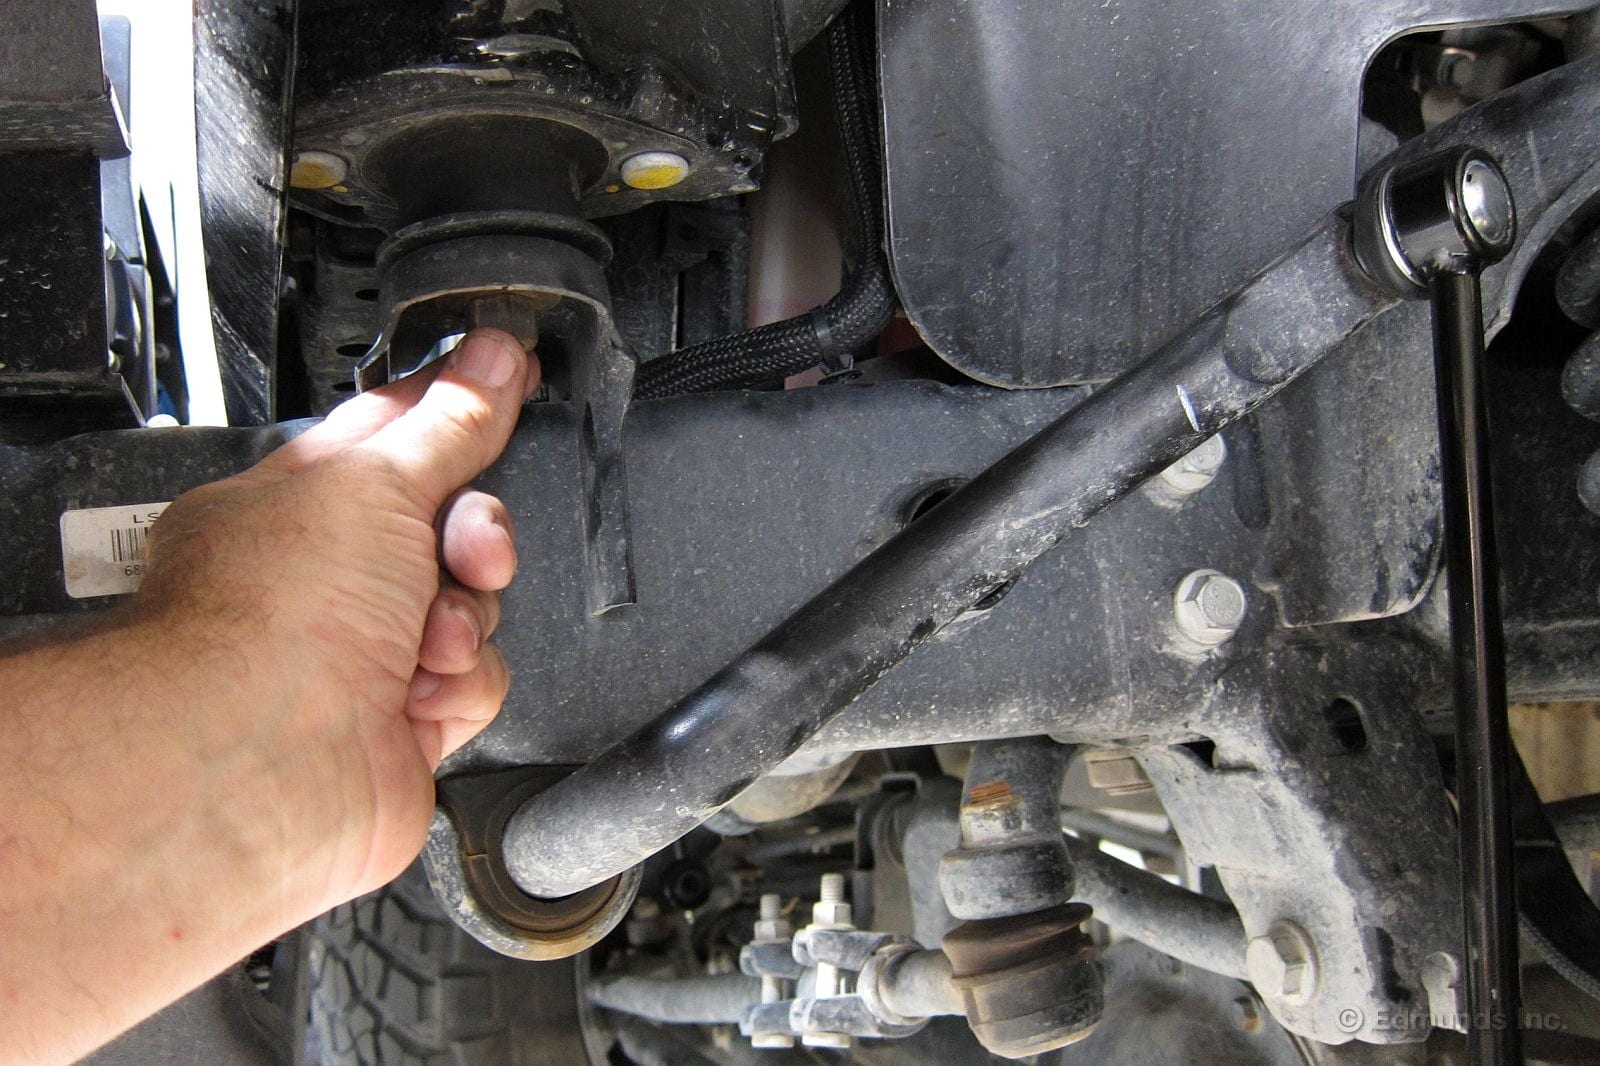
The prepared pin/brack assemblies go beneath the front body mounts. I temporarily remove the nut.
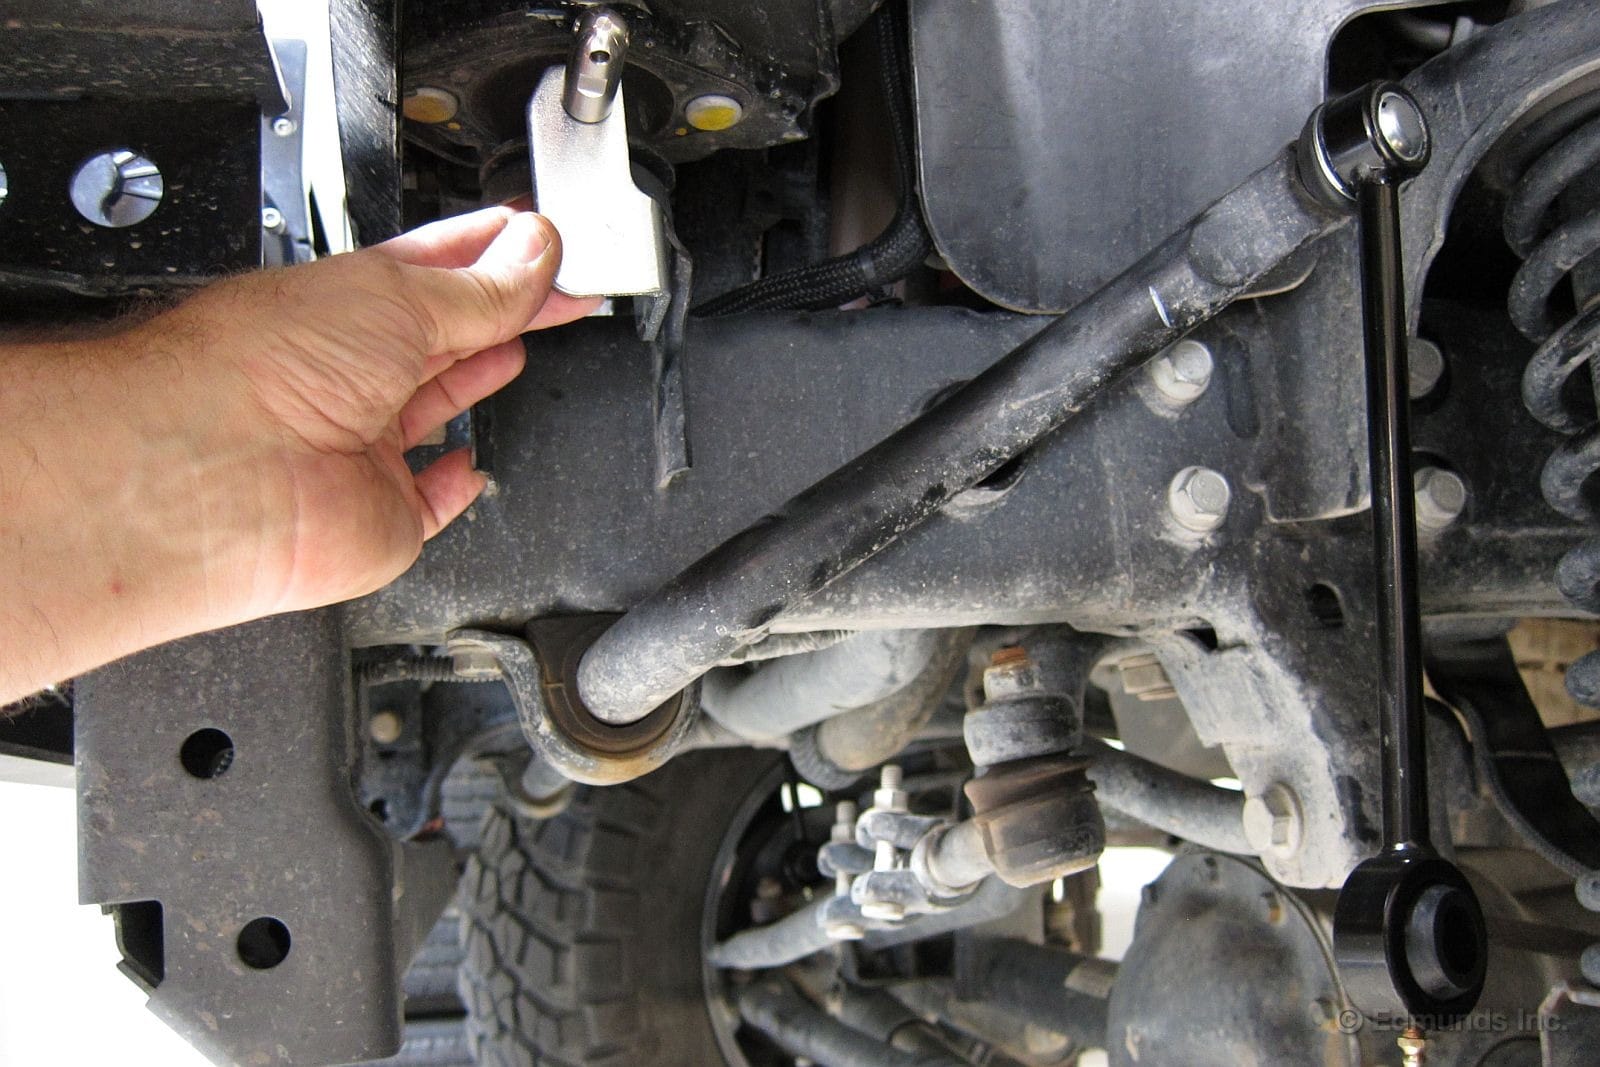
The bracket goes onto the stud and I replace the nut. Make sure to keep the bracket from cocking sideways as you tighten the nut. The pin needs to stick straight out.
This pin is smaller because it's just a hanger for the link. It doesn't need to fit tight inside the bushing.
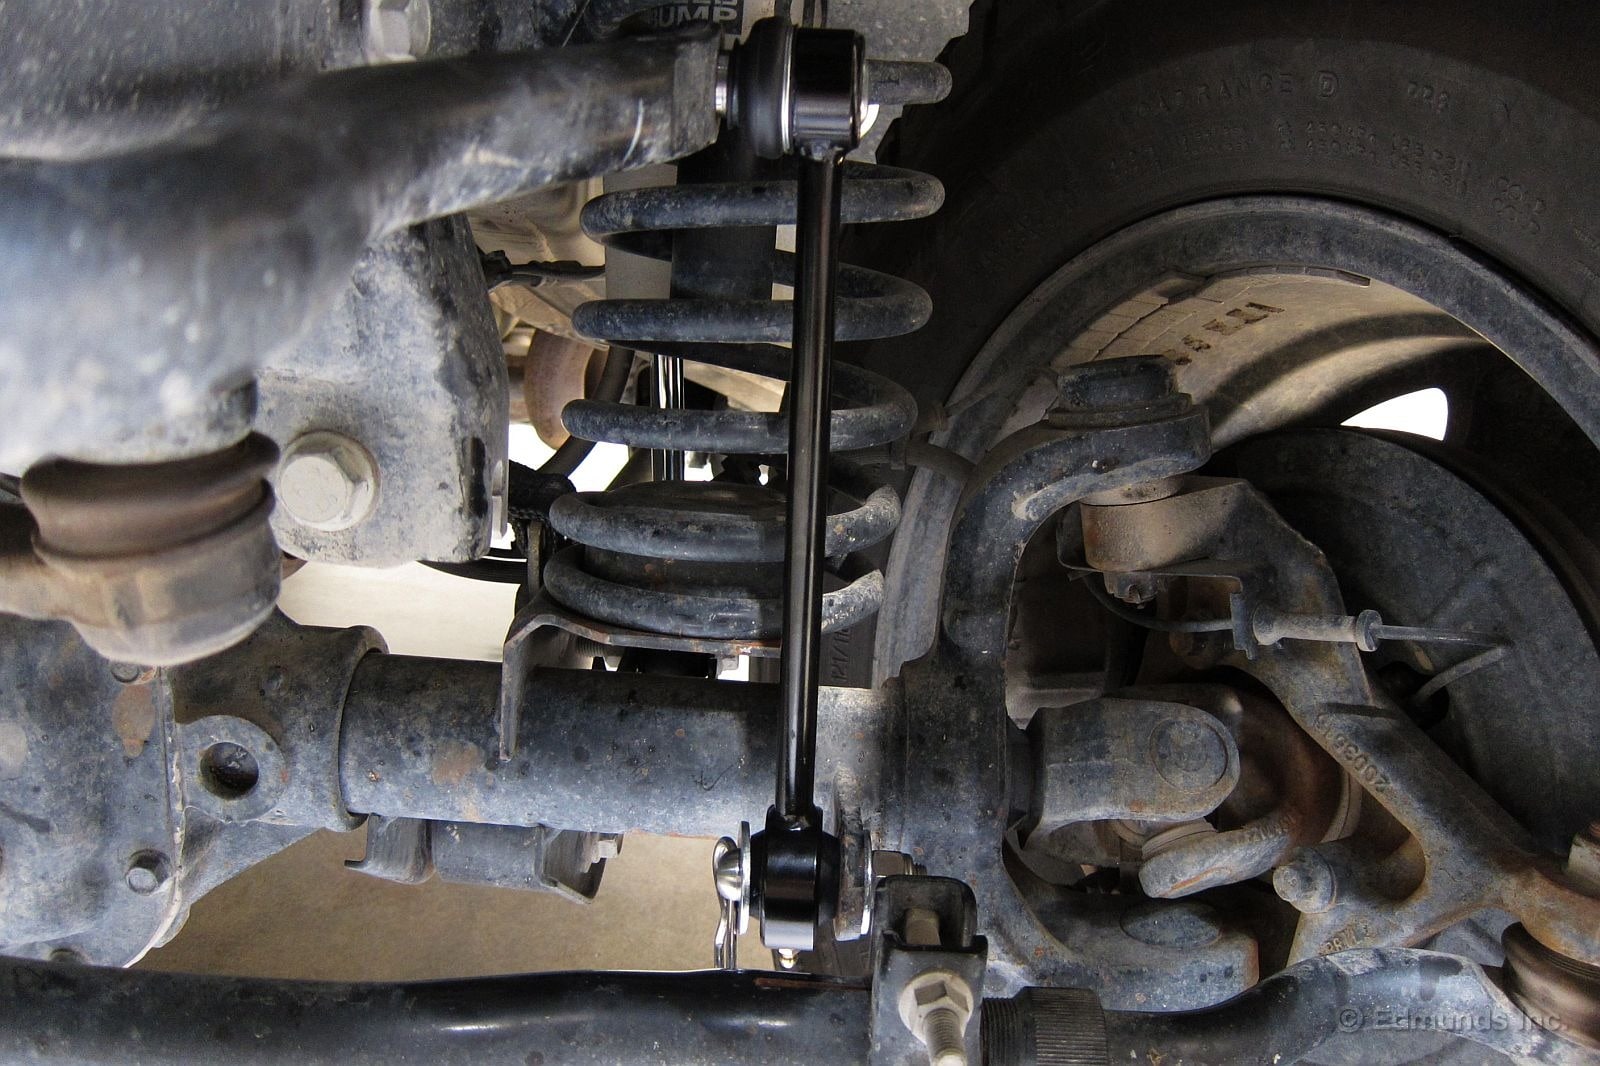
Our work is done. The bar is connected to the fat lower pin for daily driving, with the washer and retaining clip there to hold it in place.
Just before we head off-road we'll stop on level ground so the stabilizer bar isn't under any torsional load, and then we'll remove the clip and washer and slip the bushing off the lower mounting pin. It's a tight fit, so it helps to have a screwdriver or mallet for encouragement, especially when everything is brand new.
Once it's off we'll fold the link up to the smaller hanger pin and transfer the washer and retaining clip there to hold it in place. Dust and dirt can get into the bushing while we're off-roading, so we'll need to examine clean the bore of the bushing before we slip it back over the pin to get back into road mode.
And we absolutely cannot afford to forget to do this part. We must reconnect the bar when we're done off-road. Driving at speed on asphalt with the front stabilizer bar disconnected is more than a little dangerous.
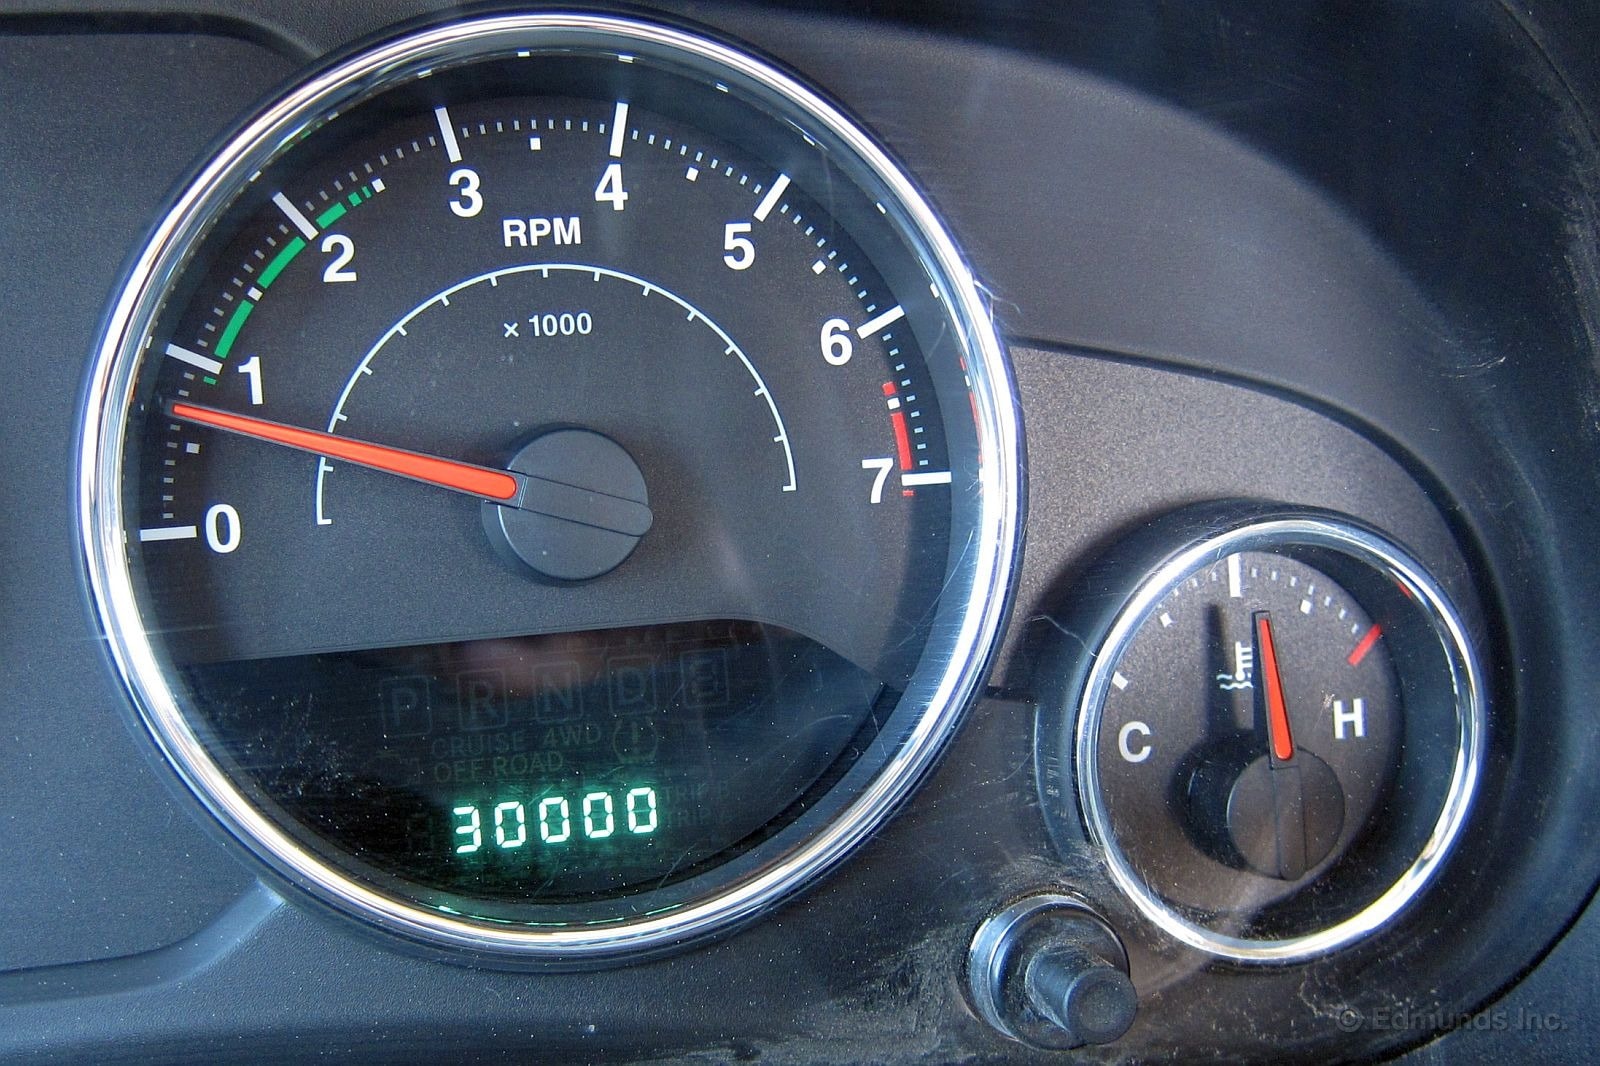
It happened on the way to Moab for its second visit to the Easter Jeep Safari. Our Jeep's odometer rolled over to 30,000 miles not one mile after I crossed the Utah state line.
It's running strong, but so far the combination of 75 mph freeway speed limits, rising elevation and a fierce headwind are not adding up to a new "best tank" in the Jeep's mpg logbook.
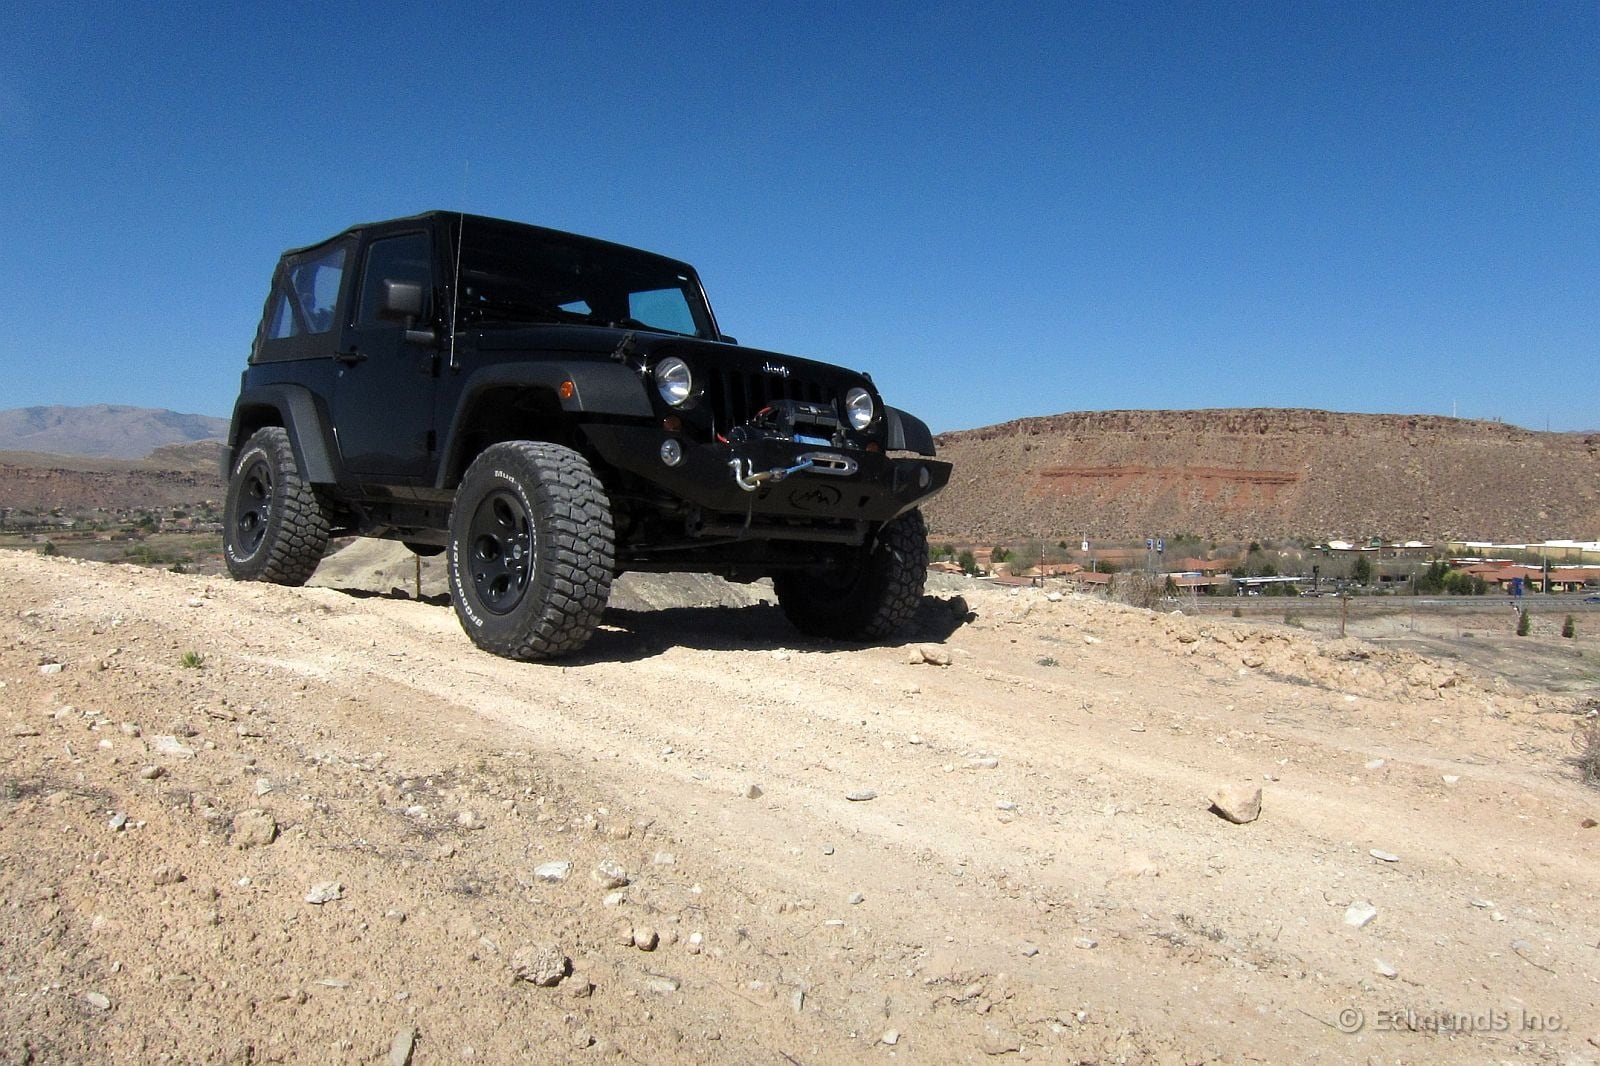
I was able to pull off and pose the Jeep on a dirt side road before it rolled on to 30,001 miles.
From this point I should roll into Moab in about 4 hours. And then the fun begins. Jeep is introducing some new stuff and I'm expecting to get behind the wheel of the new diesel Grand Cherokee on some nice slickrock.
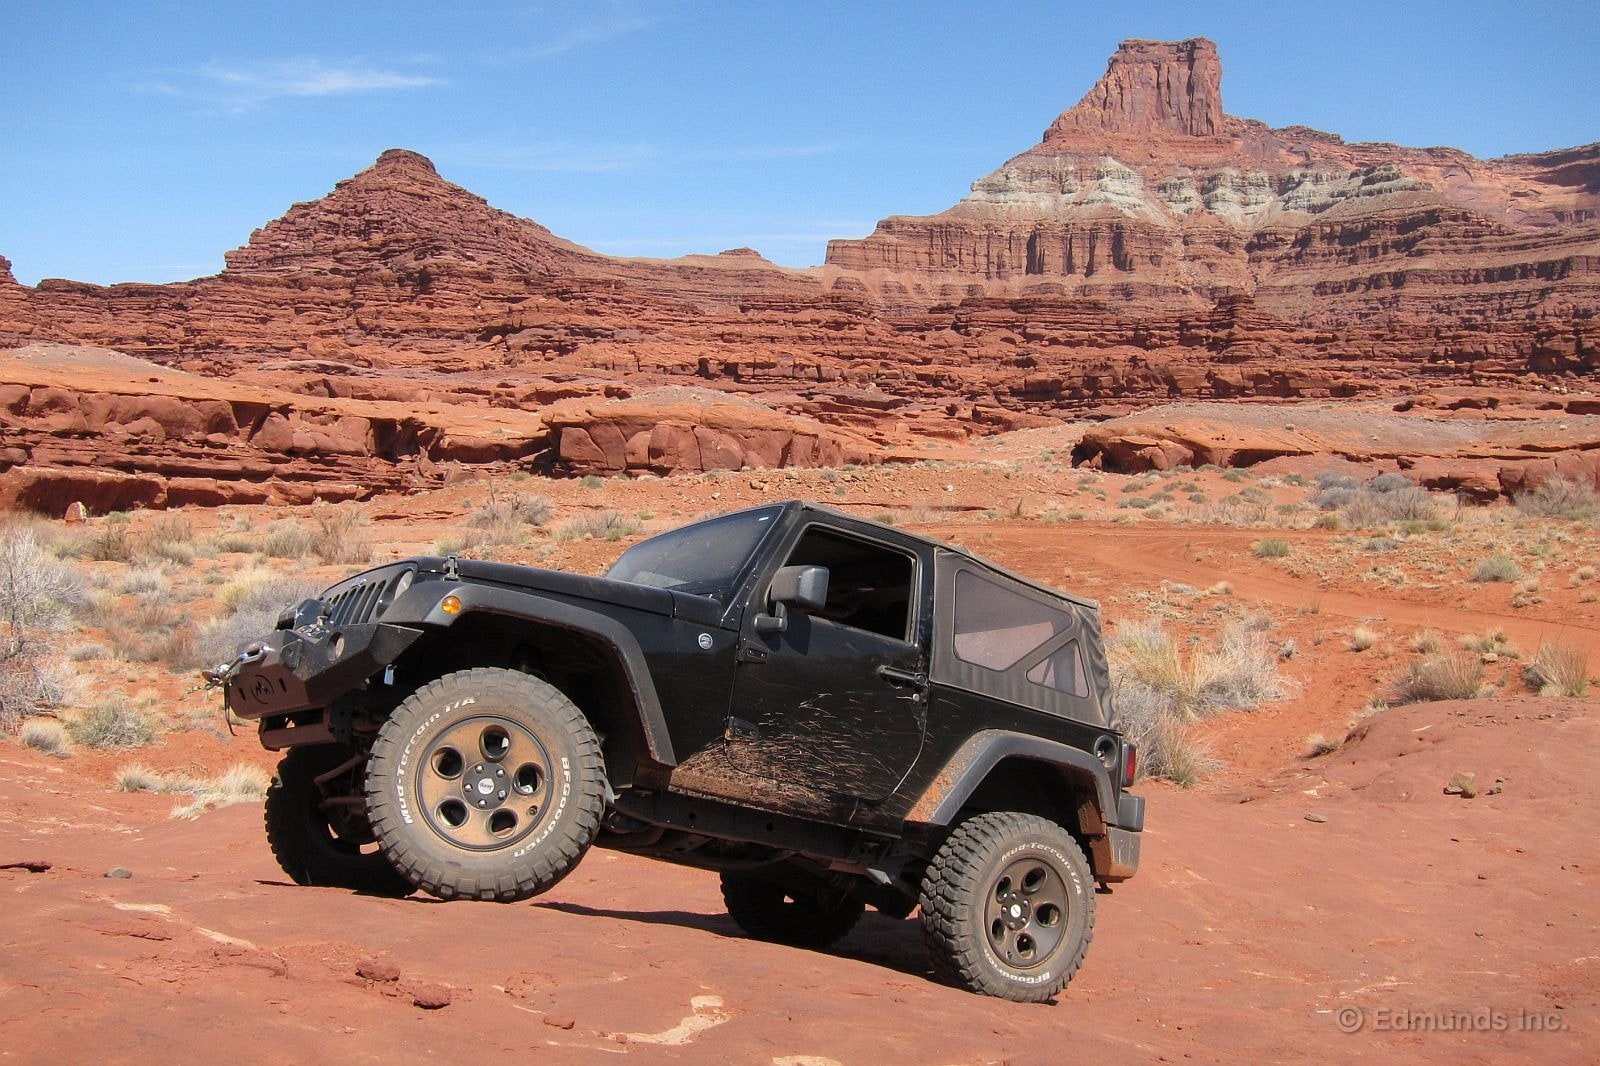
The Easter Jeep Safari in Moab is a big deal. Jeeps and Jeepers take over the town for the week, which makes it a natural place for Jeep, the corporation, to wade in and mingle with the Jeep faithful.
Once I arrived I participated in some of these Jeep-organized Jeep activities, which means I would park our 2012 Jeep Wrangler while I Jeeped in some of Jeep's Jeeps.
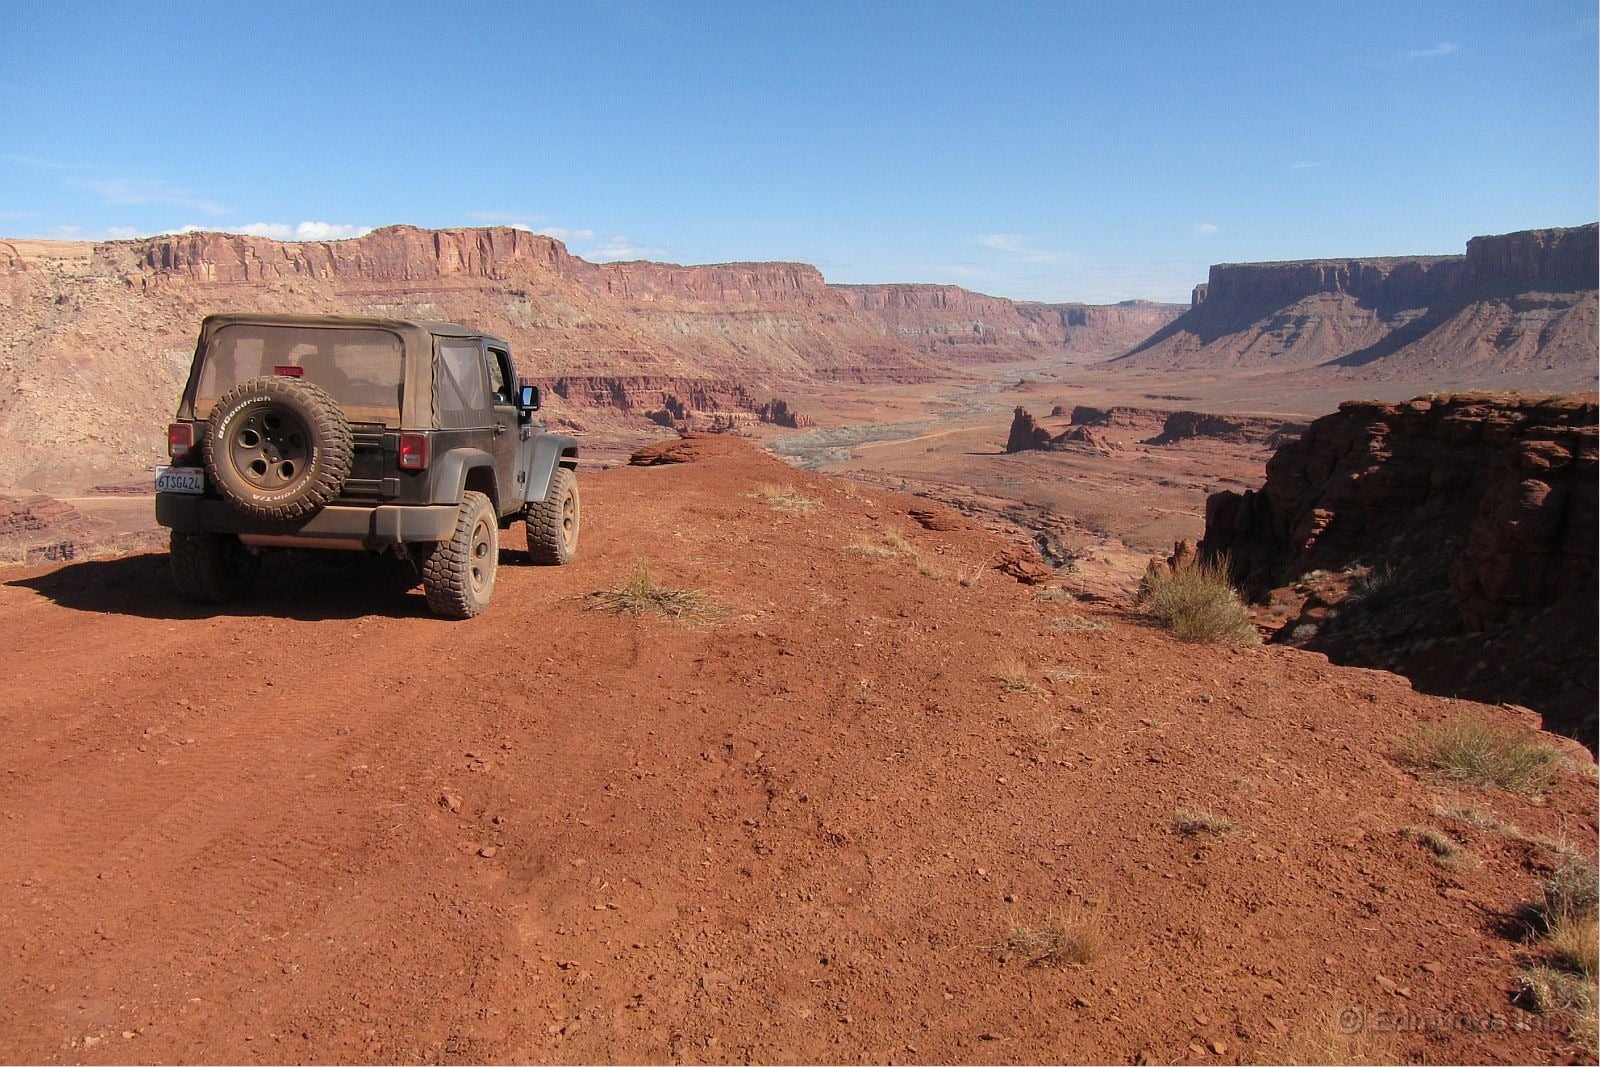
But first there was a warm-up run over Hurrah Pass to Chicken Corners. This is an easy trail, but the scenery is stunning. I wouldn't be surprised if our Honda CR-V could get here, but don't take that as a guarantee that it'll make it up here. There are rocks and ledges that require clearance along the way.

Next day we hooked up with Jeep to try some of their production equipment on Elephant Hill, a more difficult trail that is a good test of unmodified stock Jeeps.
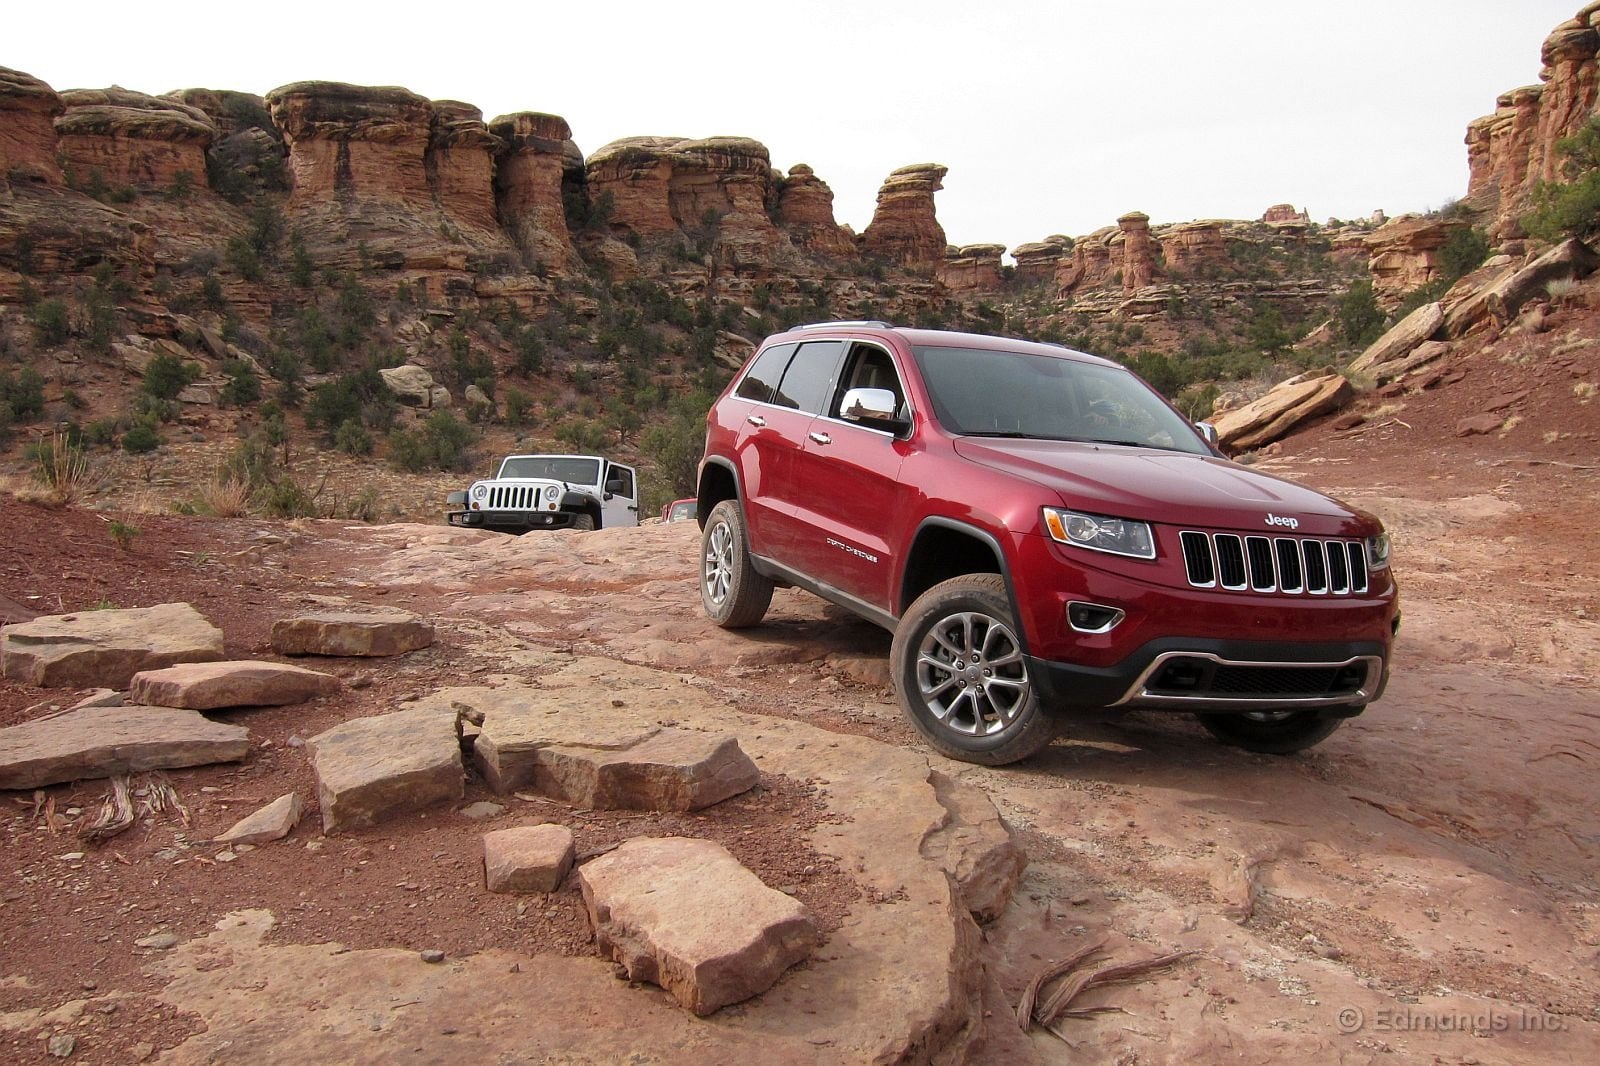
They brought a 2014 Jeep Grand Cherokee diesel with the height-adjustable air suspension option, a combination I drove in Austin, Texas a month ago. But this trail was much more serious, despite the rather calm scene depicted here.
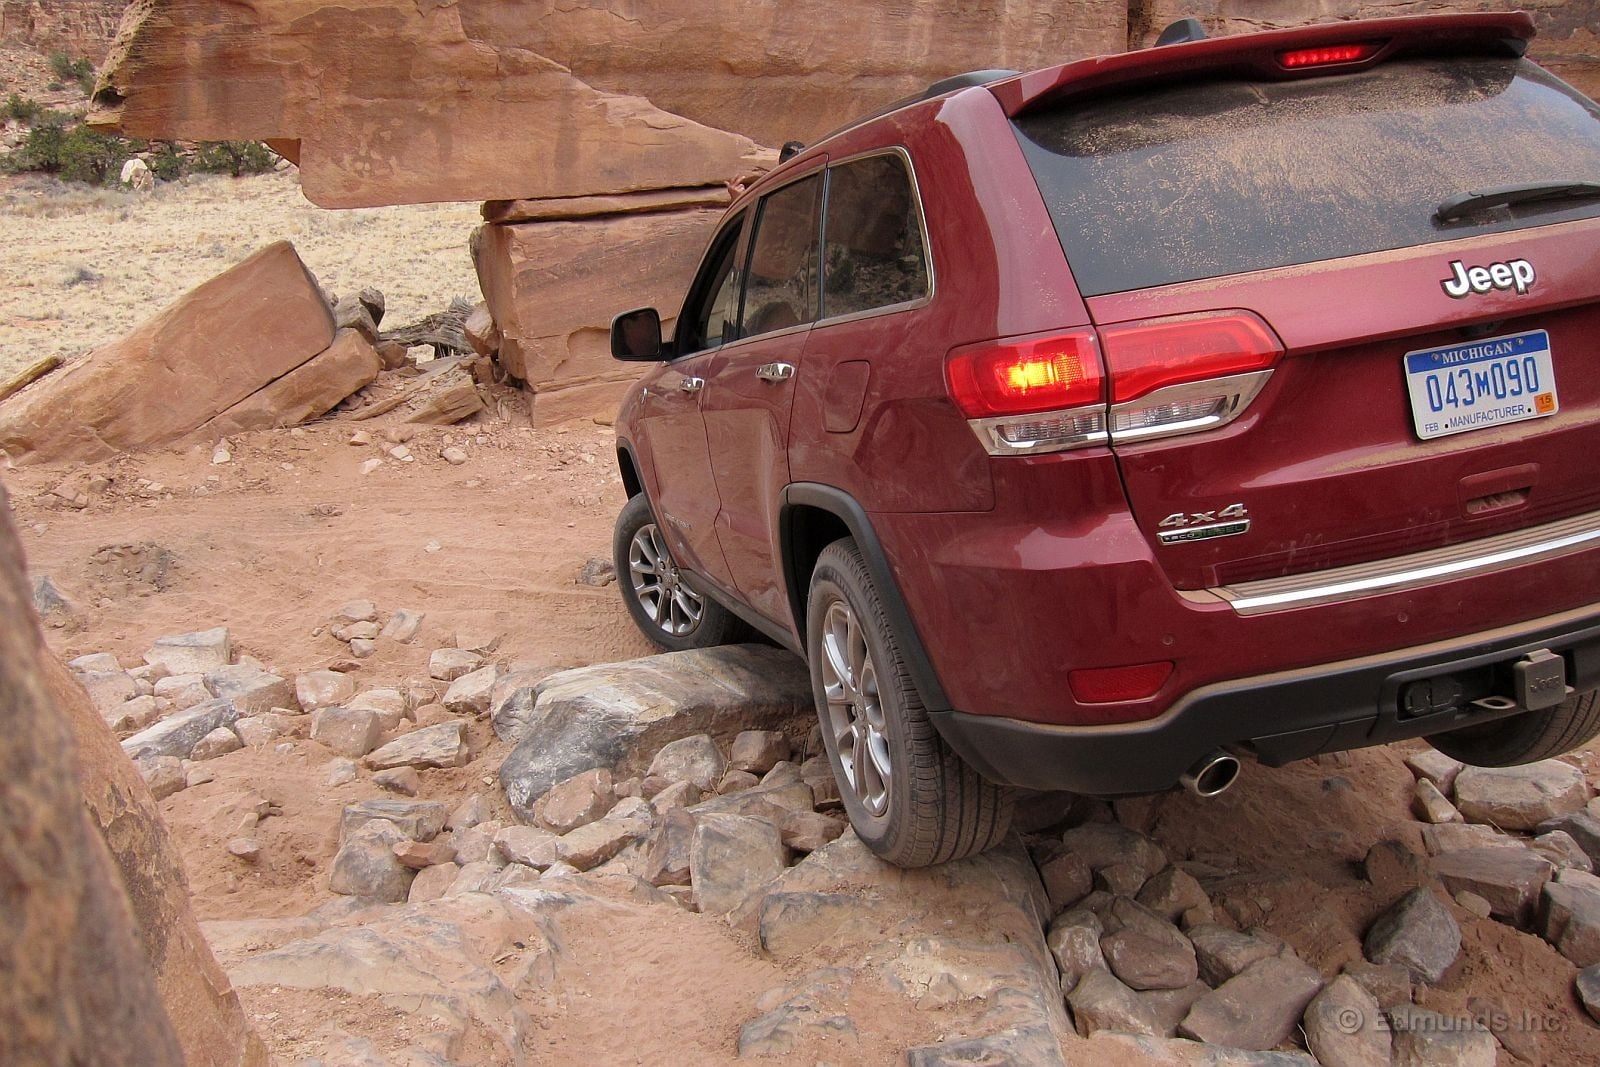
The axle articulation isn't huge, but the sophisticated 4x4 drive system makes up for it, at least on this trail. I glanced at the tachometer a few times while climbing some tough obstacles and noticed the engine was giving me everything I needed at just 1,100 or 1,200 rpm.
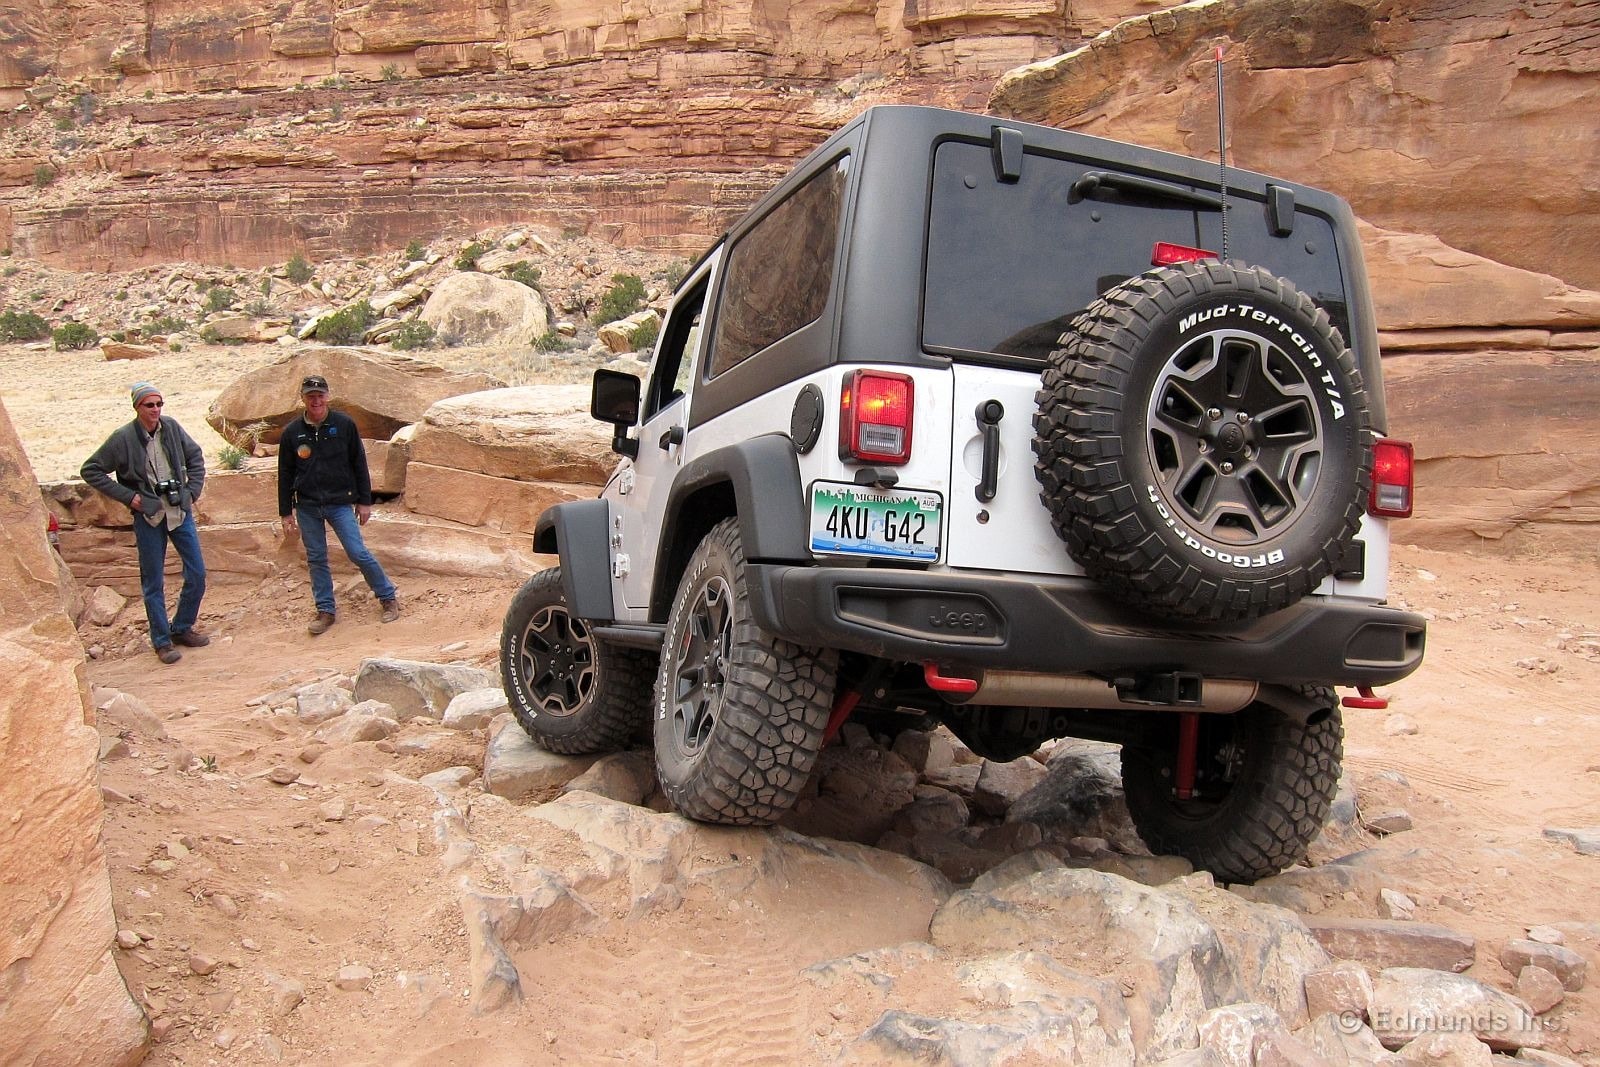
There was a 2013 10th Anniversary Jeep Wrangler Rubicon. The 10th Anniversary package combines all of the Rubicon stuff we're used to, plus hill descent control and a TMPS system that finally displays all four individual tire pressures.
There are trick new bumpers, too. The front one can hold a winch and has removable outer ends that can be unbolted to create a "shorty" bumper for extra obstacle clearance. The rear one has a fitting to accept a swing-away tire carrier.
The tires are 32-inch versions of the BFGoodrich Mud-Terrain KM2 tires on our own 2012 Wrangler project car. Two huge vents are built into the hood and the interior is dotted with 10th Anniversary touches.
Elephant Hill is far too easy for this one.
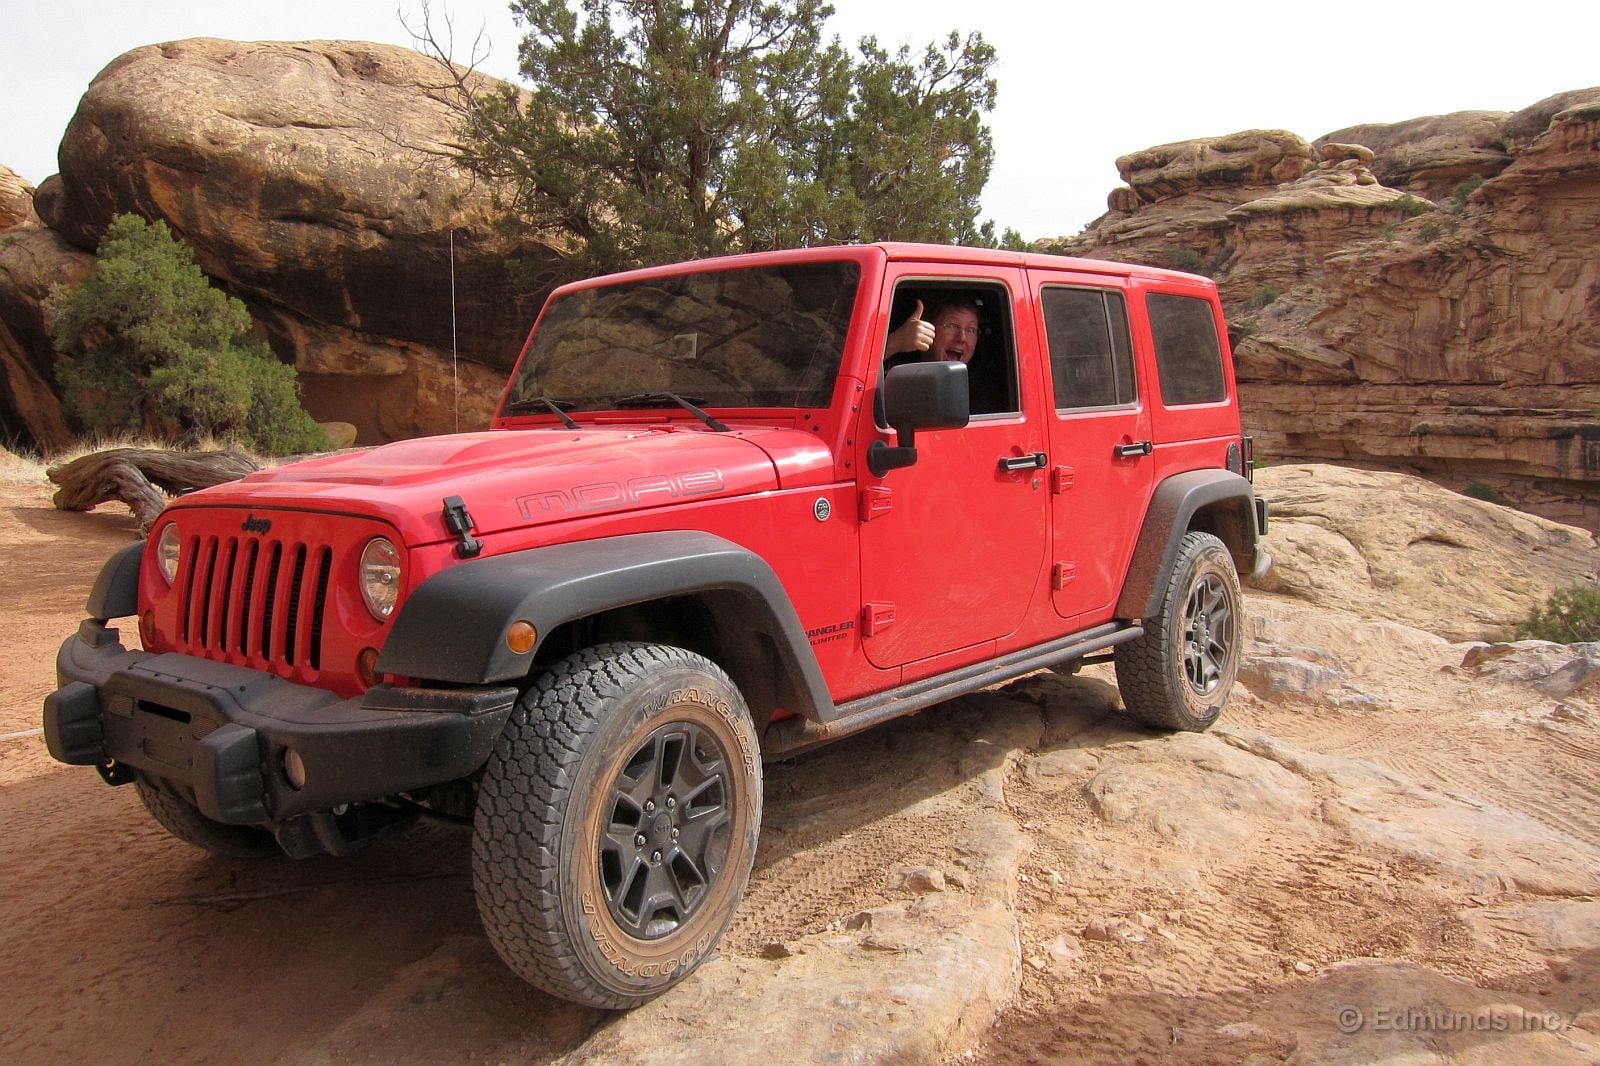
I hadn't driven the new-for-2013 Moab version yet, but we might have started with one of these if this model had existed when we began our 2012 Jeep Wrangler project.
Why? It's pretty much a Sport with a rear locker, rock rails and a winch-capable front bumper (but not the unique configurable one on the Rubicon.) It has the same axles and 2.7-to-1 transfer case that we have, and the tires fall somewhere between the 29-inch rim protectors our Jeep came with and the knobbies found on a Rubicon.
That rear locker is very nice to have. And so are the rock rails, especially on this four-door Unlimited. And it's nice to know that you don't need to buy a new bumper if you want to add a winch.
Elephant Hill is not a terrible puzzle for this one, but the locker was necessary a few times. And the long Unlimited wheelbase required a few three-point turns in places where the two-door simply made the turn. The four-door's less favorable breakover angle also puts it right on the edge of needing a lift for anything rockier than this.
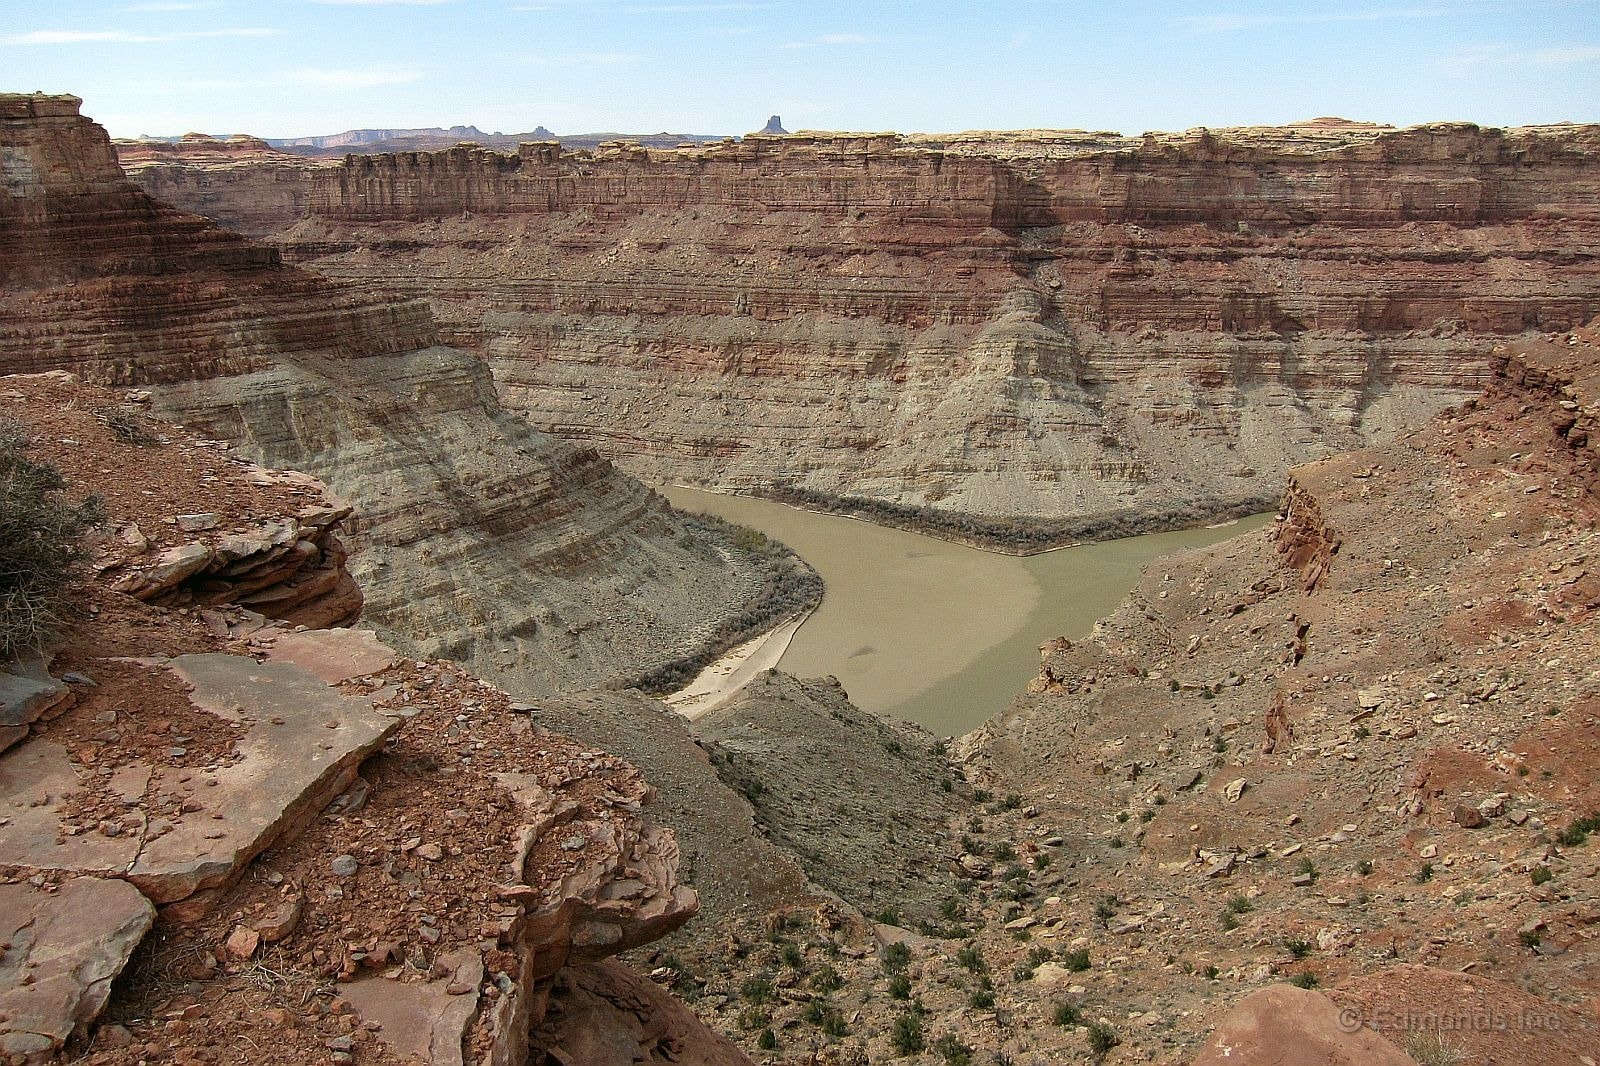
Elephant Hill is an in-and-out trail with several one-way sections because it's simply way too narrow to let others pass in many stretches. One of the viewpoints ends where a small hike leads you to the confluence of the Colorado and Green Rivers at the Center of the Park.
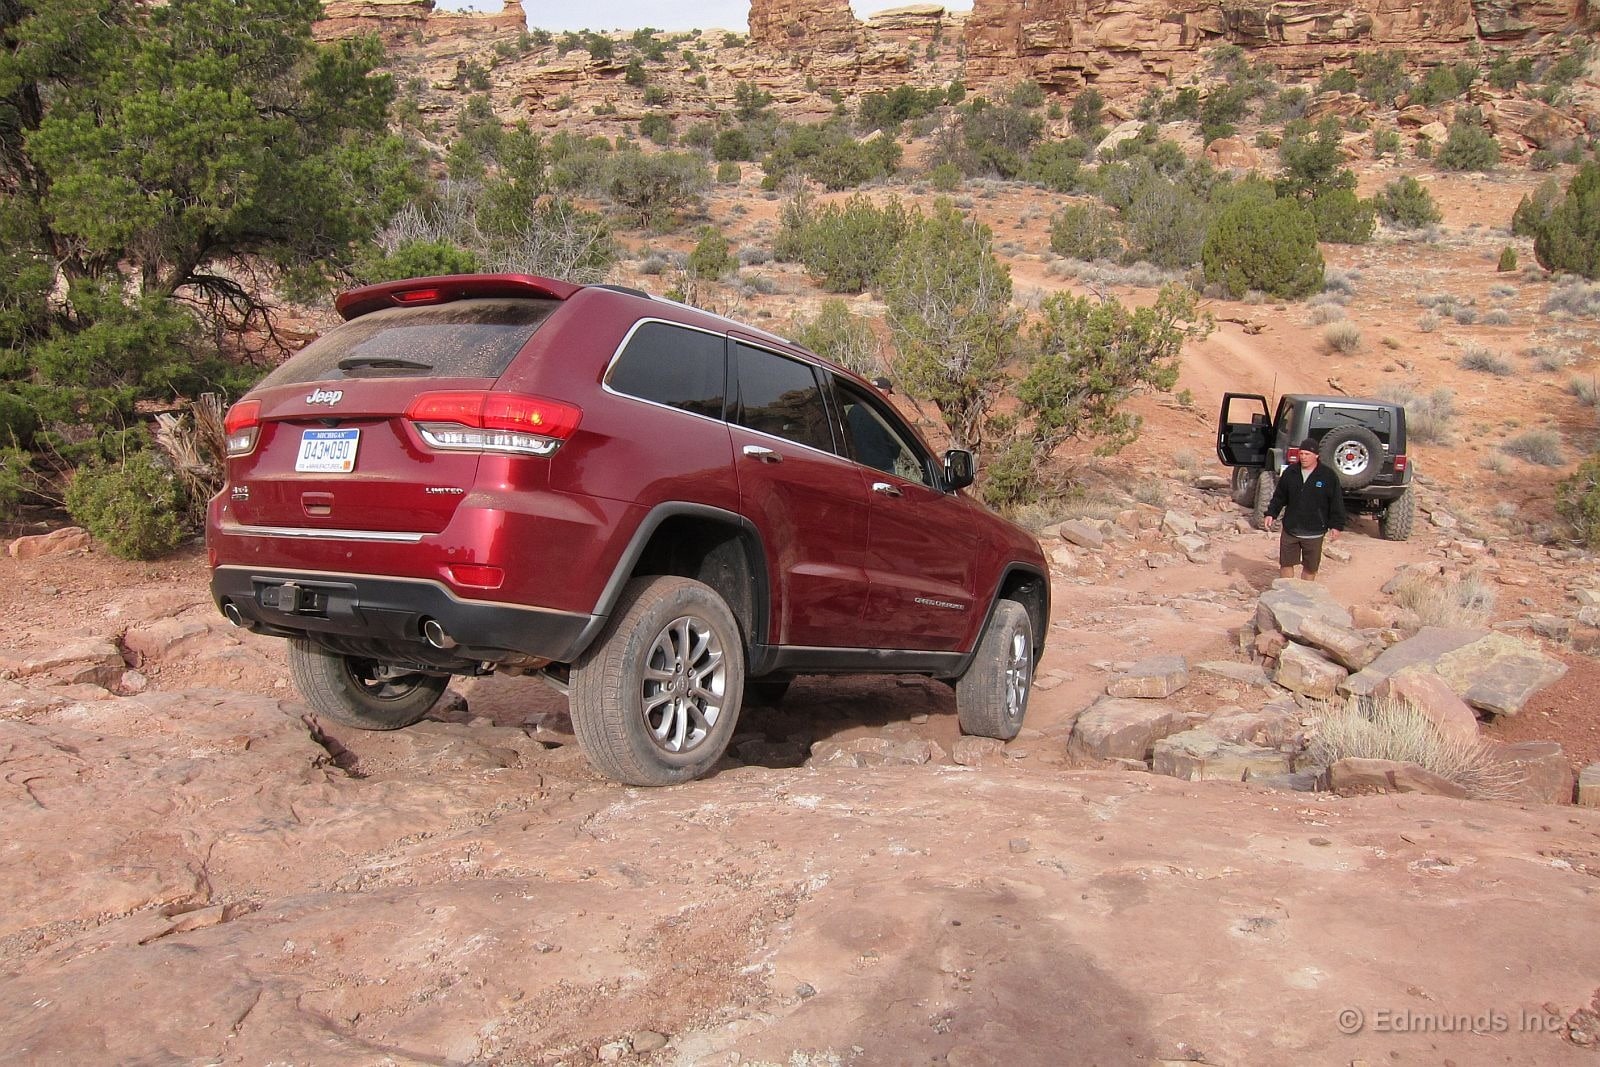
I don't have pictures of the toughest obstacles because I was too busy driving over them. For example, there's a whole switchback section that's far too tight to make any turns. You drive forward up one switchback and then reverse up the next. I have some Go-Pro video that I'll post when I get it edited and uploaded.
Elephant Hill is a beautiful trail in a stunning national park about 90 minutes drive south of downtown Moab. Go and do it sometime. You can rent a Rubicon right there in Moab if you don't own one.

Airing down the tires is the first order of business upon arrival at any rocky trailhead such as those found in and around the town of Moab, Utah.
But the average tire gauge doesn't have a dump valve. The slightly nicer dial gauge I own has one, but it's a thumb button that needs to be held down through the entire process.
In the past this made for a long, drawn-out ritual as I walked around our 2012 Jeep Wrangler and set each tire one at a time. Large off-road tires contain more air than you think, and it doesn't drain out near as fast as a compressor can shove it in. It can take minutes to let out 10 to 15 psi — times four.
I vowed this trip would be different. Before I headed to Utah I stopped at my local four-wheel parts warehouse for some Staun "Tyre Deflators," a particularly useful Australian product.
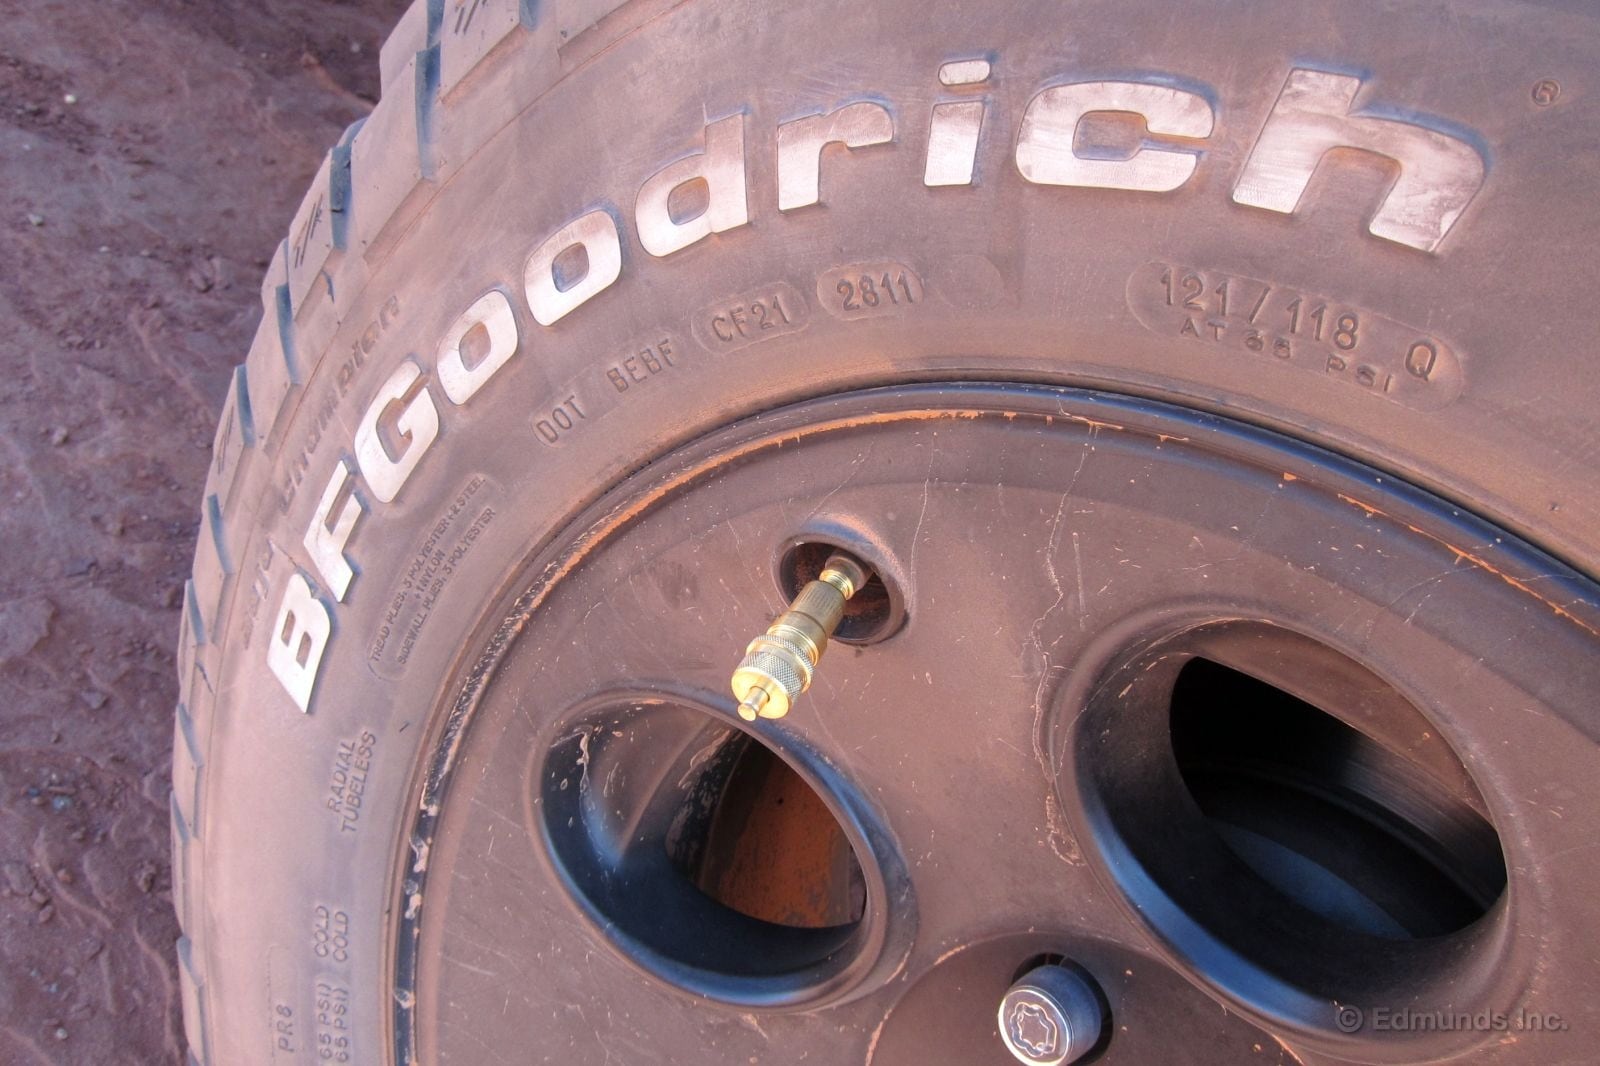
Proper tire deflators make this annoying but necessary task ridiculously easy. Simply remove a valve stem cap and screw one of these on in its place. A loud hissing will abruptly commence, which signifies it is time to move on to the next tire and do the same. In about a minute all four tires will be hissing simultaneously.
Then, one at the time, the hissing will stop as each tire drops to the preset pressure dialed into the spring loaded check valve built into the device. As each one goes quiet, simply unscrew the tire deflator and reinstall the valve stem cap.
That's it. And there's no reason to get out a tire gauge at this point because the tire deflators were previously preset to a pressure of my choosing.

I didn't take pictures of that process, but it's easy. Jeeps owners can use the spare tire because it's right there at a comfortable height, but any tire will do. This job is best done at home before you leave for the trail.
Start by deflating the chosen calibration tire to the desired off-road pressure using a standard tire gauge, preferably one with a thumb-operated dump valve, like mine.
Then you loosen the knurled jam ring (white) on one of the Staun tire deflators before screwing the device onto the tire's valve stem using the fainter knurled surface (green) near the bottom. If hissing starts, tighten the main knurled end (yellow) until it stops. If there is zero hissing, loosen this knob until it juuust starts to leak, then go back the other way until it stops again. Basically, you're looking to find the point where your desired tire pressure matches the trigger threshold in the device.
Once you zero in on it, lock down the skinny jam ring so the calibration doesn't move, then repeat the process three more times on the same tire with the other deflators. Once that's done you can stash the four of them in their little leather pouch until you need to drop your tires pressures for real at the trailhead.
You don't have to do any of this if you're satisfied with the 18-psi threshold the devices are set to at the factory. On the other hand it doesn't hurt to check. One of mine was delivered with a loose jam nut.
The punchline? They cost about $75. But even at that price I didn't hesitate. These work too well and they look like they'll last forever. I can continue to use them on any number of vehicles I may own in the future.
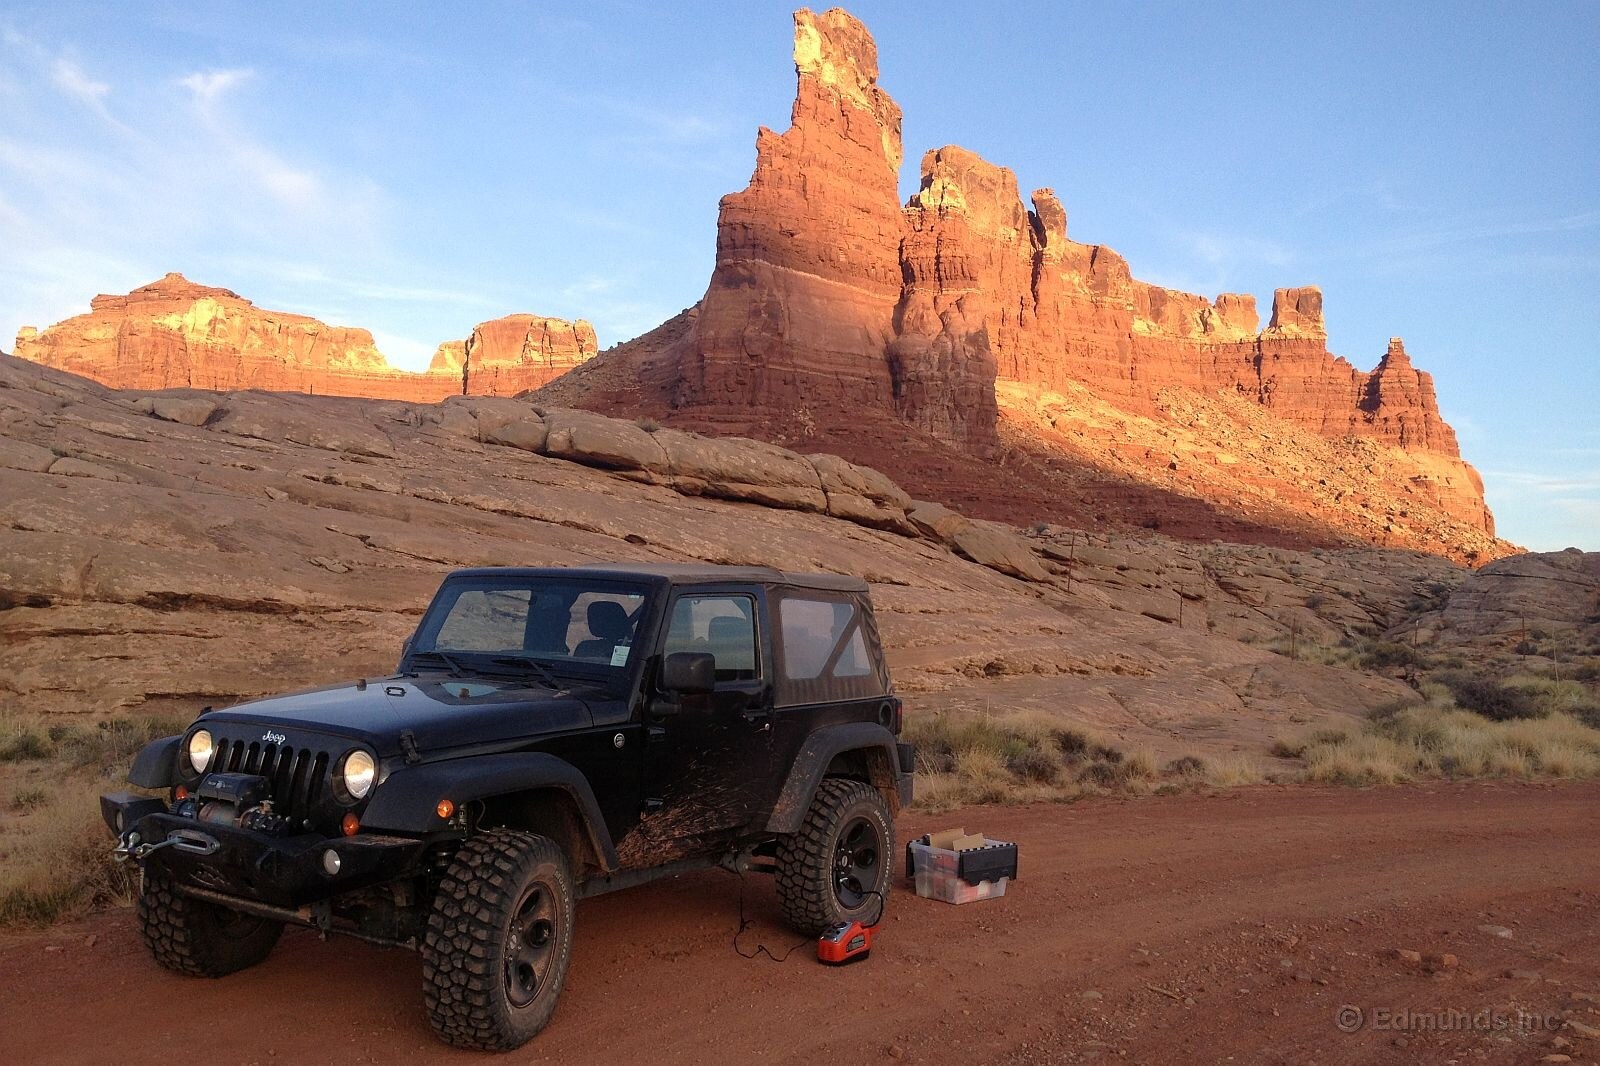
Next, I have to work on my compressor. That air has to be replaced at trail's end, and the inexpensive Black and Decker one I bought at Home Depot is simply too slow (about 7 minutes per tire) when compared to the fancy-pants off-road units I see others using. But those can range into the hundreds. I'm not sure I'm ready to invest that kind of money just yet.
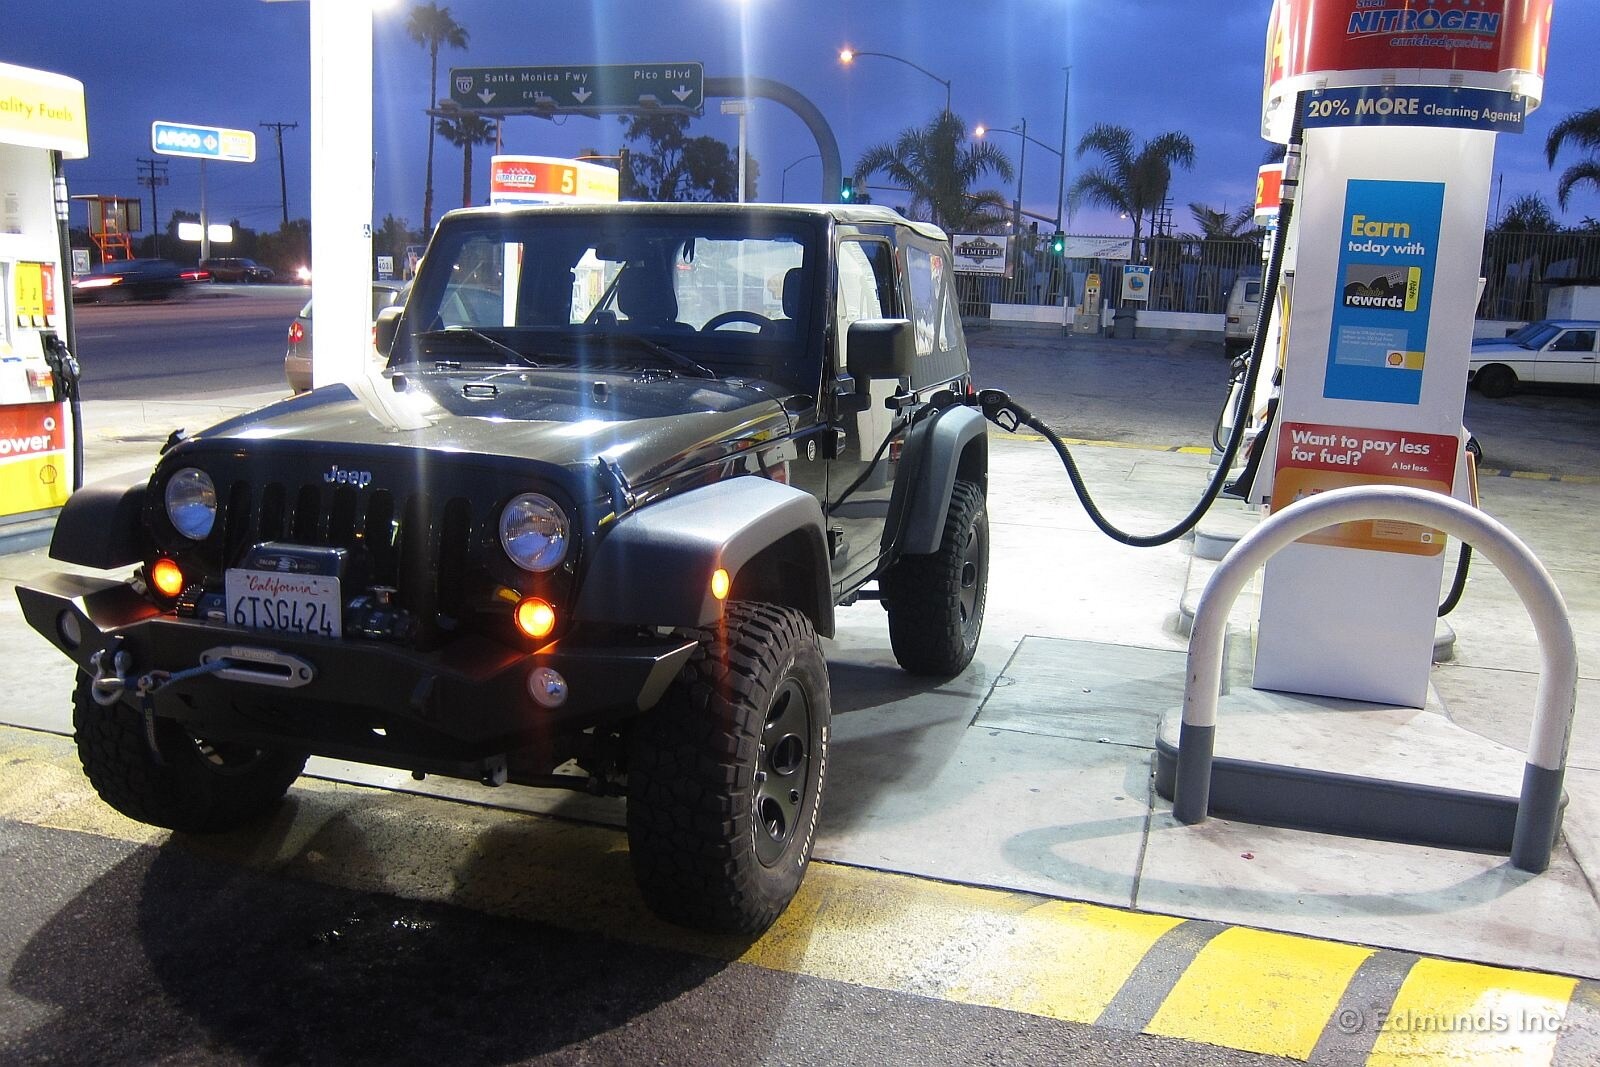
By now our 2012 Jeep Wrangler Sport's fuel economy has become fairly stable. Some 31,000 miles will do that to MPG data.
It's fuel economy hasn't quite lived up to EPA estimates, but tall, wide and sticky 285/70R17 BFGoodrich Mud Terrain T/A KM2 tires have not done on-road gearing, inertia or rolling resistance any favors for the last 25,000 miles. And then there's the 3-inch lift kit and the extra aerodynamic turbulence and increased frontal area it brings to the party.
March was dominated by two off-road trips, one to northeastern Arizona and another to Moab, Utah. Such trips are an odd combination of long stretches of highway cruising followed by short bouts of low-speed crawling in low range. These trips and a smidge of commuting in between added 3,822 miles to the Jeep's odometer at an average fuel consumption of 16.5 mpg.
I guess off road use isn't all that bad for the average if you drive hundreds of freeway miles to get there.
Average Lifetime MPG: 16.3 (17.3 before mods / 16.0 after)
EPA MPG Rating (City/Highway/Combined): 17/21/18
Best Fill MPG: 21.0 (19.0 after mods)
Worst Fill MPG: 11.4 (low-range off-roading, before and after mods)
Best Range: 315 miles (305 after mods)
Current Odometer: 31,415 miles
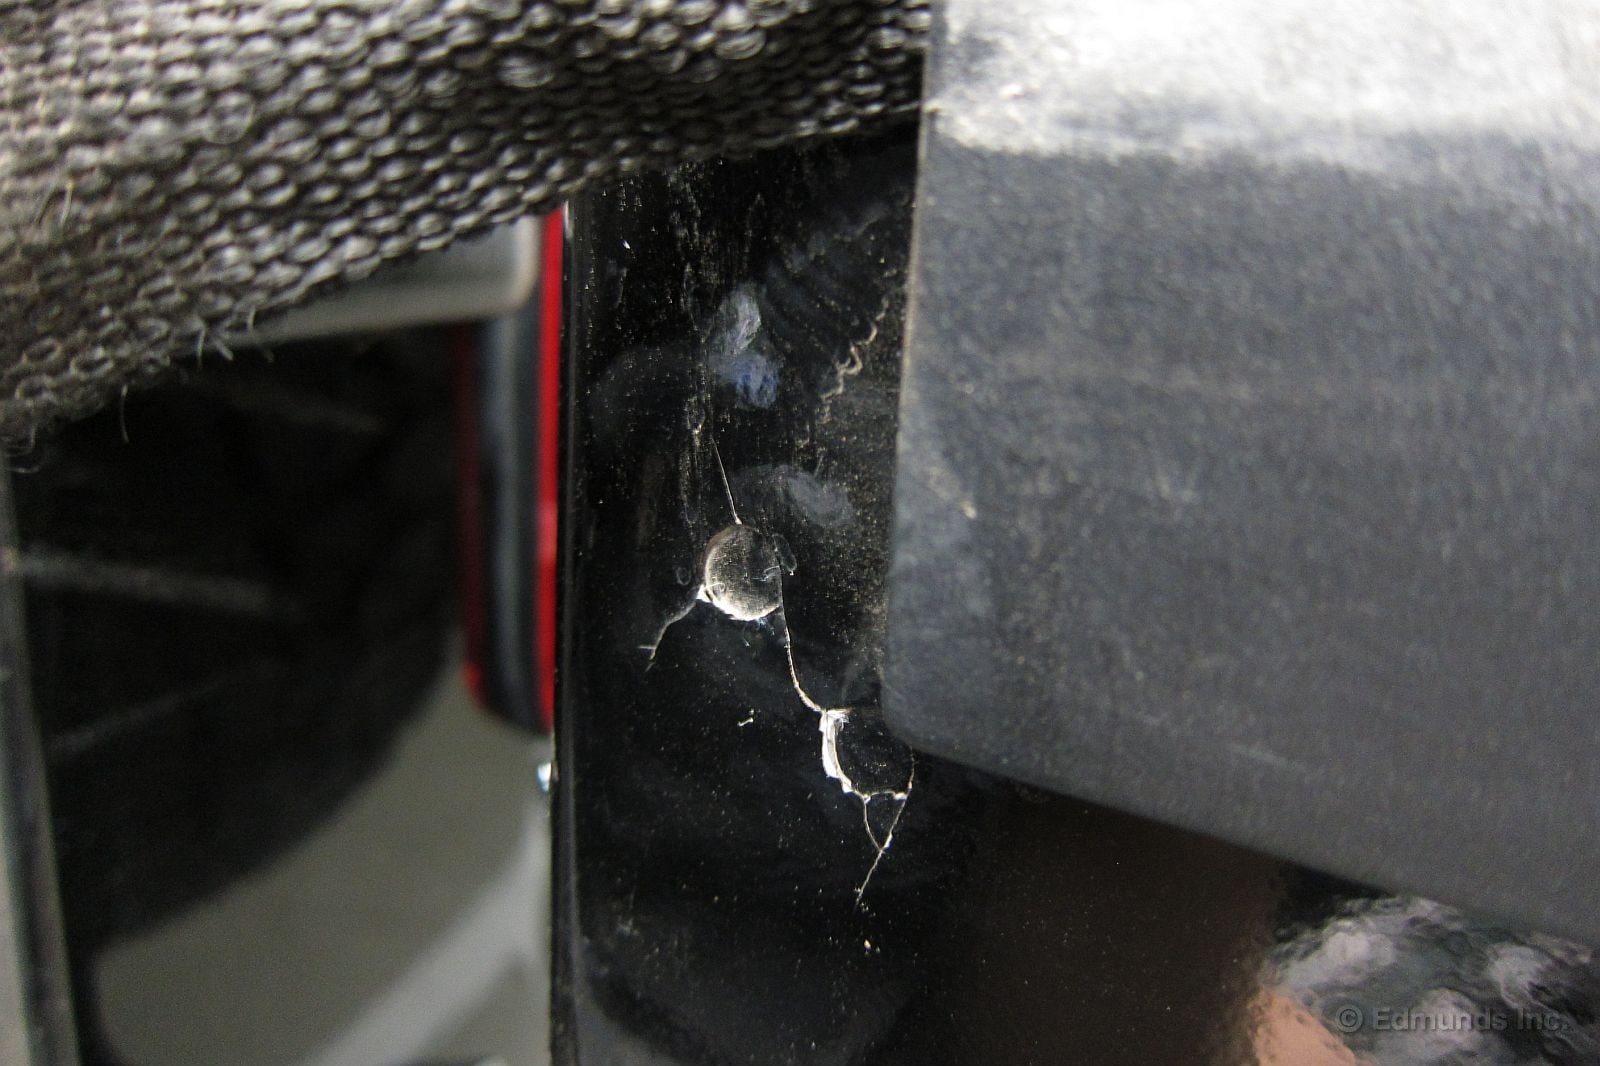
Last week I was startled by a loud and annoying pop and squeak coming from the cargo area of our 2012 Jeep Wrangler on my way to work. The sounds were largely confined to rough sections of L.A. freeway and the occasional drainage dip near my neighborhood.
I'm pretty sure I've heard a much quieter version of this sound once or twice before, but it didn't scream "problem" like it did this time.
It didn't take long to find the culprit once I decided to have a look. The hinge area of the tailgate has starburst cracks radiating out from a pair of exposed spot welds on the interior side.
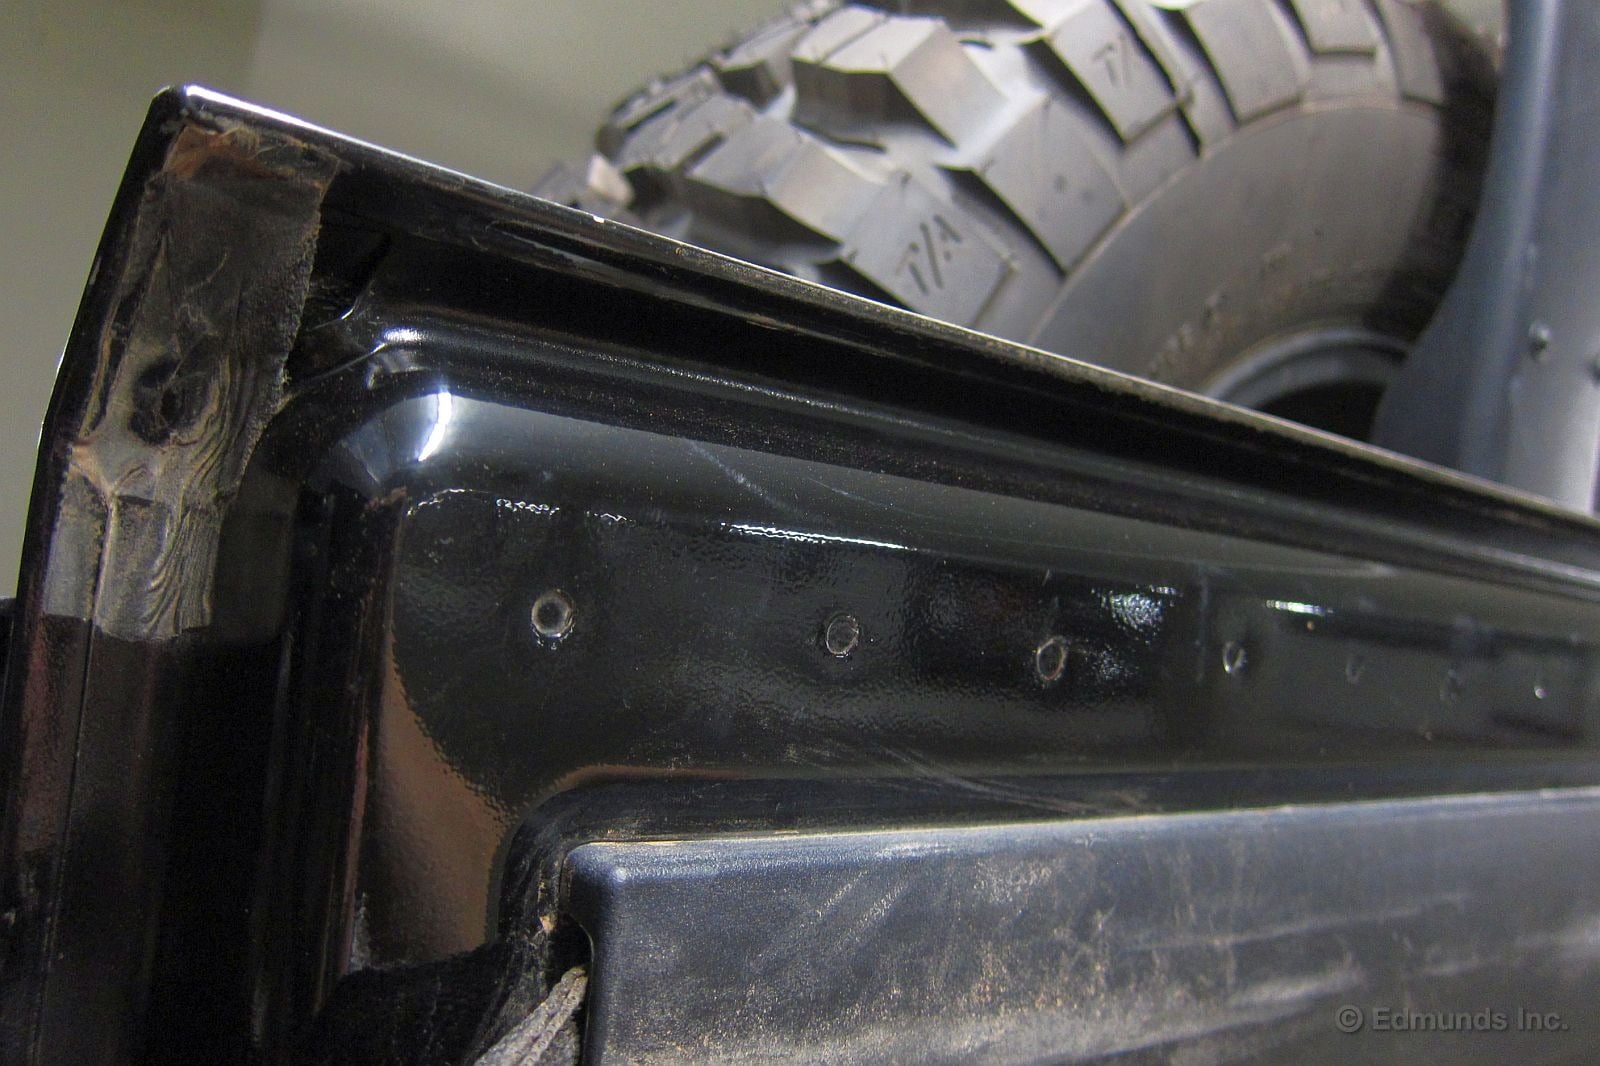
Further inspection revealed four more broken spot welds nearby. These circular cracks look more like punched holes than starbursts, but the two pieces of metal they're supposed to join are now detached, just the same.
So we took the Jeep to a dealer for an assessment (and an oil change.) It's back in our hands, but we're still awaiting word on whether or not this is a warranty issue.
To me it seems like it should be. Yes, there's a lift kit and harder suspension under our Jeep, but it's a Mopar-blessed one. And the larger wheels (which are made for larger tires) are also Mopar pieces.
Also, the elevated position of the third brake light more than clears the top of our 32-inch BFGoodrich Mud Terrain T/A KM2 tires, which says to me they're not taller (and by extension, heavier) than the designers expected.
We'll let you know how it all turns out. But one thing is clear: it's only going to get worse.
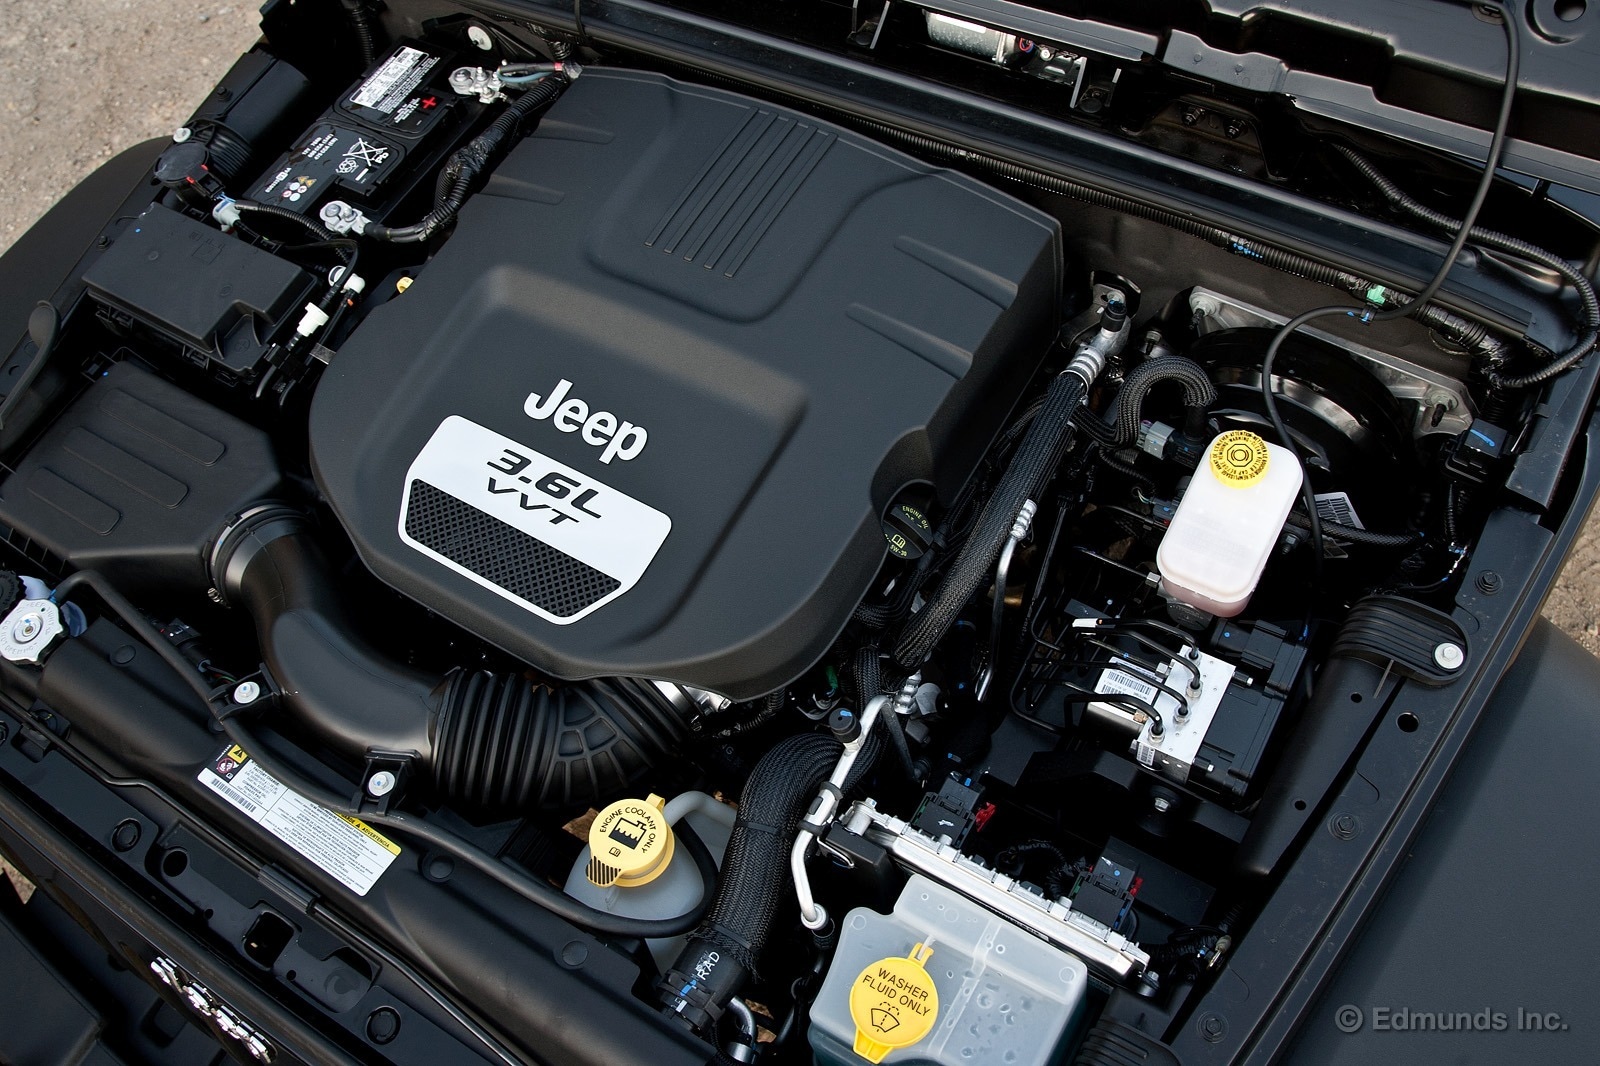
We are another 8,000 miles into our test of the 2012 Jeep Wrangler. That means it is time for routine maintenance. A visit to our local dealer, Buerge Jeep, was easier than swapping out the oil ourselves this time, so we went there.
This was a simple oil change, oil filter replacement and tire rotation. After about an hour it was done, 59 bucks. We can live with that.
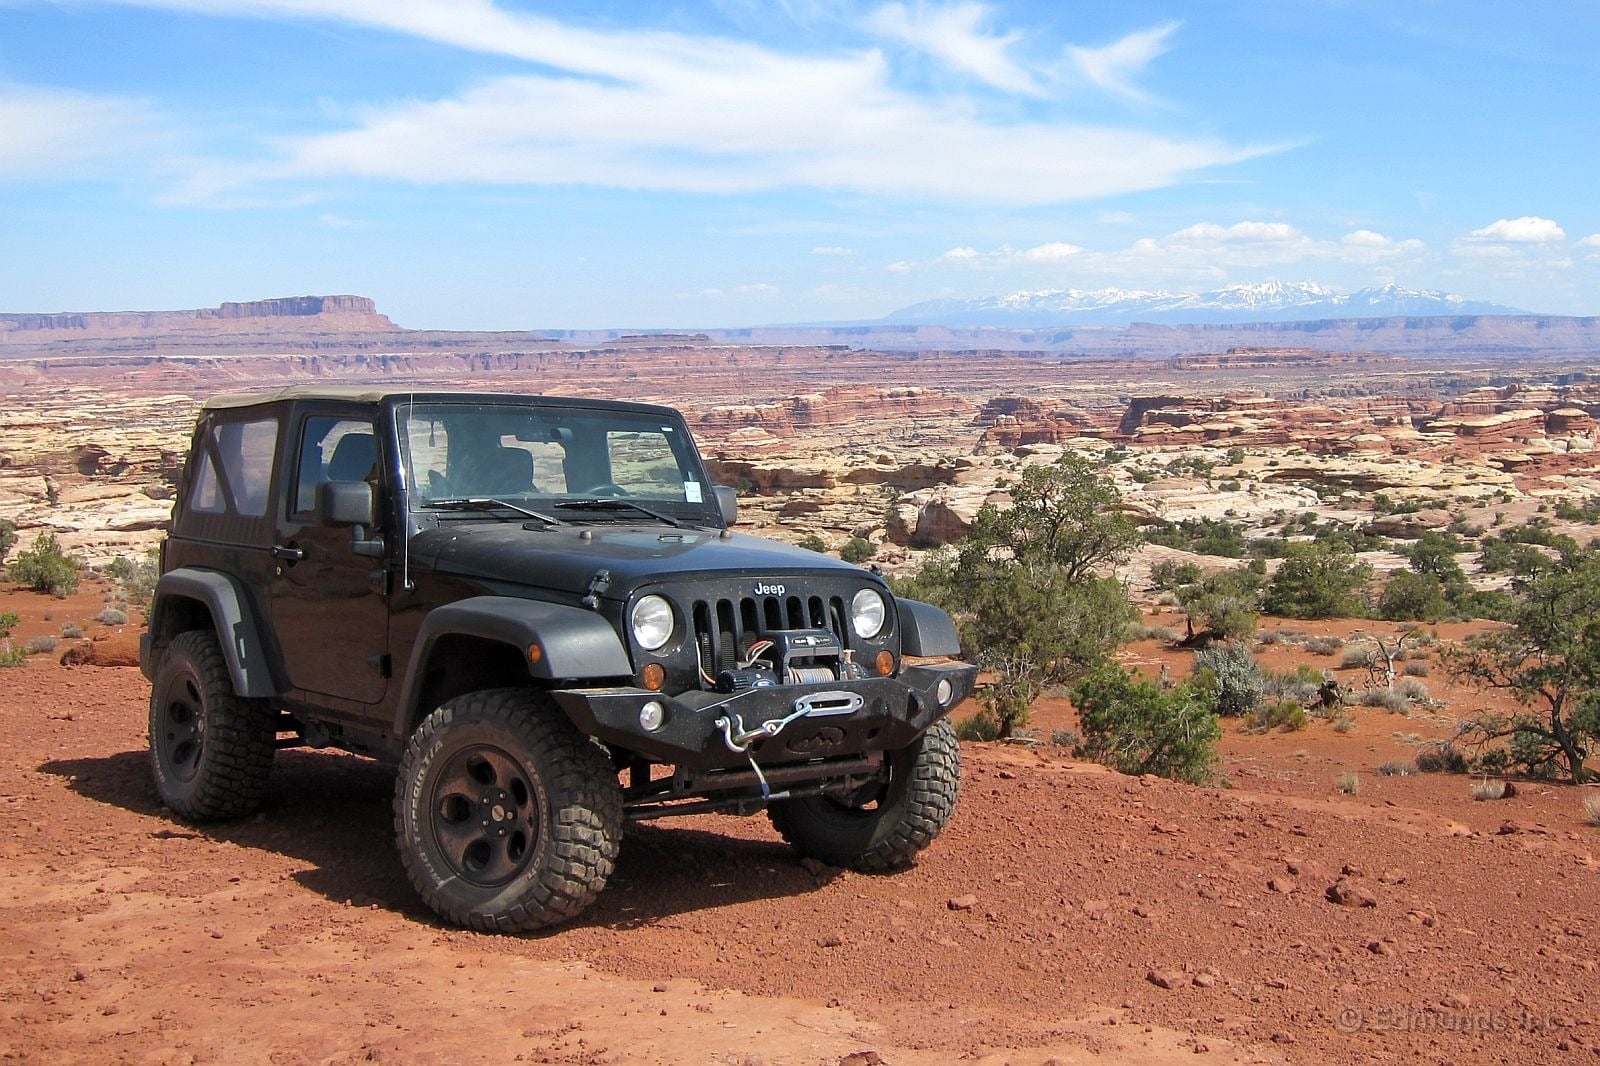
Our long-term 2012 Jeep Wrangler has a new owner, one who frequent readers of this blog may recognize: Dan Edmunds, Director of Vehicle Testing.
The Wrangler was Dan's pet project, and he selected and installed many of the upgrades himself. He built a bond with the Jeep over the course of many off-road adventures. And when it came time for us to sell it, he wanted to keep the good times rolling.
Edmunds.com employees get the first chance to buy our long-term cars, and if there are no takers, we offer the vehicles to outside private-party buyers or to Carmax. To avoid any perception that we're playing favorites with employees, we offer cars to them at a "no-haggle" Edmunds private-party TMV price.
A few other employees said they were interested, but they changed their minds. Dan was the first to submit his paperwork and in the end, the car went to him.
The selling price was $17,397. We went with the "average" condition level because of the Jeep's high mileage, a fair number of scratches on the paint and plastic windows and a tailgate crack that was not covered under warranty.
We kept this Jeep eight months longer than usual and drove it well past the 20,000 mile goal we had set.
We paid $22,578 for the Jeep (plus tax and title), way back in 2011. It depreciated about 23 percent. For reference, average car depreciation is about 22 percent. So the Jeep didn't do too badly, given that we had decreased the condition level.
If you're curious, our Jeep would have had a private-party TMV of $19,447 if we had rated it in "clean" condition. And had it been "clean, " the depreciation would have been only 14 percent. Impressive.
Did we leave money on the table by taking it off-roading one too many times? That's not how we see it. If we had kept the Jeep in "clean" condition, we wouldn't have had as much fun with it.
Enjoy your new car, Dan. We know it will be in good hands.
Final Odometer: 32,249 Miles
After an extended long-term test it was finally time to say good-bye to our 2012 Jeep Wrangler. May was its last month on the books. April saw its last hurrah as far as mileage accumulation was concerned. Most of the past month was spent parked with a "for sale" sign in the window. All lifetime fuel economy vitals are noted below.
Worst Fill MPG: 11.4 (low-range off-roading, before and after mods)
Best Fill MPG: 21.0 (19.0 after mods)
Average Lifetime MPG: 16.3 (17.3 before mods / 16.0 after)
EPA MPG Rating (City/Highway/Combined): 17/21/18
Best Range: 315 miles (305 after mods)
Current Odometer: 32,249
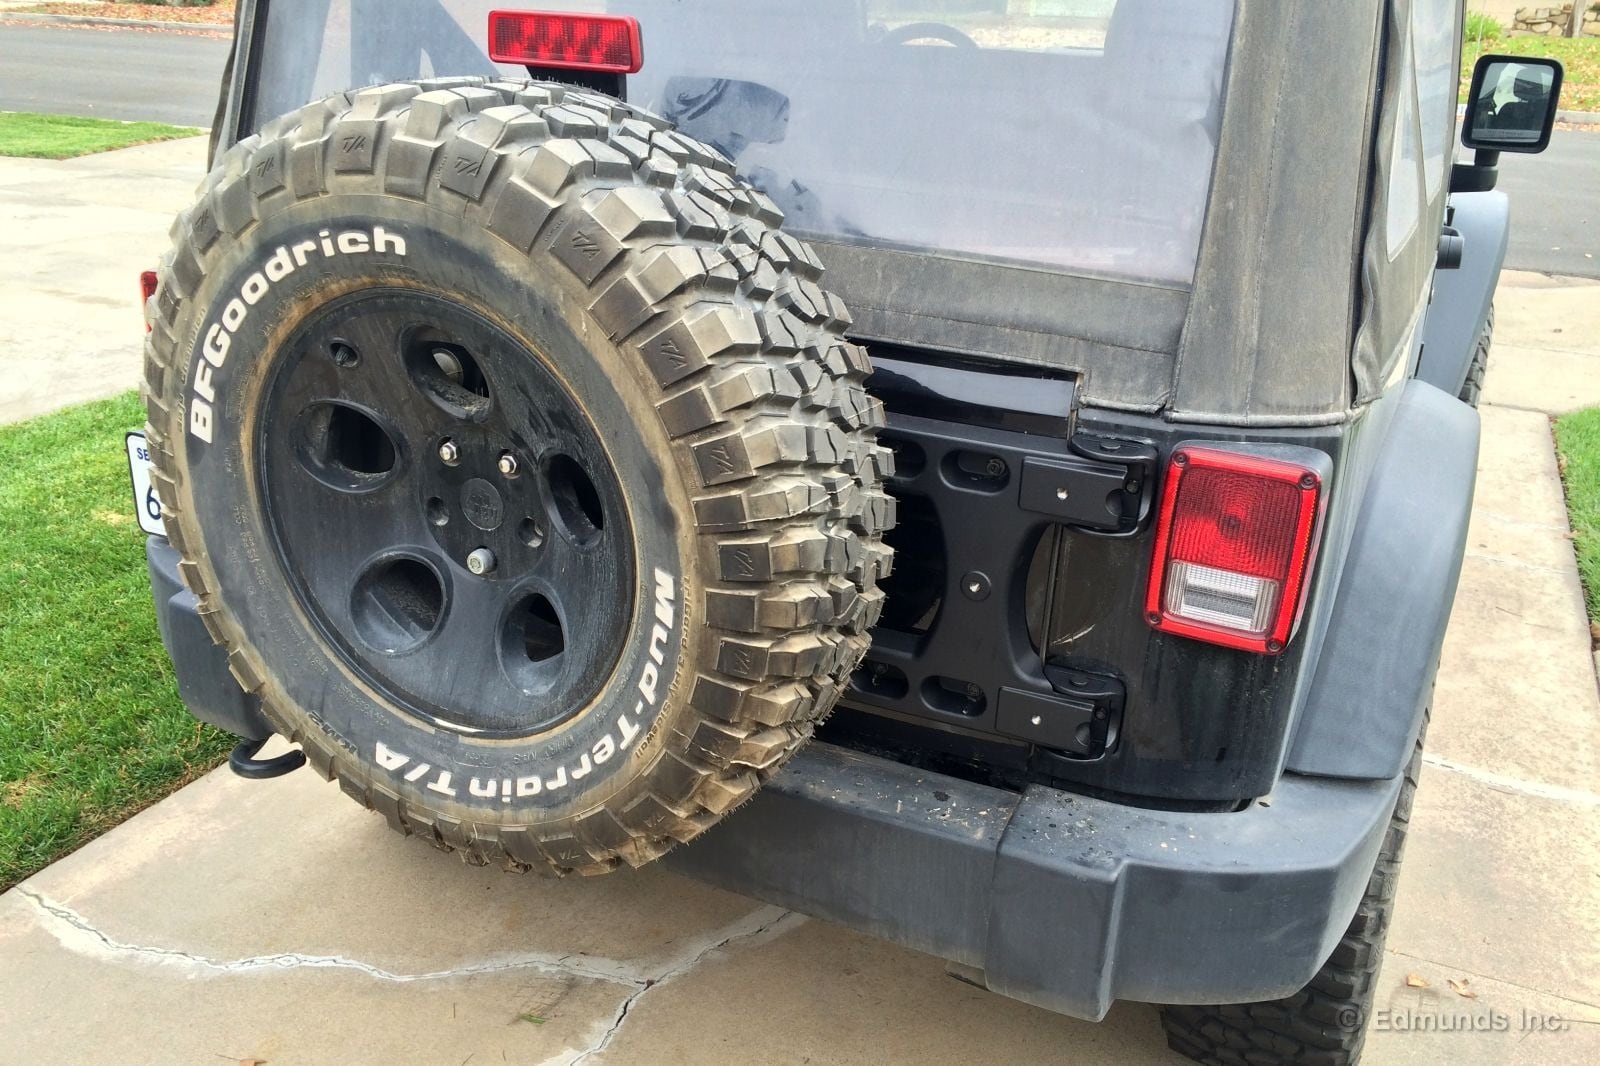
Yes, it still exists. What used to be the official Edmunds 2012 Jeep Wrangler Sport long-term test vehicle has been my personal vehicle since I seized the opportunity to buy it after the test ended. Functionally it's the same JK Jeep Wrangler that's sold today as the 2015 Jeep Wrangler. We don't expect to see a full redesign for a couple of more years, so most of what we learned (and I continue to learn) still applies.
Just before it left the fleet it developed a couple of cracked spot welds on the tailgate that creaked and popped on rough roads. The culprit was the oversized spare tire, made up of a 285/70R17 BFGoodrich Mud-Terrain KM2 tire and AEV/Mopar aluminum wheel. The largest factory wheel and tire weighs about 20 pounds less than this combination, and the JK's factory tailgate-mounted spare tire carrier has an upper limit that we had crossed.
And that's why Teraflex devised their Heavy Duty Hinged Carrier. It's designed to carry the load of massive oversized spare tires up to 37" in diameter with the optional Spare Tire Mounting Kit. The nice part about the TeraFlex approach is you don't have to buy a new rear bumper, which is a big cost savings. A new bumper costs upwards of $1,000 before you add any swing-away tire carrier option. It can run into big bucks.
So I bought one, brought it home and installed it the very next weekend.
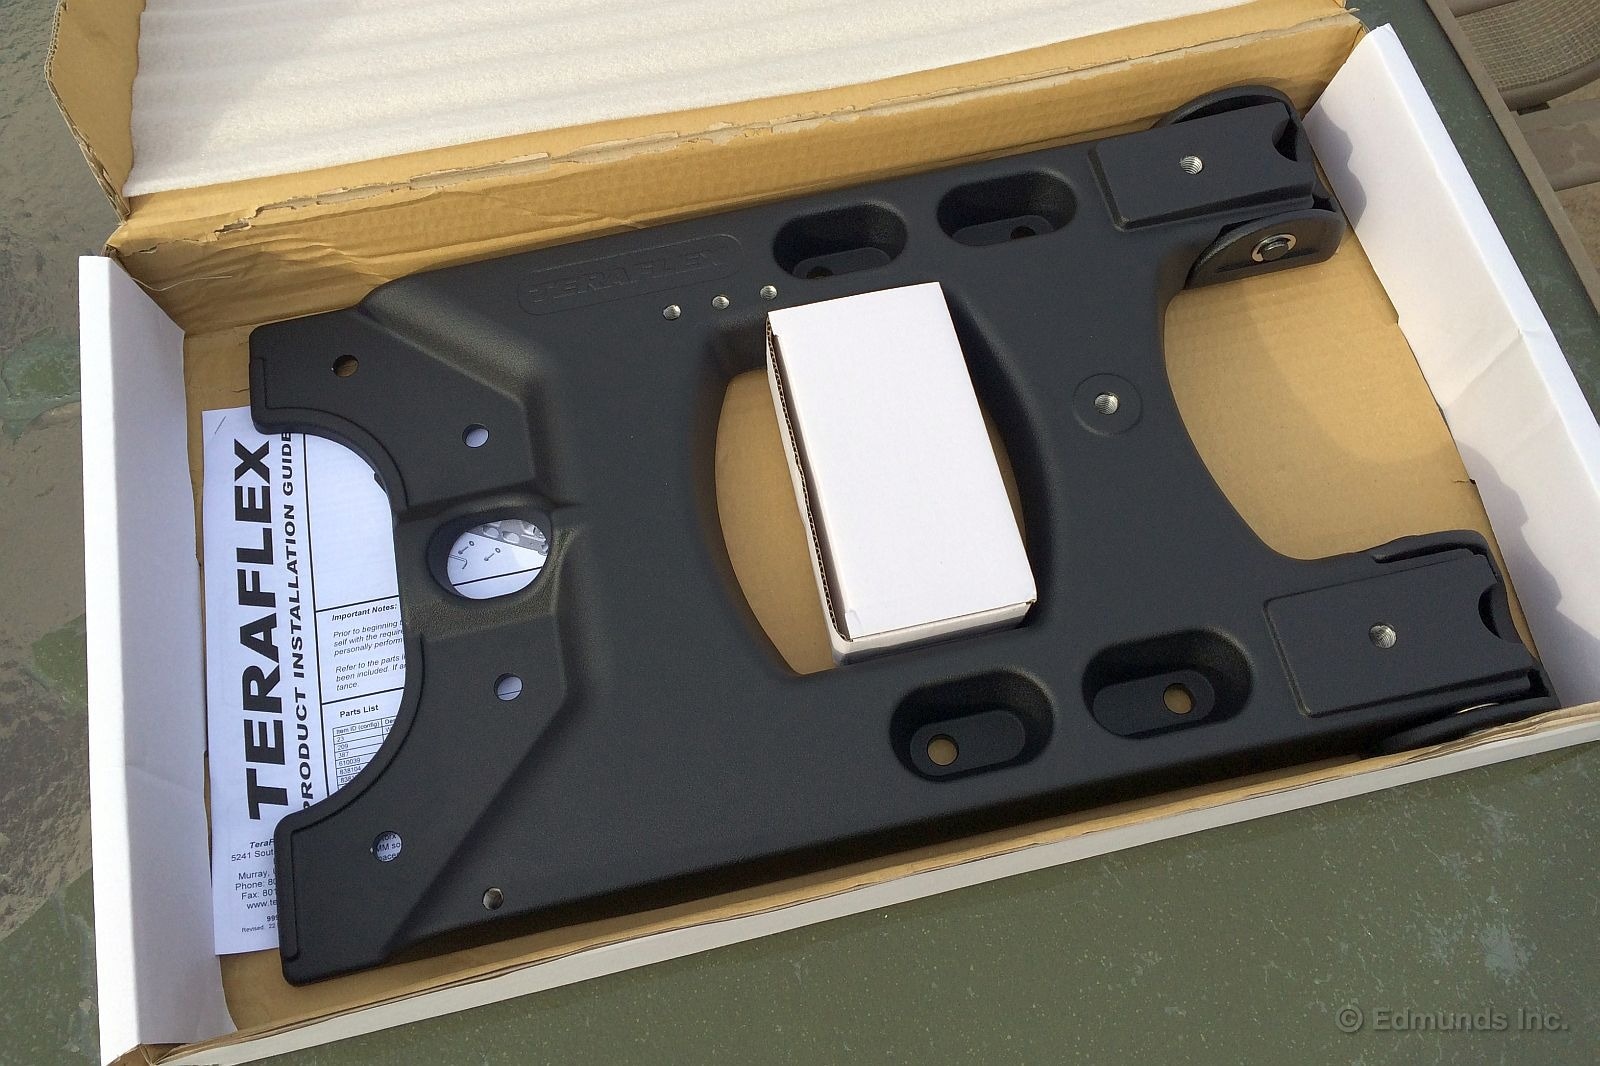
The Jeep's standard design is comprised of a side-opening tailgate with simple hinges. The spare tire carrier mounts to the center of the tailgate and the load of the tire is carried through the tailgate structure. Add a big tire and bounce everything around off road and the tailgate gets more than it bargained for.
The TeraFlex HD Hinged Carrier is essentially a huge cast aluminum hinge that supports the spare tire carrier directly. The tailgate itself just happens to mount to the back of it and go along for the ride. In this way the Jeep's tailgate shoulders almost none of the spare tire burden. It's certainly under far less stress than it was in its original factory configuration.
Best part is the tire and the tailgate still open and lock closed as one unit. There's no need to buy an aftermarket rear bumper unless you want one for other reasons.
How much do they get for one of these? My 33-inch BFG tires are not large enough to need the optional Spare Tire Mounting Kit, so I was able to buy the $499 version and re-use the factory tire carrier and third brake light. I only paid $419 because I found an outfit selling it online at a discount. And my out-of-pocket was about half that because I used some forgotten Amazon gift cards that I found languishing in my nightstand drawer.
Those who want or need the Spare Tire Mounting Kit upgrade for tires larger than 33 inches will pay an MSRP of $729. That's still cheap compared to the new-bumper route.
TeraFlex says it takes one hour to install and the difficulty level is listed as "easy." I agree on both counts. It took me about an hour and ten minutes, but I stopped frequently to take the following pictures. It would have been 45 minutes if I had plowed straight through.
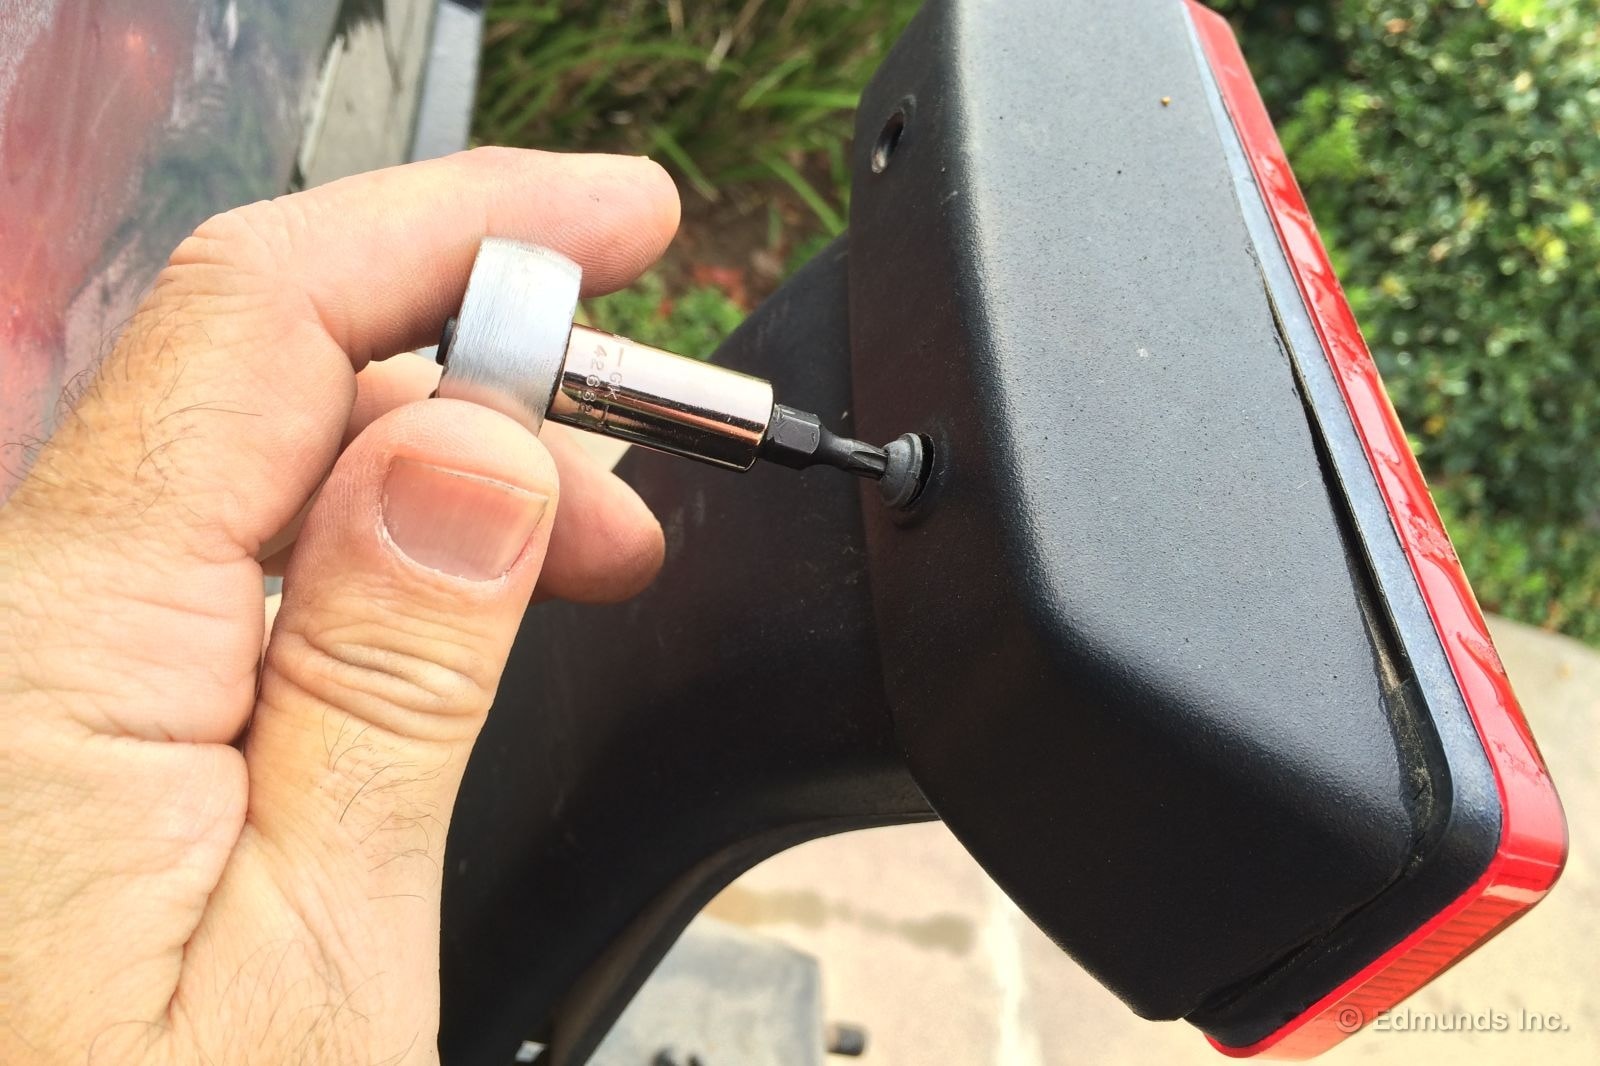
After first removing the spare, the third brake light needs to come off. Four Torx T25 screws are all that stand in the way. And you have to unplug and unclip the power harness and let it hang.
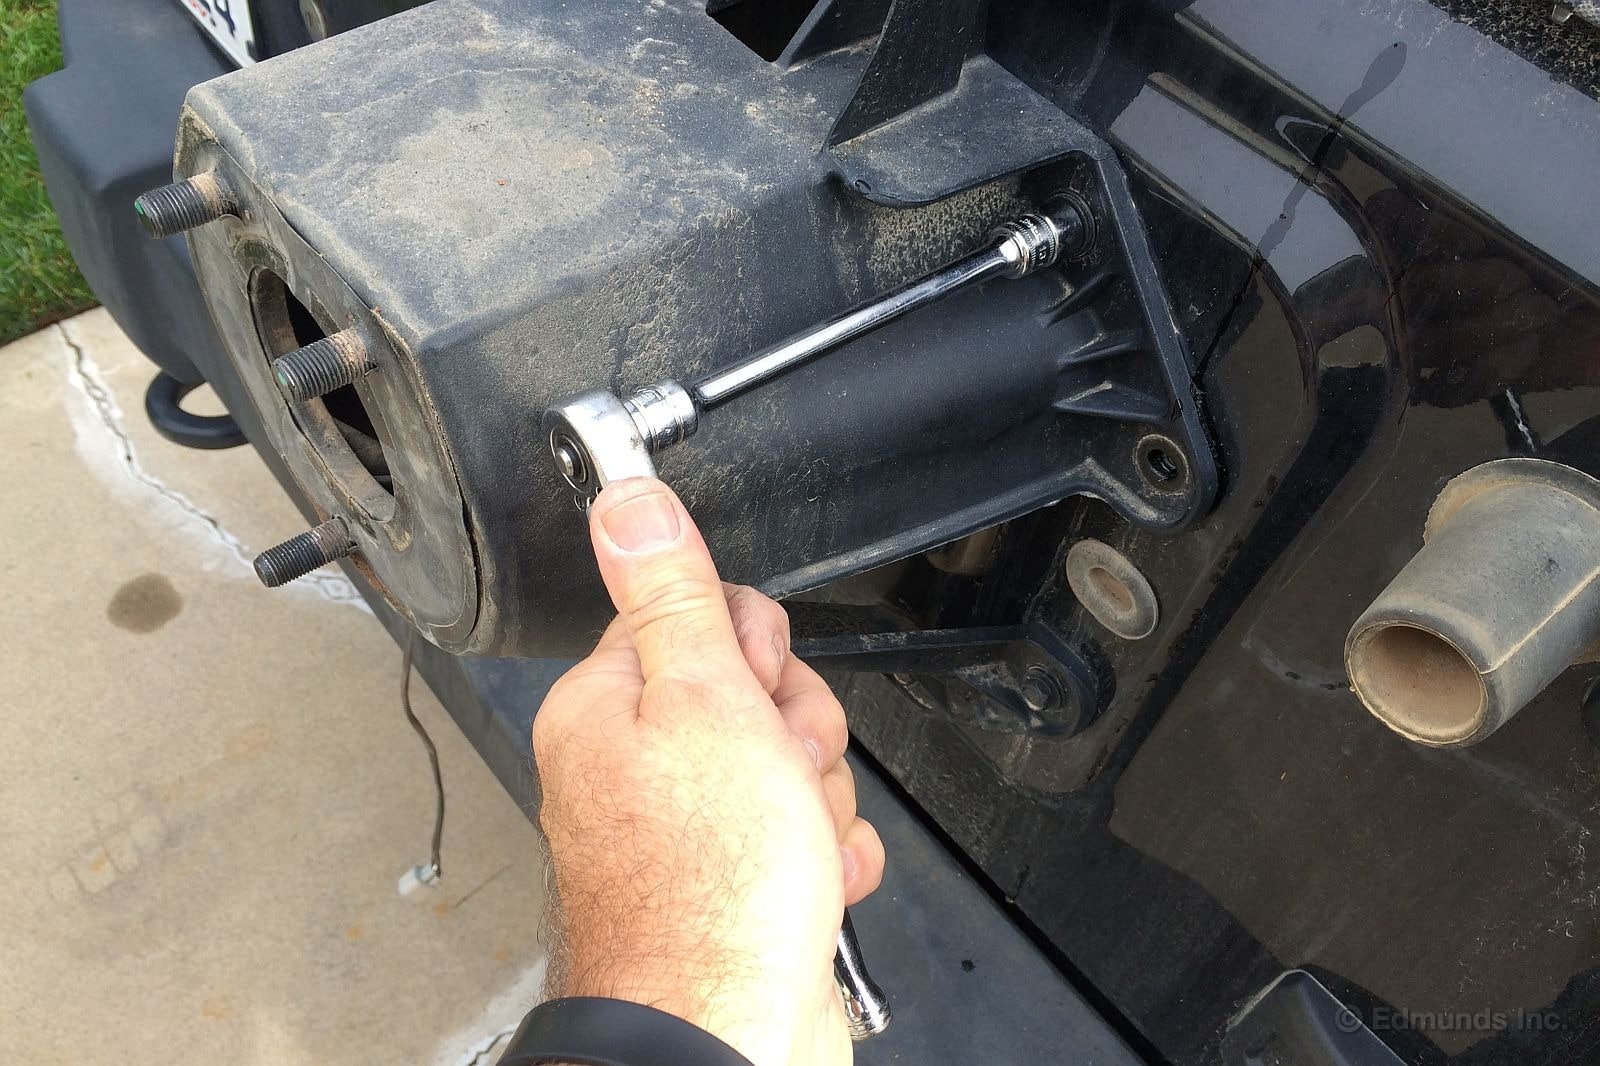
The factory spare tire mount comes off next. There are eight bolts, and they take a 13mm socket. Save every bolt and screw because everything will be reused.

Now it's time to remove the plastic covers that conceal the tailgate hinge bolts. They are easy to unclip. The instructions describe the best place to tug. But it really doesn't matter if one breaks. These will not be used again.
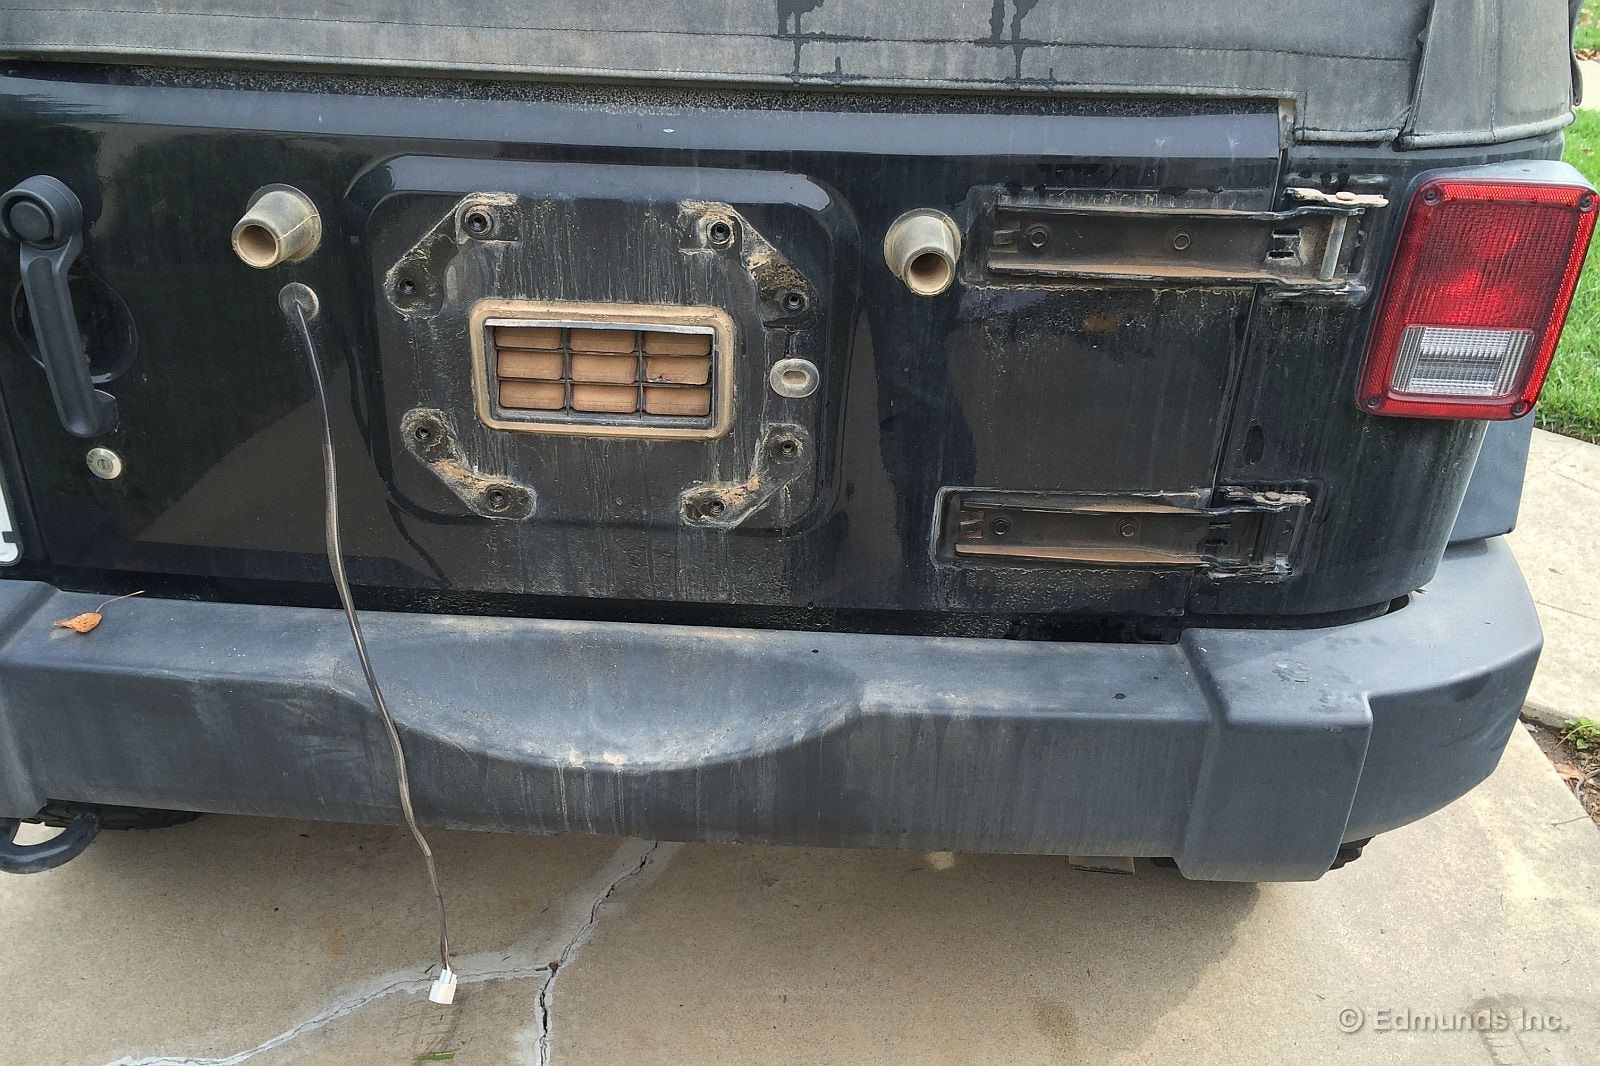
Now we can see everything, including a lot of dirt. I'd like to say it was all concealed by the spare, but that would be a fib. The entire tailgate needs to be cleaned at this point so the new hinge doesn't grind in the dirt as it is tightened in place.
Incidentally, that vent is the cabin air extractor. Your sedan or SUV has one hidden under its rear bumper cover.
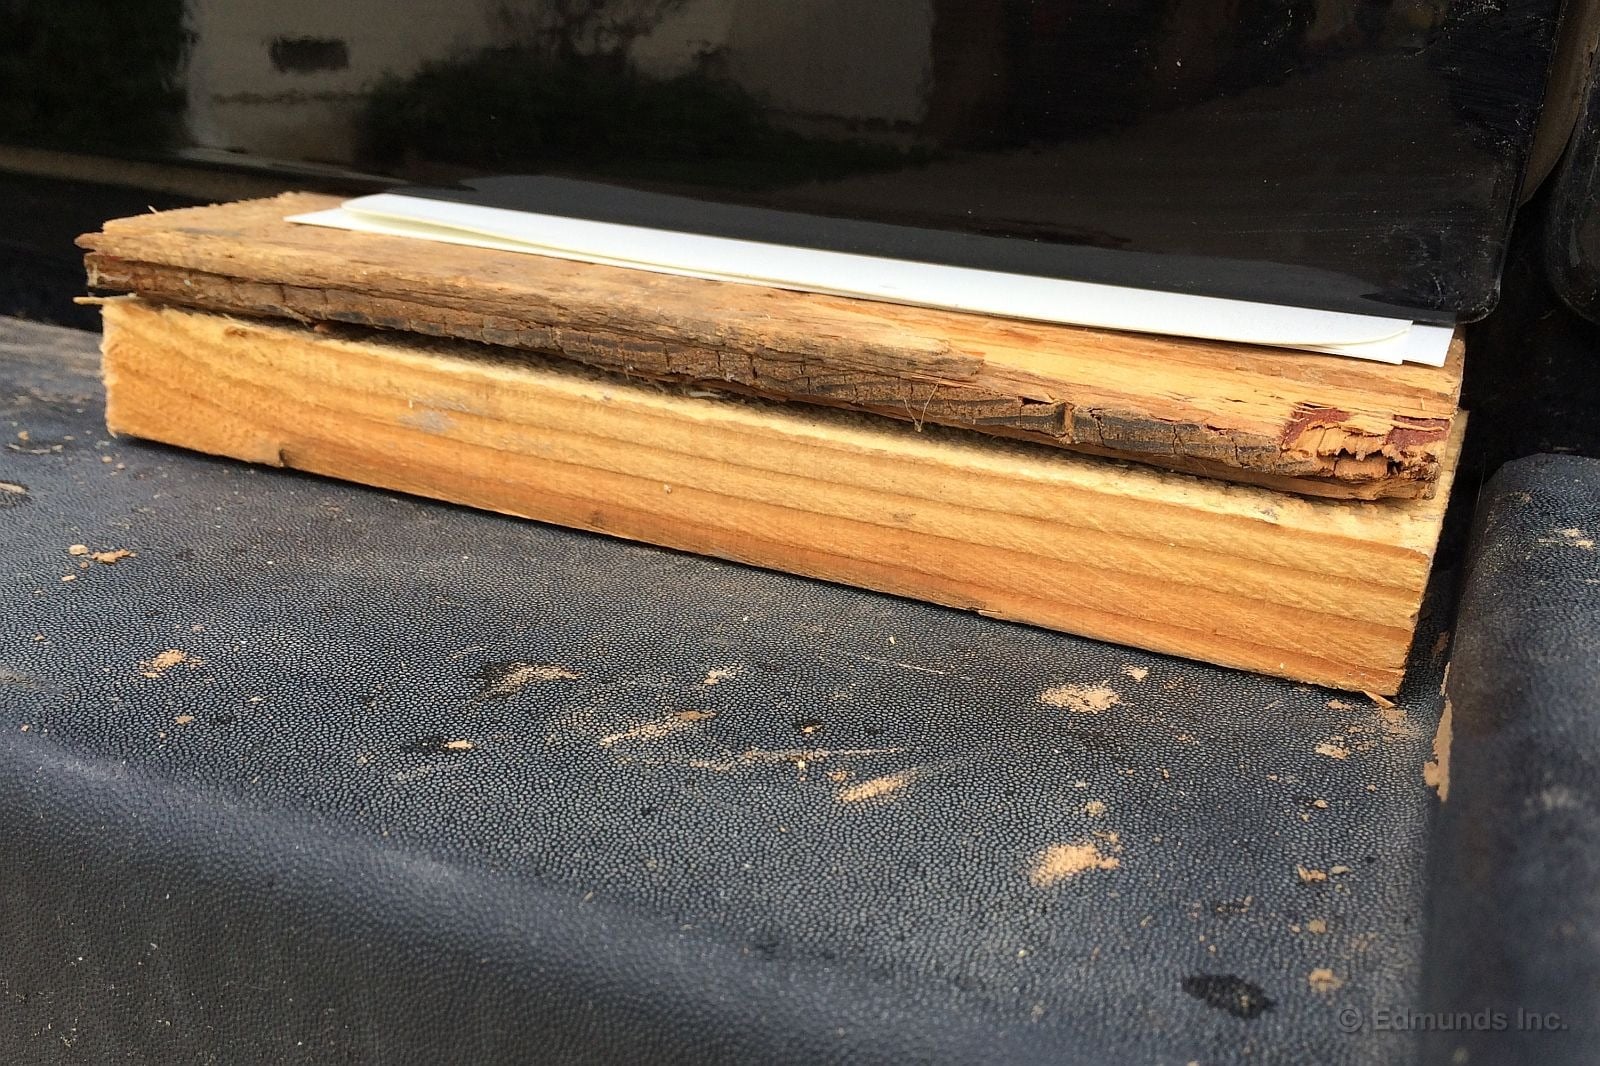
This part took the most time, but it's an invaluable step that really pays off. I had to find, cut and stack wood scraps in order to snugly shim the tailgate in position. This saves a lot of time and headache in the coming steps because it preserves the tailgate's alignment when the hinges come off.
The plastic pieces that I used to fine-tune the fit are strips cut off of a promotional dealer license plate I'd saved for...this, apparently.
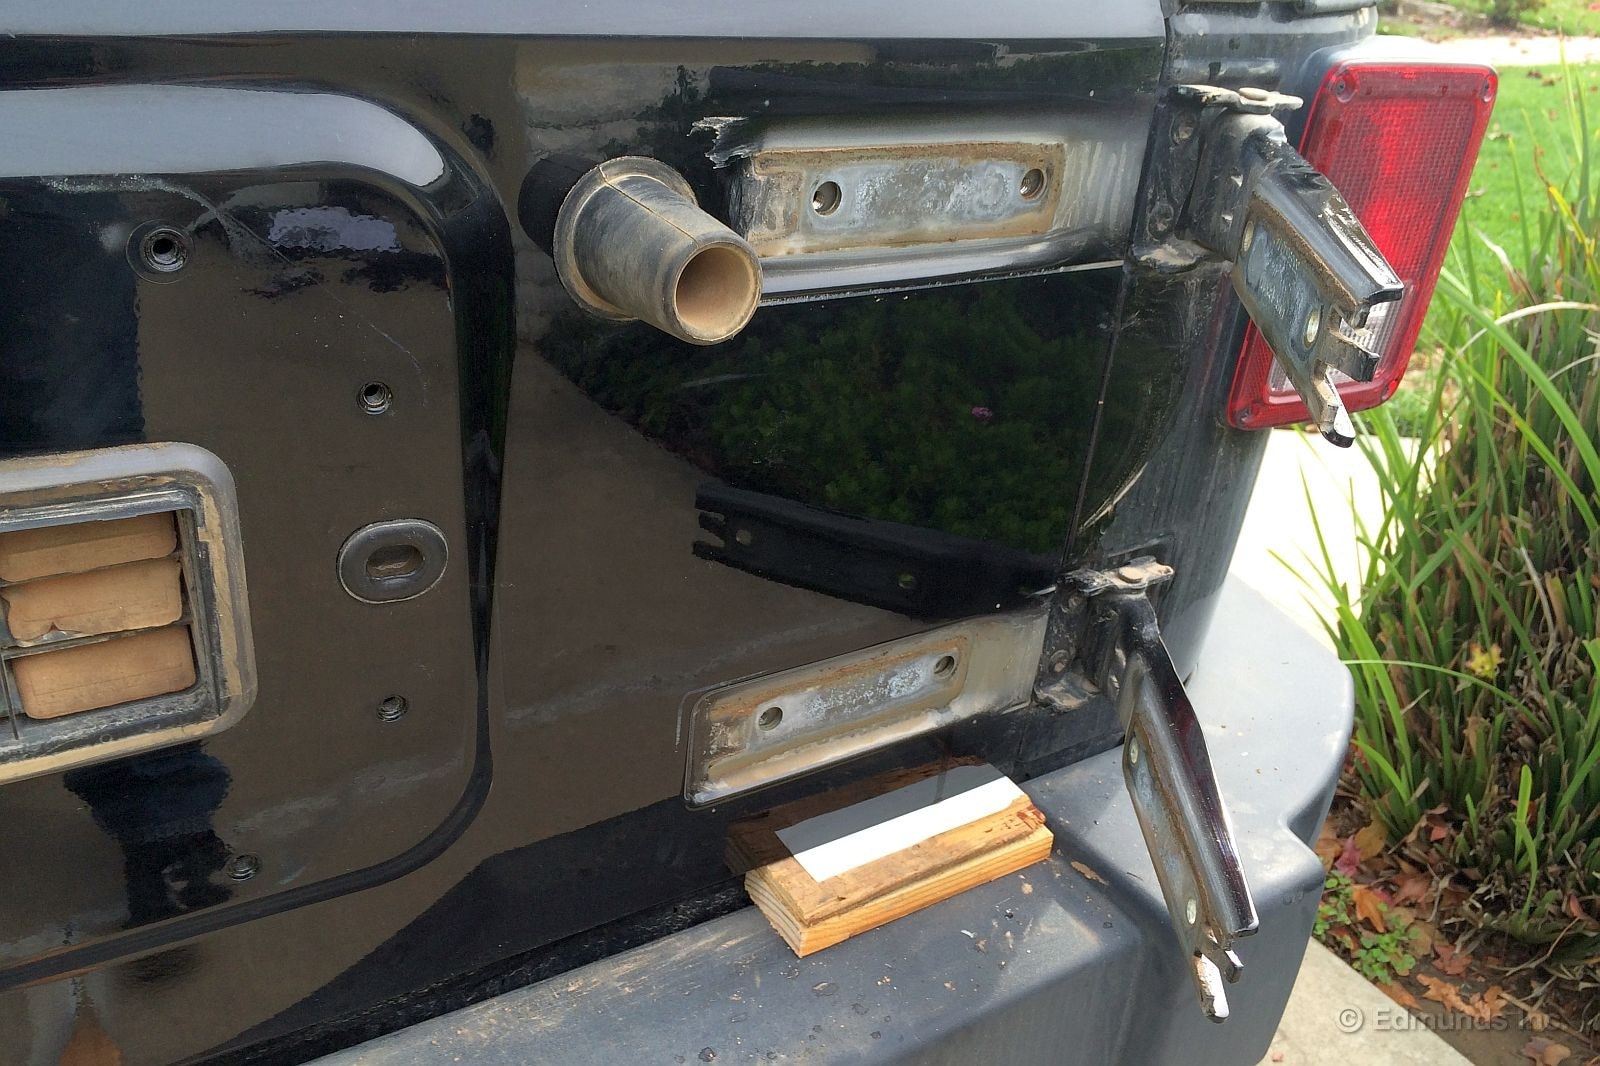
Here is why the shims need to fit just right. There's another one on the driver side by the latch (which is tightly latched, by the way.) And I'm still saving all of my bolts!
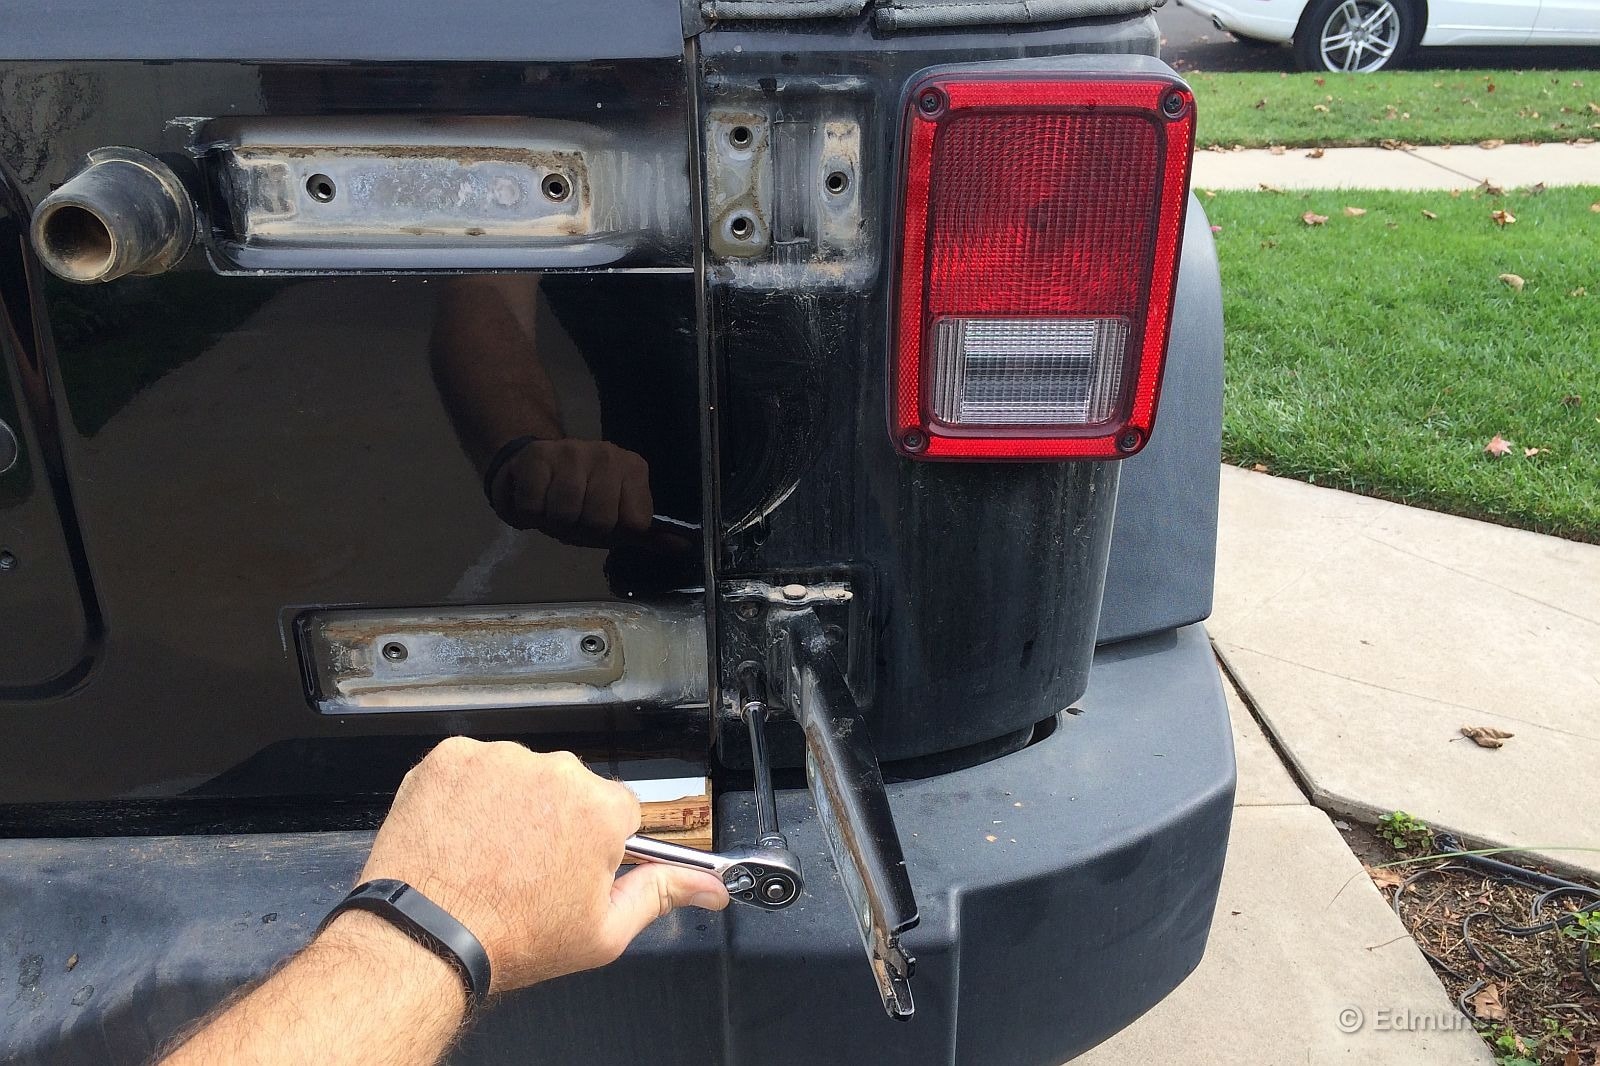
The load-bearing side of the hinge is held on with 6 bolts that have a T-50 Torx head. The kit comes with a bent allen-style T-50, but the socket and ratchet works better. Save the bolts, but these hinges are history.
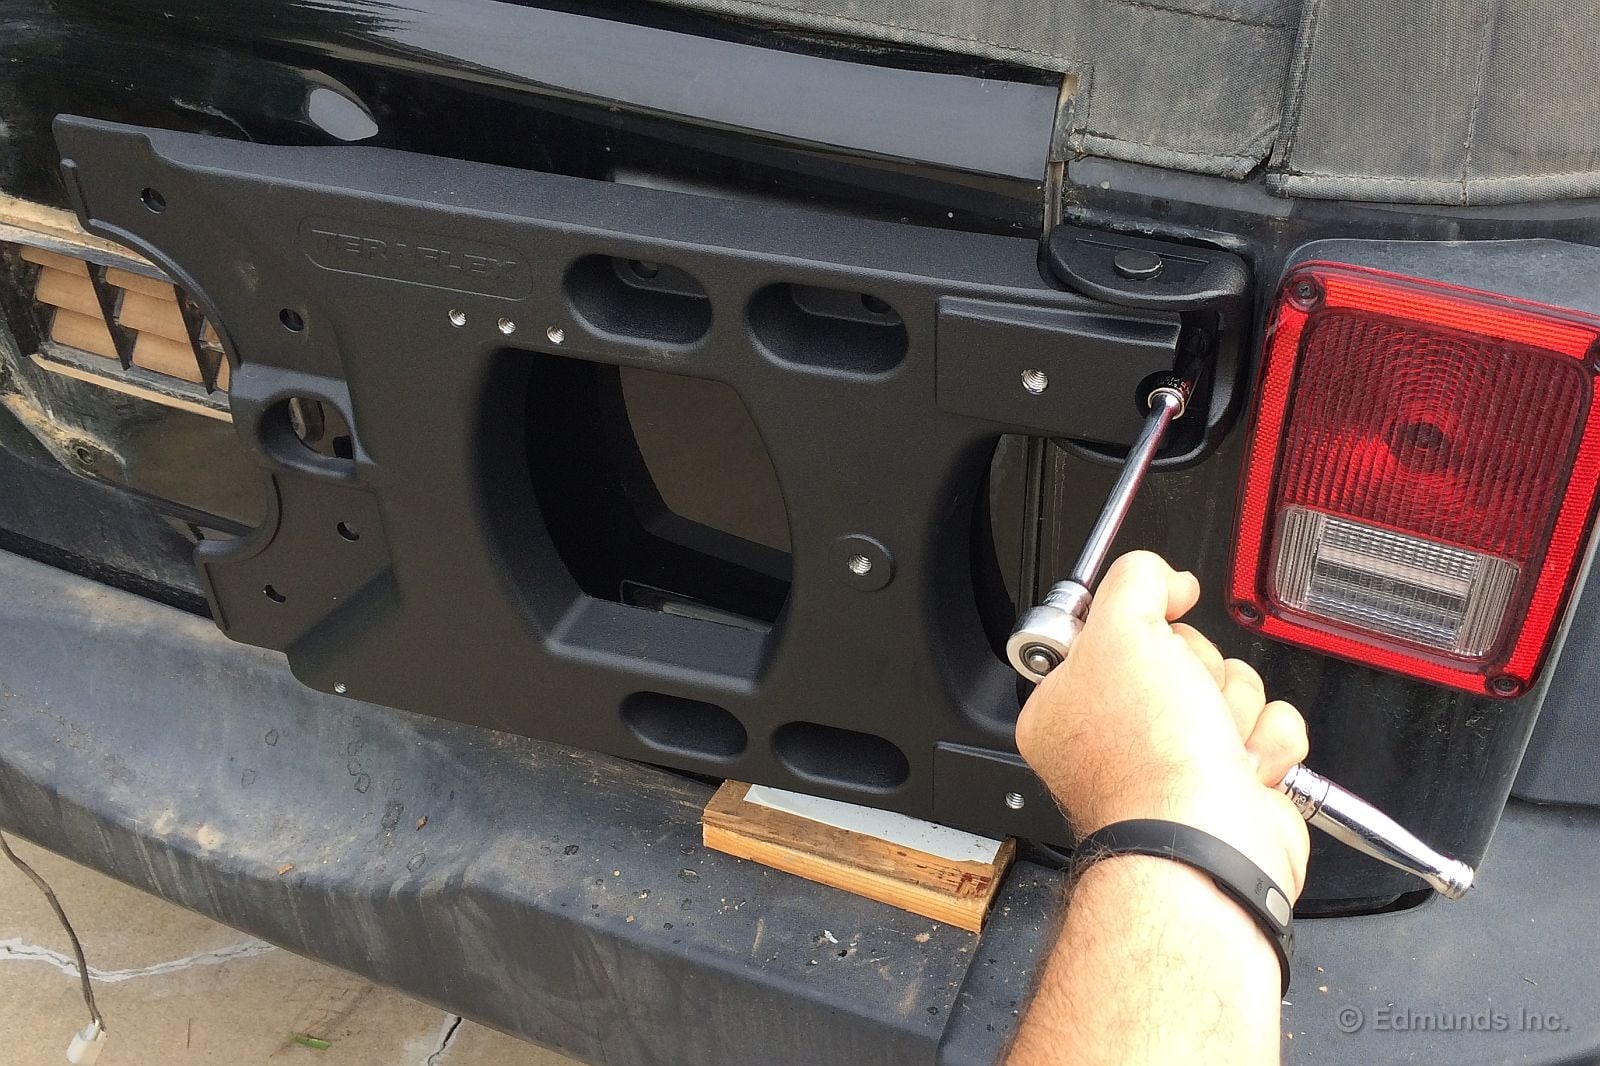
Now I can hang the TeraFlex HD hinge with the same T-50 Torx bolts I just removed, starting with the outer ones.
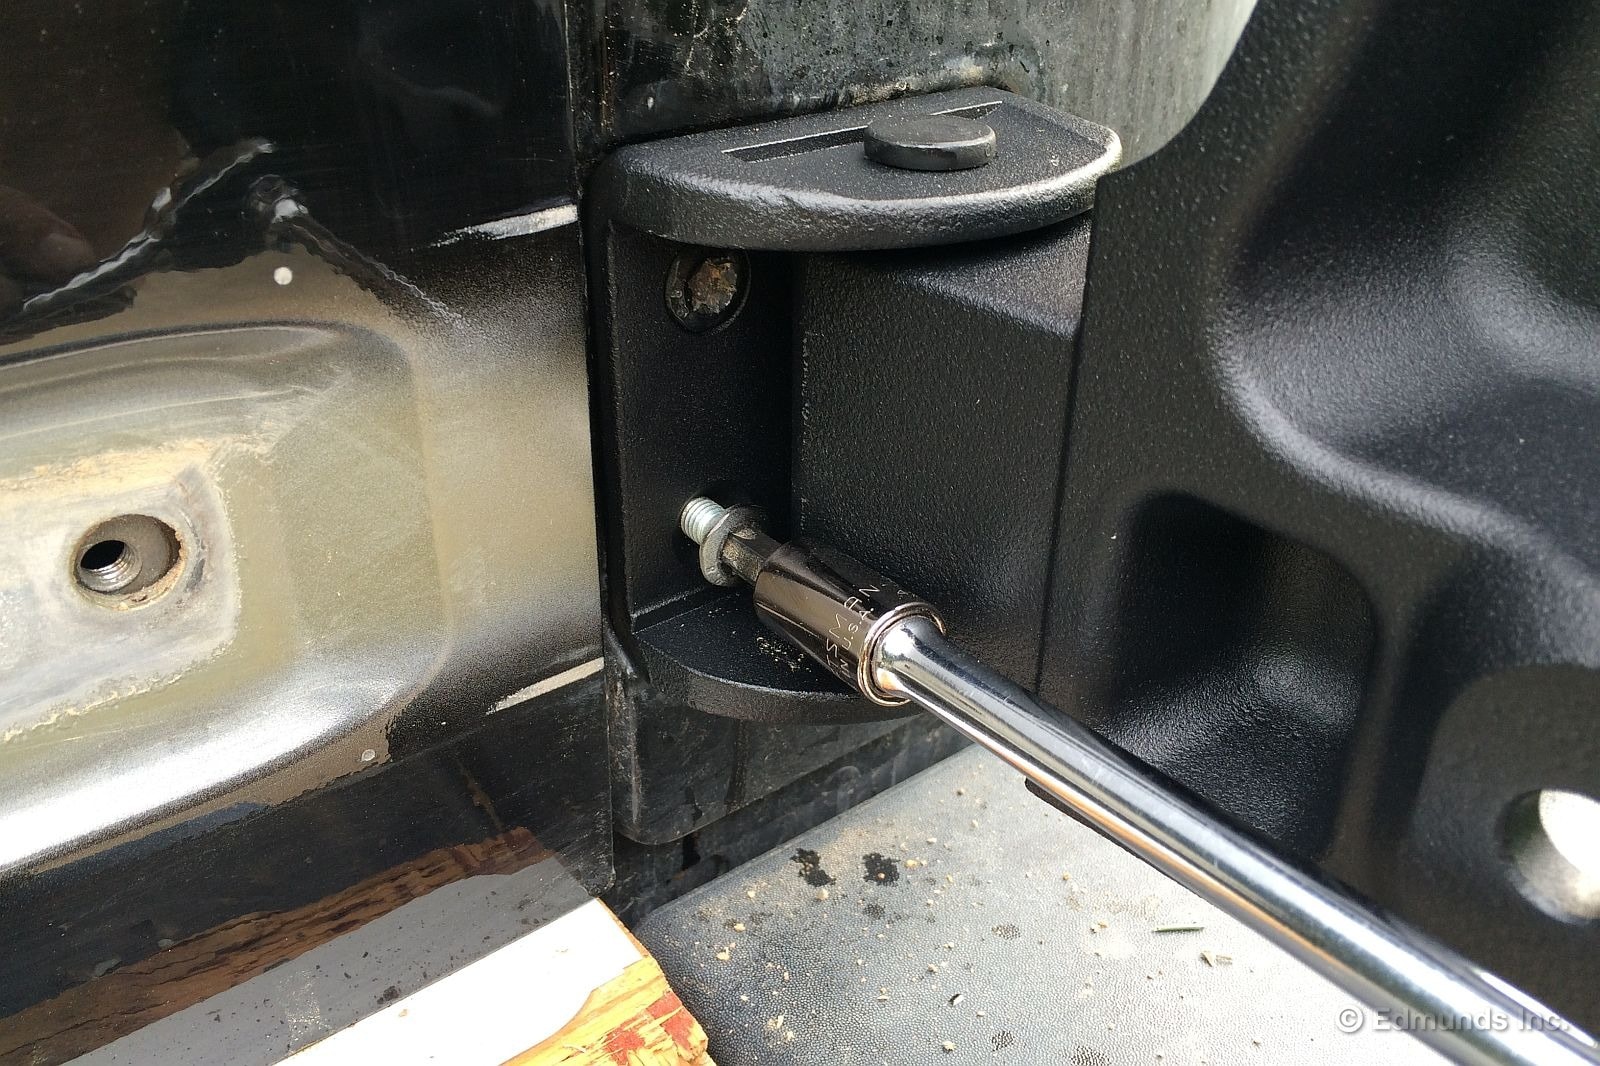
The inners go in next after I swing open the hinge. Its motion is stiff without the leverage of a three-foot tailgate and the inertia of a big tire to give it a push. Note that it's not yet time to get serious about tightening these T-50 bolts. Snug only.
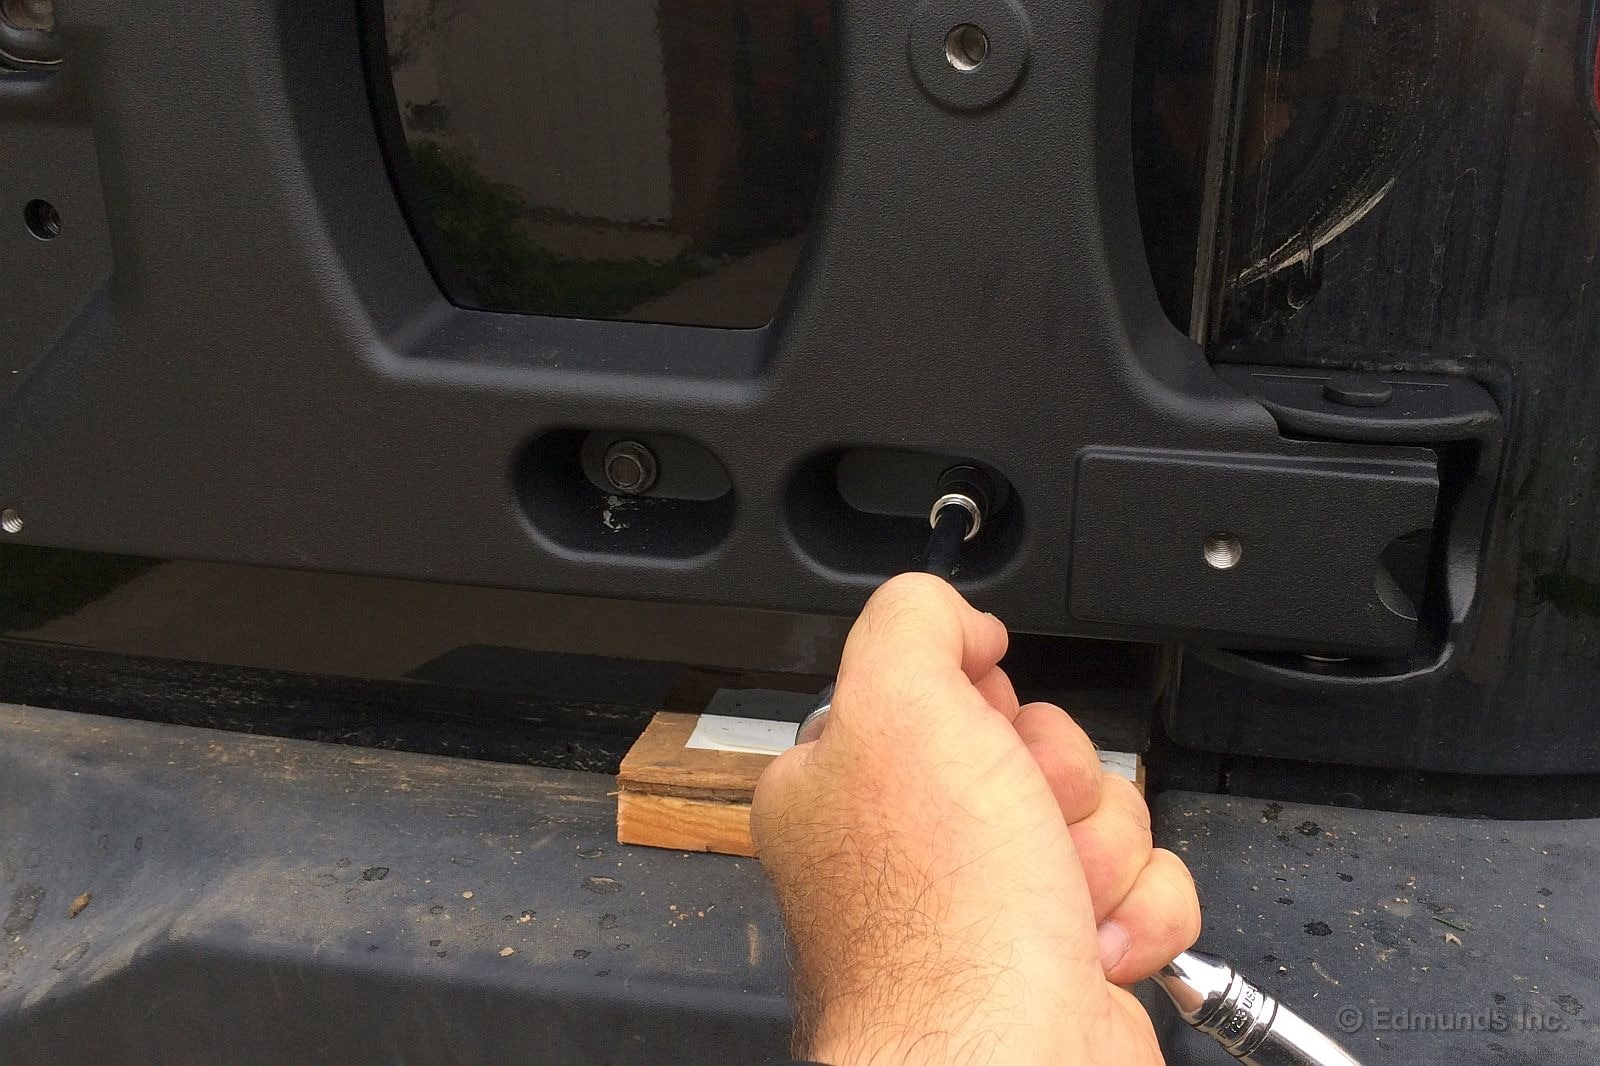
First I need to make sure the four 13mm tailgate-side hinge bolts line up correctly. It may be necessary to back off the T-50 bolts on the body side of the hinge in order to coax them into position. I didn't have to do that, though. They went right in.
Once they are in I can go ahead and tighten all four of these and then crank down on the two outer body-side T-50 bolts, the ones that are visible through the notches. Tightening these outmost two beforehand will ensure nothing moves out of alignment when I remove the shims. Once that's done I can open the tailgate to access and tighten the four T-50 bolts that are hidden when it's closed.
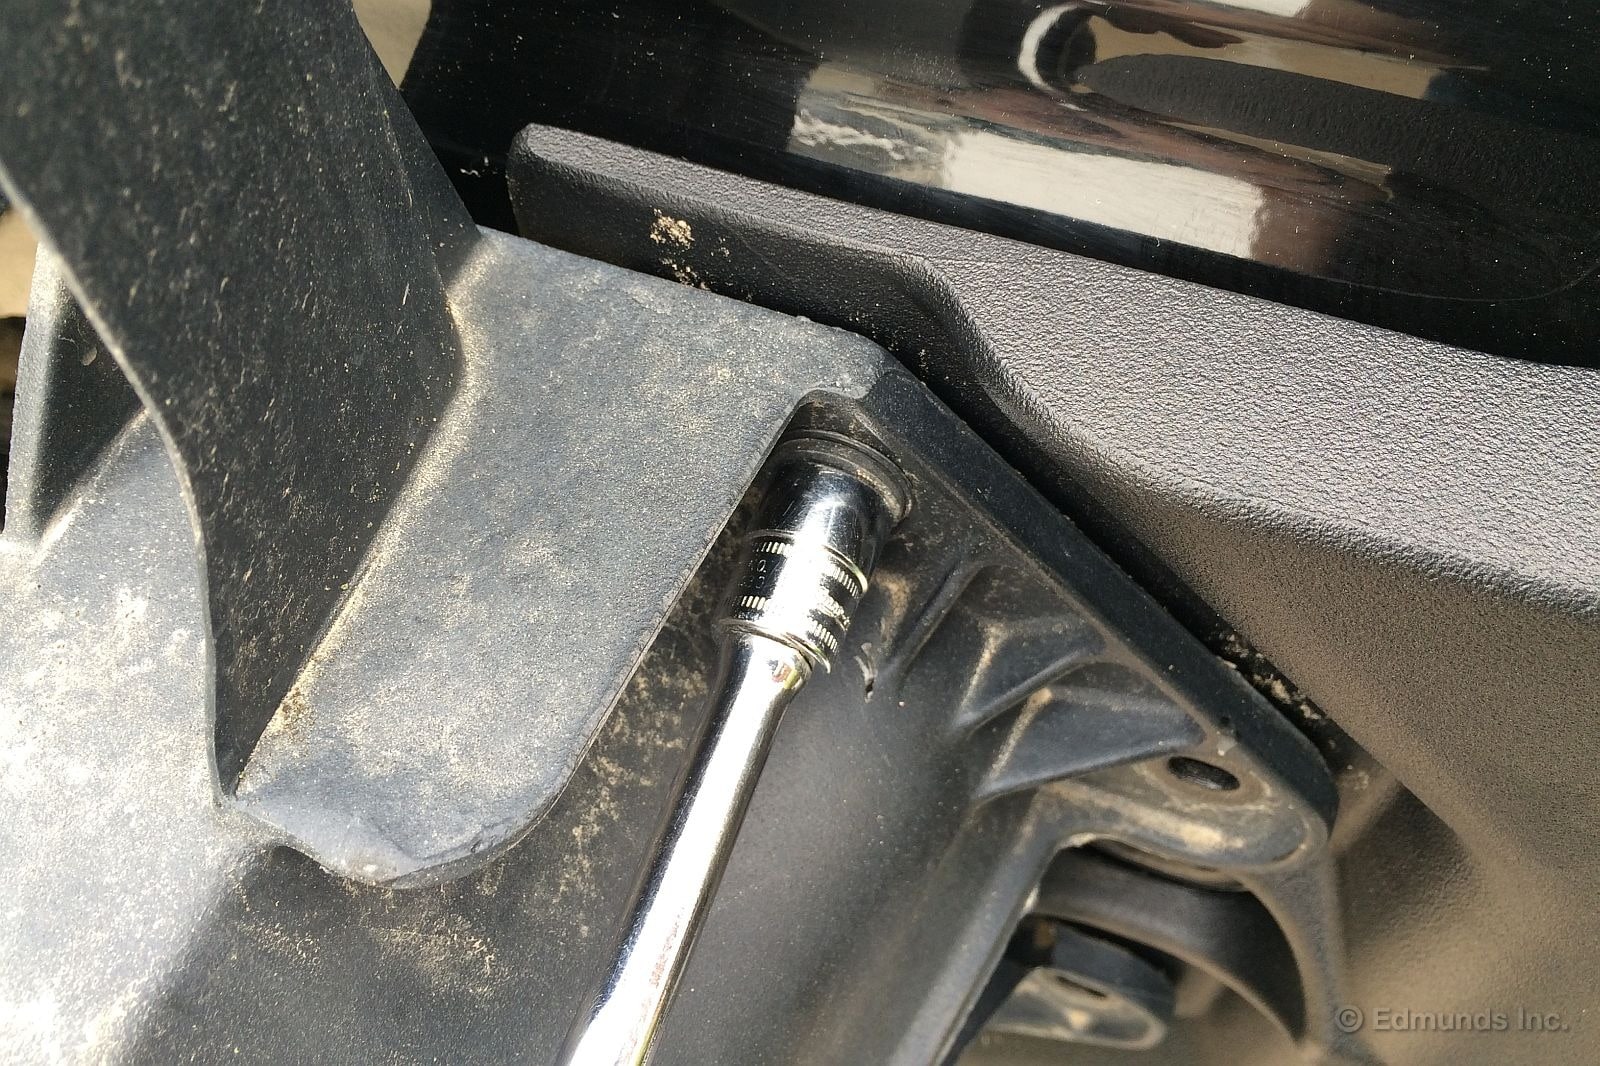
Now the factory spare tire carrier bolts can go back in, but only the four on the right-hand side. The original bolts still work even though the HD hinge spaces it out a bit. I'm not going to tighten them down all the way just yet, though.
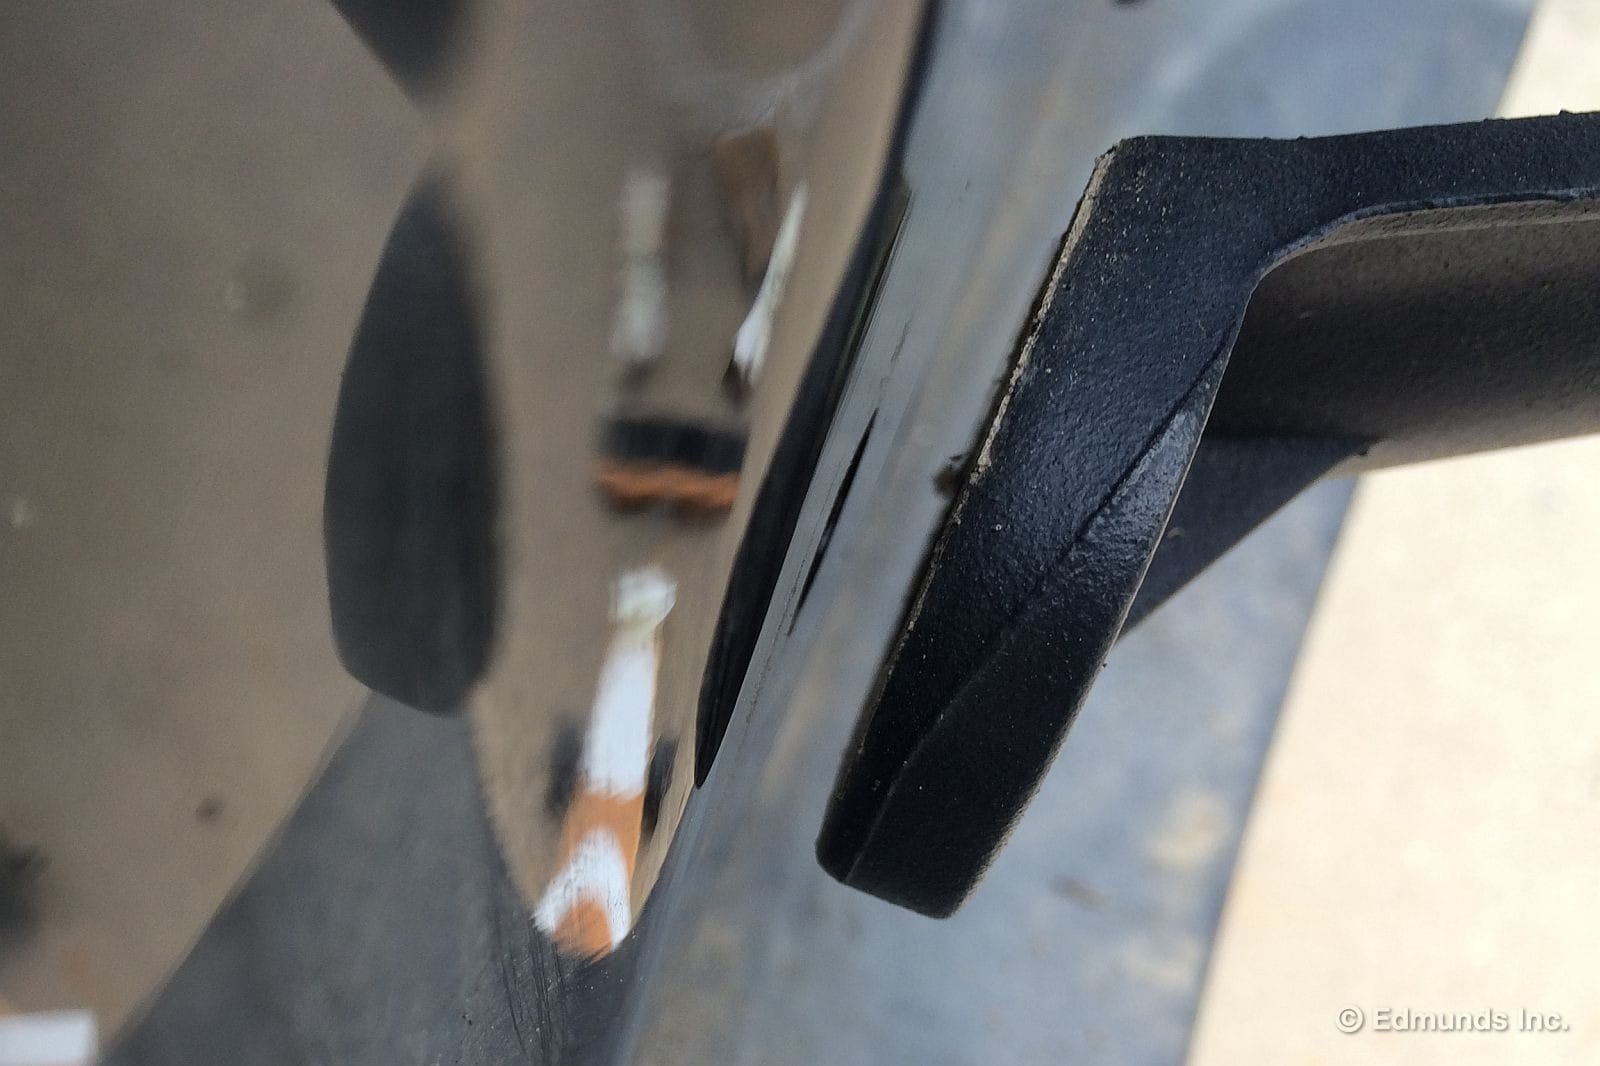
The left side now has a gap of equal thickness.
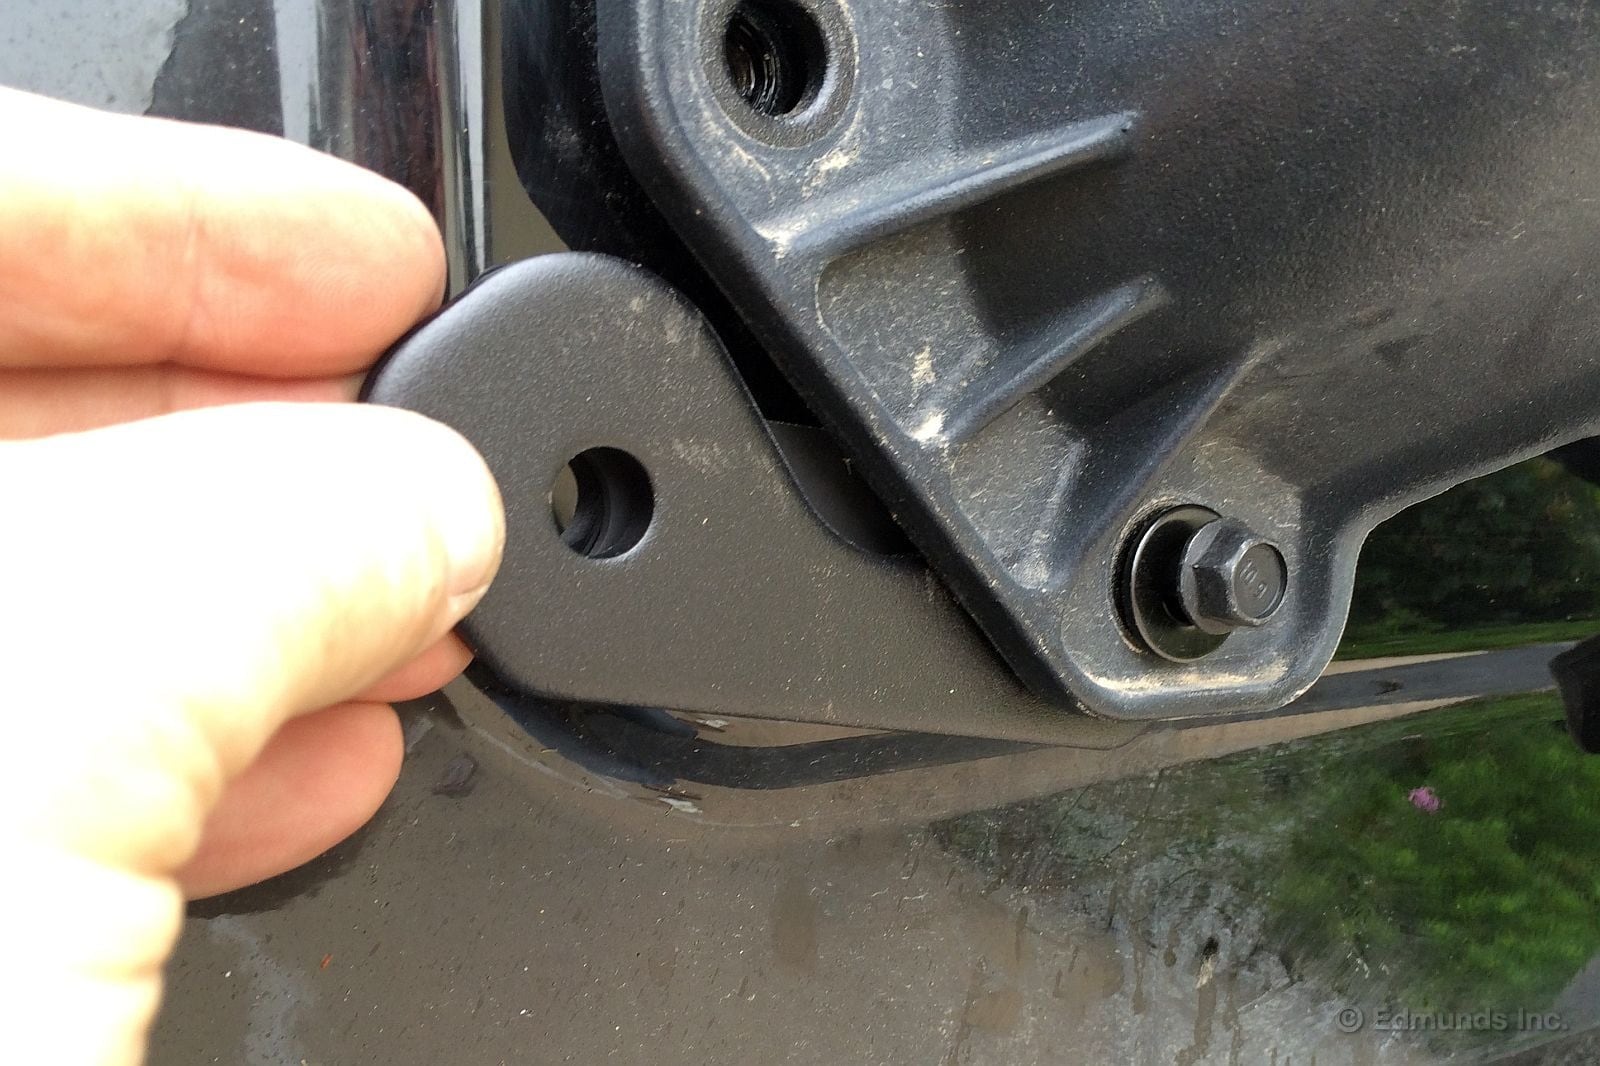
That's where these shims come in. They have a rubber gasket that helps protect the paint. Four longer bolts and washers are provided, but the instructions don't mention them. And I would have thought if the thickness mattered there should have been eight because both sides are shimmed out the same. But, like the right side, there seems to be plenty of thread engagement with the standard bolts. *shrug*
Be that as it may, all eight tire carrier bolts can be tightened once the left-side shims and gaskets are wrangled into place.
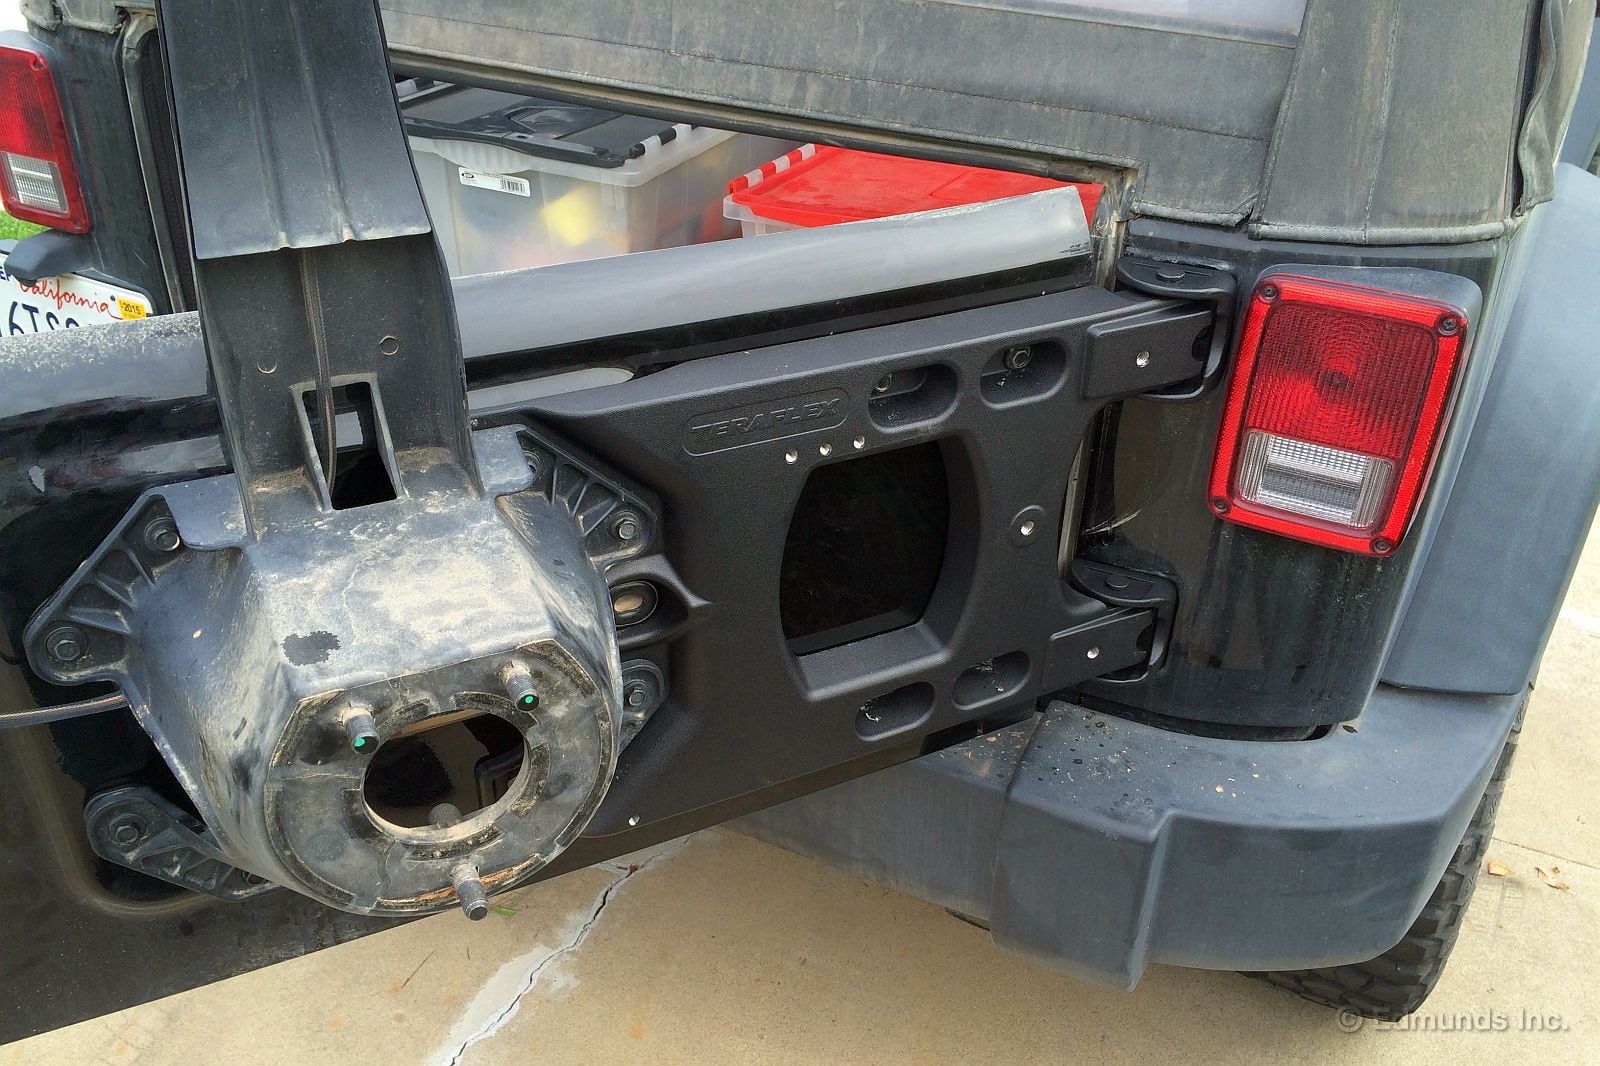
Done! Here you can better visualize how it all works. Think of the spare tire carrier as an extension of the hinge. The tailgate is merely bolted on to the back of it all. It no longer has much to do with holding up the spare other than housing the nut-plates that all the bolts thread into.
The kit was simple and the instructions were clear. And the HD hinged tire carrier itself has the look of a well-engineered piece. Thing weighs 20 pounds, too.
You may have noticed there are a few unused threaded holes. TeraFlex makes accessories that thread into them. Clamps for a Hi-Lift jack, brackets for fuel canisters, that kind of thing.

The very next day I went out into the desert near the southeast corner of Death Valley. I drove maybe a hundred miles off road on faint trails, washboard tracks and rocky wash bottoms.
Rock solid. Not a sound. And the tire didn't jiggle around like it used to, either.
Transformed with 4.10 Rubicon Crate Axles
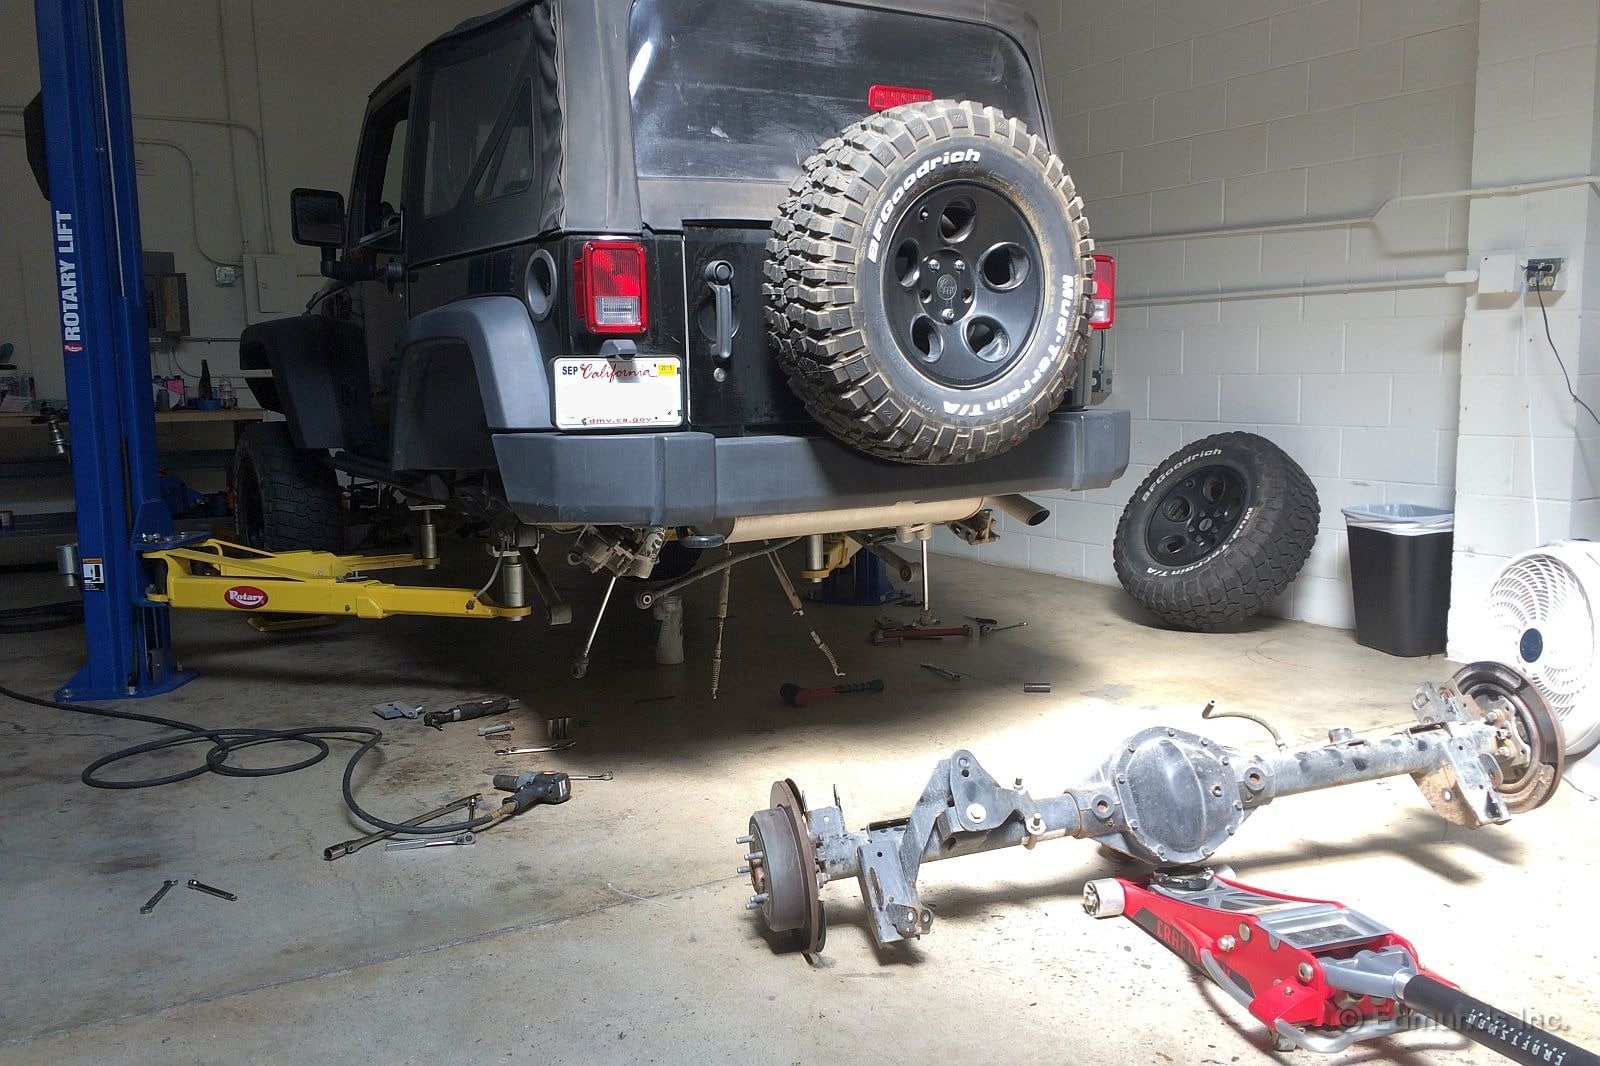
A 2012 Jeep Wrangler Sport once lived in the Edmunds long-term test fleet. It still does, in a way, because I bought it for my very own. And I'm still tinkering with it, which is still relevant here because a 2016 Jeep Wrangler is essentially the same machine.
My main beef with the stripped-down Sport we bought has always been its lame 3.21-to-1 axle gearing, an overly-tall ratio meant to maximize the Wrangler's window sticker fuel economy at the expense of off-road performance. Back in 2012, a mere $50 would have netted us a 3.73-to-1 axle gear option that would have rectified that, but we didn't bite (note: the same 3.73-to-1 option now costs $695 on a 2016 Wrangler Sport, but that's a story for another post.)
The long-leggedness of the 3.21 gears was less than optimal in certain situations with the factory 29-inch tires they came with, but it became downright intolerable after we fitted taller 33-inch BFGoodrich off-road tires. And this was no longer just an off-road shortcoming.
It became tricky to depart a stop sign without deliberate and somewhat questionable clutch tactics, and sixth gear wasn't useable at speeds below 65 or 70 mph.
The differentials desperately needed to be cracked open and re-geared, but as it turns out the 3.21 axles have a serious physical limitation: their internal design makes it nearly impossible to go beyond 3.73-to-1, their so-called "carrier break" point. This might have been OK had we still been running 29-inch tires, but it wasn't going to be enough with our 33-inch tires. We needed to go bigger.
Besides, a Wrangler Sport like mine (or a Sahara) comes with a light-duty Dana 30 front axle. Re-gearing for off-road performance doesn't make much sense without a complete upgrade to a more robust Dana 44 front axle assembly. In retrospect, our failure to spend the $50 for 3.73-to-1 Dana 30 axles only made my current decision that much plainer.
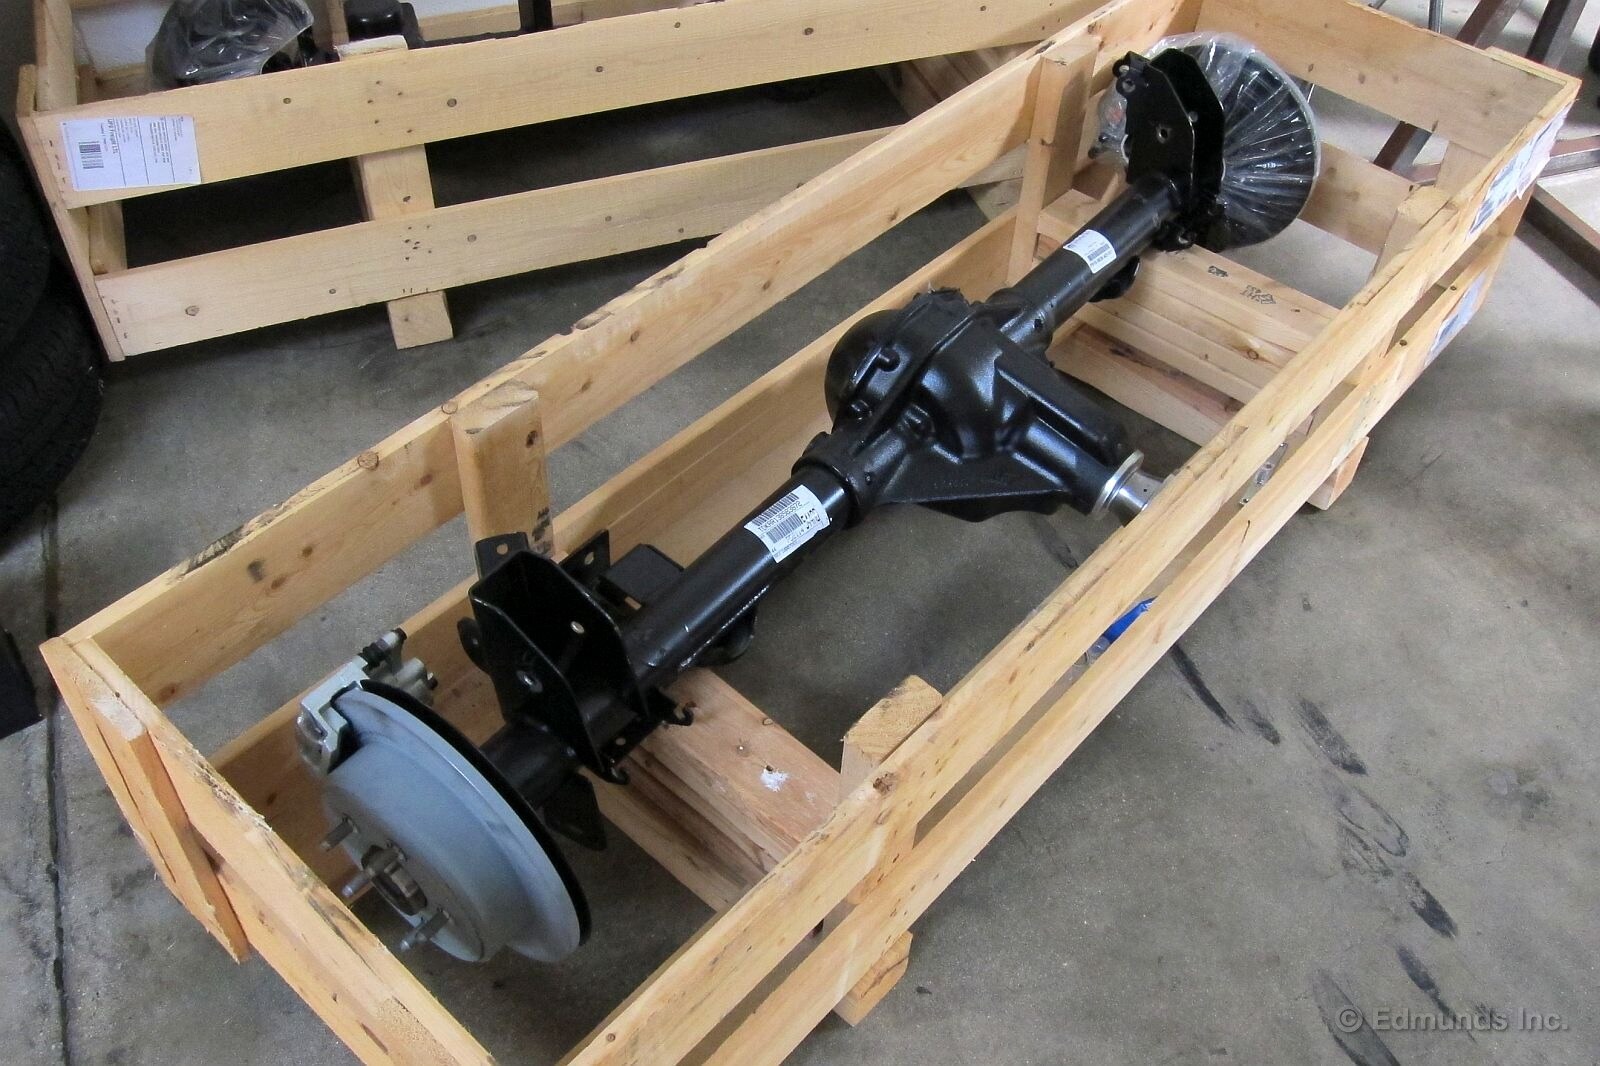
What I resolved to do was obtain a pair of complete axles from a Wrangler Rubicon, a direct bolt-in swap. These are Dana 44 units, front and rear. They have 4.10-to-1 gearing. They have electronically lockable differentials. And if I ever decide to go truly nuts, these axles reside on the happy side of their carrier break point and can be upgraded to 4.56, 4.88 or even higher.
Mopar sold exactly what I wanted in the form of complete "crate axles" back in 2012, but we balked at the cost of more than $3,000 — each. So I prowled Jeep forums and Craigslist for months, looking for Rubicon take-off axles being sold by a more intensely dedicated (and presumably wealthy) Jeeper that had upgraded to reinforced aftermarket Dana 60 custom axles.
Shipping such heavy items is prohibitively expensive, so I had to confine my search area to places I'd be willing to drive. This reduced my chances markedly. On those rare occasions they did pop up, and when I saw the listing in time, the sellers invariably wanted $2,500 or more apiece for what usually turned out to be well-used units that had been beat on. No thanks.
And then something extraordinary happened in 2015: Mopar dropped their crate axle prices significantly. Brand-new Rubicon Dana 44 e-locker axles tumbled to $2,395 for the front (part number P5153825AF) and $2,100 for the rear (part number P5153826AB), about a grand less apiece than they'd been when I'd first looked into it. And those prices included shipping to the dealer of my choice.
You order them through your local Jeep parts department as you would any other Mopar accessory or special-order part. I suppose you could work out an installation price with the service manager, but I didn't inquire. I had always planned to haul them to the shop and install them myself, and I used our 2014 Ram 1500 truck to pick mine up once they came in.

They keep the price low by configuring them exactly as they would supply them to the Wrangler Rubicon assembly line. For workflow reasons known only to the assembly plant's manufacturing engineers, the front axles are delivered without brakes but the rear ones include calipers and rotors. But I didn't want to crack open any brake lines and re-bleed the brakes during the swap process, so I stripped off the new rear brake calipers and reused my old ones.
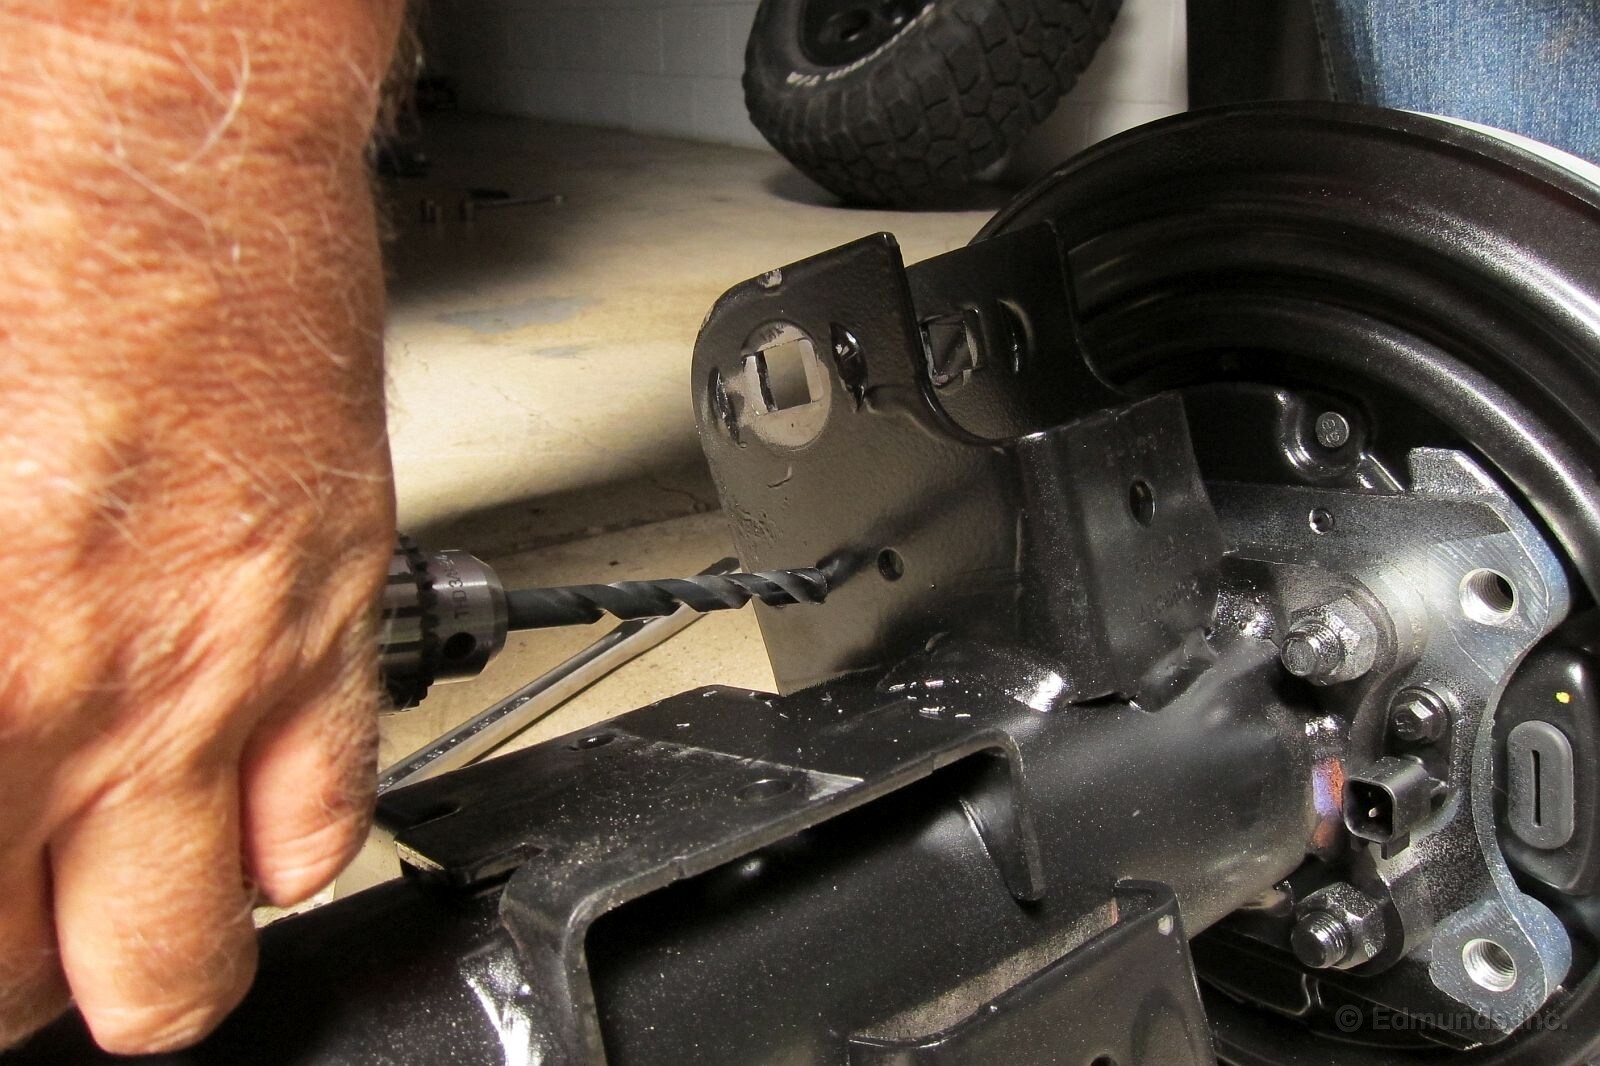
I had to drill a few holes to accommodate the limit straps and spring retainers of my existing lift kit, but this was much easier to do off the car than it had been when I first installed the lift kit three years ago.
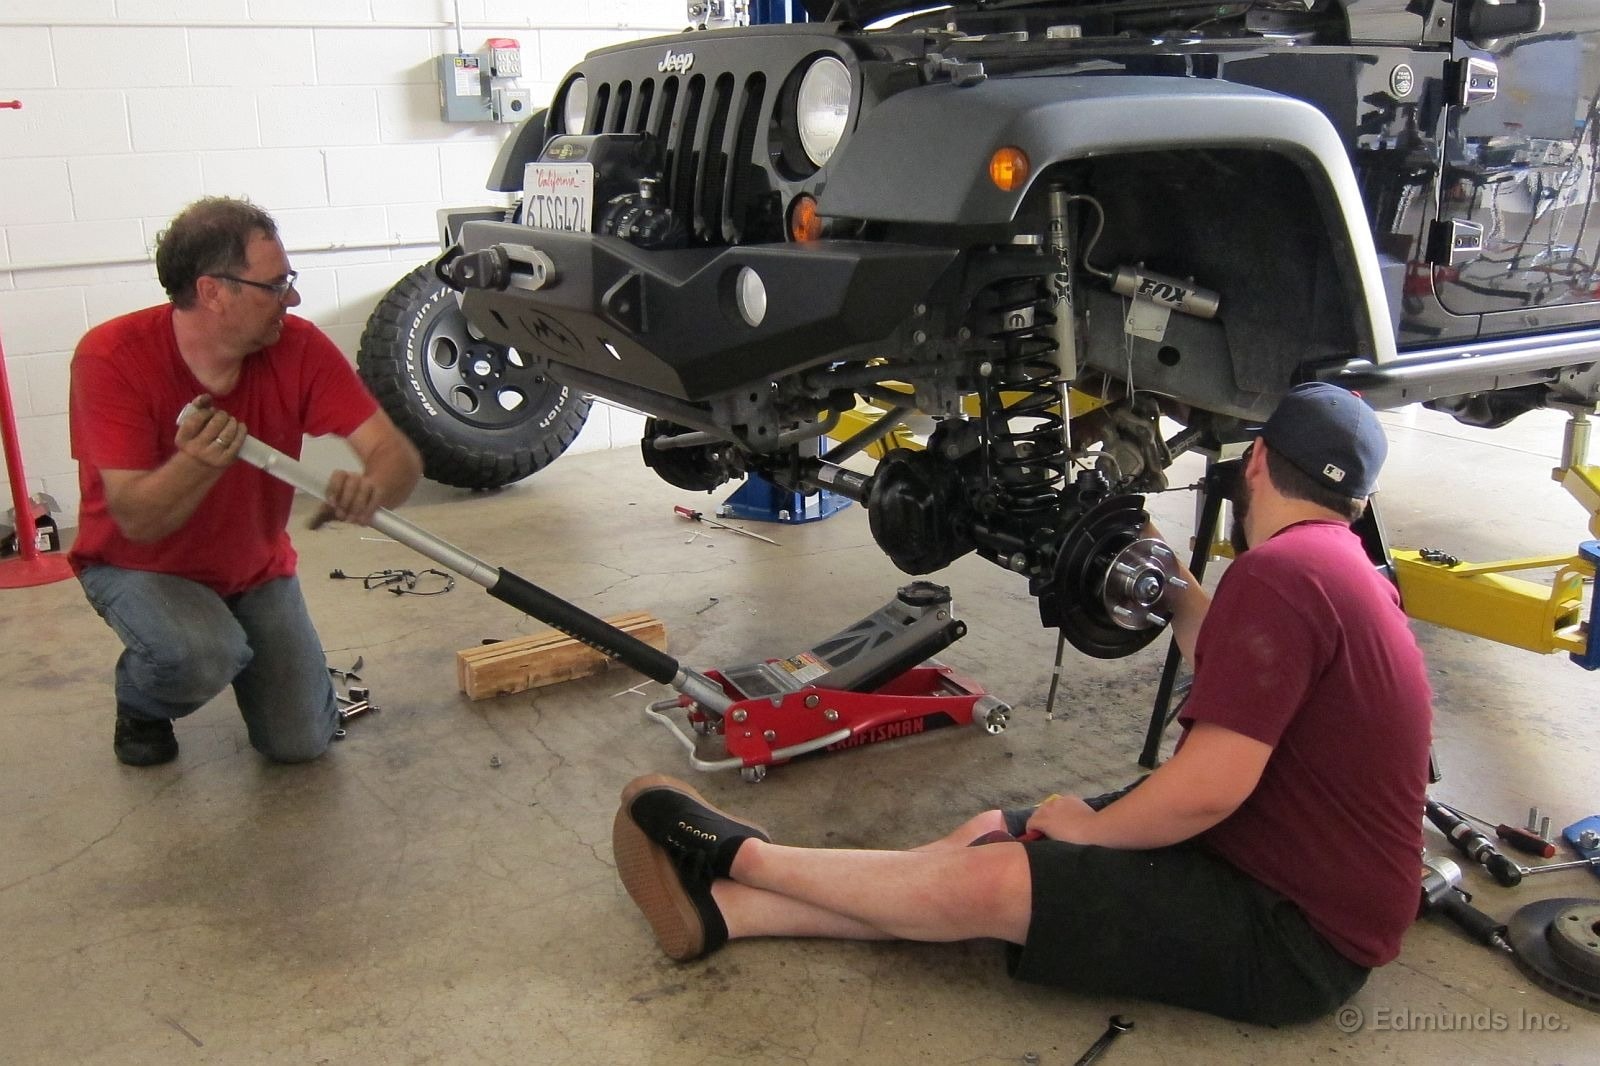
In the end this was a solid eight-hour job, even with access to our Rotary Lift and a second pair of hands — both of which seem essential. Call it six hours if you deduct my specific lift kit mods and the unrelated spring change I decided to make while I had the thing apart. Either way this is a straightforward, yet clumsy process involving heavy components and numerous critical nuts and bolts to disconnect, reconnect and re-torque.
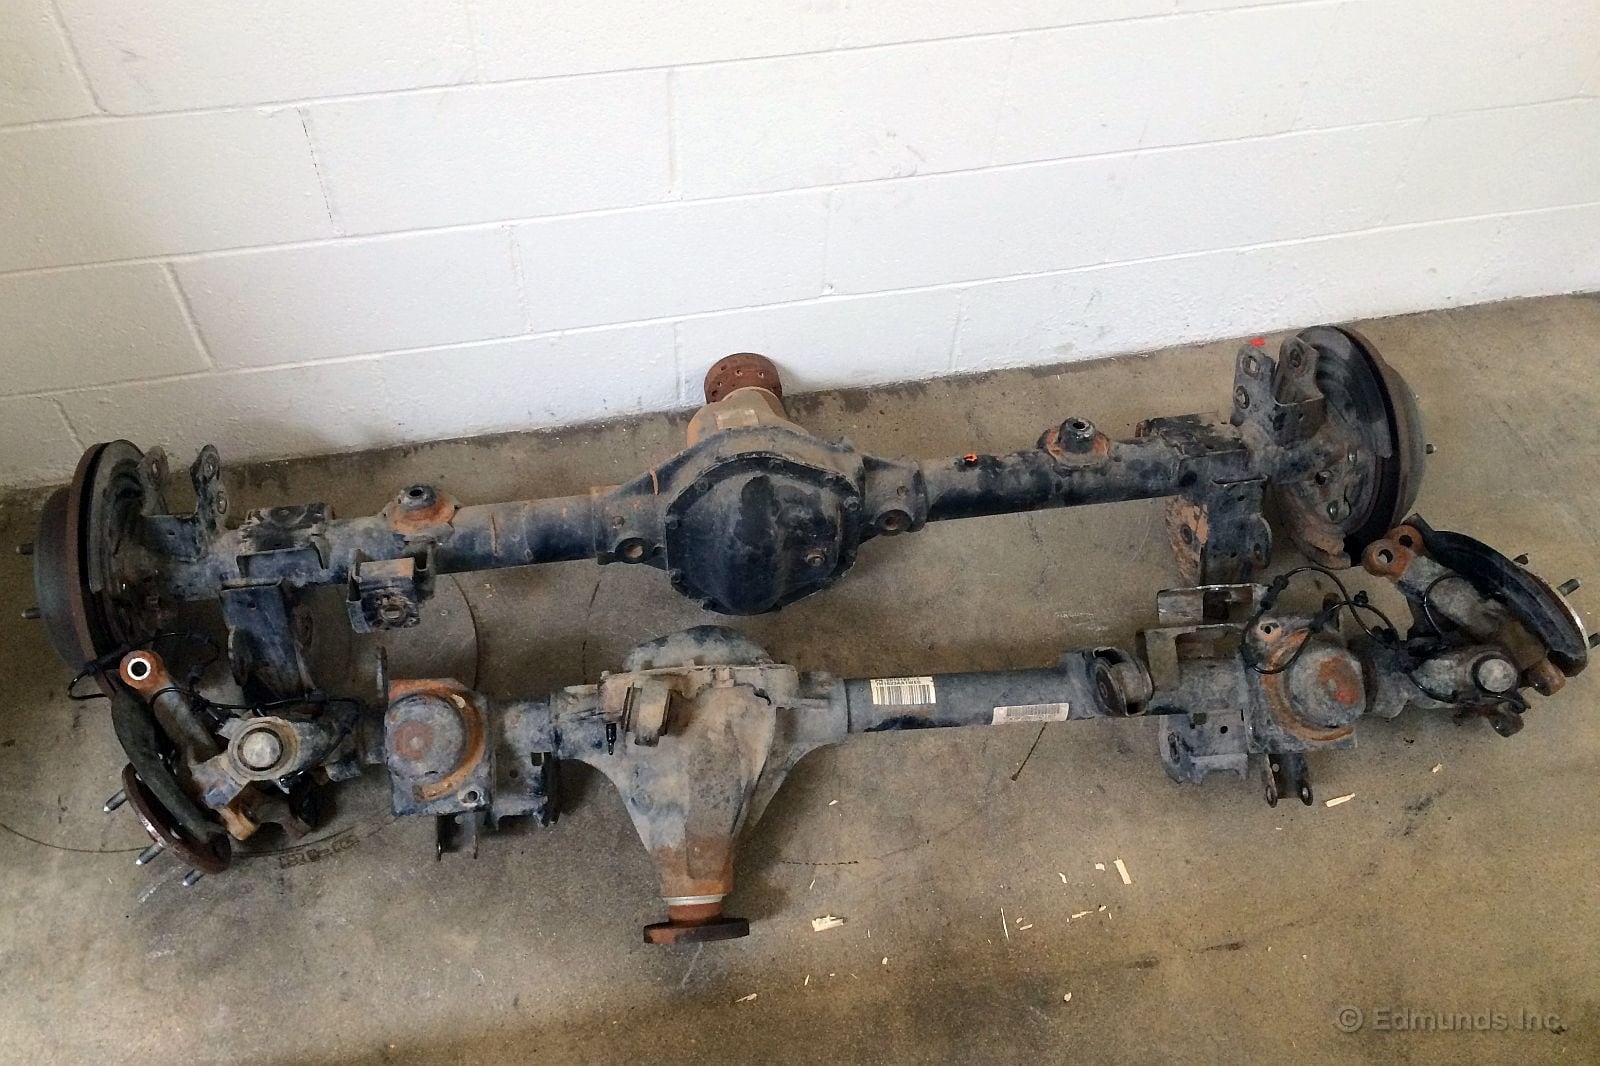
The result has been transformative. Stop-sign launches require no thought at all. With the old 3.21s and the big tires, the engine lugged at a lowly 733 rpm at 5 mph, but my new 4.10s have brought that up to a more comfortably stable 936 rpm. And I've got sixth gear back!
On the freeway, 65 mph used to come at a loping 1,700 rpm, a speed at which the engine was not able to deal with any sort of hill or roll-on acceleration. I found myself downshifting a lot more than should have been necessary. Now it purrs along at 2,200 rpm at that speed and can easily pull sixth gear at just 55 mph and 1,850 rpm.
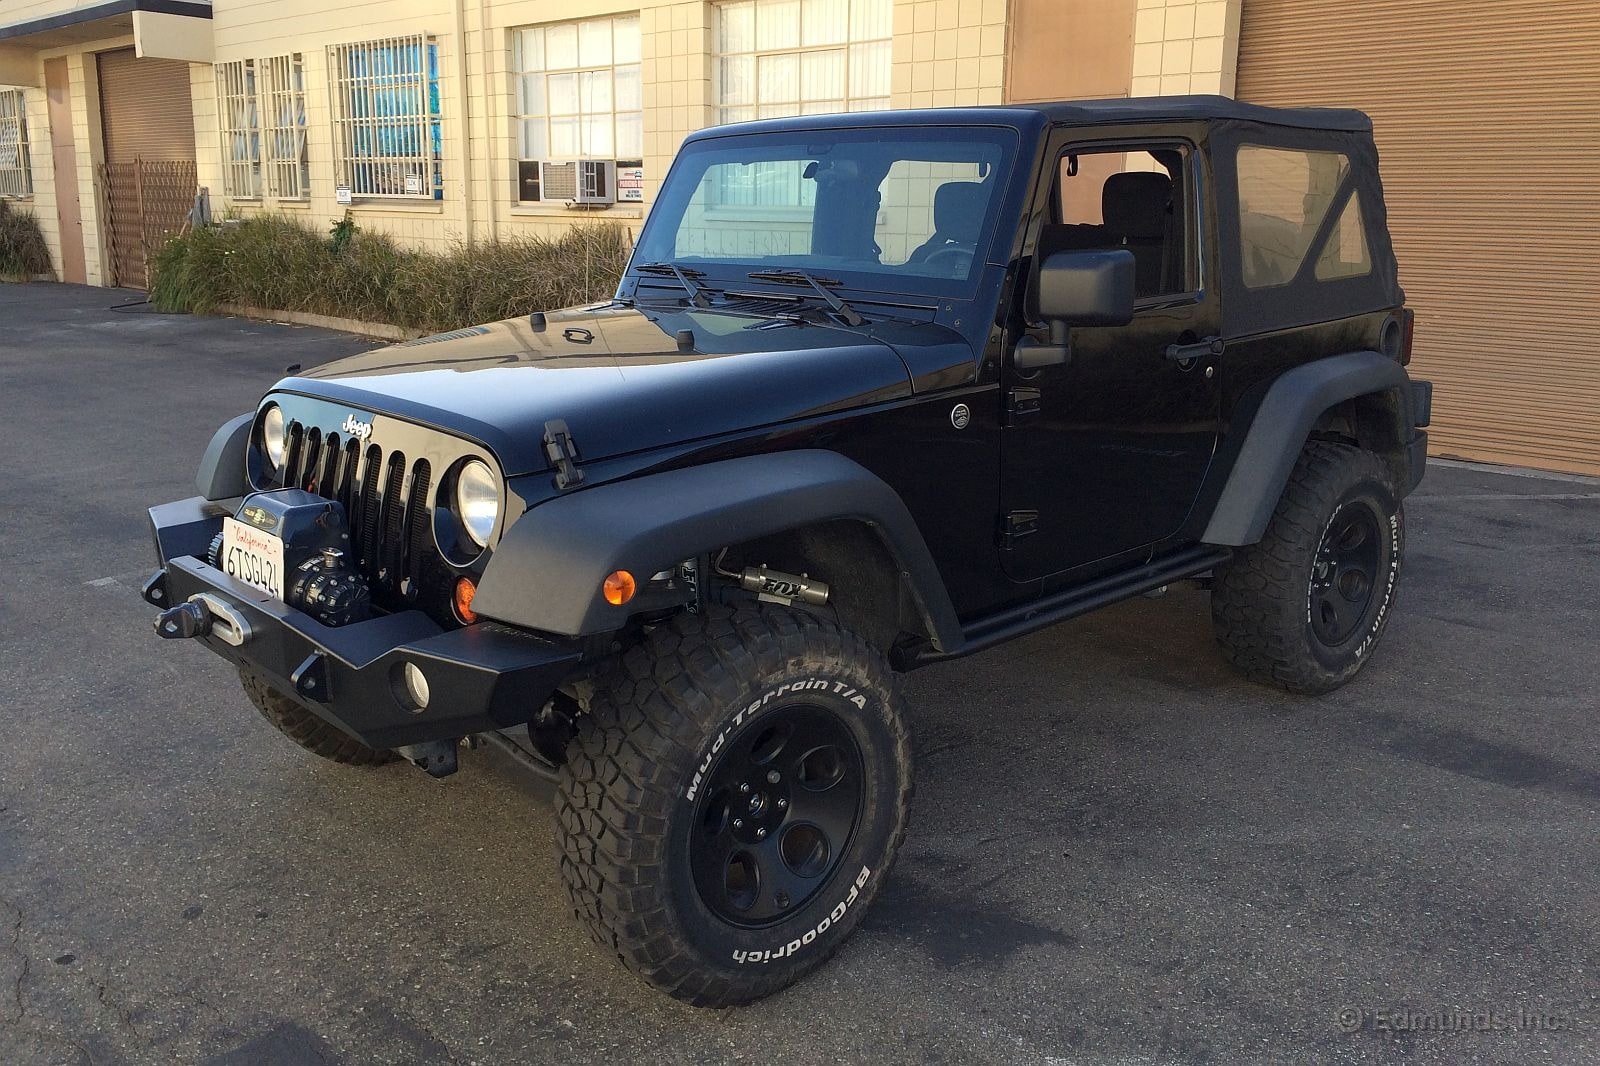
Will fuel economy be worse? Maybe not. Before the swap I found myself cruising in fifth gear a lot of the time, with the revs at 2,150 at 65 mph — the same rpm I'm at now, more or less. It's more like I've gained a gear and can now enjoy the drivability benefits of a close-ratio gearbox.
On paper, my new low-range crawl ratio has improved from 38.9-to-1 to 49.7-to-1, but I have not yet wired up my new electronic locking differentials and got them working. A hard-core off-road test at someplace like Moab is still off in the future, but I fully expect to be completely satisfied. Heck, I already consider my crate axle swap to be a worthwhile expense based on what I've experienced so far on pavement.
Wrap-Up
What We Got
We had an itch for another project car. So we set our sights on one of the most modified vehicles on the road today, the Jeep Wrangler. Rather than spend the money on a highly optioned Wrangler, we opted to go bare-bones. The money saved on comfort items like a hardtop, navigation and four doors would go toward performance modifications instead.
After some searching we located a black 2012 Jeep Wrangler Sport to suit our needs. It had the new 285-horsepower 3.6-liter V6 and virtually nothing else. The sticker read $23,740 and the only optional item was air-conditioning. Skillful negotiation and a month-end sale landed the Wrangler in our garage for $22,570.

The first few months of our test focused on the Jeep as a stocker. We used this time to establish a baseline for comparison. Then we opened the parts catalog, adding a lift, new wheels and tires and even a winch for tricky situations off-road. We were impressed by the Wrangler in its stock form and even more so once it was built to our liking. Here's a sampling of our more memorable impressions.
Our Impressions
"One of the main reasons we decided to get a Jeep Wrangler was this new engine. It may be smaller in displacement than the old 3.8-liter V6, but it delivers far more power and torque. This is not unusual for newer engines, but in this case the new V6 is a huge leap forward for the Jeep. As torquey as the old motor was, it sucked wind at any moderate rate of speed. This new engine is stronger across the board.... Obviously, the Wrangler is no street racer, but the engine makes it far more enjoyable to drive no matter how you use it. Gets better mileage, too. A definite win-win." — Ed Hellwig
"The gearing is kind of tall, so in heavy traffic, there was a lot of room to hang out in 1st gear, and when that wore out its welcome, well, there was 2nd gear. If there's a tricky part of driving the Wrangler in heavy traffic, it's the long, slow clutch engagement, which starts somewhere off the floor and finishes high. Makes sense for an off-roader, but makes it vulnerable to clumsy-footed city dwellers." — Erin Riches
"They really don't look like much, but these are great seats. Providing equal parts comfort and support, they are probably the nicest part of the Wrangler's interior. I know this after spending several hours in them bouncing around in the rocks earlier this week. No off-road butt. No hot spots. No lumbar issues. They just work." — Josh Jacquot
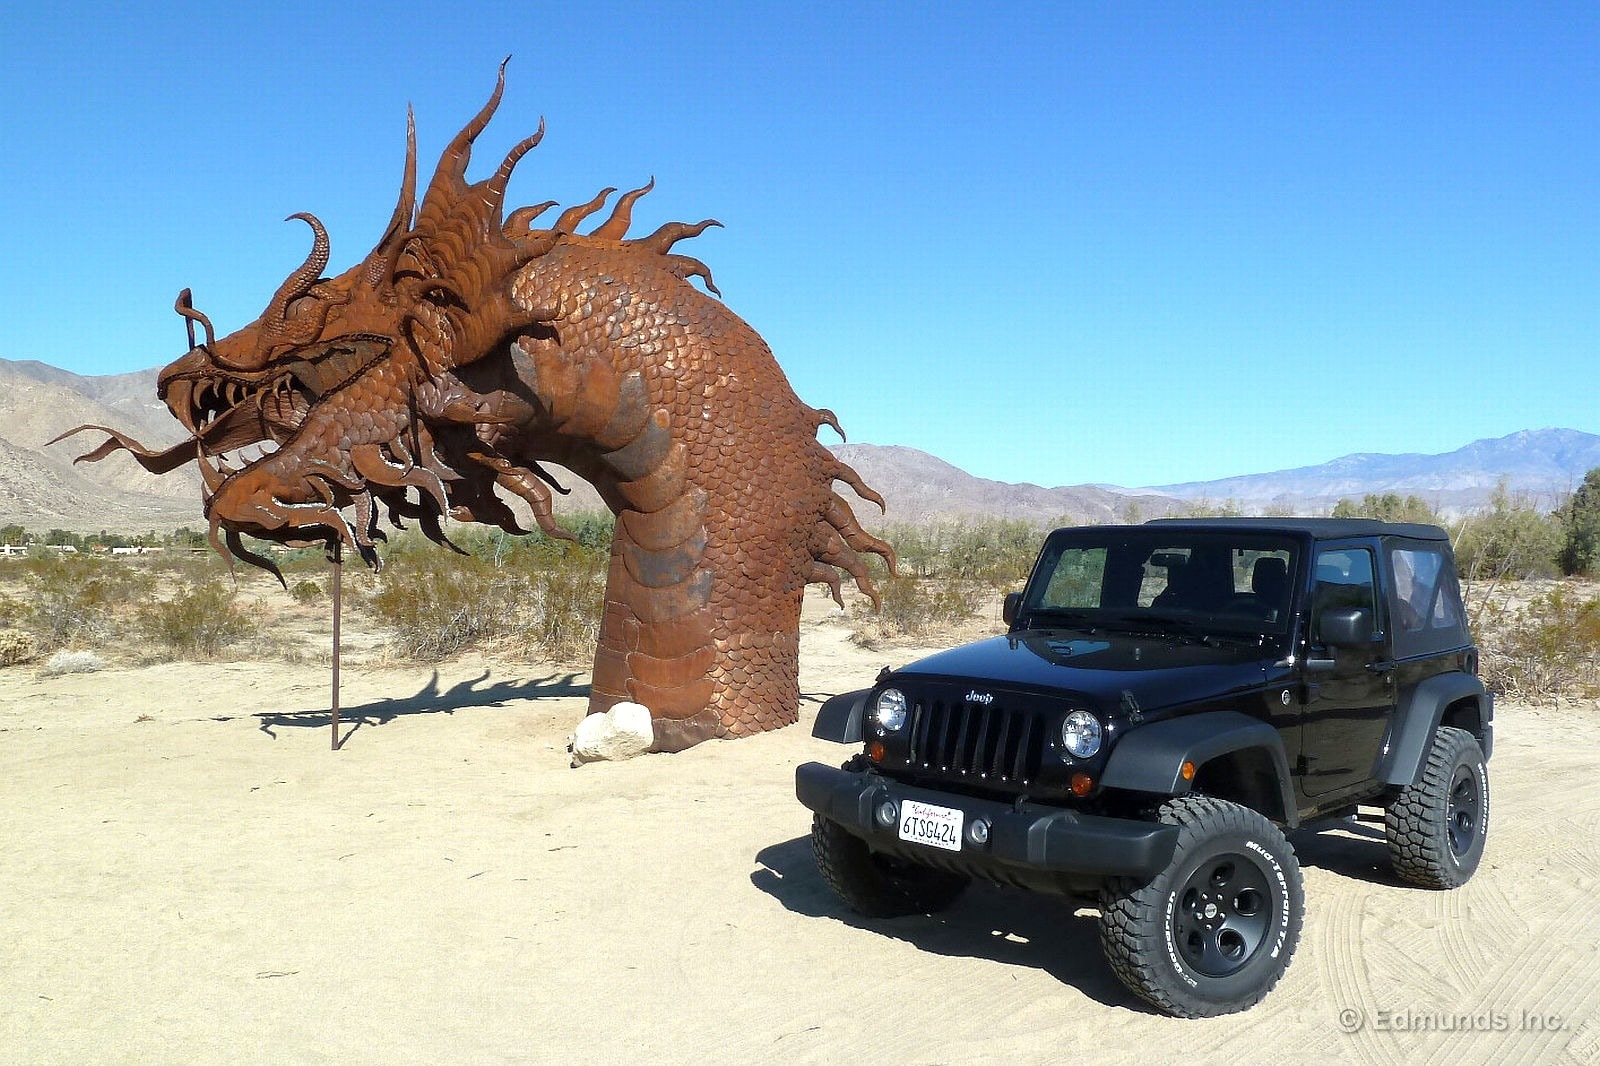
"The Wrangler is making me realize more than ever that my favorite cars are those that are unapologetically honest. It knows what it is, it's up front with its faults and if you don't like it, well, buy something else." — James Riswick
"When I heard we were putting some real meats on the Jeep I was pleased. Figured anything would be a huge improvement over the donuts that come from the factory, at least in terms of looks. Turns out, the new tires make it drive better, too. It feels more controlled over bumps and it's far less jumpy on the highway. The noise is pretty minimal for mud tires, too." — Ed Hellwig
"The stock final-drive ratios have got to go. I spent most of the time in 4-Low, not because of the steepness, per se, but because of the combined effect of the factory gears and the bigger tires. It needs new shocks and springs. When I opened it up a little, the heavy unsprung mass of the new tires had their way with the suspension as we crashed over the bumps.... A lift kit would be nice. The rear tires rubbed inside the fender wells a couple of times." — Dan Edmunds
"It's firmer around town (with the new lift kit), but then it would be with stiffer springs and more damping force in the shocks. In many situations that's preferable to the way it was before when the stock suspension had its hands full with the 90-pound unsprung mass of these large wheels and tires. That's no longer a concern, as the big Mud Terrains now stay firmly planted all the time. Despite the 3-inch lift and the higher center of gravity that results, the Jeep corners quite securely, even when midcorner bumps rear their ugly head. But the key word is firm.... As expected, the ride is hardest on pavement cracks, concrete joints and other small imperfections, but control and impact absorption are dramatically better over larger stuff that gets the suspension really moving." — Dan Edmunds
"The 10-mile trail led mostly along a wash with deep sand interspersed with rocky sections. That made careful wheel placement and a bit of spotting necessary to prevent any body and/or undercarriage bonks. Now, the Jeep didn't have any trouble, but the combination of the short wheelbase and the spring setup made it a very jarring ride. Even with the tires aired down to 25 psi, every single rock said hello and anytime a bump stop was 'reached' it was so violent I would jump out and check for damage.... From there it was a quick trek via some sandy valley floor single-track back out to California Hwy 14. Now that's where this thing shines. Higher speeds and no rocks made our trip back to the asphalt world much more enjoyable." — John Adolph
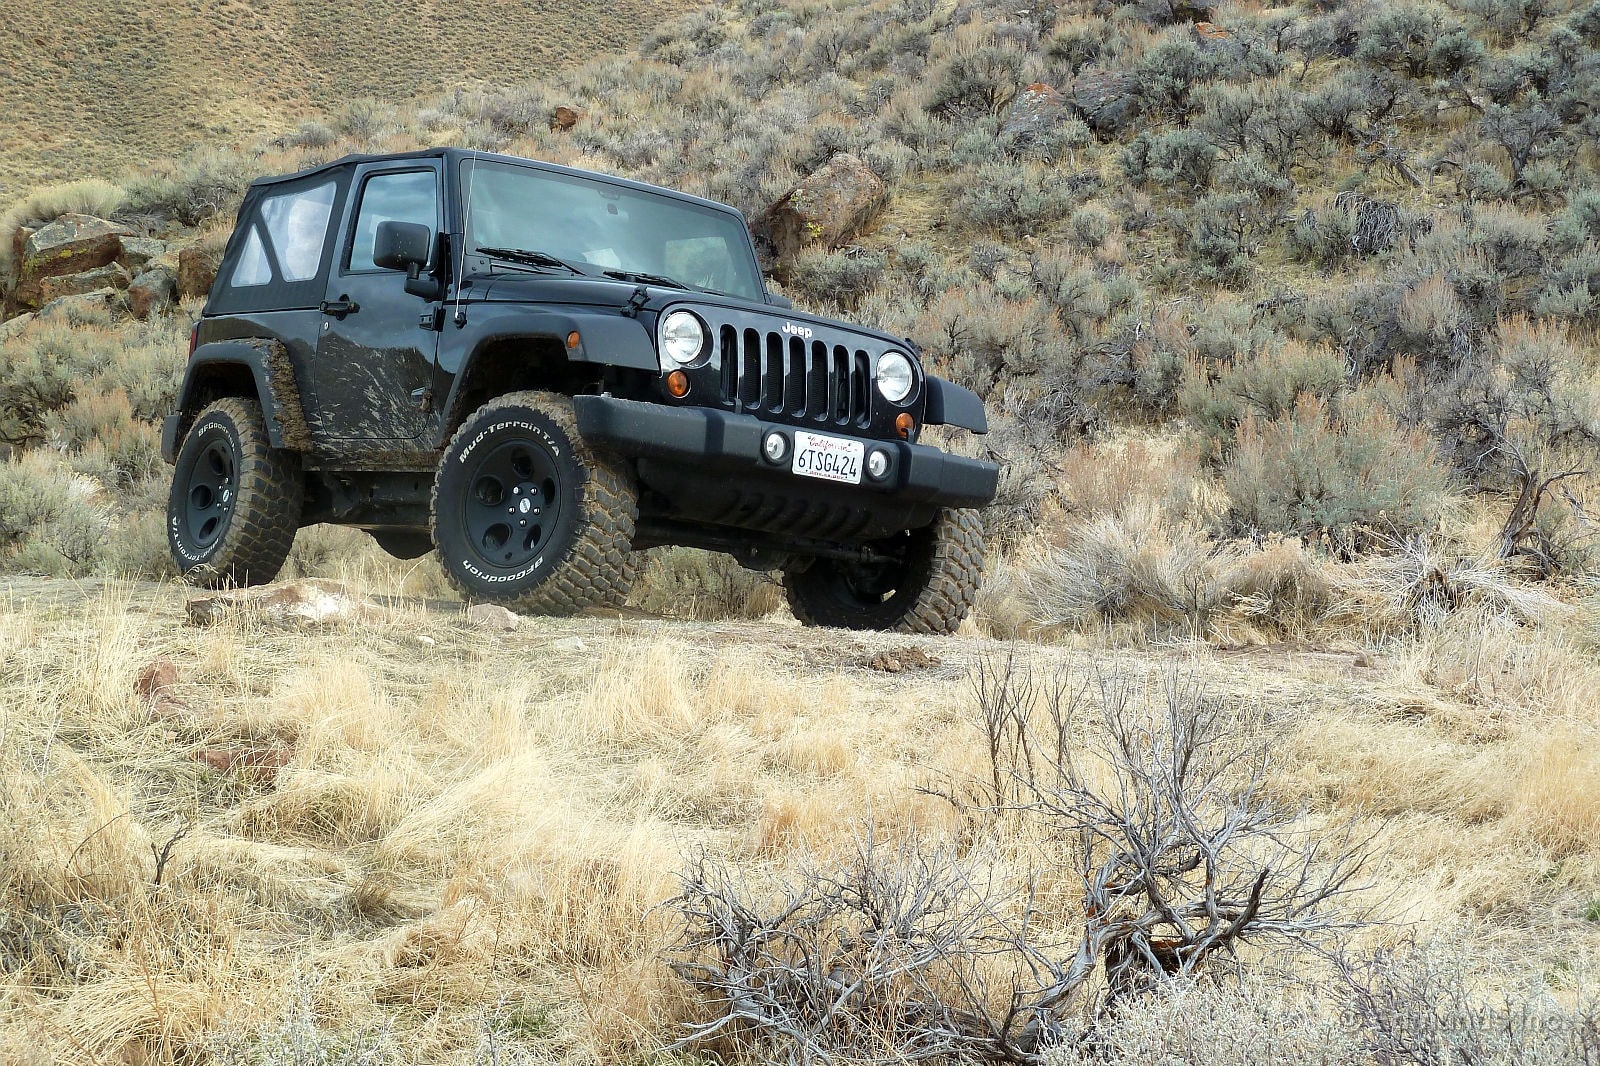
"Mopar issued a new UConnect upgrade kit to offer relief to those wishing to add Bluetooth streaming audio and phone, voice commands and iPod/USB input capability to the RES base radio they've already got.... Performance is pretty damn good. Bluetooth pairing and phone dialing with the UConnect button is easy. The system downloads your phonebook automatically so you can voice dial anyone in your existing contact list. The UConnect lady's voice is a bit robotic, but you can press on through and make voice calls in one long compound command and get past her.... I've found Bluetooth audio to be quite robust, too. You select it using the 'aux' button.... The music or podcast auto-pauses when a call comes in and auto-resumes when it hangs up.... It works like a factory system." — Dan Edmunds
"I was about to go on an upland adventure. It was going to be me, my hunting buddy, and my dog.... I found the rear seat can fold and then tumble forward... but it does not lock in position. Driving around town I found it flops about quite a bit. Not good for my gear or the dog.... Thankfully the seat is removable. Not only that, but it's a snap to take the whole bench out. Pull a handle to tumble forward, a release bar underneath unlocks the hinges and it lifts right out with ease." — Scott Jacobs
"The same way a kid isn't a ball player until he's taken a fastball to the ribs, a Wrangler isn't a Jeep until it's cracked its windshield. Our Wrangler has proven itself a Jeep multiple times during its stay with us. This growing crack, nearly spanning the length of the glass, only solidifies it." — Dan Frio
Maintenance & Repairs
Regular Maintenance:
The Wrangler requested routine service at 8,000-mile intervals. In 19 months we changed the oil and rotated the tires, among other necessary items, a total of four times. One was a do-it-yourself job. The next was in conjunction with the speedometer recalibration. Our third oil change was free, courtesy of a cylinder head recall on our Pentastar V6. The final service was part of a standard dealer oil change. All told, we averaged just $39 for routine maintenance.
Hands-free phone capability is a must nowadays. So we installed a Bluetooth UConnect kit for $349. For the sake of accounting we considered this a non-warranty repair, as we did the $459 replacement windshield.
Service Campaigns
A few issues outside of the norm occurred during our test. We consider the broken rear headrest and idler pulley bearing failure to be normal failures. By normal, we mean that they weren't the result of any modifications we made.
Some problems were the result of our enhancements to the Wrangler. The rear license plate screws backed out following a washboard road weekend, which we attribute partially to stiffer suspension upgrades. An oversize spare tire also took its toll on the tailgate welds. This was likewise the result of our doing, so we can't hold it against the Jeep.
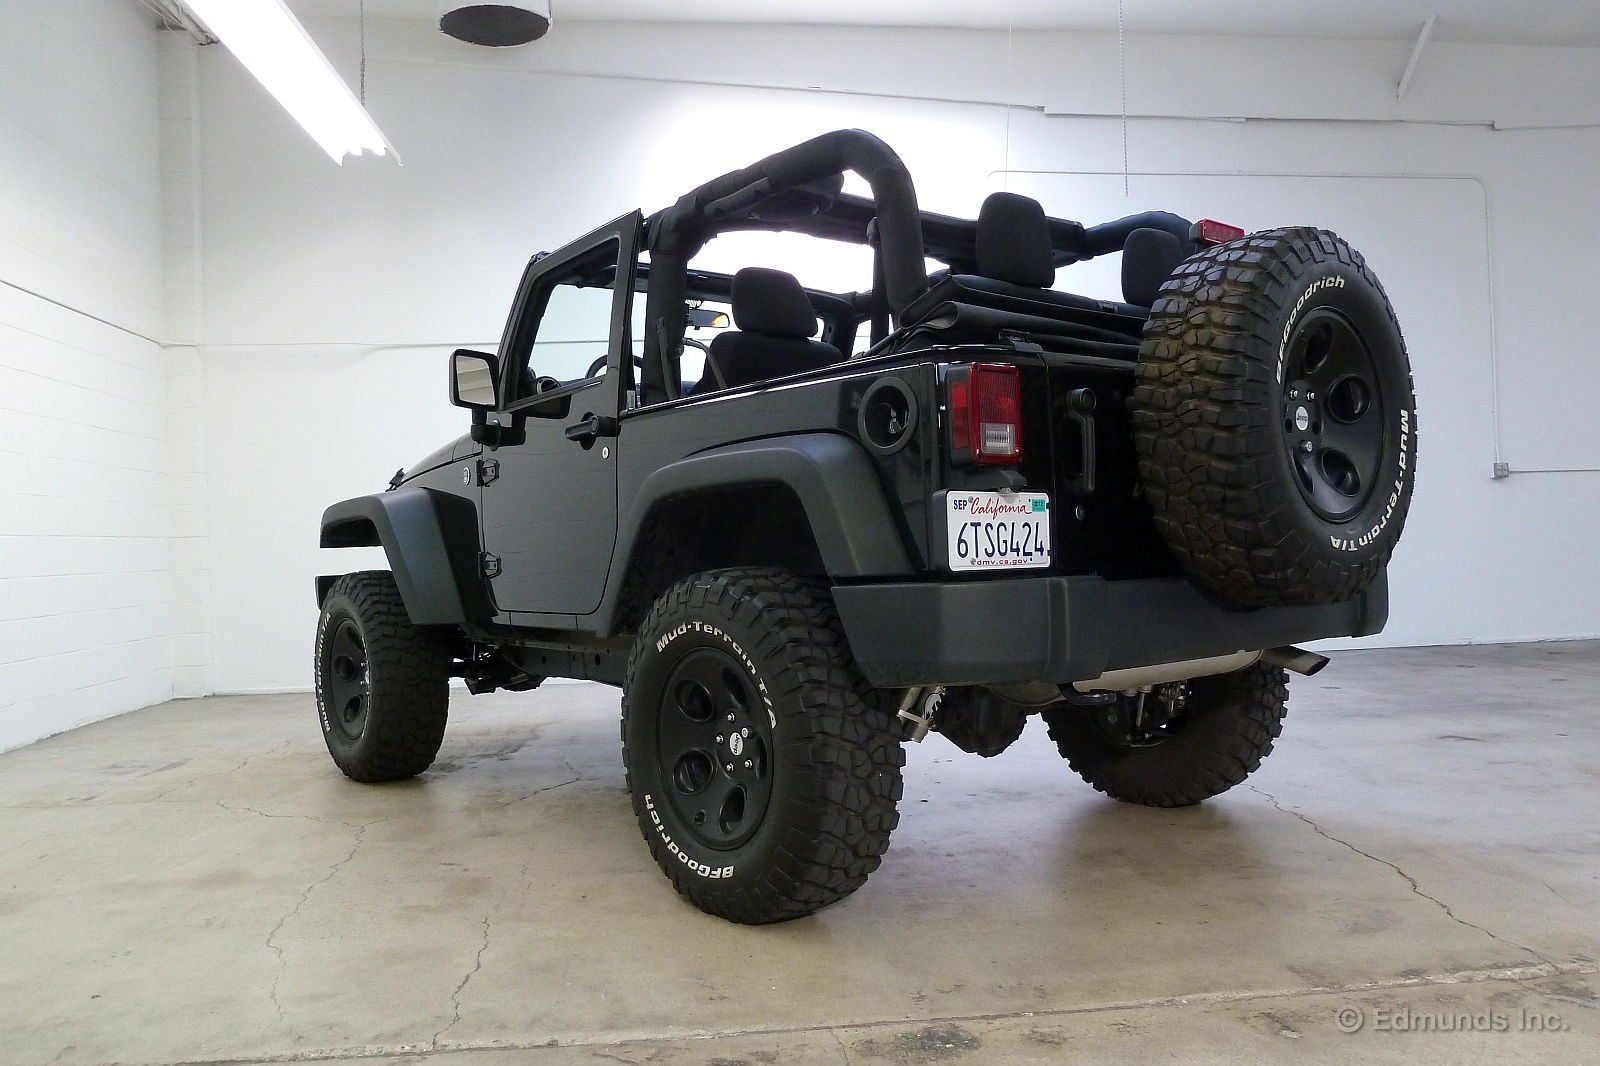
Modifications:
The primary reason we bought our 2012 Jeep Wrangler Sport was to spend the money saved on off-road modifications. Check the chart for a full breakdown of parts and cost:
| Upgrade | Cost |
| 33-inch, LT 285/70R17 BF Goodrich Baja Champion Mud Terrain T/A KM2 tires | $ 1,370.00 |
| 17-inch aluminum Mopar wheels | $ 1,295.00 |
| Mount and balance BFGs | $ 125.00 |
| Recalibrate speedometer for BFGs | $ 85.00 |
| TPMS sensors for BFGs, installed | $ 297.27 |
| Mopar 3-inch JK Wrangler Pre-Runner Suspension System: Stage II Performance, DIY installation | $ 2,400.00 |
| New IPF headlight reflectors and Philips H4 bulbs, DIY installation | $ 118.77 |
| Superwinch Talon 9.5iSR, DIY installation | $ 1,602.00 |
| Expedition One Trail Series JK, DIY installation | $ 1,059.95 |
| AEV ProCal speedometer recalibration tool | $ 149.00 |
| Teraflex front stabilizer bar disconnect | $ 130.00 |
| Total | $ 8,678.09 |
Fuel Economy and Resale Value
Observed Fuel Economy:
Fuel economy was recorded with stock tires and with 33-inch tires. In stock form, the EPA prepared us for 17 city/21 highway and 18 mpg combined. We averaged 17.3 mpg and documented a best single-tank range of 315 miles.
After we swapped to larger wheels and tires the mpg decreased expectedly. Our average with the BFG tires fell to 16 mpg and our best range to 304 miles. The majority of our fill-ups occurred with the big tires mounted, which was reflected by our combined overall fuel economy for this test of 16.3 mpg.
Resale and Depreciation:
Over a year-and-a-half ago we purchased a 2012 Jeep Wrangler Sport for $22,570. We drove it 32,249 miles and spent more than $8,600 in performance modifications. We considered it to be in average condition, with some minor, unresolved issues at the time of sale. Edmunds' TMV® Calculator valued the Jeep at $17,397 based on a private-party sale. And we found a buyer in our midst that agreed to the price and made it his own. In the end it depreciated 23 percent in value, which is a hair below average in our experience.
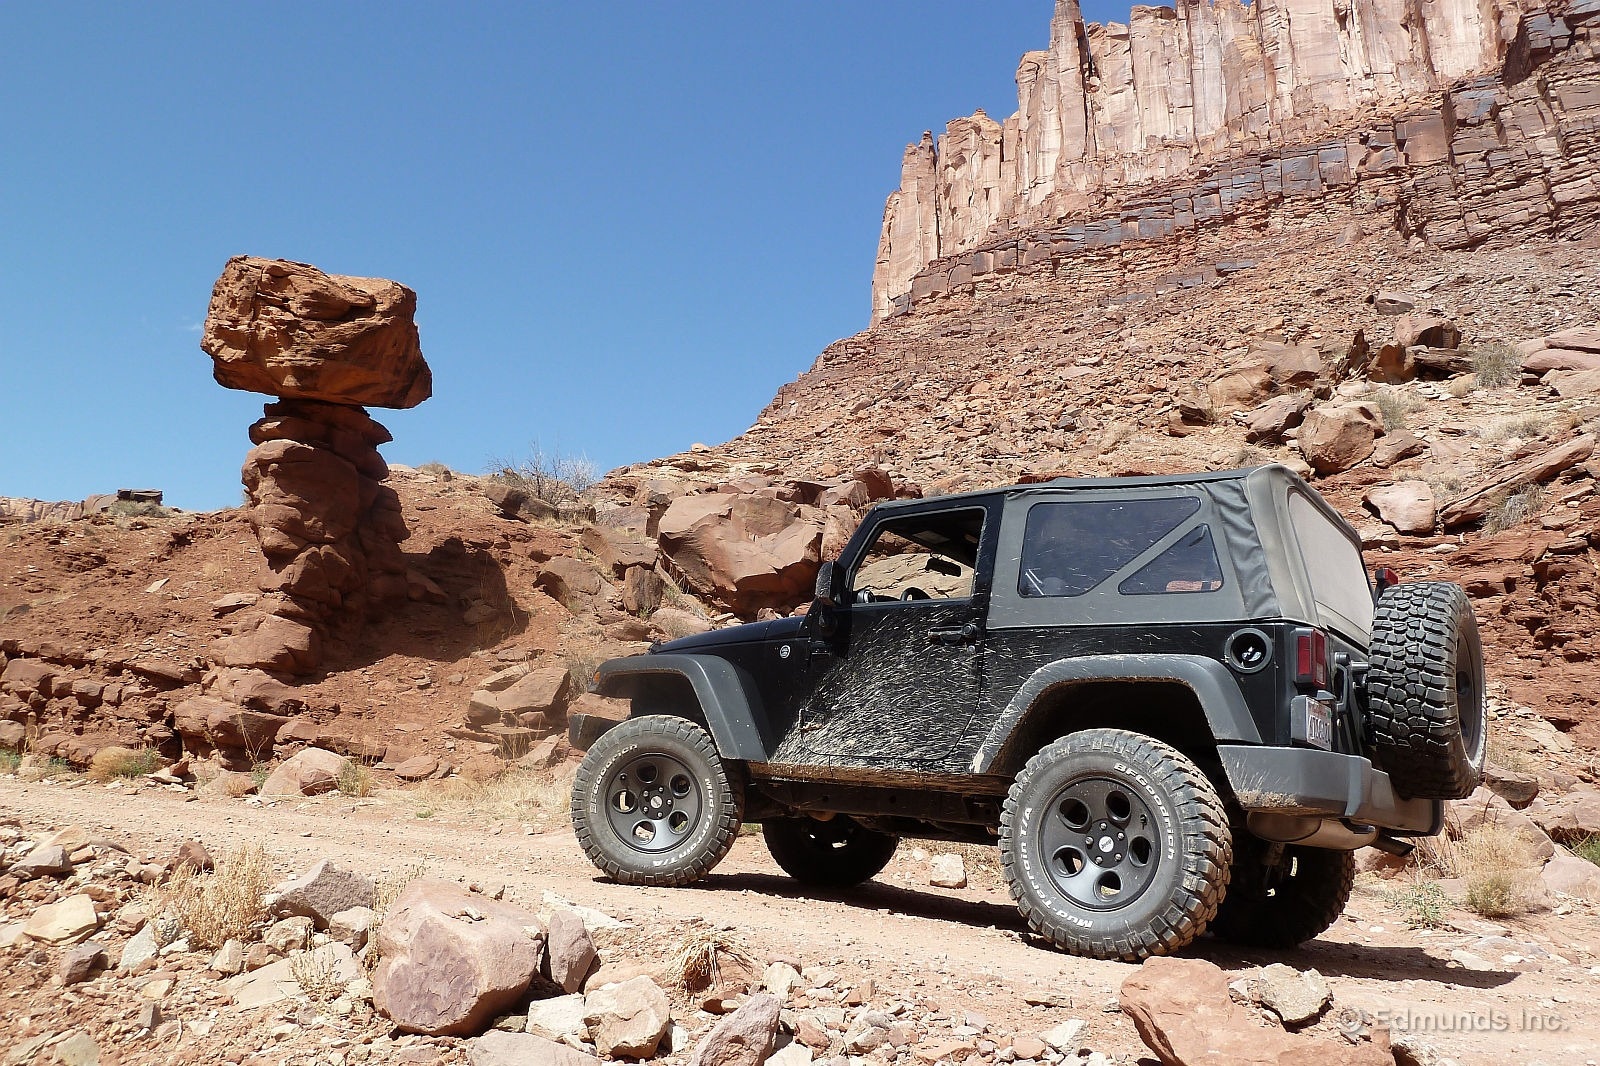
Summing Up
Pros: Still sets the bar for affordable off-road vehicles, new V6 offers better power and reasonable mileage, simple seats are comfortable for the long haul, easy-to-use climate controls, easily modified for serious off-road use, inexpensive routine maintenance.
Cons: Off-road-oriented suspension delivers a bumpy ride in the city, long clutch pedal travel, tall 1st gear can grow tiring in traffic, convertible top zippers get hung up easily.
Bottom Line: The 2012 Jeep Wrangler remains a one-of-a-kind vehicle that combines a simple design, extraordinary off-road abilities and an affordable price into a reliable, fun-to-drive package that does exactly what you expect of it.
| Total Body Repair Costs: | None |
| Total Routine Maintenance Costs: | $155.04 (over 19 months) |
| Additional Maintenance Costs: | $807.85 |
| Warranty Repairs: | Replace idler pulley bearing, replace left-side cylinder head |
| Non-Warranty Repairs: | Replace windshield, add Uconnect Bluetooth |
| Scheduled Dealer Visits: | 4 |
| Unscheduled Dealer Visits: | 2 |
| Days Out of Service: | 2 |
| Breakdowns Stranding Driver: | None |
| Best Fuel Economy: | 17.3 mpg |
| Worst Fuel Economy: | 16.0 mpg |
| Average Fuel Economy: | 16.3 mpg |
| True Market Value at service end: | $17,397 (private-party sale) |
| What it Sold for: | $17,397 |
| Depreciation: | $5,181 (23% of the paid price) |
| Final Odometer Reading: | 32,249 miles |
Edmunds purchased this vehicle for the purposes of evaluation.